Detailed cow records after moving back to the farm

33,025 pounds of cattle on the farm.  825.65 pound average. This includes cows, calves, stockers, etc.

Stocker cows total 11,632. Average weight of 969.85 across 13 cows. Plan is to finish 1 cow per month in 2016. 13 cows should help us meet that goal. Some stockers have had good weight gain, some are trailing behind. Need to identify the ones that are trailing and either cull or get them back on track.

#39 also finished and ready, from our own herd.

9 established momma cows. #1 Uno, #3, #50 Sprinkles, #7 Laser, #11 Curious, #12, #14, #22 who was retagged as #62.

2 new momma cows will be calving in 2016, #33, #37

4 new momma cows in late 2016, early 2017. #45, #46, #48, #51

Ideally we’d like to have 15 momma cows. Waiting till late next year to get them isn’t a great plan. Need to buy at least 2 or 3 good momma cows.

Finished, ready to go to processor now- #25, #39, V7, LF7, Steve 05

Not quite finished but crazy and need to go. LF 501, LF 500, LF07

Between our stockers we bought and our own finishing cows, we should have 1 cow per month from now till April of 2017. We need to buy feeder calves now in order to have our next batch of cattle ready starting in May of 2017, or stocker cows in the spring. Feeder preferred.

The head gate worked very well with the new scales. Display is a bit hard to read in the sun but it’s manageable. However the head gate moves when crazy cows hit it. It needs to be set back in place and secured to the posts holding the fence so it doesn’t move.

Individual cow records across the scales.

#1s baby escaped when the head gate got pushed back. We need to bring that one back in and weigh him.

#1 1175 pounds. 53″ tall. BS 5

#3 1014 pounds. 52″ tall. BS 4

#50/#6 1188 pounds. 53″ tall. BS 6

#7 1139 pounds. 49″ tall. BS 6

#11 1069 pounds 50.5″ tall. BS 6

#12 1272 pounds 52″ tall. BS 6

#14 1122 pounds. 53.5″ tall. BS 5

#23 1038 pounds. 52.5″ tall. BS 4

#25 1126 pounds. BS 5. Scheduled for processor 10/29/15

#32 942 pounds. 50.5″ tall. BS 5

#33 840 pounds. 47″ tall. BS 5

#37 758 pounds. 49″ tall.

#39 1019 pounds. 52.5″ tall. BS 5

#43 789 pounds. 50″ tall. BS 5

#45 666 pounds. 48″ tall. BS 4

#46 610 pounds. 46.5″ tall. BS 4

#47 519 pounds. 47″ tall. BS 4

#48 519 pounds. 44″ tall. BS 5

#51 433 pounds. 40″ tall. BS 4

#54 411 pounds. 41″ tall

#55 269 pounds. 37″ tall. BS 5

#59 102 pounds.

#60 101 pounds. 29.5″ tall. BS 4

#61 119 pounds. 28.5″ tall.

#62/#22 910 pounds. 50.5″ tall. BS 6

#A11 1118 pounds. 52″ tall. BS 5 – Graham

Stockers

#42 976 pounds. 52″ tall BS 6

#LF07 997 pounds. 47″ tall. BS 5+

#LF32 956 pounds. 50.5″ tall. BS 5+

#LF501 1009 pounds. 51.5 ” tall. BS 5

#WF18 863 pounds. 50.5″ tall. BS 5

#Steve10 960 pounds. 52″ tall. BS 6

#LF500 983 pounds. 53.5″ tall. BS 4

#V7 1040. 53″ tall. BS 5

#759 908 pounds. 51″ tall. BS 5

#B4 955 pounds. 50.5″ tall. BS 5

#761 886 pounds. 49″ tall. BS 5

#LF7 1012 pounds. 52.5″ tall. BS 5

#Steve05 1063 pounds. 52″ tall. BS 5

Bringing the cows back to the farm and detailed records part 3


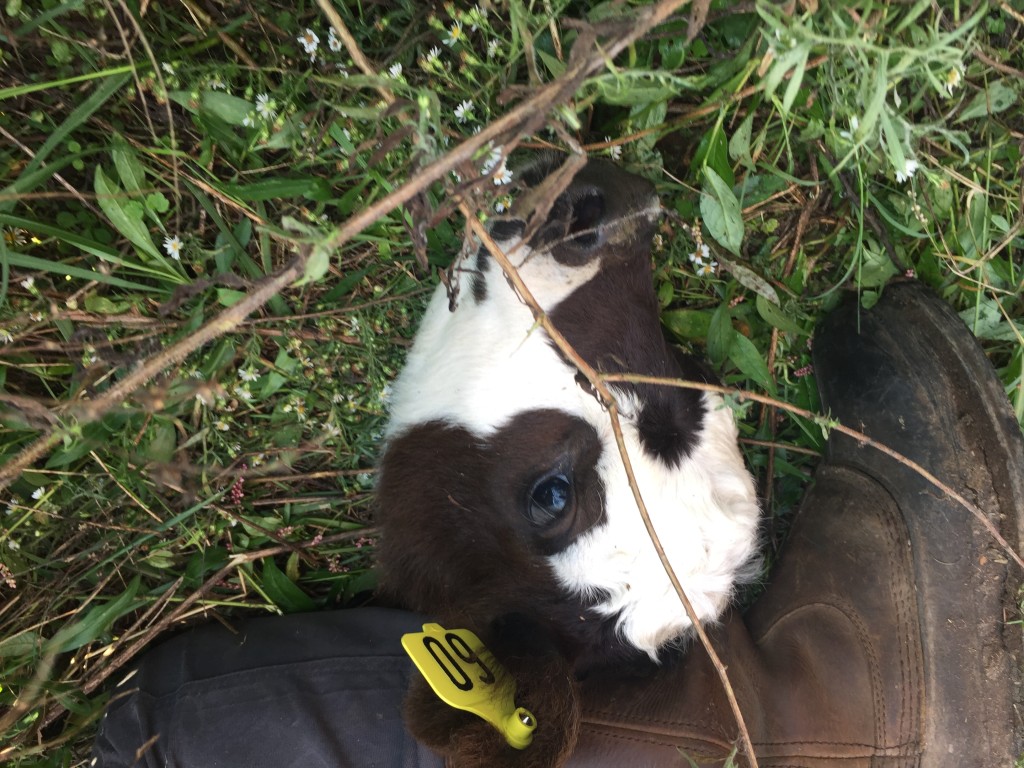
Calf getting an ear tag.
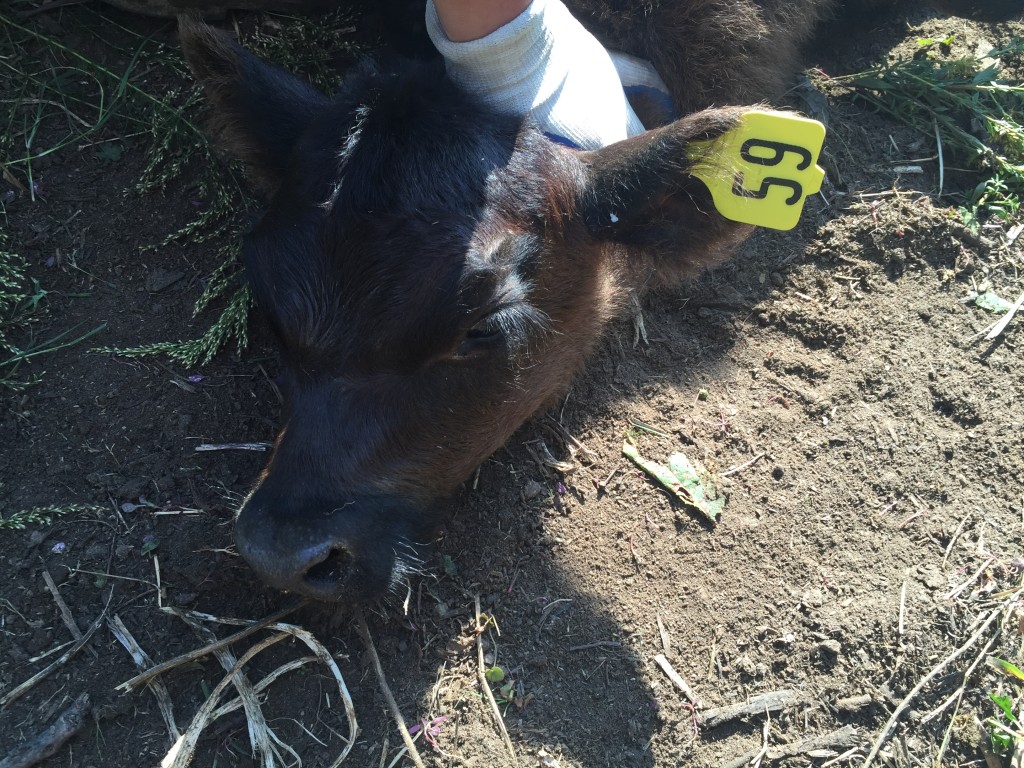
#59 gets an ear tag.

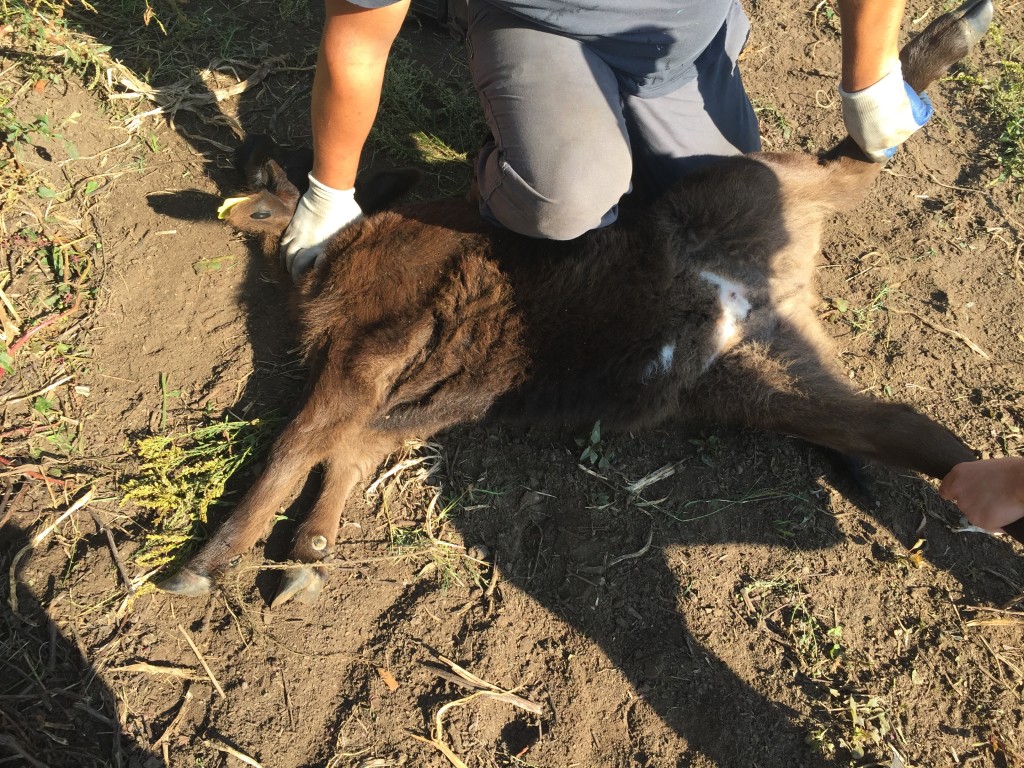
While all the big cows were worked in the head gate, the little calves just born at our leased farm were mainly processed on the ground in the corral. It’s easier that way as there is more room to work and they are just little dinky calves so we can just catch them and put them on the ground. I’m used to just grabbing a calf and tossing it on the ground like it’s nothing. Once we tagged them, we walked them through the head gate to be weighed. I was surprised to see these calves go across the scales at over 100 pounds. No wonder people struggle doing it their first time. I guess years of wrestling Spork has paid off, or maybe it’s the other way around.

Female calf with new ear tag.
#59 with her new ear tag.
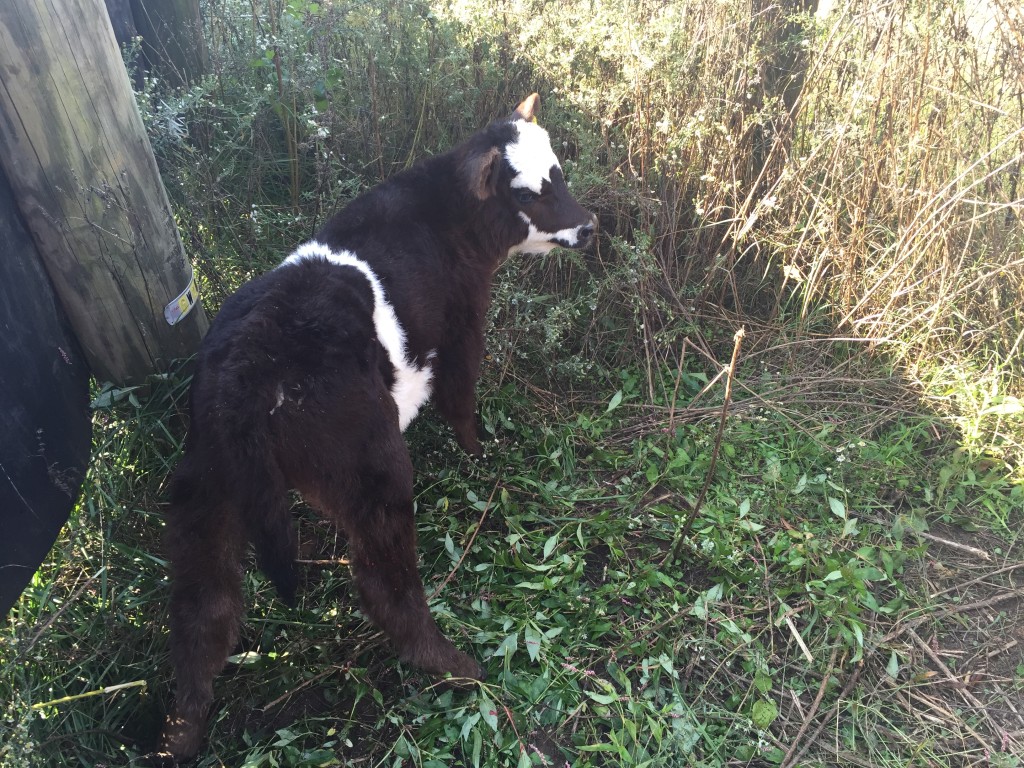
Calf with new ear tag
#60 with his new ear tag

#60 was a bull calf so he had to be castrated as well. Normally we band calves the day they are born but since he was a few weeks old we had to manually castrate. Luckily I’d had lots of experience doing this with the vet because that’s the way we did it when I was growing up. I still prefer banding on day one but he was none the worse for wear.

Calf just castrated
Post castration, all is good.
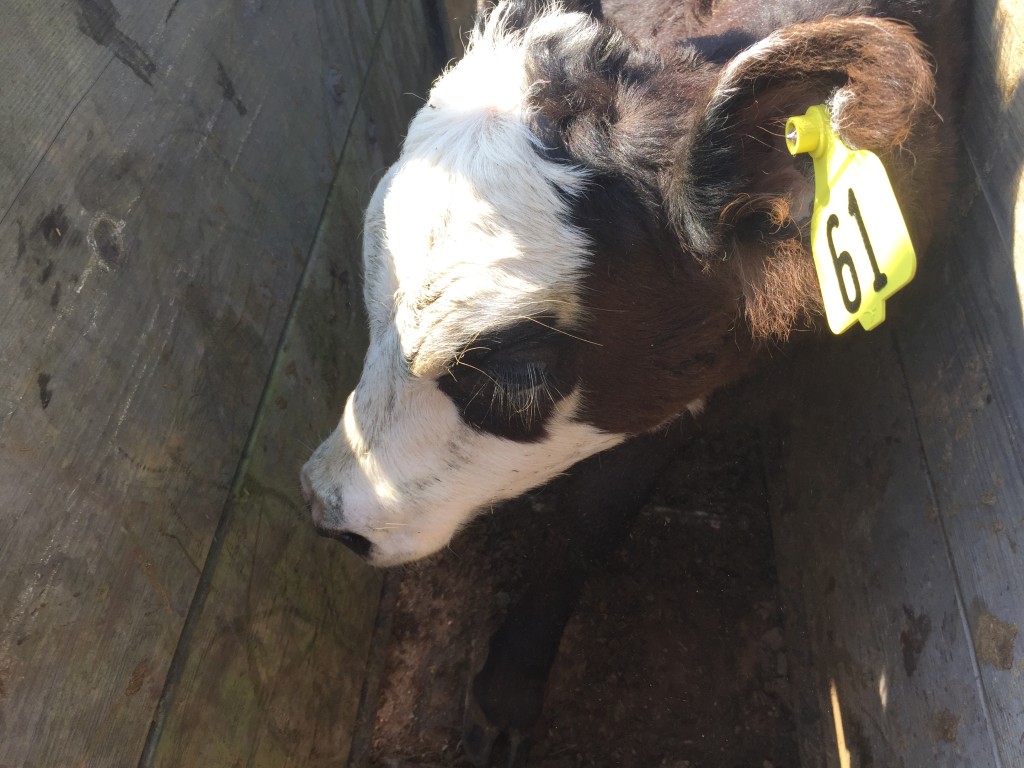
Calf in head gate with new ear tag
#61 with his new ear tag

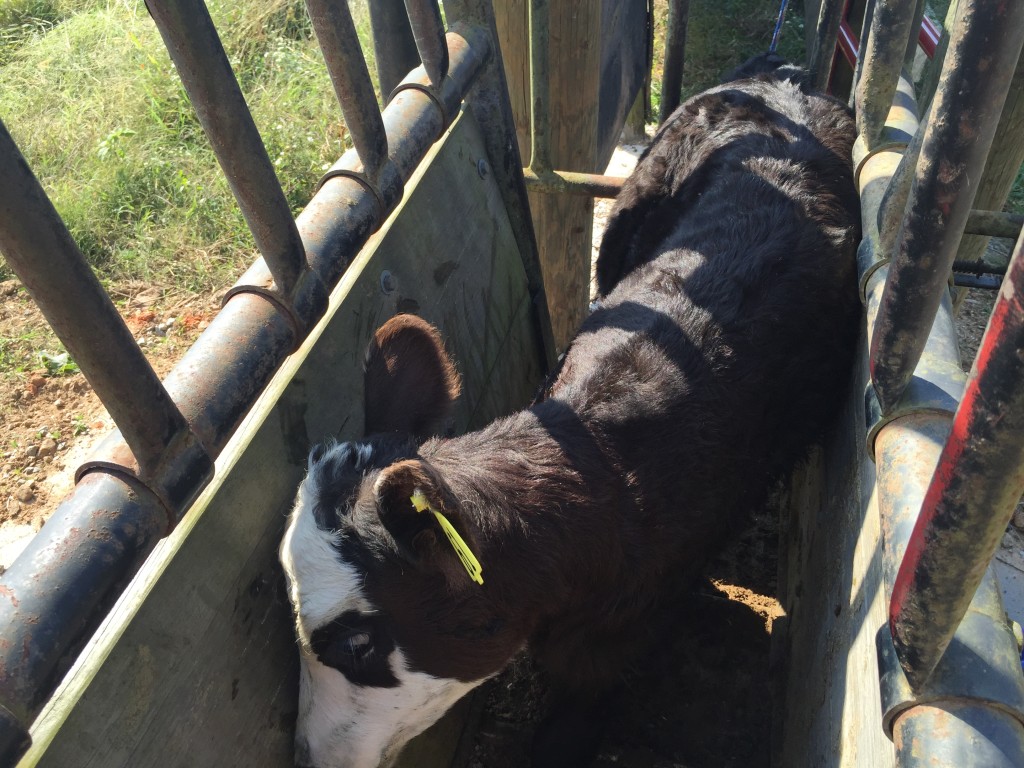
#61 had a problem coming back to the farm. The cut gate in the trailer didn’t hold as it was supposed to and this little guy got caught under the gate. It was choking him and he was in real trouble. Luckily the ride back to our farm is only a few minutes and we were able to get him out quickly. He seems to be favoring his neck (where he was trapped) but otherwise is acting normally, nursing and running around. We elected not to castrate him on Saturday because he’d already been through enough. I checked him Sunday and all was good with him still. We’ll get him back this coming week if he’s doing ok. It was really scary having him in trouble like that. We are all really pulling for him.

Calf in head gate
#61 in the head gate getting checked over.

And with that everyone was home, weighed, tagged, castrated, and back out on pasture. The little calves immediately went out into the high grass and disappeared, causing momma and farmers both to worry. I rode the pastures the next couple of days flushing calves and running them back to mom so everyone knew they were ok. Now things have settled down and everyone is doing well. The next post will be our detailed records of the cows.


Bringing the cows back to the farm part 2

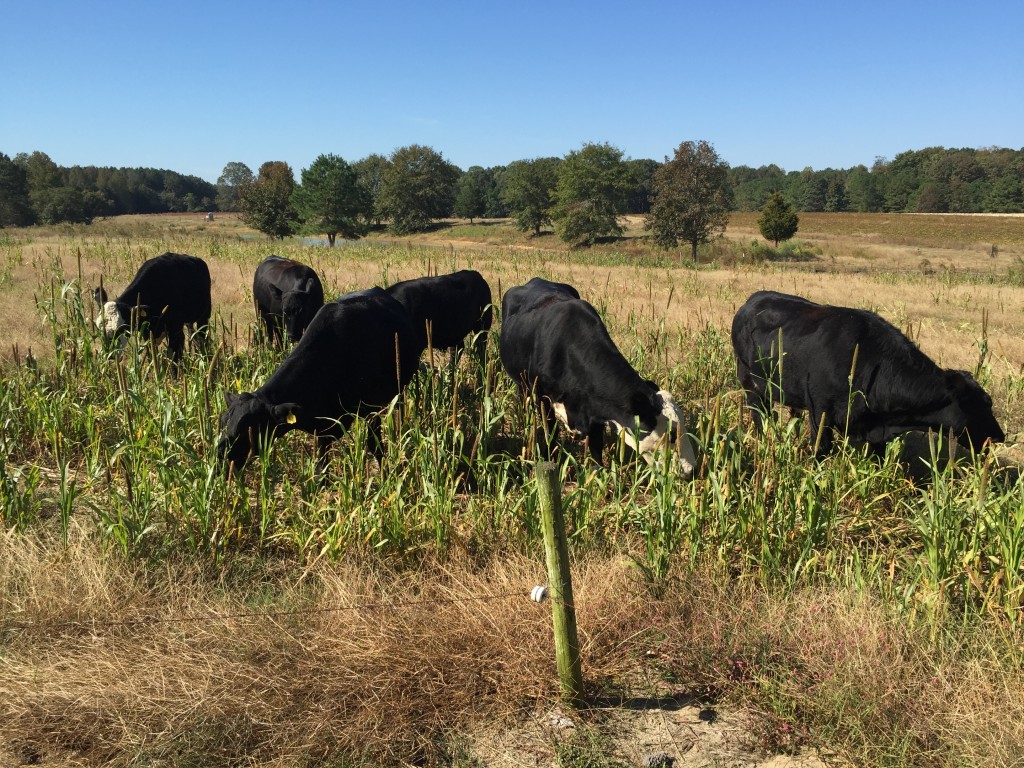
The day before we were to move the cows, we got word from the row crop farmer that leases the rest of the farm that we could graze his millet field as he wasn’t going to be able to get another cutting off of it.

Cows grazing millet
Cows grazing millet

I turned the cows into the field, which was about 6 acres, and they went to town. It’s funny watching cows go into an area like that. The flow across the paddock back and forth like ripples on a pond. They are always moving trying to be the first one to that bite of good food. They really enjoyed the treat and it was a last hurrah before we loaded them the next day.

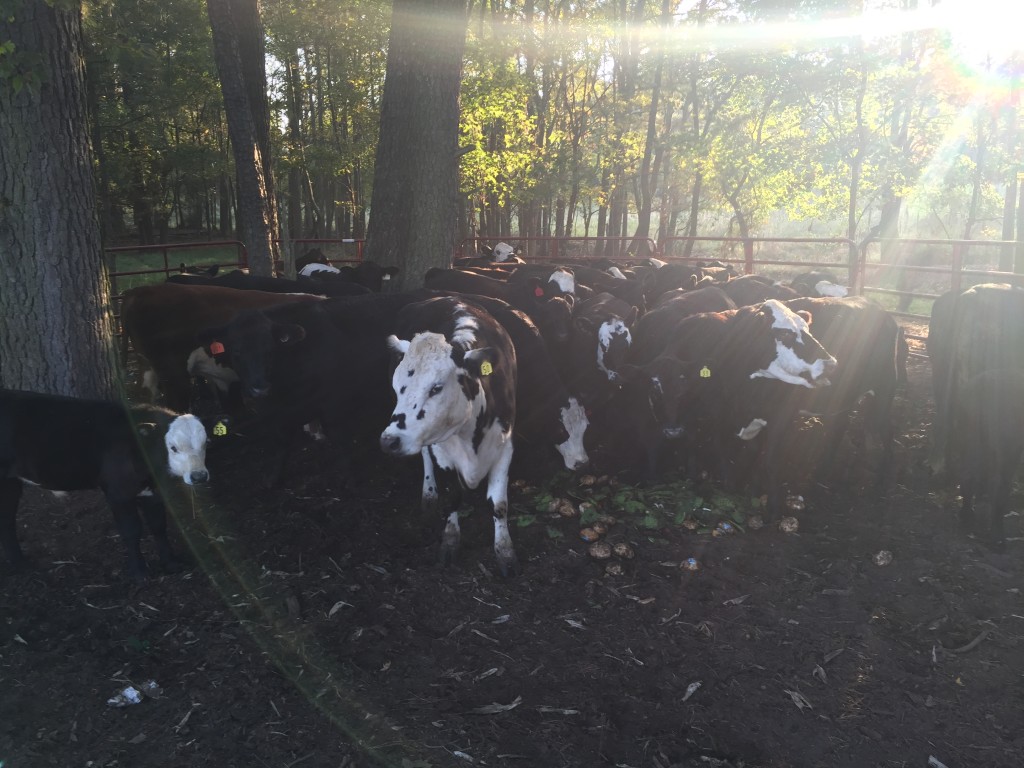
Cows in a temporary paddock, getting ready to load.
Loading cows with new loading ramp
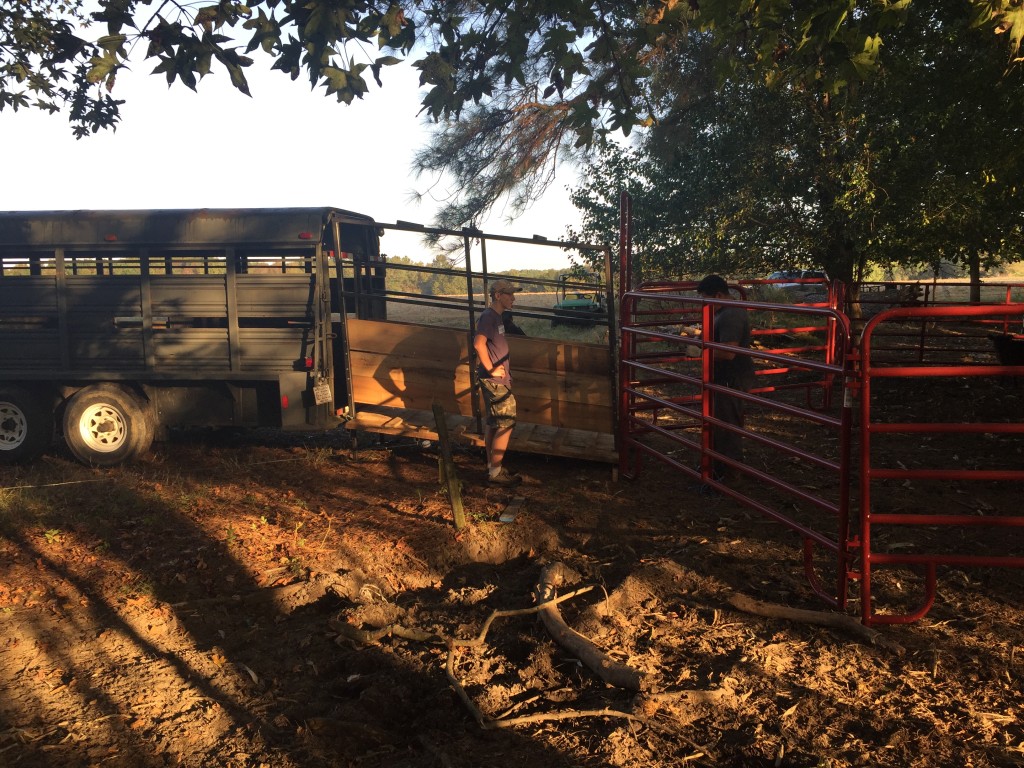
Now we are ready to load. Loading ramp and trailer in place.

Adam and Spork helped load the cows, staying on the outside of the paddock. Miguel and I went inside with the cows and pushed them onto the trailer. Well first we tried to push them ourselves. That didn’t work. Then we tried rearranging the cattle panels to make more of a chute. That didn’t work. Then we tried a few other iterations until finally Miguel said, let’s just get an extra panel and push then with the panel between us. Bingo! That was the way and how we’ll do it going forward. We were able to get 12 cows on the first load, 13 on the second load, and 15 on the last load all while cutting the time to load in half, and in half again.

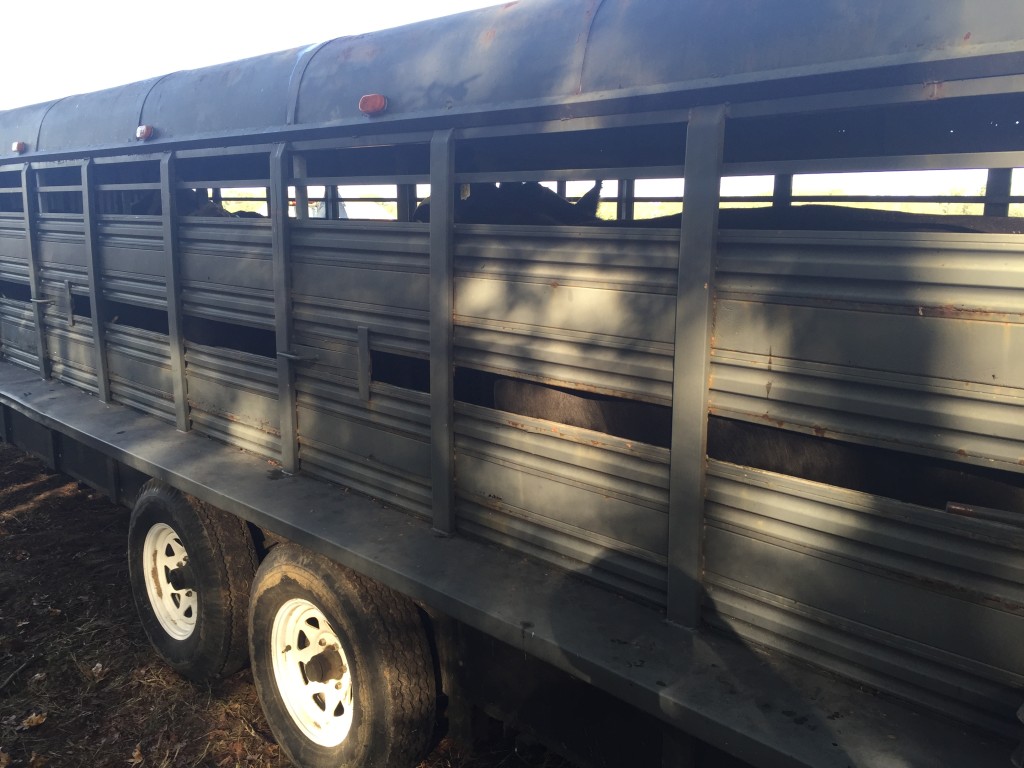
Cows on 24' stock trailer
Cows loaded onto the new trailer.

This was with our new (to us) 24′ stock trailer. The best we’ve ever had with our old trailer was 11 cows and they were packed like sardines. The new trailer cut out at least one trip and probably two so it was a success. The only problem is, it doesn’t fit my truck. I’ve creased the tailgate in a couple of places where it rubbed. We’ll be cutting off the current mounting for the gooseneck and making a new one as soon as we can this winter. Luckily the cows should be home all winter so we should have time to get it done.

Once we had the cows on the trailer, we took them to our main farm and offloaded them into our corral. We then worked them one by one into the head gate where we weighed them on our new scales, checked their body condition, their ear tags, and castrated them if need be since we had new calves born on the leased farm.

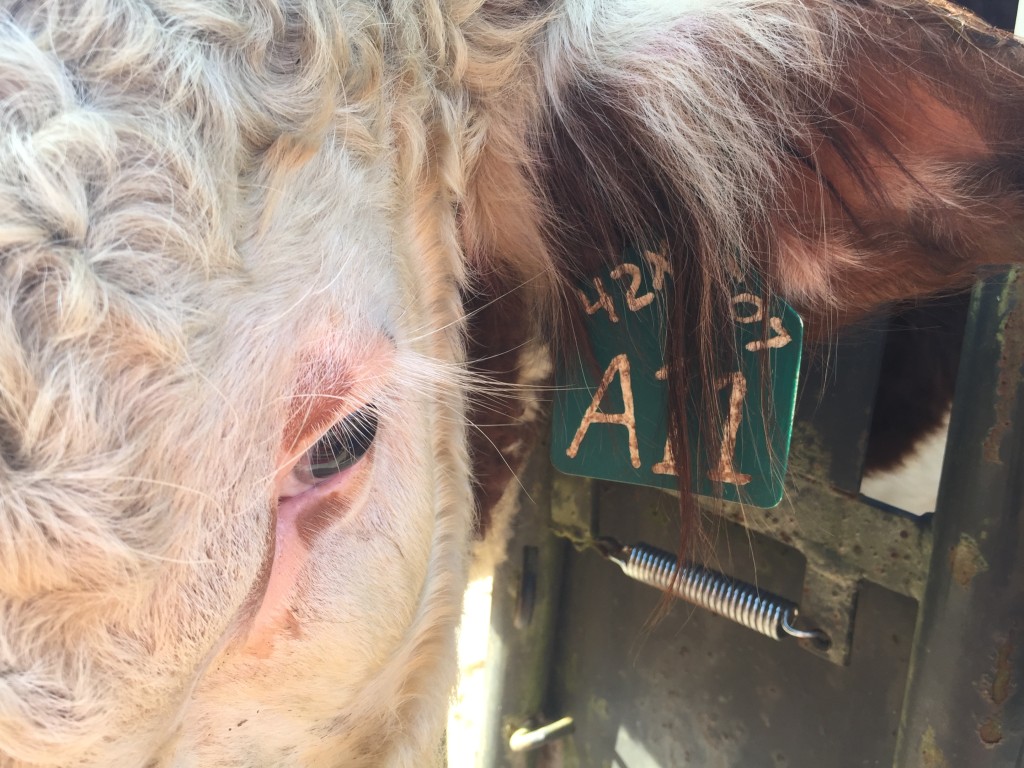
Ear tag on bull.
Ear tags were recorded and updated, like Graham’s #A11 tag.

Once we’d processed a cow, they were turned into the paddock to start grazing. Once the entire trailer load was processed, we went back to get another load and wash, rinse, repeat. Everything was the same, except for our new little calves, but that is our next post.

Bringing the cows back to the farm part 1

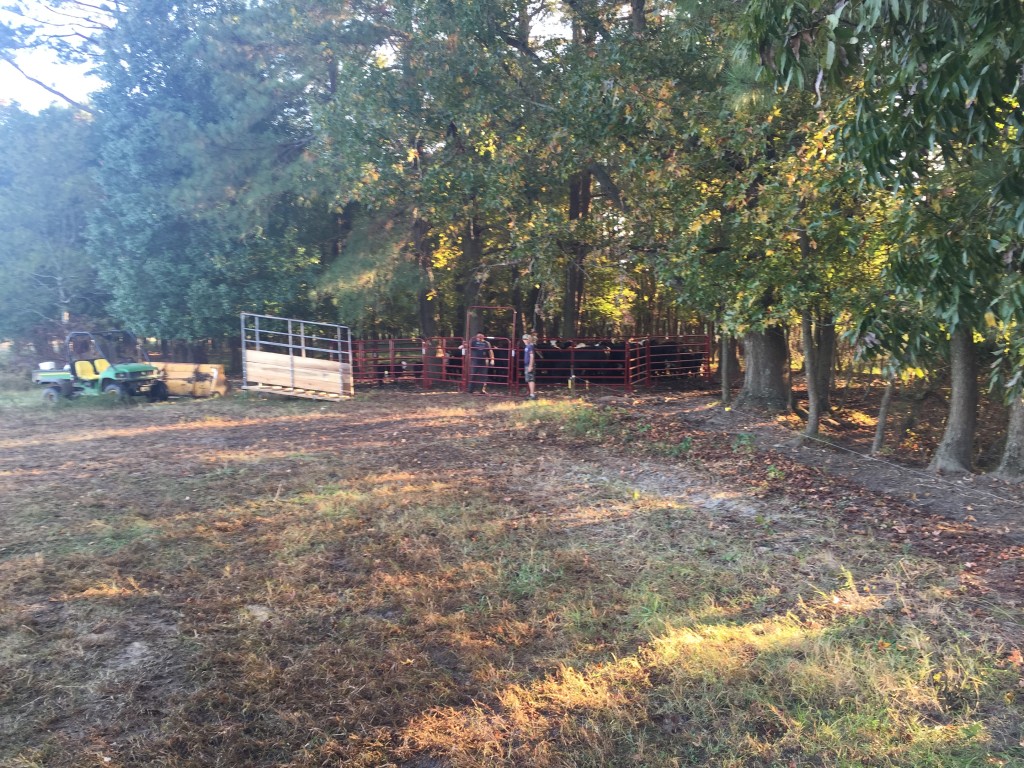
Saturday, after being gone for two months at various farms, we brought our cows back to the main farm. The newest farm didn’t have a loading facility so we had to buy temporary panels to make a corral. The idea with these panels is they will mount to the side of our new trailer making for a self contained cow moving rig.

Cows in the temporary corral, waiting to be loaded onto the trailer

While the cows were gone, we’ve stockpiled about a month’s worth of grass at our farm so that our cows will have grazing into the beginning of winter, which is a first for us. Normally by November we are out or nearly out of grass. By grazing our leased farms the last few months, we were able to let our grass grow and get lush. Hopefully our farmer on our big leased land will plant rye this winter as a cover crop, meaning we would have some grazing this winter as well which would help the cows and us.

Regardless of all the above, we are bringing in more hay than normal this winter, 119 bales with 68 already on the ground and more coming when I get time. We only brought in 68 bales last winter and I ended up scrambling all over trying to get another couple of loads late in the winter. I don’t want a repeat of last winter when we ran short of hay.

Plus, we are going to be purchasing a group of feeder calves shortly so we will need to make sure we are stocked up and ready for extra mouths to feed in case grazing doesn’t go as planned. But before all that, we need to get the cows from the leased farm back to our farm.

But that is our next post.


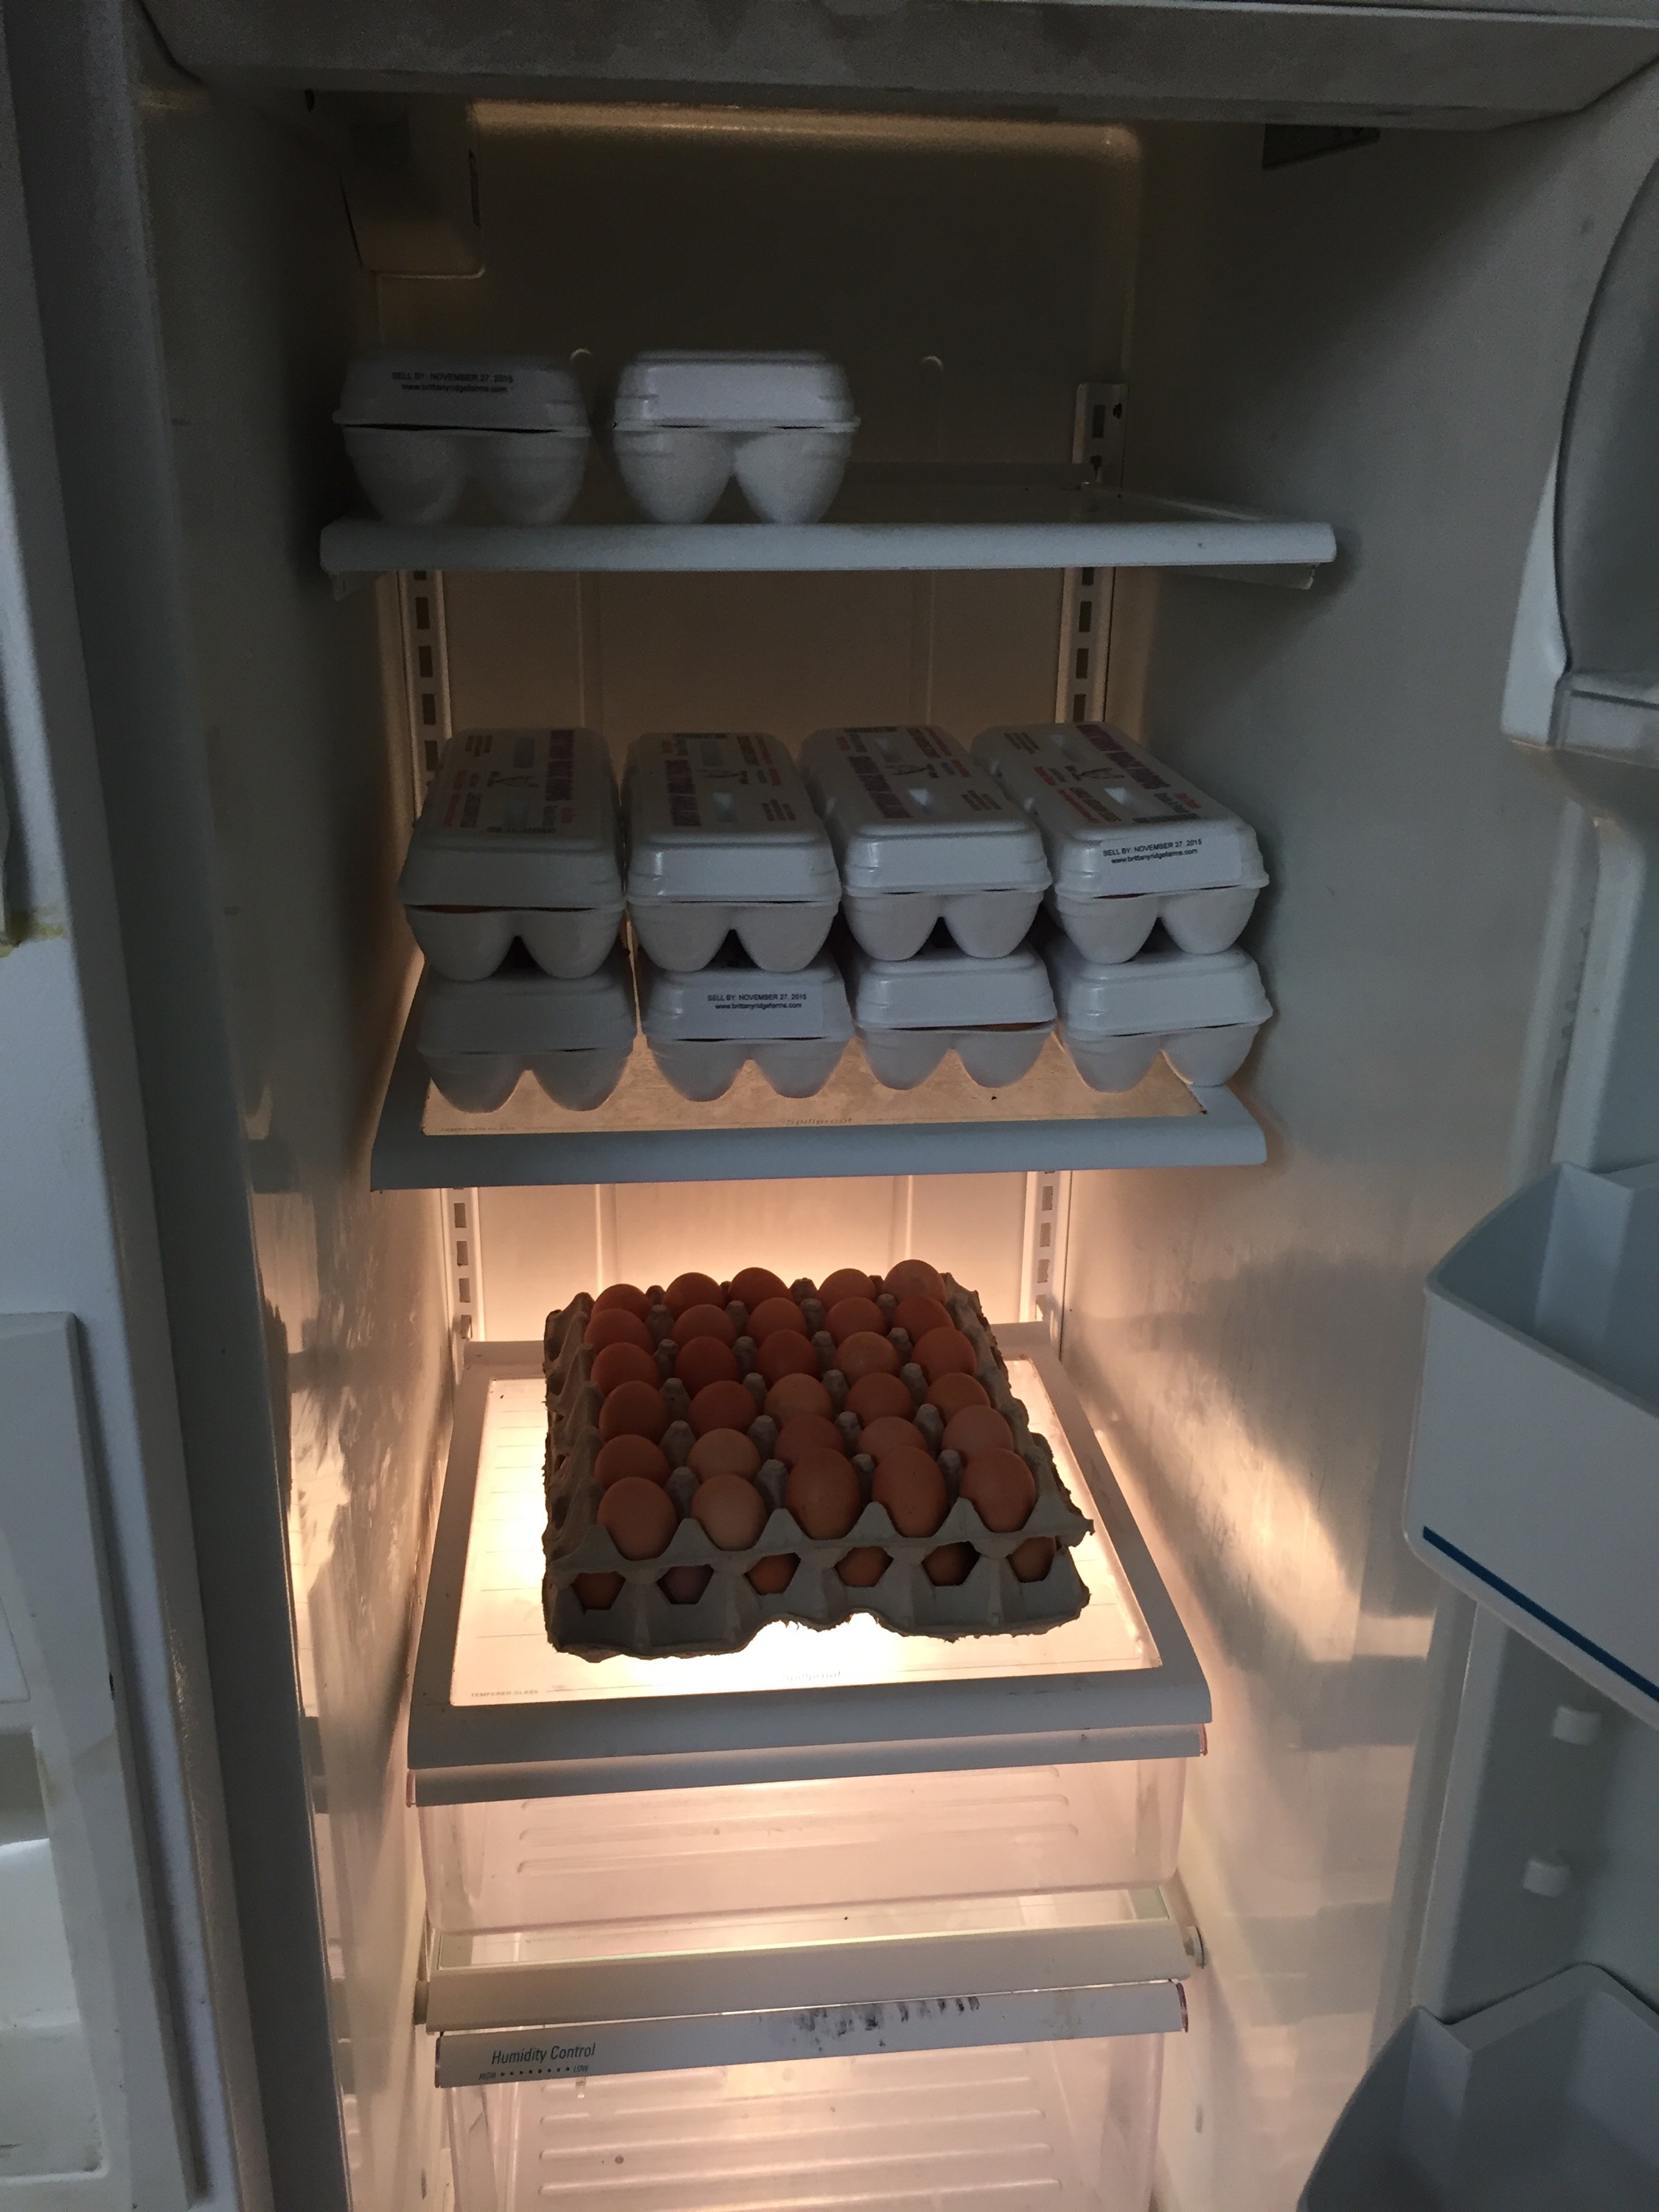
We have eggs back in stock

  A number of you are waiting on eggs. I just stocked the fridge with a whole bunch of them so they are first come, first serve. 

Of course we have plenty of pork and a bunch of hamburger and roasts in stock as well, not the mention all the honey, soap, and jams from Buck Naked Farm. 
I will be around some today and all this weekend so let me know when you want to come by and pick up your loot. 

BBQ pigs for sale

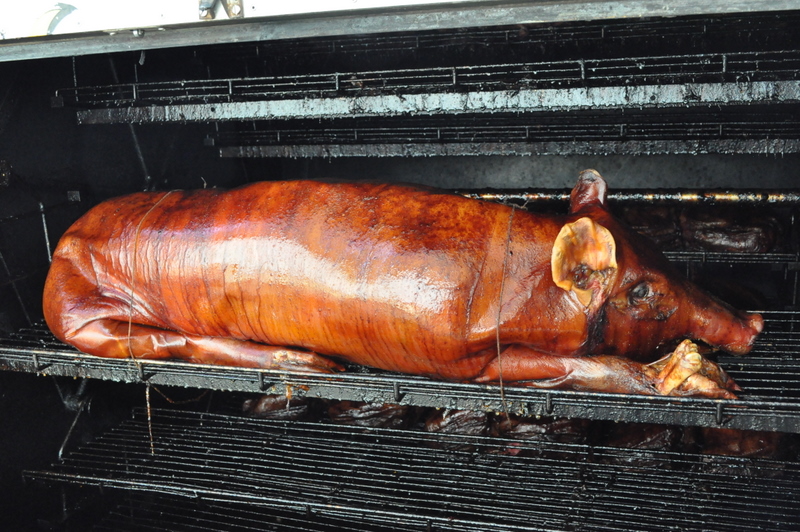
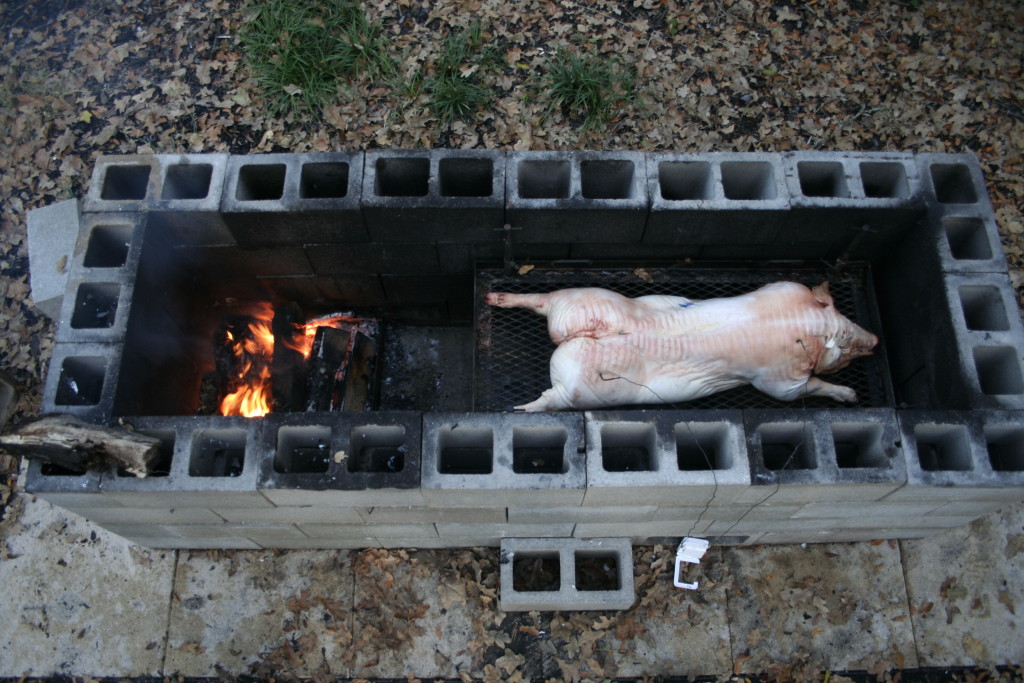
Pig on the BBQ
Hours of work for an awesome eating experience

This page is being updated as of 6-15-2019. We no longer offer BBQ pigs for sale directly to the public. We are concentrating our efforts on hogs for our store.

We don’t list this as one of our normal products we sell but with the weather turning cooler it’s a great time to fire up (or dig out and build) the smoke pit and invite your friends over for a BBQ.

Cinder block BBQ pit
It doesn’t have to be expensive or fancy to be awesome.

(For a primer, here is an in depth article about all things BBQ, with a shout out to us crazy NC folks in paragraph 4) I love this quote from the article.

“But when it comes to whole hog, there is no place on earth that takes it as seriously as the folks in the Carolinas.”

We sell BBQ pigs of all sizes, from suckling hogs to over 200 pounds. Availability is based on what we have on the ground at the moment and generally you’ll come out to the farm ahead of time to pick your pig and pay a deposit of 1/2 of the estimated price. When you order a pig, we will need as much notice as possible, at least a week. We will have ready for your pickup the pig of your choice, scalded, scraped, and gutted, and chilled in our walk-in, ready for the grill. We generally will handle all of the bloody bits a few days before your event so the hog has some time to cool properly in the walk-in and there are no last minute issues that can mess up your event.

You’ll pay by the hanging weight of the pig and the price per pound is $4.50. For those of you who don’t already know, our pigs never have commercial feed and eat a diet of forage and produce every day of the year. There is no comparison of the flavor of our hogs and of corn fed hogs.

For more detailed information on selecting a BBQ pig, see our post here with a link to Sugar Mountain Farm

In case you aren’t ready for some BBQ  yet, here is one last thing to get you thinking about that wood smoke smell.

We have new loot in stock!

We are fully stocked up on pork and we still have lots of non-steak cuts of beef left. In fact the freezer is overflowing but that is not the exciting new. The exciting news is we have is all the new loot from our friends at Buck Naked Farm.

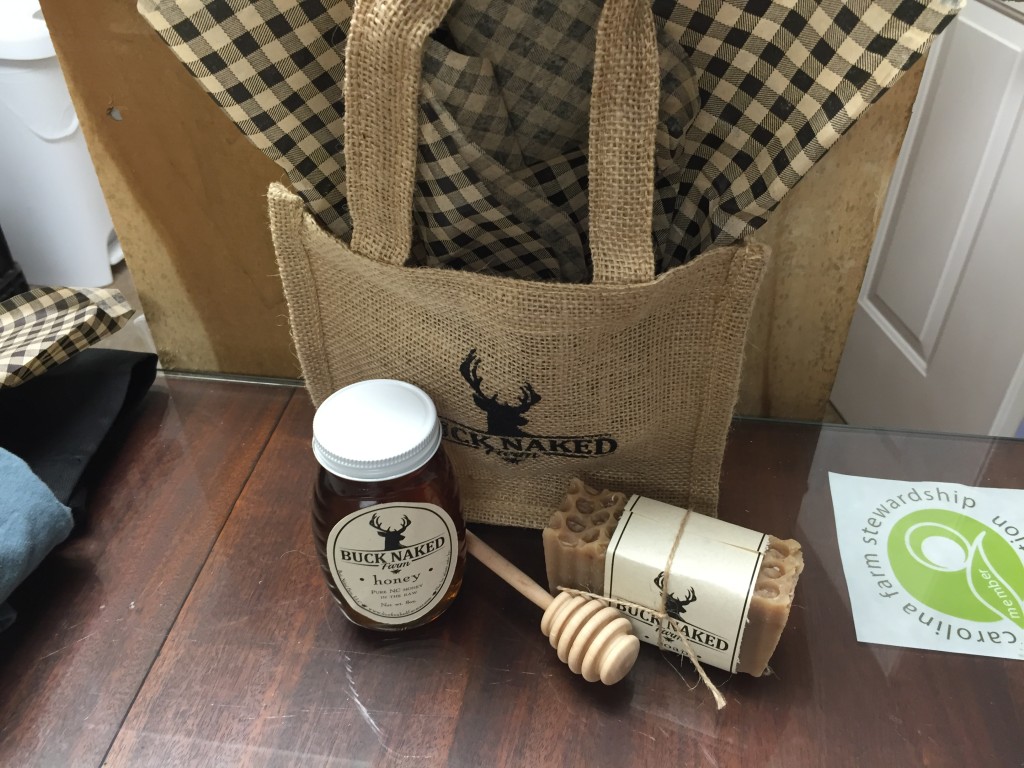
gift bag from Ninja Cow Farm and Buck Naked Farm
The small gift bag

Since Christmas is right around the corner, Jennifer has put together some gift bags of farmy goodness as samples. What is in the gift bag is up to the individual buying them and there is a lot to choose from. We have new jams and jellies in stock and I’ve already received this feedback on one of the new ones.

“…Either way, tell Mrs. Paul that they’re terrific.  The vanilla rhubarb especially is outstanding!  I had to do a little dance after I tasted it.”

We also have new soaps in stock including the awesome new Herbivore soap made especially for us.

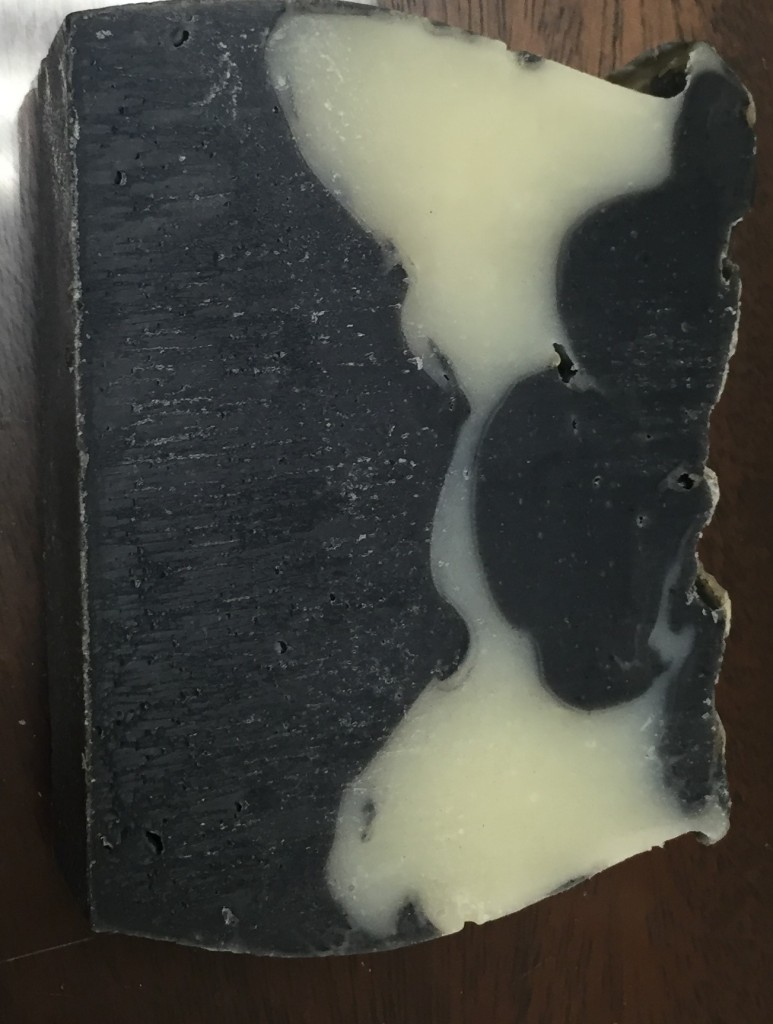
Ninja Cow soap
Herbivore soap, AKA Ninja cow soap

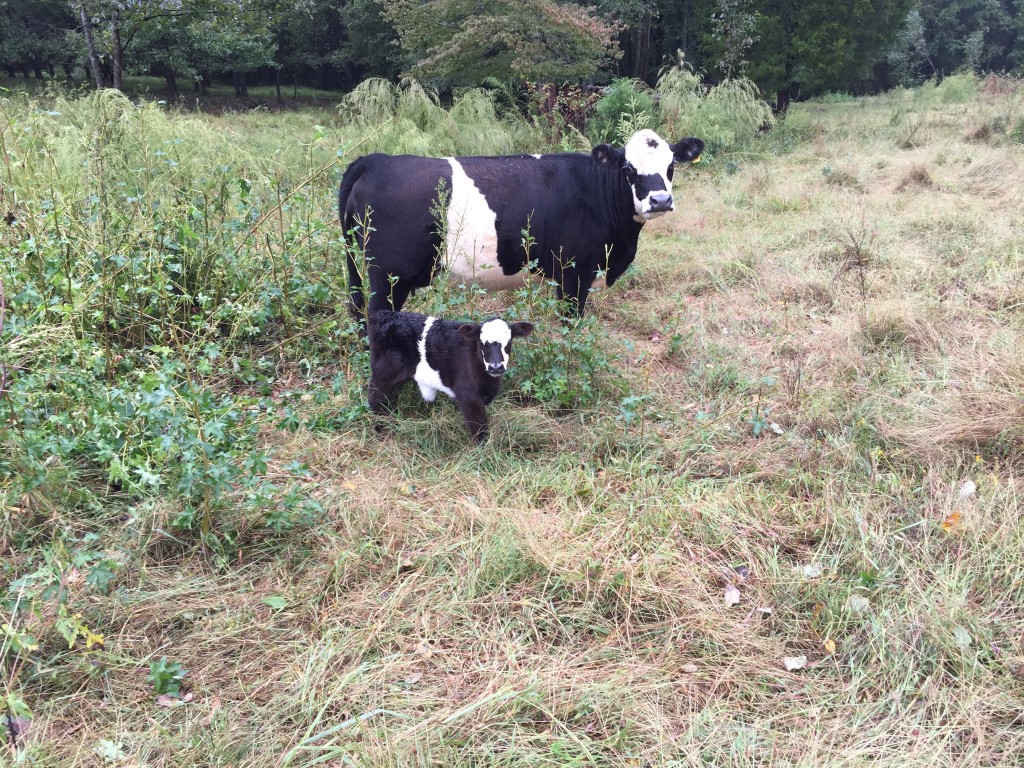
It’s an actual Ninja Cow, in soap! How cool is that? Here is a comparison.

Cute Belted Galloway calf and mom
More cute pics of the new calf

The black part of the soap is activated charcoal. Since I come in the house smelling like a ninja cow, or worse, having something that will absorb those odors is awesome. Activated charcoal is also what you use if you ingest poison because it absorbs toxins so for all you folks trying to detox, now you can do it in the shower and smell good to boot.

If you have some interest in gift bags for friends and family this Christmas, just let me know. We are already taking orders (20 sold so far!) and we will have them ready to pick up in time for your delivery before Christmas. We are also going to be putting together meat boxes for those of you who’d like to give the gift of meaty goodness for Christmas (who doesn’t like meaty goodness!)

We are planning a breakfast box with items like breakfast sausage, bacon, etc and a grilling box with items like steaks/pork chops, bratwurst, etc. I’ll have pricing available as soon as we figure it all out but everything will be dressed up for Christmas and look good. I know this because Jennifer said she’d help me put it together. I’m more famous for my lack of wrapping ability so rest assured everything will look great when you pick it up.

When TMI (too much information) is just enough part 4

In our previous posts, we’ve talked about marketing, record keeping, finding your voice and finding time to do all this stuff. If you’ve made it this far, you have an interest in taking this information and putting it into action. That means it is time to get into the nuts and bolts of software. This post isn’t meant as a read through as much as a reference for once you get started. Don’t let all the names and jargon overwhelm you. It makes sense once you are doing the work.

In this final post, I’m simply going to tell you what we use, and why. Again, everything we use is free, except the hosting. Still like free stuff? Me too. Alright, let’s get our nerd on.

Hosting is step one. I’m no expert on picking a hosting provider. I simply picked GoDaddy as my domain registrar and also selected them as my hosting provider at the same time. The main reasons? It was easy, and their tech support speaks English and answers the phone promptly. Other than uptime, that is about all I ask out of hosting. Not everyone provides it though so do your research. I’ve had friends pick somebody else for hosting I’ve never heard of because it was $1 cheaper per month. Then their tech support is in India with a bad phone connection. Believe me, when you need support, you want it quick and easy to understand. Who else can you use if you don’t like GoDaddy? Hostgator has a good reputation, as does Hostmonster.

Whoever you use, make sure they are setup to host a WordPress site without you having to do some weird install. It should be a very simple process. Your hosting provider should directly support WordPress and the installation should be simple and well documented. Here are the instructions for GoDaddy. As you can see, at 6 steps total, it’s a fairly simple process.

Some of this may seem a bit overwhelming at first. Just follow the instructions step by step, and write down every username and password you use (ask me how I know that is a good idea). If you mess it up, it’s easy for you or tech support to delete your blank site and reinstall with no ill effects so just give it a try.

But what if you already have a website? You can install WordPress to a subdomain. Think of it as a subfolder on your computer which is what it really is. If you site now is www.myfarm.com then you’d install you new WordPress site at www.myfarm.com/testsite. I’d have tech support on the phone to make sure I did it correctly, but once it’s installed you can have a complete WordPress site running, but hidden, live on your site. Only you know to type in the testsite portion and nothing will link to it. This will let you work with the new site all you want while you are still showing your old site to your customers. When the time comes, you can simply move (with tech supports help to be safe) your new site to www.myfarm.com and make everything live. It seems a bit scary to move sites around like this, but it is quite simple to the tech folks you’ll have on the phone and it doesn’t take long at all. It’s no different than moving a folder on your computer to them.

One of the first things you’ll need to do when you install your site is to select your theme. Themes are like templates for the look and feel of your site. They control the colors, layout, fonts, etc. They also control how your site behaves on a computer and also on an iPhone (two obviously different screen sizes.) Themes are very important and once you pick one and do a lot of work to your site, you don’t really want to change your theme because it can break some of previous work (links, customizations, etc). There is a lot of money out there being made selling themes to people and I’ve heard good reports from customers who’ve purchased themes. However, I’ve never felt the need to spend the money when every year WordPress puts out a new theme that is free and supported 100% by WordPress. They are simply named for the year they were released, 2013, 2014, 2015. They are powerful, flexible, easy to install and test. With all the previous years themes to choose from, I’ve always been able to find what I needed and have had zero problems. However themes are what control the look and feel of your site and you may want something very specific. By all means, pick what makes you happy. Just remember, simpler is better.

Once you have your site installed and working correctly, there are a few setup items you should take care of first. Here is a great article by one of my favorite sites to get you through the first 10 steps after installation. This article isn’t gospel, and I don’t use everything they list (skip #5, #6, and #9 for now), but it is 90% of what I do and I’ll review the rest here below.

If you read the article, you’ll note that “plugins” were mentioned. By itself, WordPress works very well. For the first weeks or even months of having your new WordPress site, I recommend you leave the plugins alone (other than the ones in the article mentioned above and I list below) and concentrate on what is already built in. However the power of WordPress lies in the plugins that outside developers create to enhance functionality. For an in-depth look at plugins, both the good and the bad, take a look at this article.

For our website, we use the following plugins, all of which are free to use and work flawlessly for us.

Must have plugins

Akismet: It’s already been mentioned in the 10 first steps article. It’s required. It works with no real input from you and it keeps the SPAM off of your site which will show up. Install it and forget it.

Broken Link Checker: As you add posts, you’ll link to other things on the internet like I’ve done throughout this article. Over time, other sites update and change their site. Links change and unless you click on the link you’ll never know your link is broken, but your customer will. This plugin quietly sits in the background checking links and lets you know if one breaks. Very handy.

Google Analytics Dashboard: Google analytics is its own article. Heck, it is it’s own series of articles. For now know that you need to install it and get it working. It doesn’t need to be day one but make sure you get it installed once the basic website work is done.

Jetpack for WordPress: The reason we skipped #5 and #6 earlier is because that functionality is built into Jetpack. Jetpack is the “built in” WordPress plugin. It actually has 27 plugins inside of it. You install Jetpack when you install WordPress, and then turn on the individual items from inside of Jetpack. I use Comments, Contact Form, Enhanced Distribution, Infinite Scroll, JSON API, Likes, Manage, Mobile Theme, Monitor, Notifications, Omnisearch, Photon, Protect, Publicize, Sharing, Site Stats, Site Verification, Spelling and Grammar, Subscription, and Widget Visibility. Many of these are simple on/off switches. There is no configuration but they enable some great, simple functionality like Spelling and Grammar. This enables spell check on your editor.  As you can see, I use 20 of the 27 features built into Jetpack. Don’t skip installing Jetpack, it is a must when you are getting started.

MailChimp: You’ll need to start or continue building your email list of customers. MailChimp is a free (until you have over 2000 subscribers) service that handles your emails beautifully and lets you send out targeted emails easily. Constant Contact is a good competitor to MailChimp but they require a fee right from the start so I went with the free one.

No Self Pings: Whenever someone links to your site, WordPress lets you know. Weirdly, WordPress doesn’t differentiate between outside people and when you link to yourself such as when you reference a previous post inside of your current post. This plugin stops the notifications when you link to yourself. Simple and handy.

SumoMe: This is my new favorite plugin. I’ve been using it about a year and it adds some awesome functionality in the free product. One of my favorite tools is heat maps. We had an issue where customers would call us and ask how they buy our meats. We had a link right there on the page but they never seemed to see it. I turned on heat maps and it recorded every click that the customers clicked on. Our link for buying meat rarely got clicked. I made the link shocking simple. I changed it from “Products” to “Buy Meat.” I reran the heat map and what do you know, now that is one of our most clicked links. Figuring out what your customers are doing on your site is how you improve. The SumoMe folks also have free webinars, free articles, etc all the time on how to improve your website. They also have Listbuilder (for collecting email addresses), Welcome Mat (for collecting email addresses), Google Analytics, and a host of other products all built in. If you are really going to market with your website, you need SumoMe.

Updaft Plus: This is my backup program. There are a lot of paid for backup services out there. Updraft Plus is free and it will send your backups to pretty much wherever you want. I use Dropbox, which is, you guessed it, free. The backups are automatic if you set them up, and Dropbox synchs automatically across all your devices so your backups are backed up to your local computers. Most importantly when it comes to backup programs, I’ve had to restore from a crashed site via my backups. They work.

YOAST SEO: This plugin was listed in the 10 first steps article. I agree that you should install it right away. It really helps you learn to write a better post, and it has awesome tools for sending over the proper content to Facebook, Twitter, etc.

Plugins we use but aren’t required

AK: Featured Post Sidebar Widget – I put a ton of content into blog posts. The downside of doing so is some good posts get lost in the backlog and nobody ever sees them. I added this plugin to let me mark favorite posts with their own category (Sticky). Then this plugin displays those posts on the left side of our site under a “sticky posts” column allowing them to see the light of day.

P3 Plugin Performance Profiler: Sometimes your site gets slow. Often times it is a plugin that is causing the problem. P3 checks all your plugins and lets you know how each one is performing so you can fix the problem. I keep this one turned off unless I’m having an issue. One click and I’m in diagnostics mode. Handy.

Exclude Pages from Navigation: We wanted some pages on our site that weren’t listed in the main menu. This plugin let us do that. It works simply and well.

WP-Optimize: This is a simple plugin that performs some routine cleanup on your site, cleaning up SPAM comments, old draft posts, etc. Runs well when I run it. It can also be automated to run on a schedule.

Yet Another Related Post Plugin: This post works amazingly well. You install it and it reads all your posts. Then at the bottom of your post, it uses what it read to suggest other posts on your site that are related. It’s really good at picking related content. If someone is reading your site, this helps them find new content they might not have seen.

The last software I’d recommend isn’t WordPress or a plugin. It’s a site called Canva. This site is also free and it’s as good of an editor and desktop publishing program as I’ve used. Need a poster, or a handout for the market, or a banner on the top of your website, or a greeting card? Whatever you may need, Canva lets you make it, download it, and print it locally. The only thing they charge for is if you use their artwork. Since I already have pictures of cows a plenty, I just use my own photos and I can build whatever I want for free.

If you’ve made it this far, congratulations. You have been promoted from Farmer to Nerd Farmer.

The next level up happens when you put this information into practice so figure out those first steps and get moving before a calf is born and you get busy again.
The 2015 Carolina Meat Conference my actual notes from class

This is a post to record for myself the notes from different classes. This isn’t going to be good reading, just my personal scribblings.

  • HR9 – Retail meat exemptions. I was late and missed the setup but there is an exemption for preparing meat in the retail environment. Need more information on exactly what this means and does it apply to us. Anything produced under this exemption is not inspected and has specific labeling requirements to qualify under the exemption.

The rest of the notes are from the sausage making class

  • Cure #1 – Other curing. For curing with heat
  • Cure #2 – For dry curing. Long time curing. Country ham, pancetta, air dried meats
  • Hot smoke 1.5-2.5% by weight (green) for salt. Whole muscle cures 2-1 ratio of salt to sugar. (i.e. Green weight 10 pounds. 2.5% = 1/4 pound of salt, 1/8 pound of sugar.)
  • Sausages – Salt and sugars and nitrites all the same as whole muscle. Spices can vary all you want. Nitrites are 1/4% of green weight.
  • For hot smoking, salt is 1.75-1.5% of green weight.
  • Most of his curing is done in a cryo-bag. When you cure in a cryo-bag you make sure that the drawn moisture mixes with the salt and forms a brine. If any area remains dry, open the bag and fix it. Massage the bag daily to evenly distribute the cure.
  • When figuring the amount of nitrite, round the amount up or down to the nearest gram.
  • Converting pounds to grams. 1lb x 454 = number of grams.
  • Bacon cures in a cryo-vac for 7 days.
  • Spices are set a various levels by weight. Level 1 is the spiciest. Level 1 is .625% of green weight. Level 2 is .3125%. Level 3 is .08% and level 4 is .04%.
  • 5.4 pounds of meat = 2554 grams. Multiplied by 1.75% =42.9 grams of salt. 2-1 ratio mean 42.9 grams of salt divided by 2 for 21.45 grams of sugar. 2554 grams green weight times 1/4% = 6.12 grams of nitrite, rounded down to 6 grams even.
  • Capricola – Made from boneless pork loin. He uses a small amount of nutmeg as his secret spice. Herb like basil are too wet and should be used dried. Rosemary is ok by itself.
  • Do not use acids in sausage. Lemon, lime, tomato etc can be used on whole muscle, but not in sausage. If you want something acid added, soak the sausage casing in it. It adds the flavor but doesn’t contaminate the meat.
  • Red wine helps pork belly to cure. Belly doesn’t have much moisture to make its own brine.
  • Don’t grind spices for bacon. Grind them for sausage. Bacon just washes off anyway so leave them whole or chopped.
  • For smoking, hang meat/sausage for 8 hours in walk in first so that it forms a pellicle. Don’t smoke wet, it forms a nasty slime. Just enough that a pellicle forms.
  • Spice bush is a native plant in NC and can be used to add interesting spice to smoking. Can buy as an ornamental plant. Red berries are like white pepper for spice.
  • If you leave the skin on bacon, then put 2/3 of the rub on the skin side, 1/3 on the meat side. Skin slows down the absorption.
  • For ham, brine. Inject 10% of green weight of meat with bring. 10 lb ham, 1lb of brine. Inject in 2# square grid pattern all over ham. Inject in bag so that any brine that runs out stays in cryo-bag. If you use a liquid only brine, it takes 2-3 weeks to cure. If you inject, it takes 8 days.
  • If you dry cure in a refridgerator (low humidity) the meat doesn’t develop a rind. If your meat does develop a rind, cryo-vac the meat and leave it for a few weeks and it will go away as the meat normalizes.
  • Join two Facebook groups. The salt cured pig and Sausage Debauchery. Jason Mullinary is on Sausage Debauchery. Really intense curing and smoking groups full of chefs and butchers.
  • Dry curing – Meat is done when it loses 30% of its weight minimum, although 30% might be too wet for good taste, it is safe to eat. 40% weight reduction is the standard for some cuts like sopresetta, capricolla. Anything past 40% and you’ve made jerky.
  • Nitrite poisoning symptoms – Flushed, sweaty, really thirsty.
  • Botulism poisoning symptoms – 12-20 hours after ingestion. Weakness in neck, sleepy. Very deadly. You die because botulism paralyzes your chest and you suffocate. Botox anyone?
  • Emulsified sausage – Need a non-acid liquid to make. Water, beer, wine, etc. Can’t be more than 40% fat by law.
  • Dry cured sausage can be higher in fat than 40%.
  • Emulsified sausage, 10% liquid max, by law.
  • When you stuff sausage, you always have some left over. Instructor saves it in the freezer and takes different bits and combines to make pate. Recipe is weight of all meat plus 10% weight in onions, 5% each of celery, milk, and bread.

When TMI (too much information) is just enough part 3

This is a long post, so let me tell you the most important part of it right up front. Everything we are discussing is free. Free to learn, free to use, free to improve your farm, and free to make money with. Do you like free stuff with no strings attached? Me too. Let’s get to it.

Learning to use the tools is both easy and hard. It’s easy because compared to when I built my first website (in the 90s), the tools associated with WordPress are really simple. As in easier than using Microsoft Word simple. There is a learning curve, like with any new software, but once you get your website up as a blank canvas, adding content is really just utilizing the same few tools over and over again.

In fact, the thing to remember most is that simple is better. Don’t install plug-ins if you can help it (we will discuss plug-ins later). Don’t add extra fonts. Don’t put more than one call to action on your home page. The danger is in doing too much, not too little. For some examples of what not to do, take a look at this post.

Bad website design
Here is an example of how not to design your website.

Did you read the post? Kind of scary, right? Makes me look at my own site and wonder what I should remove so I don’t end up on that list.

So what does a good design look like? How about these examples. The good news is that your website, when you first load it as a clean sheet design, will look at lot more like the second set of examples than the first. The default theme that comes with WordPress is actually very powerful and effective. There are also thousands of themes that are free and will give you the look and feel that you want. The key is to not add content that takes your clean and crisp theme back to the first set of examples.

So this stuff is actually pretty easy, but in reality it’s hard. Hard because after farming all day from can to can’t, or more likely working a day job then farming after working a full day. And trying to spend some time with the family, and finally getting to a computer to pay bills, answer emails, file taxes, etc. there really isn’t any time to sit down and learn something completely new. I get it. I’m in the same boat as you.

However this topic falls into the old dilemma of working “in the business” or “on the business.” Marketing and improving record keeping are both items that are never on the critical must do today list but are always on the ought to do some day list. Some day items are the ones that make the difference between being busy and being profitable but they are always the hardest to get done. Fortunately almost everything for this task can be done from a laptop. Even busy farmers tend to watch a bit of TV each day. Try turning off Modern Family before bed and get something productive done in that last wind down hour instead. Or try getting a bit of work done while having lunch. Electronics are insanely portable now, and even farmers have down time occasionally.

As for actually setting up a website, most of us already have one. Some are quite dynamic, and some are very plain and static. Remember I said that 75 million sites are based on WordPress? That means that there is wealth of information on how set it up, optimize it, and make it work for you. Sites like this one, or videos like this one, and one of my favorite sites here, all for free. Did I mention that WordPress itself is free as well? All you will be paying for going forward is your hosting, which you are most likely already paying for meaning that besides your labor, this is a zero cost project. Many very good WordPress themes are free, as are many of the plug-ins that you will use. Our site has zero paid content or plug-ins at this point and it does pretty much everything I want it to. All of this may sound overwhelming, but know that both grandmothers and kids alike are building websites every day. If they can, you can too.

Despite my assurances, setting up a new site can seem overwhelming. I know, I’ve been there. Don’t worry though. In all reality, you can hire the neighbor kid to do everything I’ve spoken about previously. He’ll probably work for pizza and be happy to set up a real site instead of the Star Wars fan site he’s been working on with his friends. He’ll have you set up in about an hour, show you how to log in, and disappear with his pepperoni slice in his mouth. In fact, our intern Brian set up our original WordPress site because I didn’t know how, and didn’t have time to learn (sound familiar). So however you get it set up, get it up and running so you have a blank canvas.

But now what? Now it’s time to create content. Not everyone is a writer. Not everyone can type that well. But there is good news as you bring your brand new site to life.

  1. Nobody is reading your writing anyway. That’s right, nobody sees it and nobody cares. Unless you already have a large customer base who utilizes for website routinely, nobody is looking at what you are doing. This is like singing in the shower. Nobody is listening so belt it out. The more you do it, the better you’ll be. By the time anyone is reading what you are writing, writing will be old hat.
  2. You can always fix it later. I had another blogger come and interview me for his blog. Since he was a peer I asked what he thought of our blog. He was somewhat stunned by the quantity of content on our site. I didn’t really understand his reaction until months later when he finally posted about his trip to our farm. His post was perfectly written and had excellent pictures, but it took him months to produce what I’d have done in 30 minutes. I’d have typos and grammar that could be improved but I’d written dozens of posts in the time he’d written one. Nobody wants to mess up in public but you just have to get over yourself. Lack of action has caused way more damage than the wrong action. Get moving.
  3. You have something story worthy almost every day. You are a farmer. You have cute critters, sunny days, rainy days, farm projects, buying and selling of animals, new products, etc. You have stuff all the time that people really are interested in knowing about. The local food movement is growing daily and you are as local as the local food movement gets. Is your dinner tonight from your farm? Take a pic and do a quick post on the recipe. Goats just had babies, take some pics and post them along with details about the goats. Many, many people wish they could escape suburbia and live the life you are living and they will read about you just to imagine themselves doing it. Very few people think their daily grind is interesting to others. You are different, you are a rock star, put something up for others to see.
  4. Just posting your records will drive content. Ok, so you aren’t a story teller. You barely got out of 11th grade English class. You participles routinely dangle precariously. Then put up the basics. Get your records out there. Show what you are doing and be as taciturn as you like. Just make sure you have plenty of pictures as they say 1000 words. Your customers will still appreciate the transparency and frankly, on the web, shorter is better anyway (something I obviously struggle with).

Lastly, for however you write, you have to find your voice. What does it mean to find your voice? It means, who do you come across as when you write. Do you speak as a disembodied third person narrating life on the farm? Do you speak as yourself, the farmer? Are you professional and strict in your writing style or do you speak in down home Southern colloquialisms? For me, I speak as myself. I make every effort to not be formal. I enjoy poking fun at myself and the situation I’m in usually due to some comedy of errors. Writing in the style of this post is uncomfortable to me because I don’t like writing as the “expert.” I always remember that an “ex” is a has been and a “spurt” is a drip under pressure. Bungling neophyte who got lucky and survived is my preferred voice as it’s self-deprecating and usually funny. However you may have 40 years of experience and prefer to write with the voice of a seasoned professional. What you pick doesn’t matter. What matters is that you know what your style is and you make it work for you. By knowing your content, knowing your voice, and having a few pictures as the basis for your post, it makes it much easier to put together something that is worthy of a few minutes of your customers time. If this is all you ever do, you’ll still be ahead of 90% of small farmers when it comes to their social presence. However, if you want to make things easier still, and better, you have to learn the tools of the trade. In the next post, we’ll talk about the tools that I use on our own website.