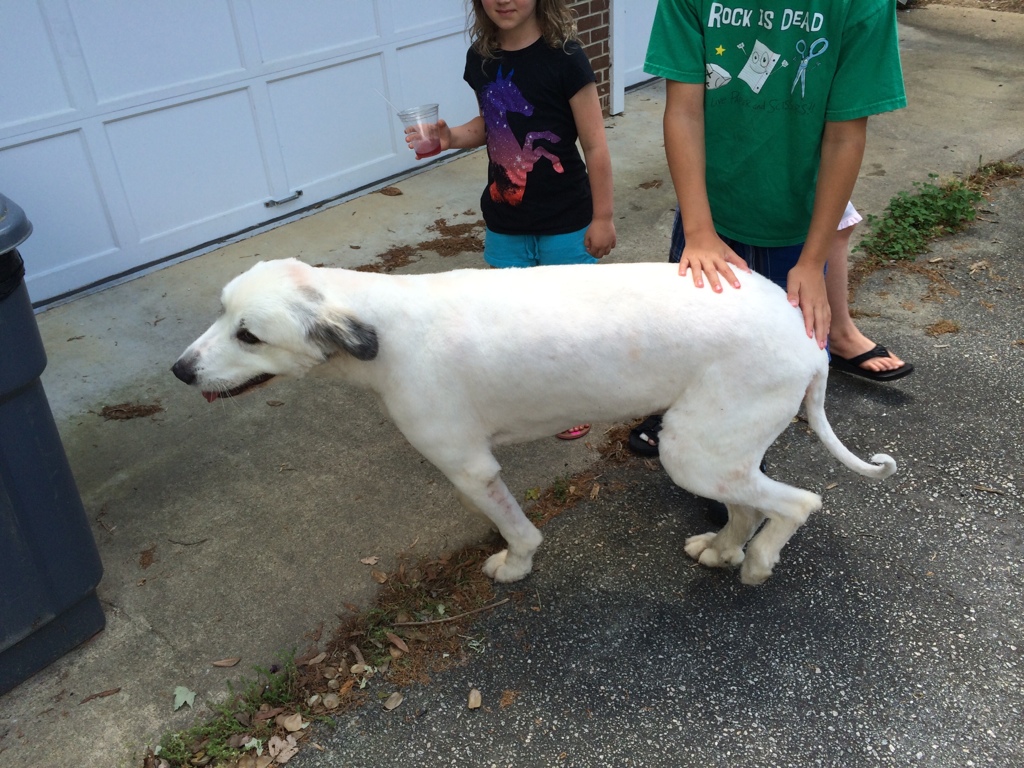
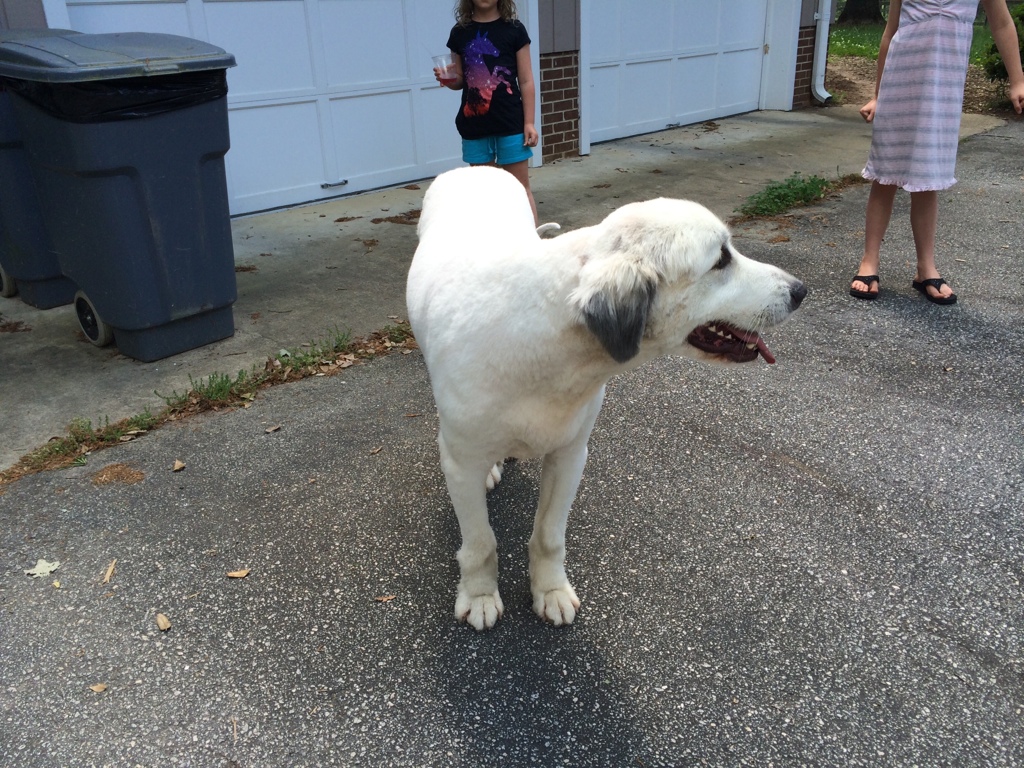
We received about 7 inches of rain in a short amount of time last week. I took the occasion to go down to the back pasture and see if there was any water coming onto our land. In all my years on the farm, which include multiple hurricanes, I’ve probably seen the pasture flooded 8-10 times in any way. I’ve seen it flooded till it covered the pond once, after a hurricane. I’ve never seen the water flowing like a river and I’ve never seen what we saw last week.
Kung Pow and the cow fight
I was at the Wake County Agri-Business Council meeting yesterday along with about 60 other folks involved with the council. We met at Adam’s Vineyards in Willow Springs for our monthly breakfast and a tour of the vineyard. While there, I met an extension agent who learned our farm name when it was announced we had contributed pork sausage to the breakfast for everyone. He loved the name and asked if I’d seen Kung Pow before. Why no, I had not. Turns out there is a scene in the movie where the protagonist fights a dairy cow, black belt theater style.
Of course this is silly comedy. And obviously Kung Pow would have lost this fight against the actual ninja cow vs. this Hollywood stunt cow.
Consumer study on local food buying habits
No update yesterday, which is a shame because we have lots to report. However computer issues are preventing an upload so I will share this quick post on this study about consumers and buying local. We will have plenty of good farming stuff coming in the next few days.
Little red truck, 12.0
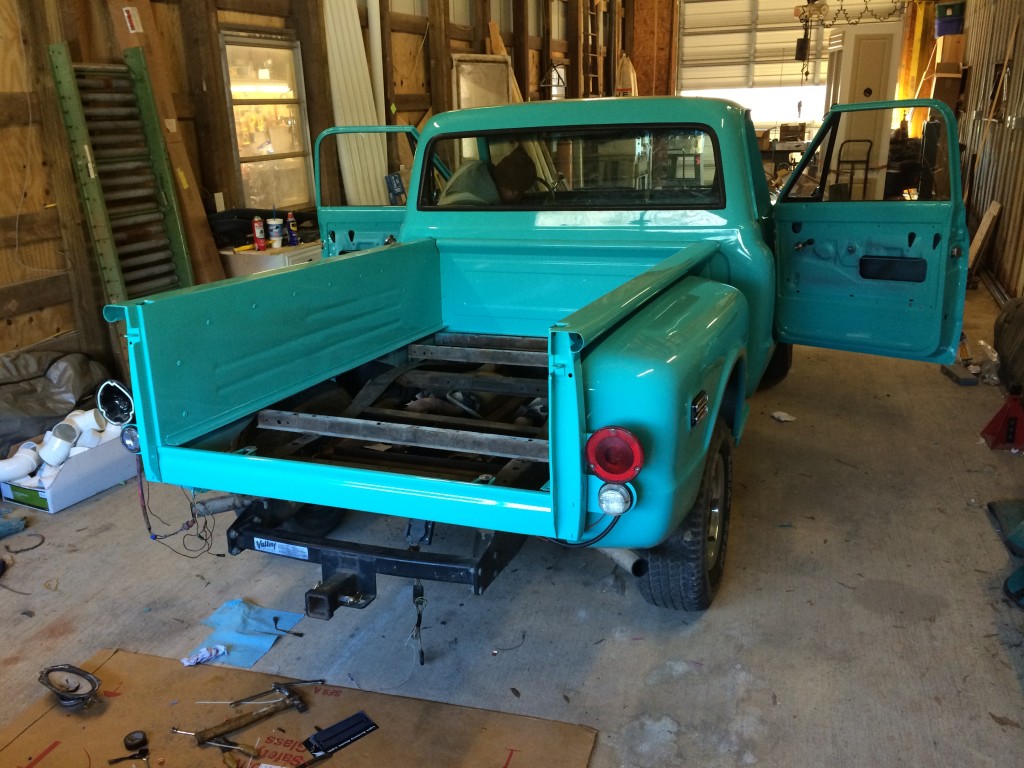
Today we continue the series on our truck restoration. These pictures were taken on March 10th. The truck is mostly together, at least the big pieces. 5 days till the wedding. No pressure.
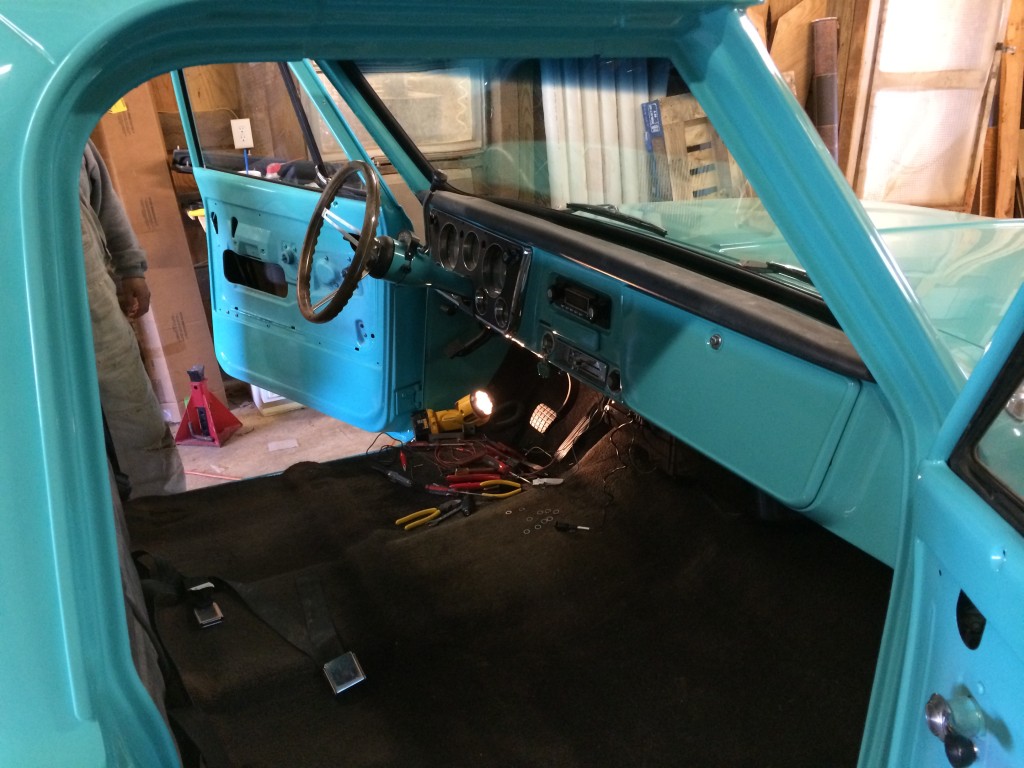
It’s definitely getting more tuck like. The scary part is I’ve heard putting the wood in takes forever and who knows what part won’t go back on, or will break on install.
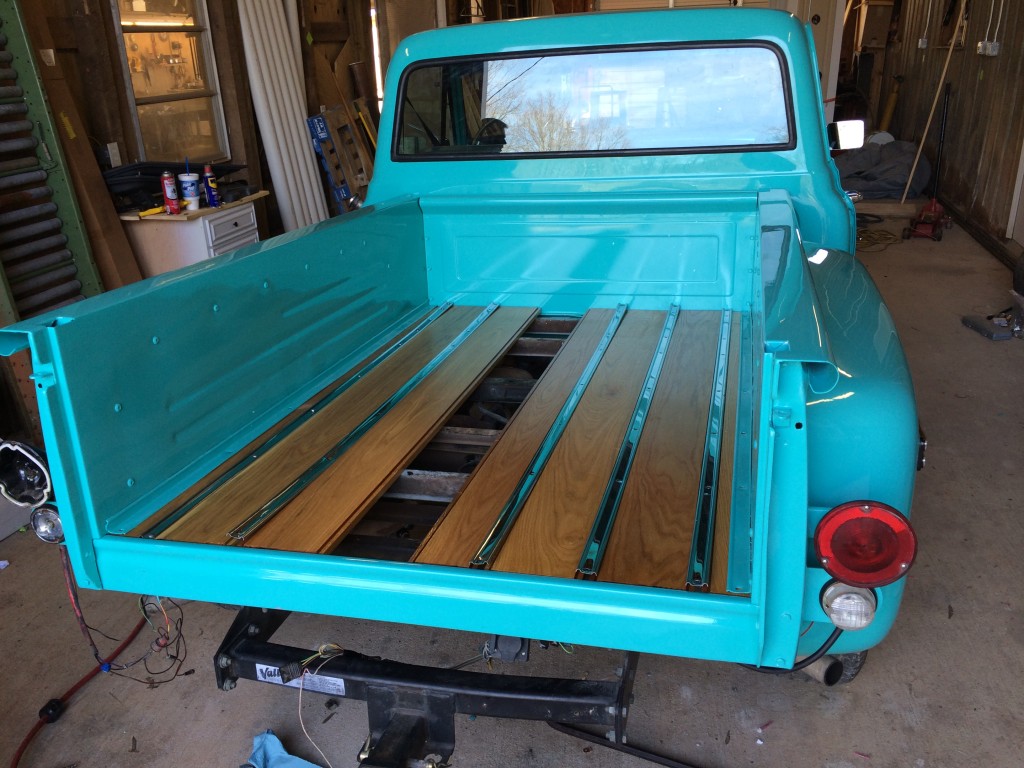
Installing the planking is a two-man job. Fortunately we have a car lift so between that and having air tools it only took Miguel and I a few hours and some limited foul language.
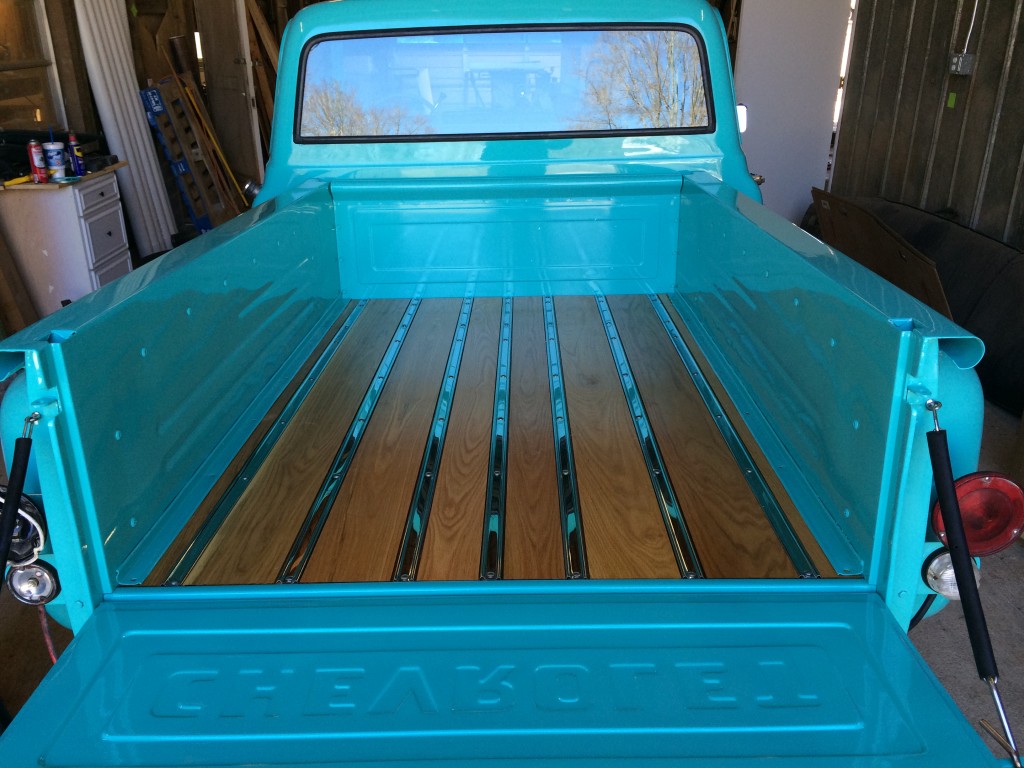
The finished bed. It did take a while, and it was a pain, but it sure was worth it when you see the result.
Cotton goes to the hair stylist. A sure sign of spring
Success! Apple press restoration 6.0 – Final
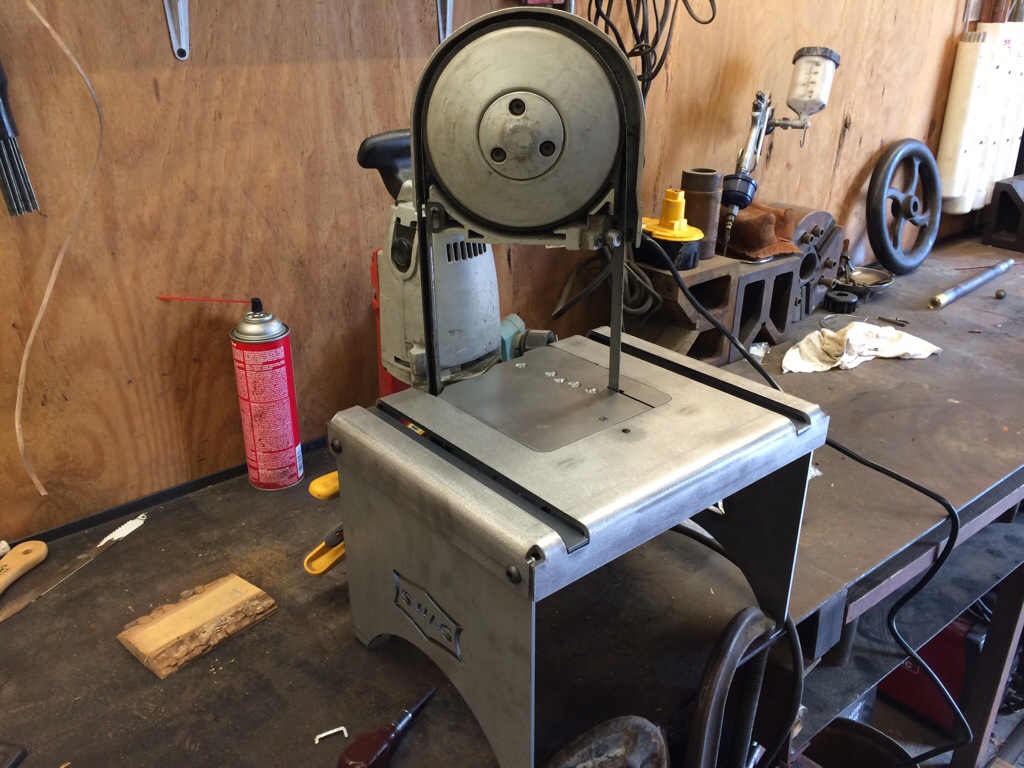
I was able to get some time in the shop to finish the apple press and some other projects that were in pieces on my work bench. Knowing everything was going to sit in pieces all summer was eating at me so I started about 4:30am and worked till about 6pm and knocked out everything on the list. The apple press was only part of what I worked on that day. Now I have a perfectly clean work bench and I can go in good conscience to the lake and have fun with the kids.
Pictured above is a conversion kit from Swag Offroad mounted to my Porter-Cable portaband bandsaw. This allows me to use my portable bandsaw as a bench mount saw. I have a big cut-off saw that I never use as the portaband does everything so well I always grab it first. The only thing lacking was a mounted option. I’ve had this kit in the box most of the winter. Doing the final work on the apple press knives caused me to finally pull it out and put it to work. It worked perfectly.
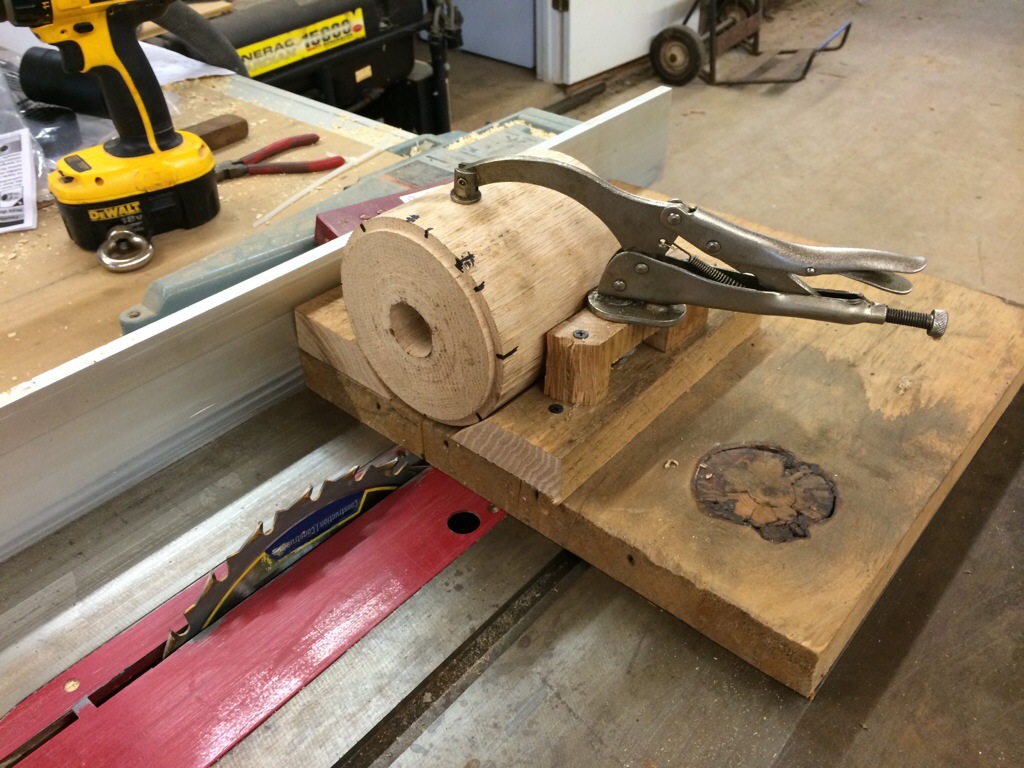
Sawing the slots in the drum was tricky. They had to be at the correct place on the drum so it stays balanced. They also had to fit closely to hold the knives in place. Plus they had to be at the correct depth, straight, etc. All that precision required a 15 minute jig made of scrap lumber lying around the shop. Here you can see the drum marked up for where each slot will be. A hold down vice grip was borrowed from the drill press and we had all the slots cut in another 15 minutes.
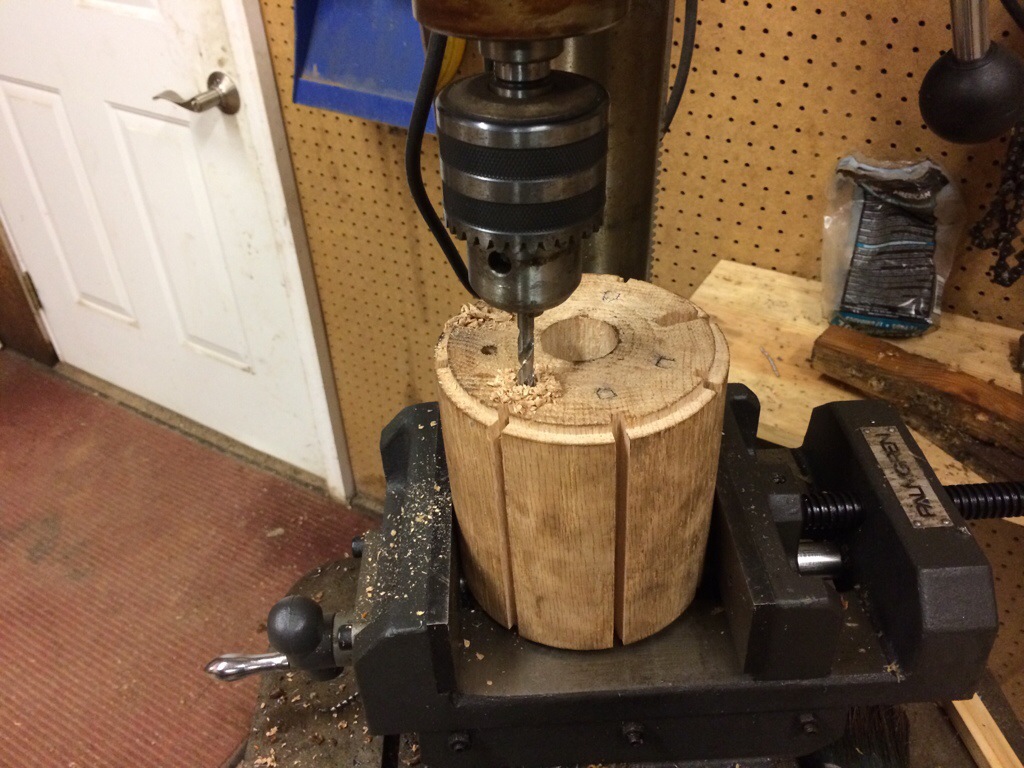
You can see the other holes marked on the drum. This was Miguel’s idea I tried to describe in a previous post. The idea was to have a positive retention system for the knives utilizing this hole. The idea worked, but it didn’t hold the knives in place well enough to be the primary retention system and the work to make the knives in this shape was too much to justify the time and tooling.
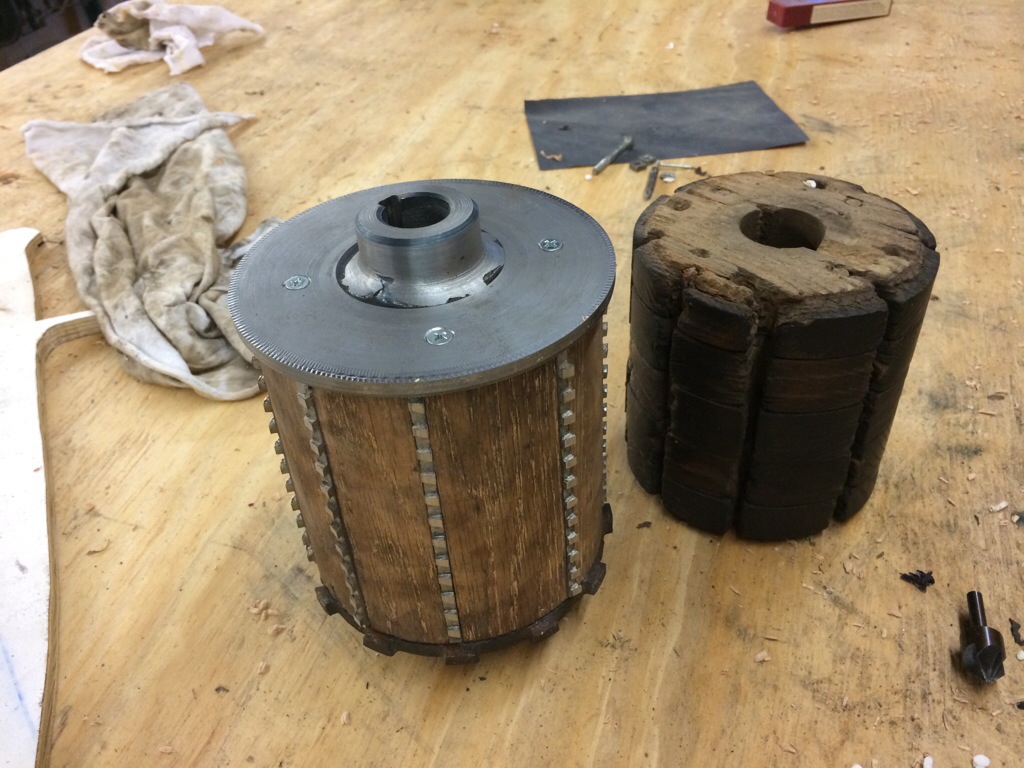
What all this work was for. A new drum, made from laminated red oak which should last past my lifetime and maybe my kids. New knives made from 304 stainless steel, twice as thick as the previous knives. Again, these should last well beyond my need.
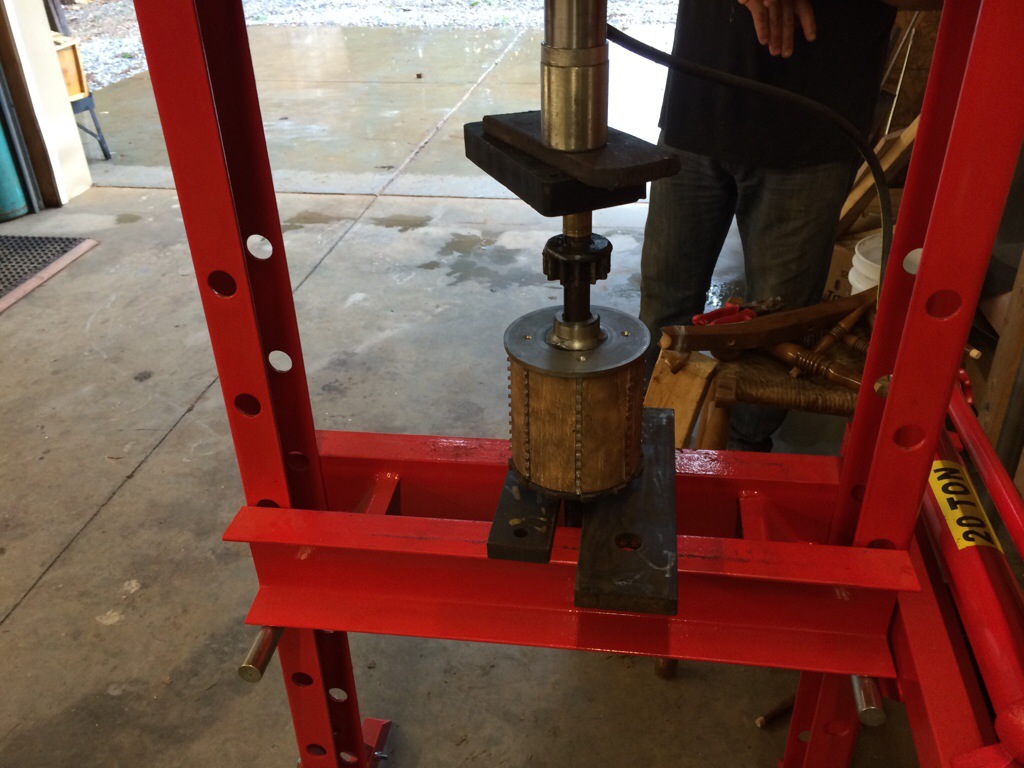
We had to use our press again, this time to put things back together. The drive gear went on my hand but the macerator and the flywheel both had to be pressed back onto the shaft. I didn’t clean the shaft before putting it back together because the marks where everything was seated originally were still plain. This made it easy to put everything back together.
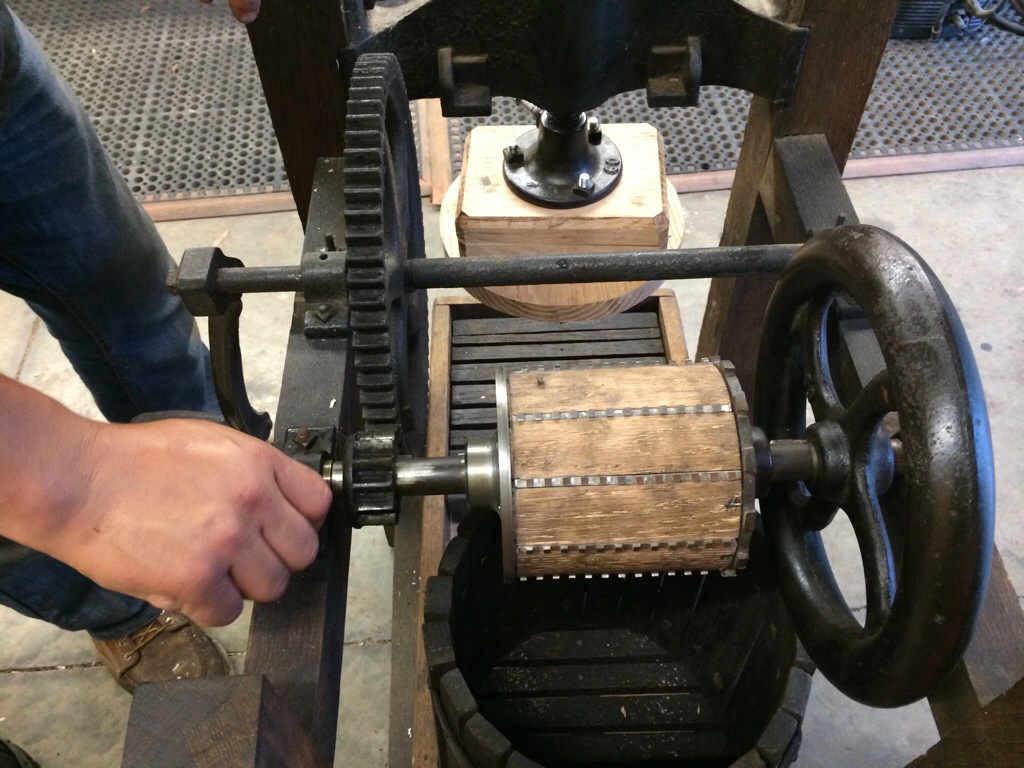
It was interesting putting it back together at this point. When we gave it a test run the drive gear sloughed off a bunch of gunk because the drive teeth were properly engaging for the first time in many years. We’re back to metal on metal the way it was intended.
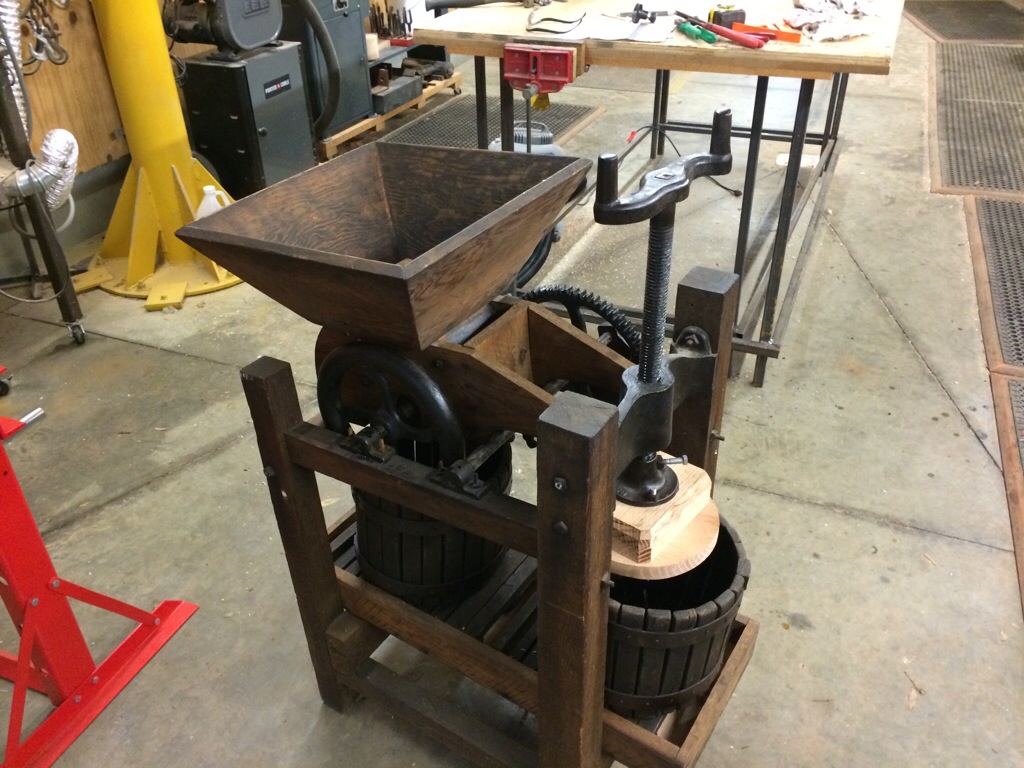
And here it is. Six posts and many man hours later, all finished and waiting on apples. I told Miguel I think we used every tool in the shop on this restoration. We even ended up using the new (to us, very used otherwise) Piranha ironworker to finish making the knives. Now we just need some apples!
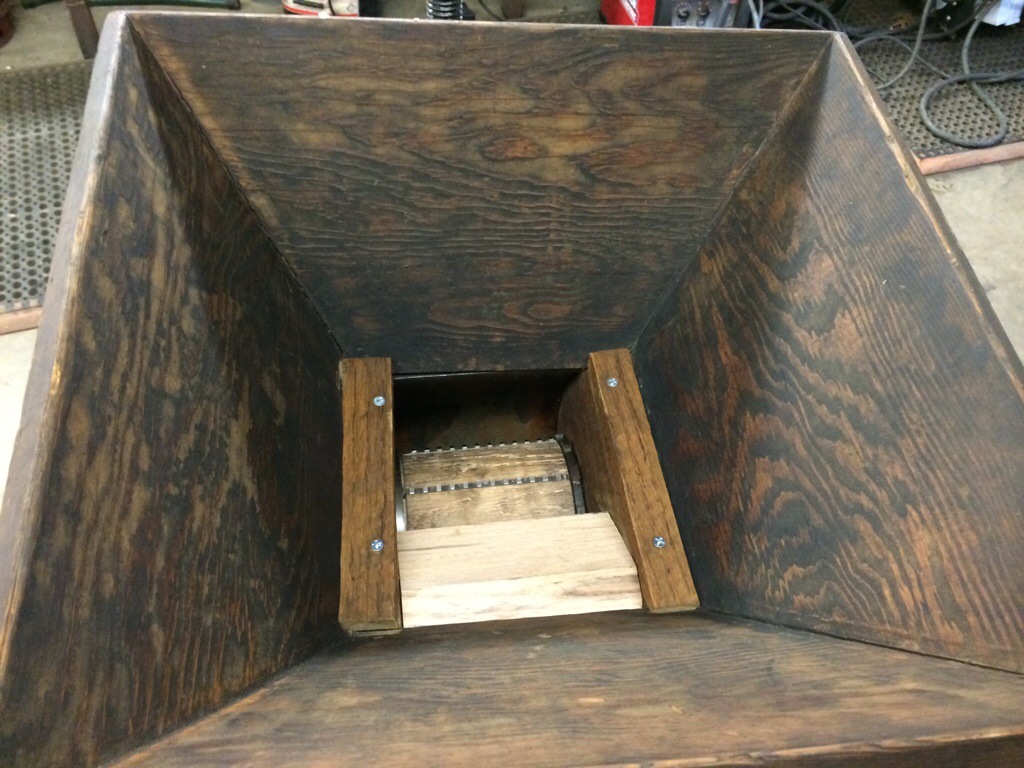
It appears that everything works correctly and all this thing needs is a few bushels of apples. Before we use it, everything will get a good bath and a wash down with bleach. No sense in being too fussy at this point since it’s just going to sit in the barn till fall apple season anyway.
A bent axle on our little farm trailer
Miguel and I took Alice (not his real name) to the market with us the other day. I’m not sure why he says yes to invites to things like this. He’s smart, thinks ahead, and generally is one of the more intelligent people I know. By now I’d think he’d have learned to avoid me when I’m dressed for work. Anyway, we put him to work helping us load about 2 1/2 pallets of tomatoes all by hand onto our little tag trailer we use to haul vegetables each day. Being the observant and careful person I know him to be, Alice pointed out that the tires looked awfully squished and the trailer seemed a tad overloaded. Didn’t we want to take a bit less and be safe? Safety 3rd is our motto, and we do this every day, so the trailer will be fine. Shut up and get in the truck.
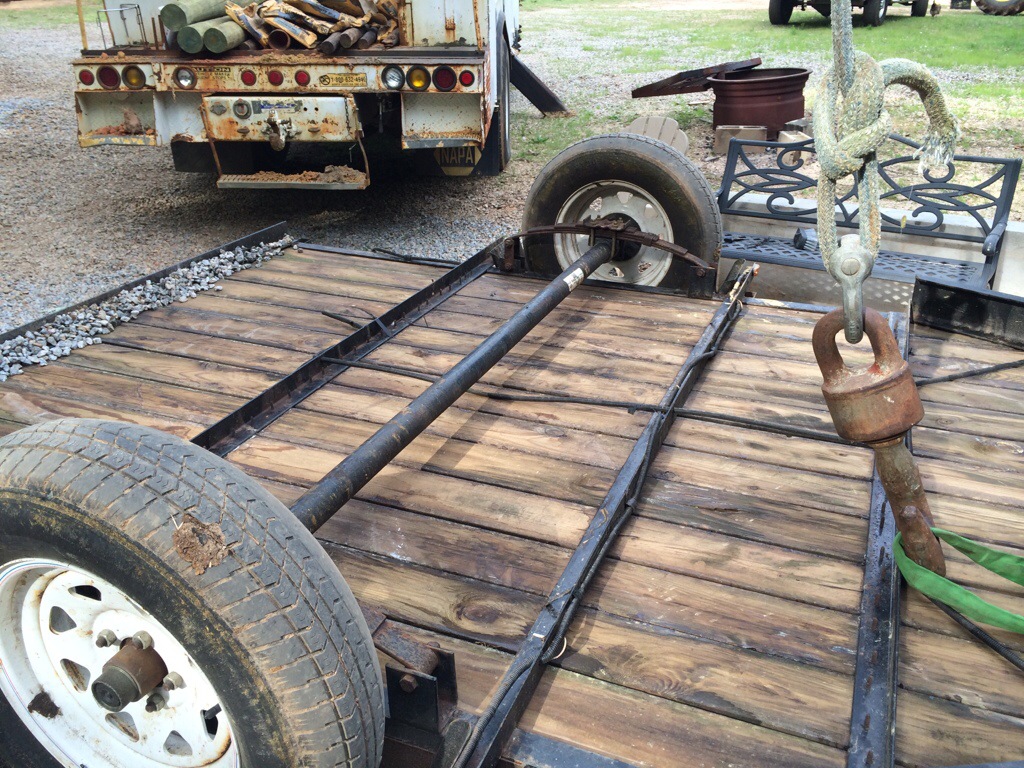
Um actually, the trailer isn’t fine. It hasn’t been fine for some time. The axle was bent at some point in the past. There is no telling what bent it, but hauling the Bridgeport mill probably had something to do with it. Miguel had noticed that the tires were wearing badly on the inside so this past weekend, just after Alice had informed me we had too much weight on the trailer, we flipped the trailer over to find out what was going on. Sure enough the axle was bent and now I have to admit once again that Alice was correct. Please nobody tell him. He’s already impossible to deal with. The bend wasn’t bad, but it was bad enough. I could replace the tires but they would cup again shortly. The axle could be straightened or replaced. Since we use this trailer every day, I elected to replace the axle. Off to Agri-Supply we go.
We determined that we had a 3500 pound axle under the trailer currently. I knew Agri-Supply carried everything to make a trailer from scratch so I thought a nice 5000 lb or so axle would be a nice upgrade for this little trailer. After consulting with the nice man from trailer accessories for about 20 minutes, we determined that there was no such option as a 5000 lb axle. The axles he had in stock were 3500 lb and 7000 lb! Yikes. That’s certainly enough to carry the weight, but that sized axle required new spindles, which were 6 bolt instead of the five bolt we had.
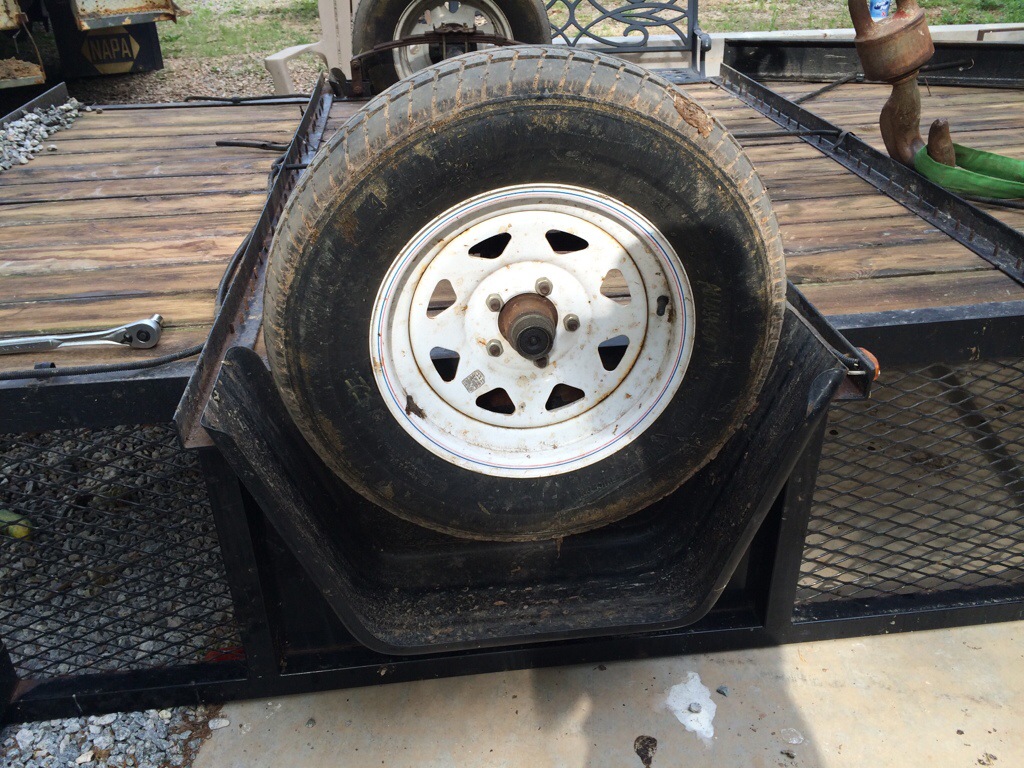
The new spindles also required a 16″ tire vs. the 15″ we had on the old axle. Sigh. That means that our fenders were an issue because of lack of clearance. This trailer had to roll at 3pm that day to make the run so cutting off and installing new fenders just wasn’t an option. Keeping the fenders meant that the tires at Agri-Supply were going to be too tall. So off to Universal Tire we go to have 225/65 R16 truck tires mounted.
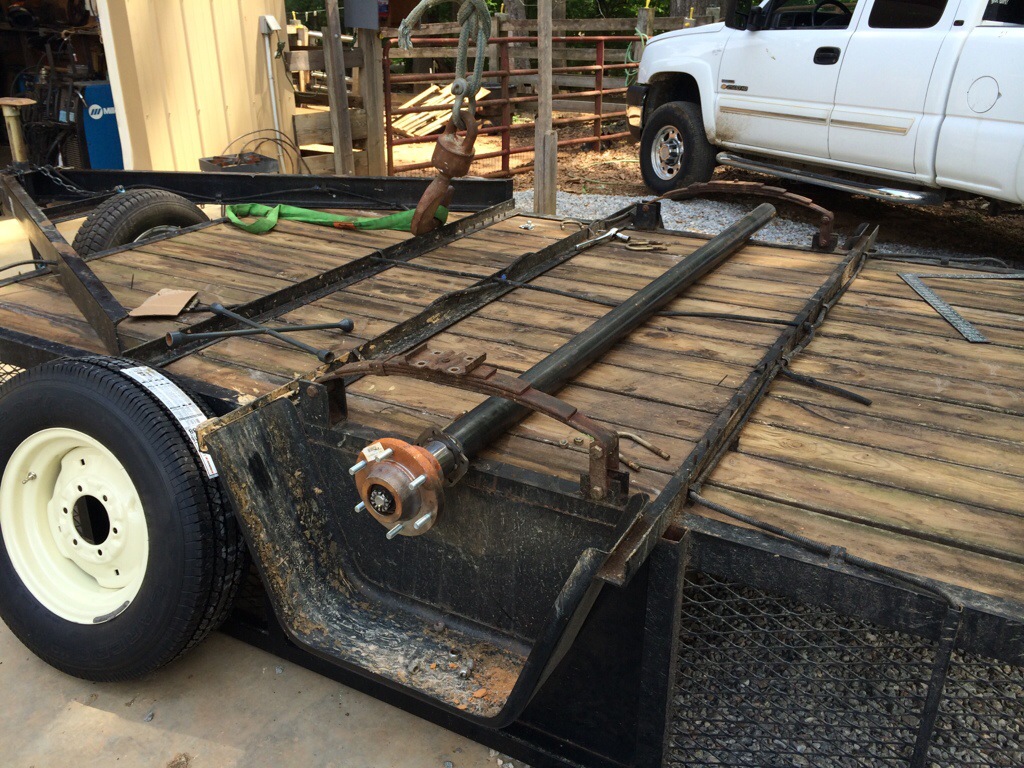
Did I mention that the 7000 pound axle wasn’t an axle assembly? It was a base metal project. An axle, cut over length, spindles, bearings, etc. all needing to be cut, welded, etc. and all needing to be properly done both in fit and strength. And all done TODAY because we have people and animals waiting on us. Here we have one side tacked up. We’re checking the clearance of the tires, once we mount the tire.
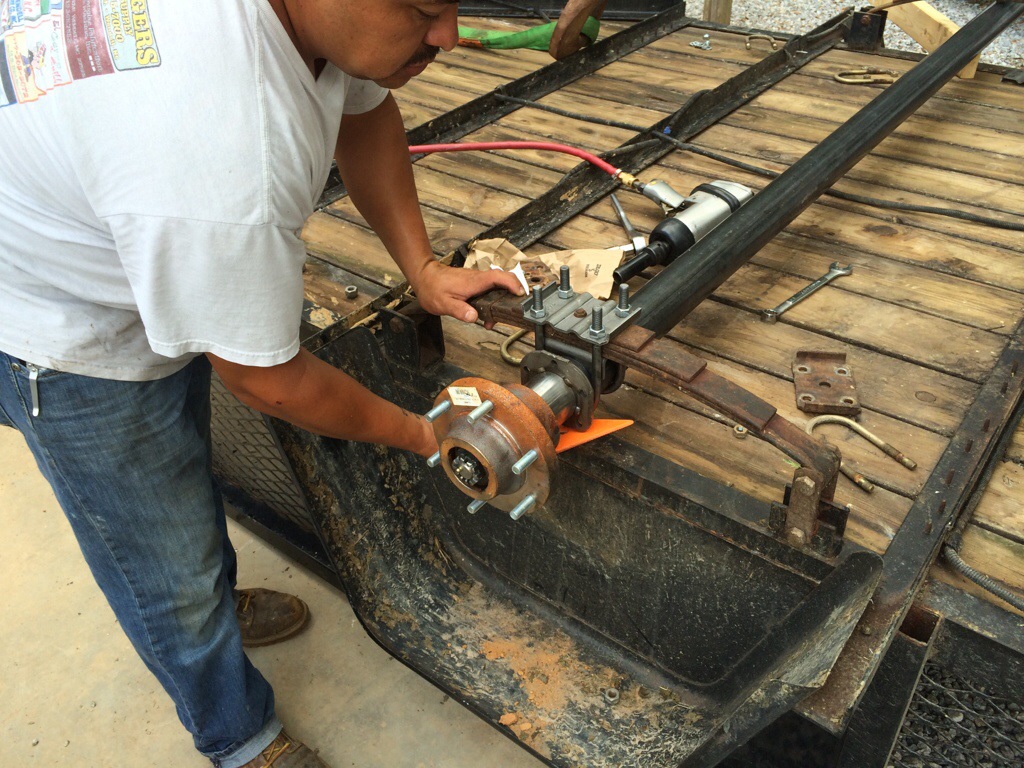
I know it looks like Miguel does all the work because he’s always the one in the picture doing the work. There’s two reasons for that.
One. Miguel actually does most of the work.
Two, I’m always behind the camera. It’s like how the children will have never had a mom if you only look at our photo album. She’s always behind the camera. That’s why her other nickname, besides SWMBO and Darling Wifey is Crazy Picture Lady.
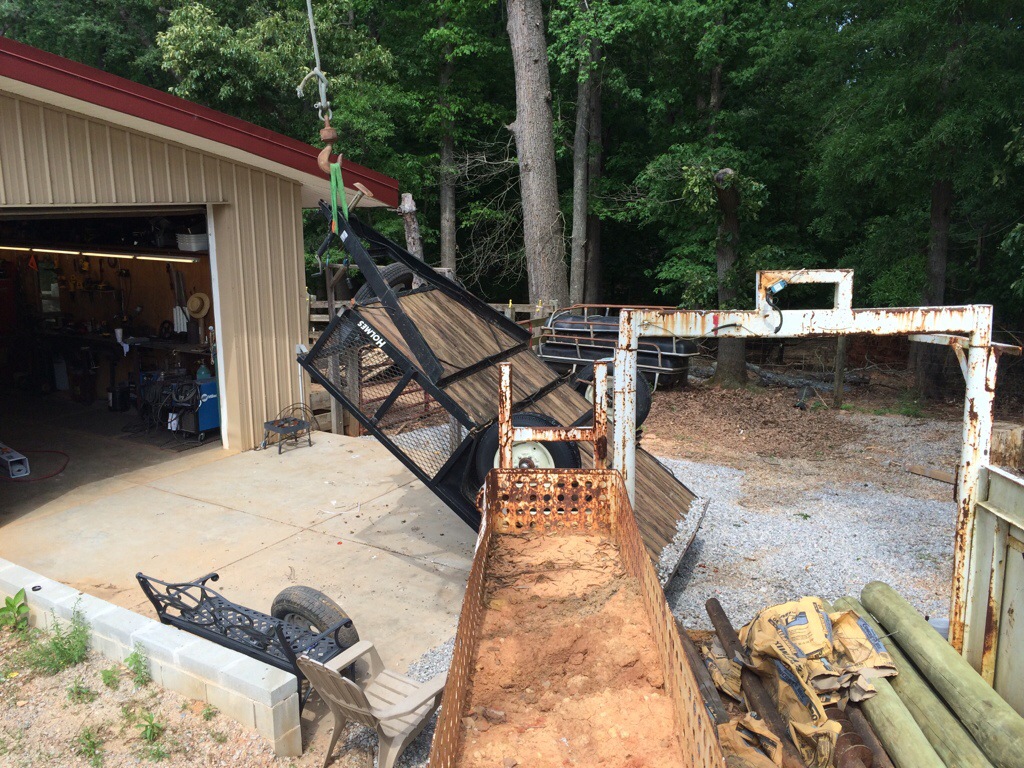
Everything put back together. We are flipping the trailer back onto its tires. Have I mentioned how amazingly handy it is to have a crane hanging around? We don’t use the bucket truck that often, but when we do it’s awfully handy and worth the money I spent on it, very used of course.
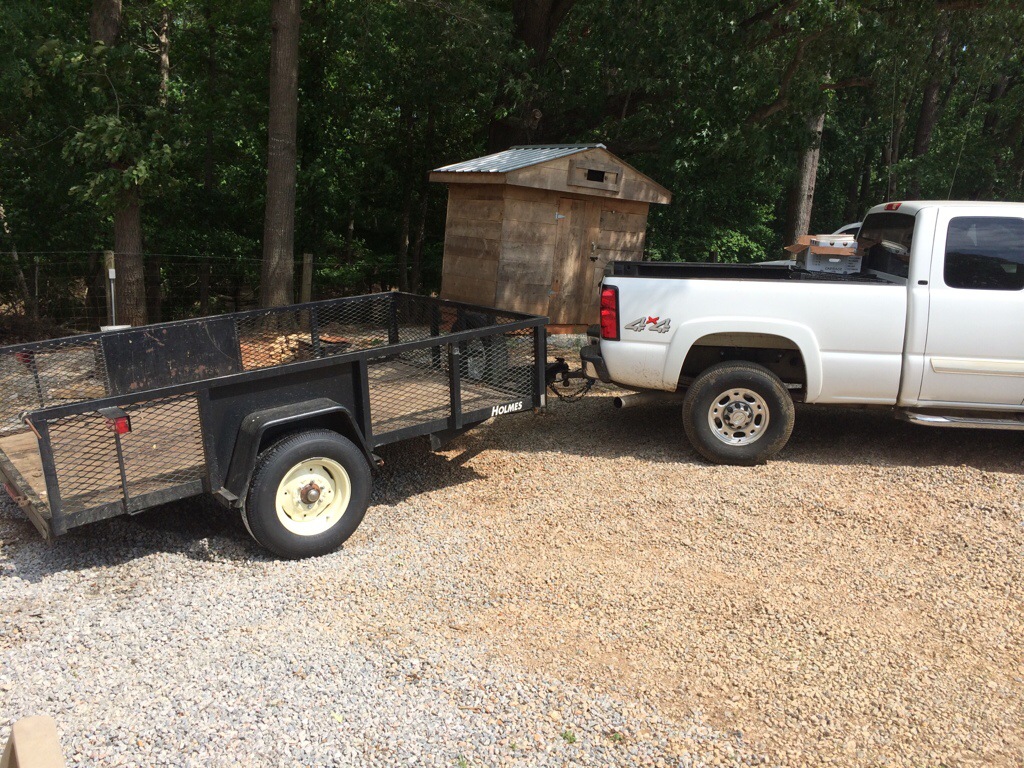
We started on this project about 9:30. We had to go to Agri-Supply, Universal Tire, Agri-Supply again, remove the old axle, and weld up a new axle, and get lunch. We were on the road at 3pm. Overall I think we did a pretty good job. Now the trailer has the capacity to carry about 6000 pounds of weight (the tires are the limit now) and should be what we need for a long time. I debated on getting a larger trailer instead but decided that having a maneuverable little trailer was too beneficial considering the places we go with it.
The old axle is bent but serviceable. It’ll probably become a hay wagon or something similar at some point in the future. Who knows, you might ride on it when you come for a tour. Don’t worry though, I’ll straighten the axle before I use it.
Update on the antique apple press restoration 5.0
The apple press restoration is close to being done, but getting further and further away as the days get warmer. You see, once warm weather hits, I lay down my shop tools and pick up my gardening implements. Not because I cannot stand the heat, but because I can’t spend but so much time in the shop working on projects like this. When it’s cold, snowy, rainy, sleety, miserable, I head to my shop where it’s warm and comfy. Nobody misses me much because they don’t want to be outside with me anyway. But as spring rolls around, things like taking the kids boating, going for a gator ride, seeing new calves, etc. all start sounding good to my crowd. So I put down my chisel and hammer and try to concentrate on projects that involve more of the family. That means that while I’m very close to finishing, I’m also very close to putting all this in a box till this fall. Maybe this weekend I’ll get it finished up and put back together. Maybe not.
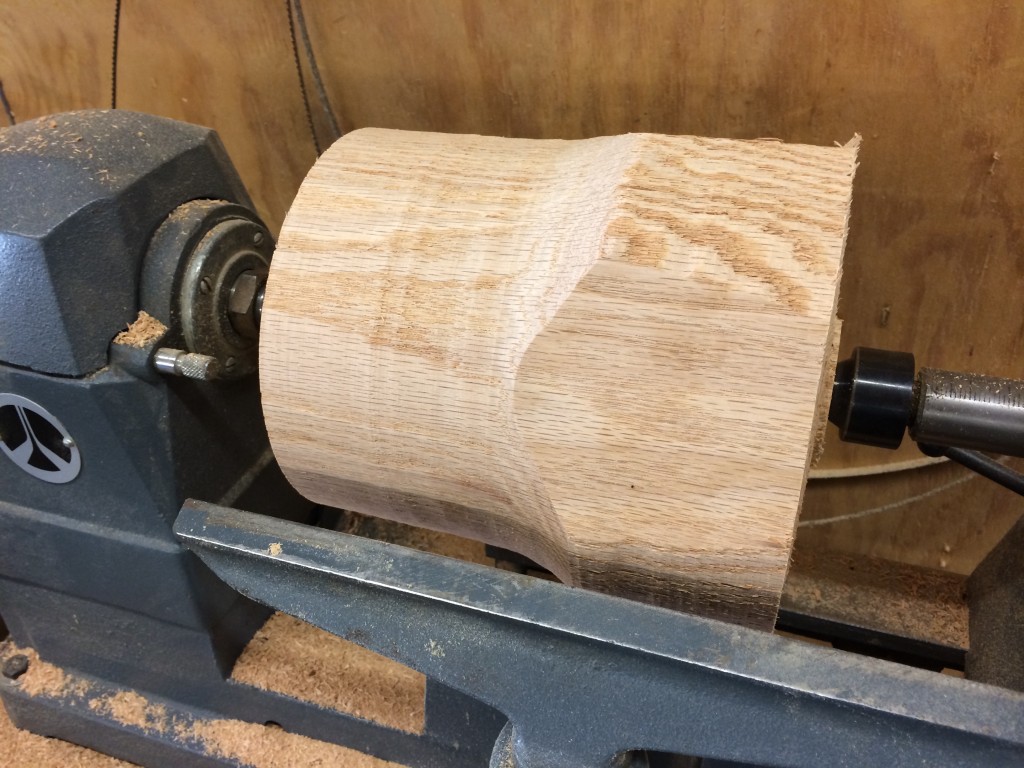
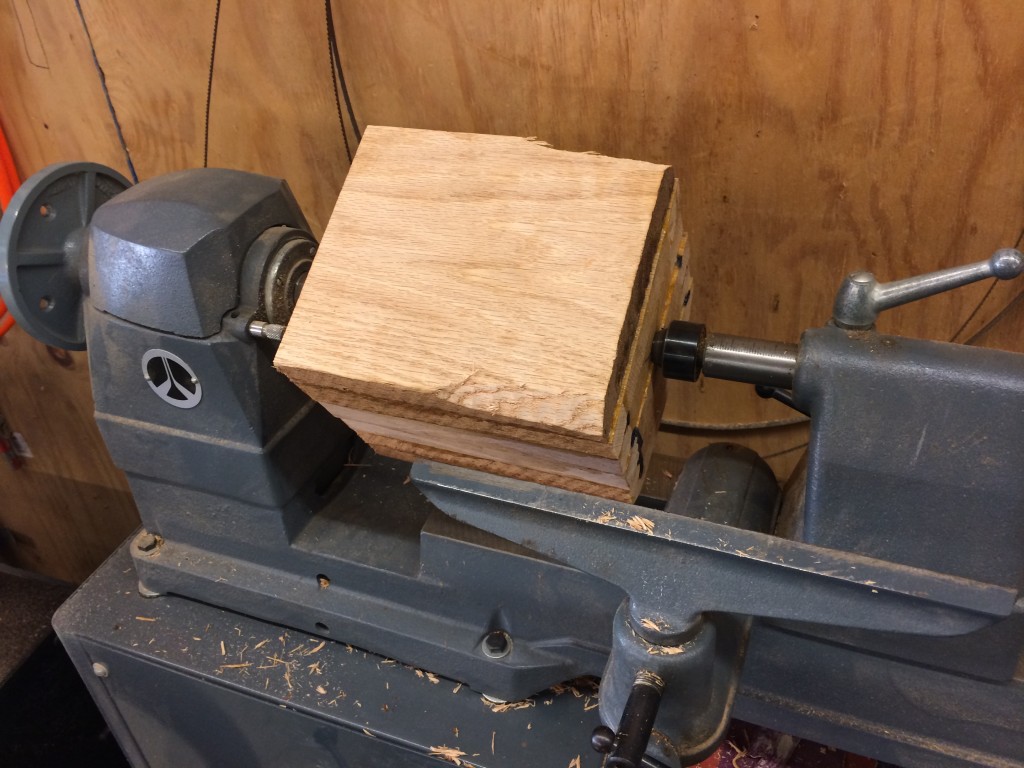
It’s a joy to get back on the wood lathe for this project. I enjoy a lot of different types of work, but working on a wood lathe is one of my favorite things to do. It’s more artistic than scientific. Not so much on this particular job but on many others. I spent a lot of time on a lathe when I was younger and any time I can get a gouge in my hand and make some chips fly is a good day.
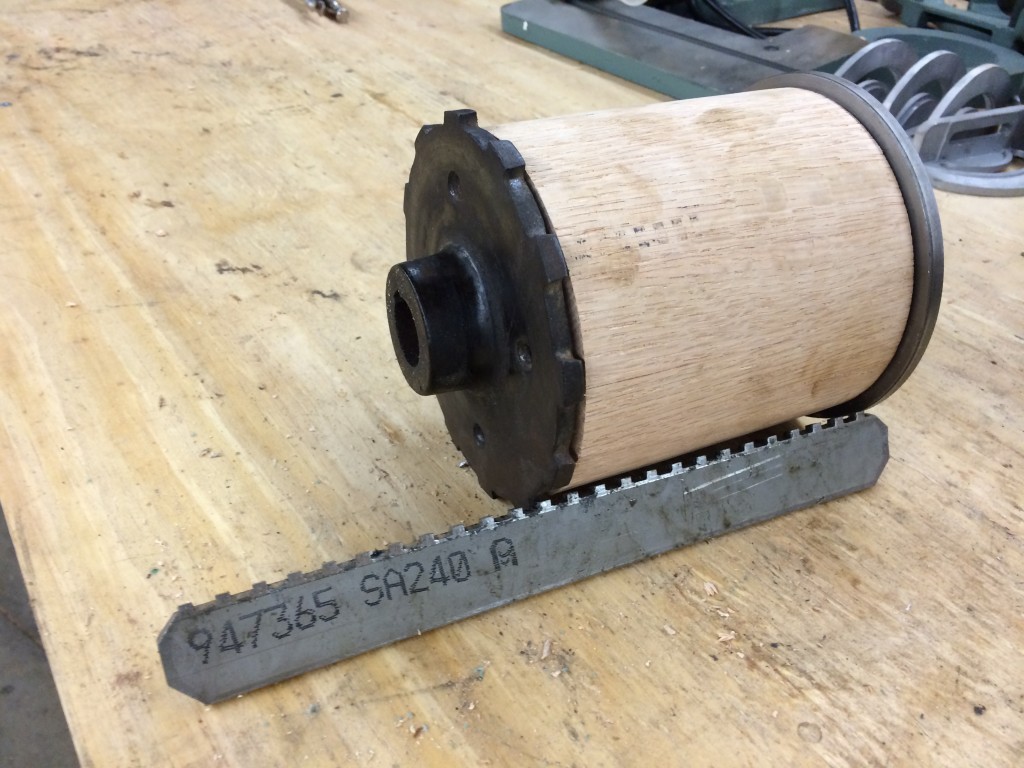
I wasn’t able to grip the drum in my wood lathe for drilling the center hole so I had to cover up my metal lathe and do the drilling in the big chuck on the metal lathe. I try to limit any wood getting around my metal working tools, as wood can be bad for them. However I’ve gotten sloppy by having a big metal lathe. I’m used to being able to grab most anything in the 100 pound chuck. My wood lathe chuck, which weighs about 2 pounds, wasn’t even close to holding this drum, something I didn’t check till after I’d already parted off the finished drum. Oh well, you cannot win them all.
Pictured with the drum is a nearly completed knife. You can see the teeth which are .250″ between teeth, and cut at a 15 degree relief, the same as the original knives. Miguel had what I think is a good idea. Since we have such large pieces of metal for the new knives, let’s drill pockets in the solid drum and cut the knives as long two tine forks instead of single piece knives. To insert a knife, you put the dull end (non machined) of the fork into the hole drilled cross wise in the drum, then the sharpened end of the knife goes into the slot cut to hold it, just like the old slots. The makes for a very positive retention system for the knives, stronger than the wedge system in the old setup. It’s overkill for what this thing does, but since we already have the large pieces of metal, why not? I have to ponder on it a bit more and make sure it’s going to work but for now it’s sounding like a good idea.
Hopefully we’ll get these last steps done shortly and button this thing up for the summer. I’d like to have it ready to press apples come fall, not be scrambling to get it working at the last-minute. I hate unfinished projects.
Apple press restoration update 4.0
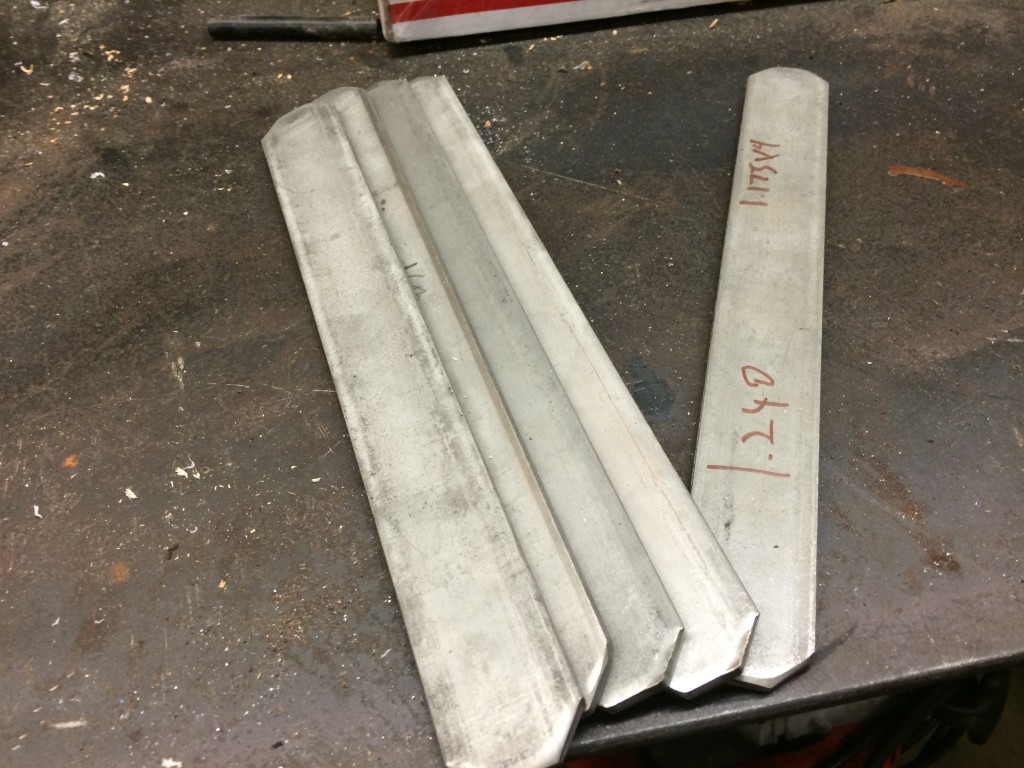
The apple press restoration made some progress lately. Thanks to Miguel’s “wife” I was able to get some stock of stainless steel for making my knives. Miguel doesn’t have a wife, it’s a joke between he and I.
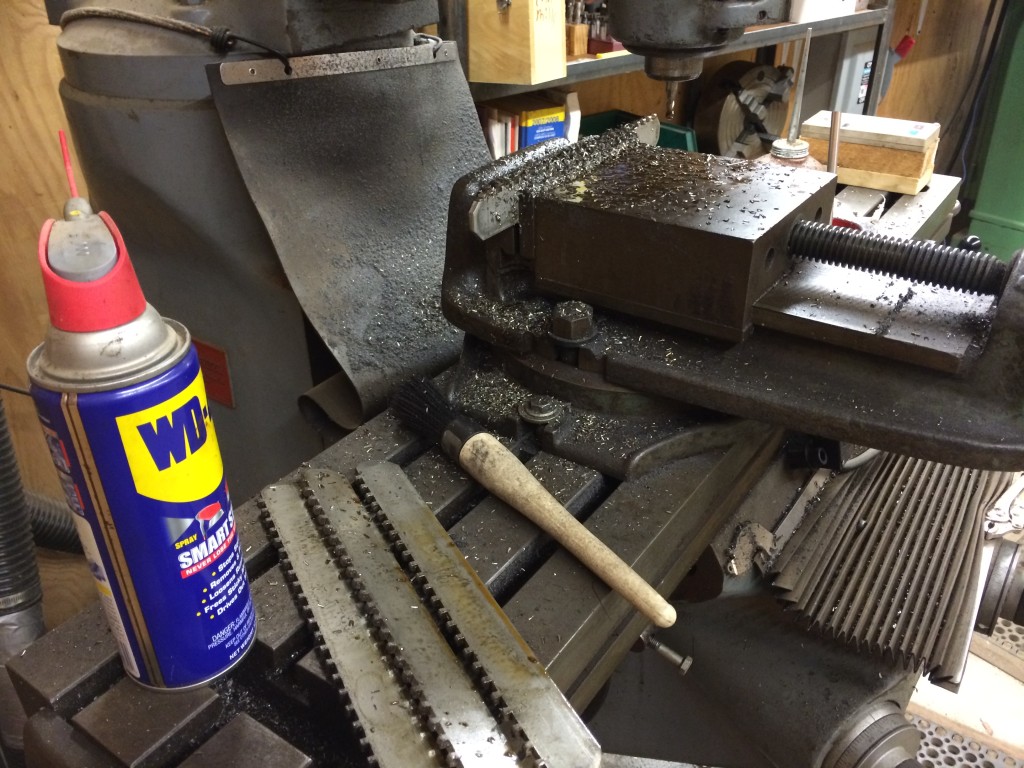
I used the old knives for dimensions and used a .250″ end mill to cut the slots you see on the three knives on the left. It’s a very simply machining operation, and it only burned up one end mill on the stainless. Luckily I had a spare.
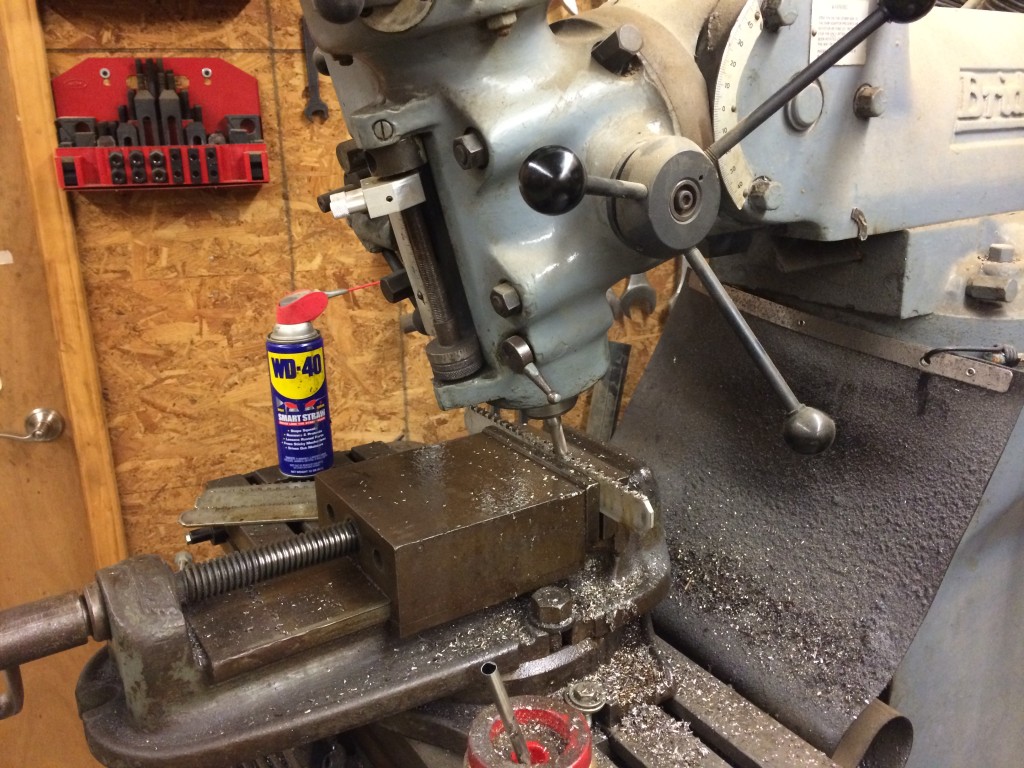
After cutting the slots, it was time to cut the relief for the knives. The knife is spinning in an arc when the macerator is running, so the teeth have to have relief on the back side so they don’t drag on the apples. Little things like this are important, but more so when you are the power source for the machine. An electric motor might heat up a bit, you’ll quickly tire and give up if a hand powered machine isn’t running correct. Coincidentally, this was the first time I’ve had to nod the head on the mill. It was neat to get out of the normal square and 90 degree setup and see more of what the mill can do.
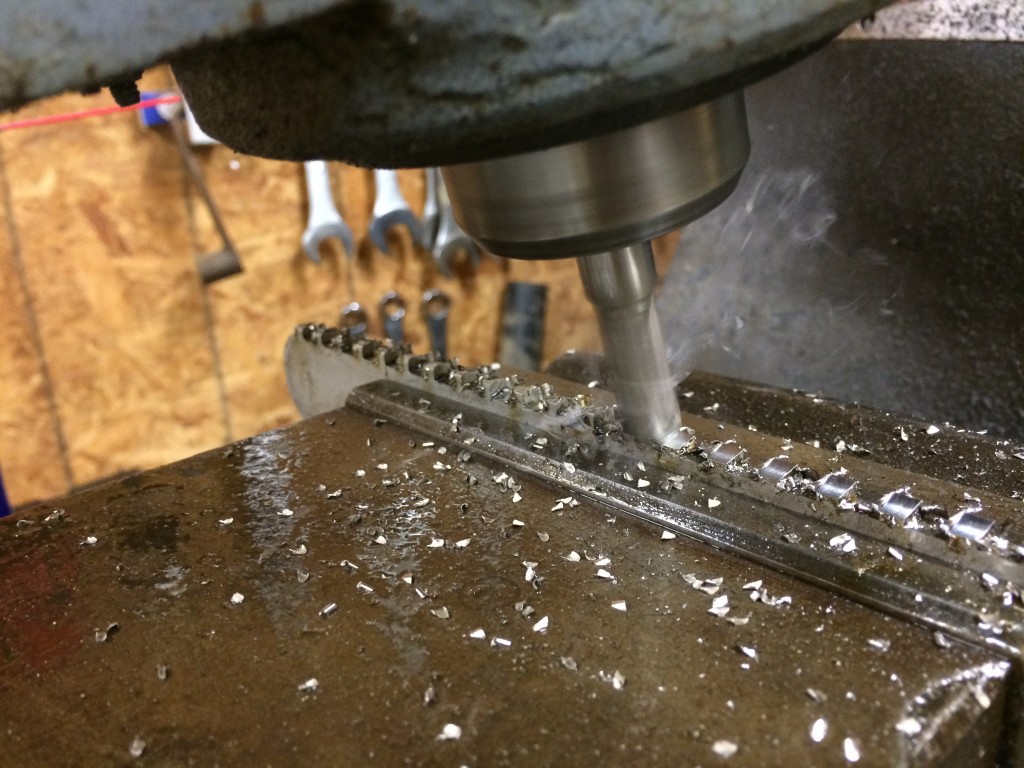
Here is a closer view of the knives being cut for relief.
Another farmer’s workout? How about sawing with a WoodMizer
I’ve written here about the silvopasture project we have going on the farm. The project was stalled because of the terribly wet and cold winter we had. We only managed to get about 60 trees on the ground before we called it quits to wait for better weather and a better idea. Then came spring, an apple press, cows to move, spring calves, my real job, and we aren’t any closer to going back in the woods. Even worse, all that timber was sitting on the ground getting older and older. I knew I needed to buck the saw logs and get them to the mill so I finally made time to run down to Mann’s sawmill, where I’ve always had my logs sawn in the past.
As soon as I pulled on the yard, I knew I was in trouble. There was twice as much lumber on the ground as I’d every seen on their best day. I popped into the saw control shack and talked to Stephen Mann. Short story, they were too busy to do any custom sawing. I needed another place to take the logs.
I have a friend who had just purchased a Woodmizer portable saw mill. Of course it’s brand new, it’s too nice to let me use, and he’s barely had time to use it himself. He said he’d help me but I knew this was too much wood for him to cut. Now what to do. After multiple phone calls, I finally came across Roy Lynch. Roy worked me into his schedule and about a week later he was on my farm, on time, and ready to work. I was under the impression that I’d meet Roy, make sure he had what he needed, then leave he and Miguel to saw lumber for 1 day. Instead I quickly found that Miguel and I were not able to keep up with Roy. We didn’t really have our stacks stacked correctly to start with so we spent the first 30 mins stacking and then restacking our wood. I had to get Spork out of the house to help with the stacks so we quite literally had two grown men and a boy not keeping up with this saw. It got better and in the video below you see us standing around more than stacking. Don’t let that fool you. There are busy periods and slack periods. The only time I could take a breath and get video was during the slack periods.
We sawed from 7:30am to 4:45pm, then sawed again from 8am to noon the next day. I thought maybe I was getting a little girly, sweating and breathing hard a time or two. Then I looked over at Miguel and he had sweat pouring off of him and most tellingly for Miguel, wasn’t cracking jokes. If he was tired, then I didn’t feel so bad. Total cost for all the sawing, including coming to the farm, was less than $1000. For that we had this when we were done.
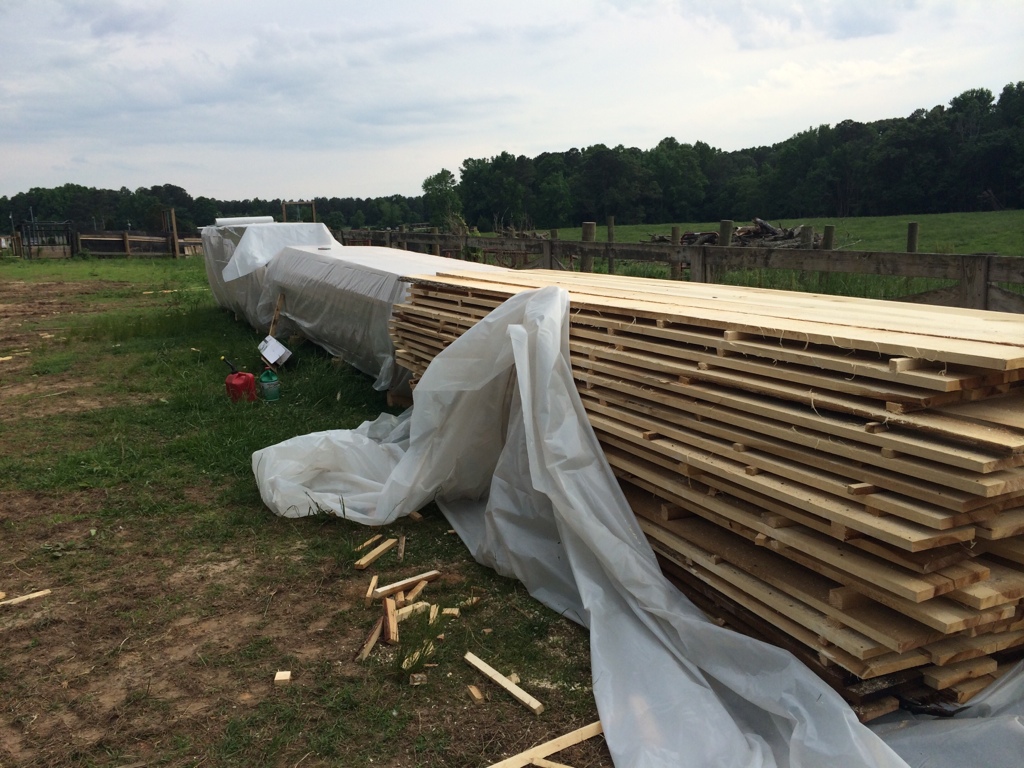
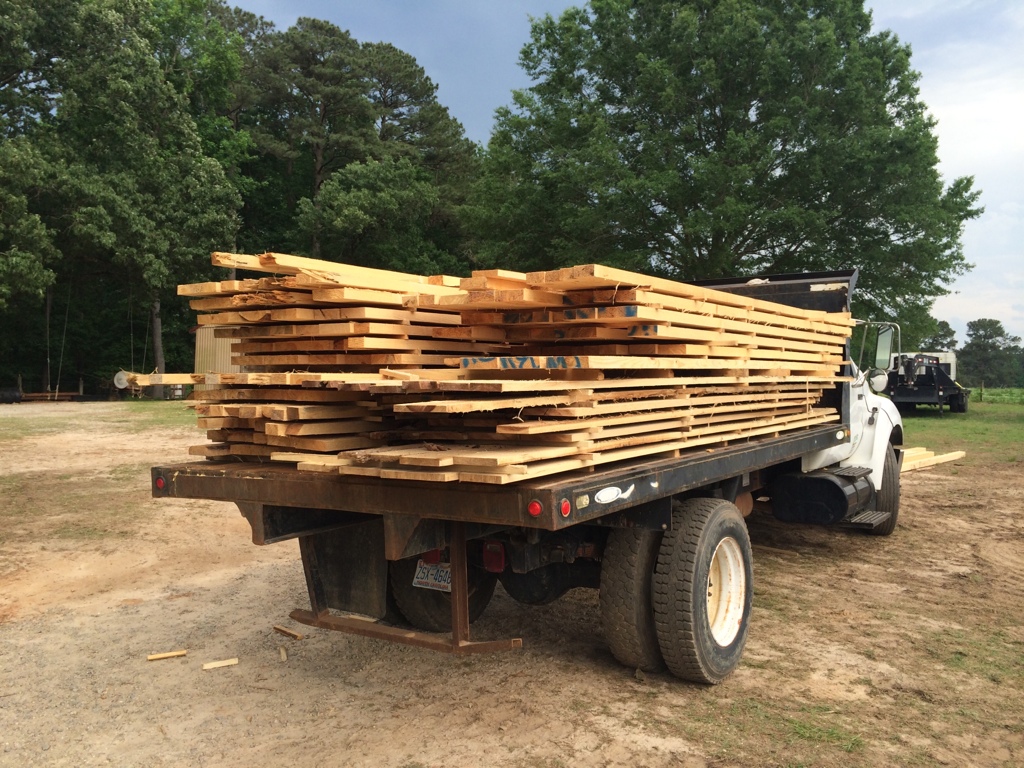
We sawed nearly all the pine into 2″ thick full dimension lumber. That means that a 2″x4″ is actually 2″x4″ instead of 1.5″x3.5″ like it is in the store. All the oak and poplar we sawed in 1.25″ thick by whatever width was possible. This way we can plane 1/8″ off of each side and end up with 1″ thick planks, cleaned and ready to use.
We are planning on building a solar kiln on the property, behind the chicken barn. We’ll build it out of some of the pine we sawed, then store the rest of the wood in the kiln to dry for a few months. After that it’ll move into the barn for long-term storage. This is the wood that will be the next barn, next soap box car, next apple press part, or whatever. It should last till Bok Bok is in college.
