When I say I’m a farmer, people have this image in their head.
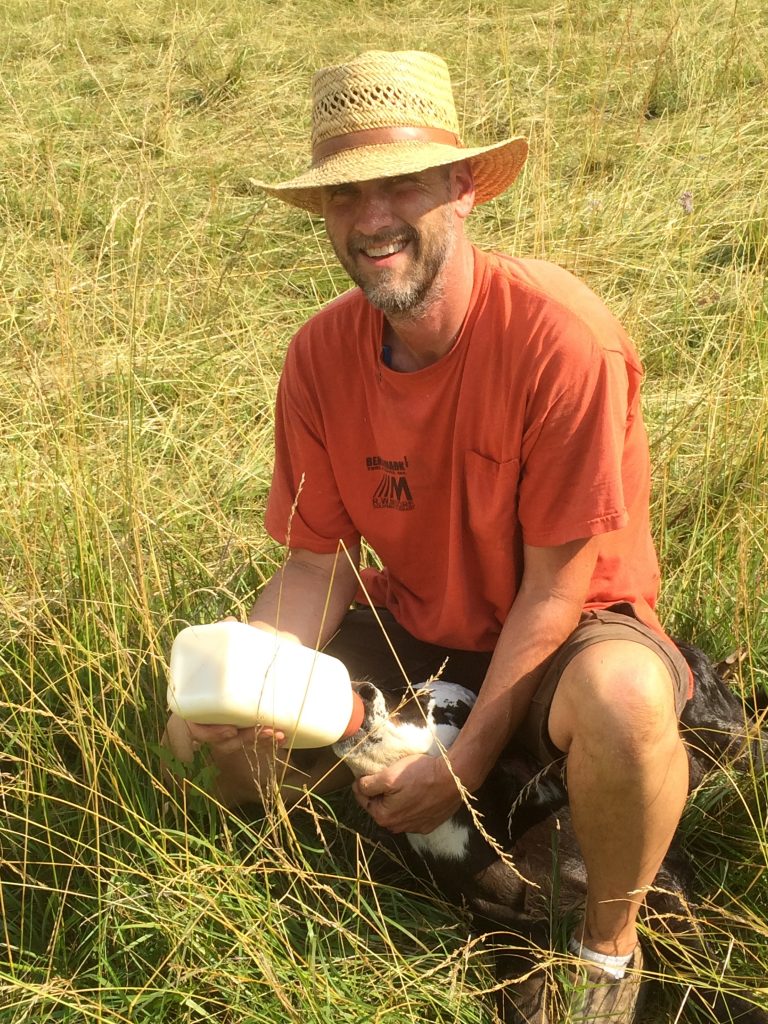
Or this
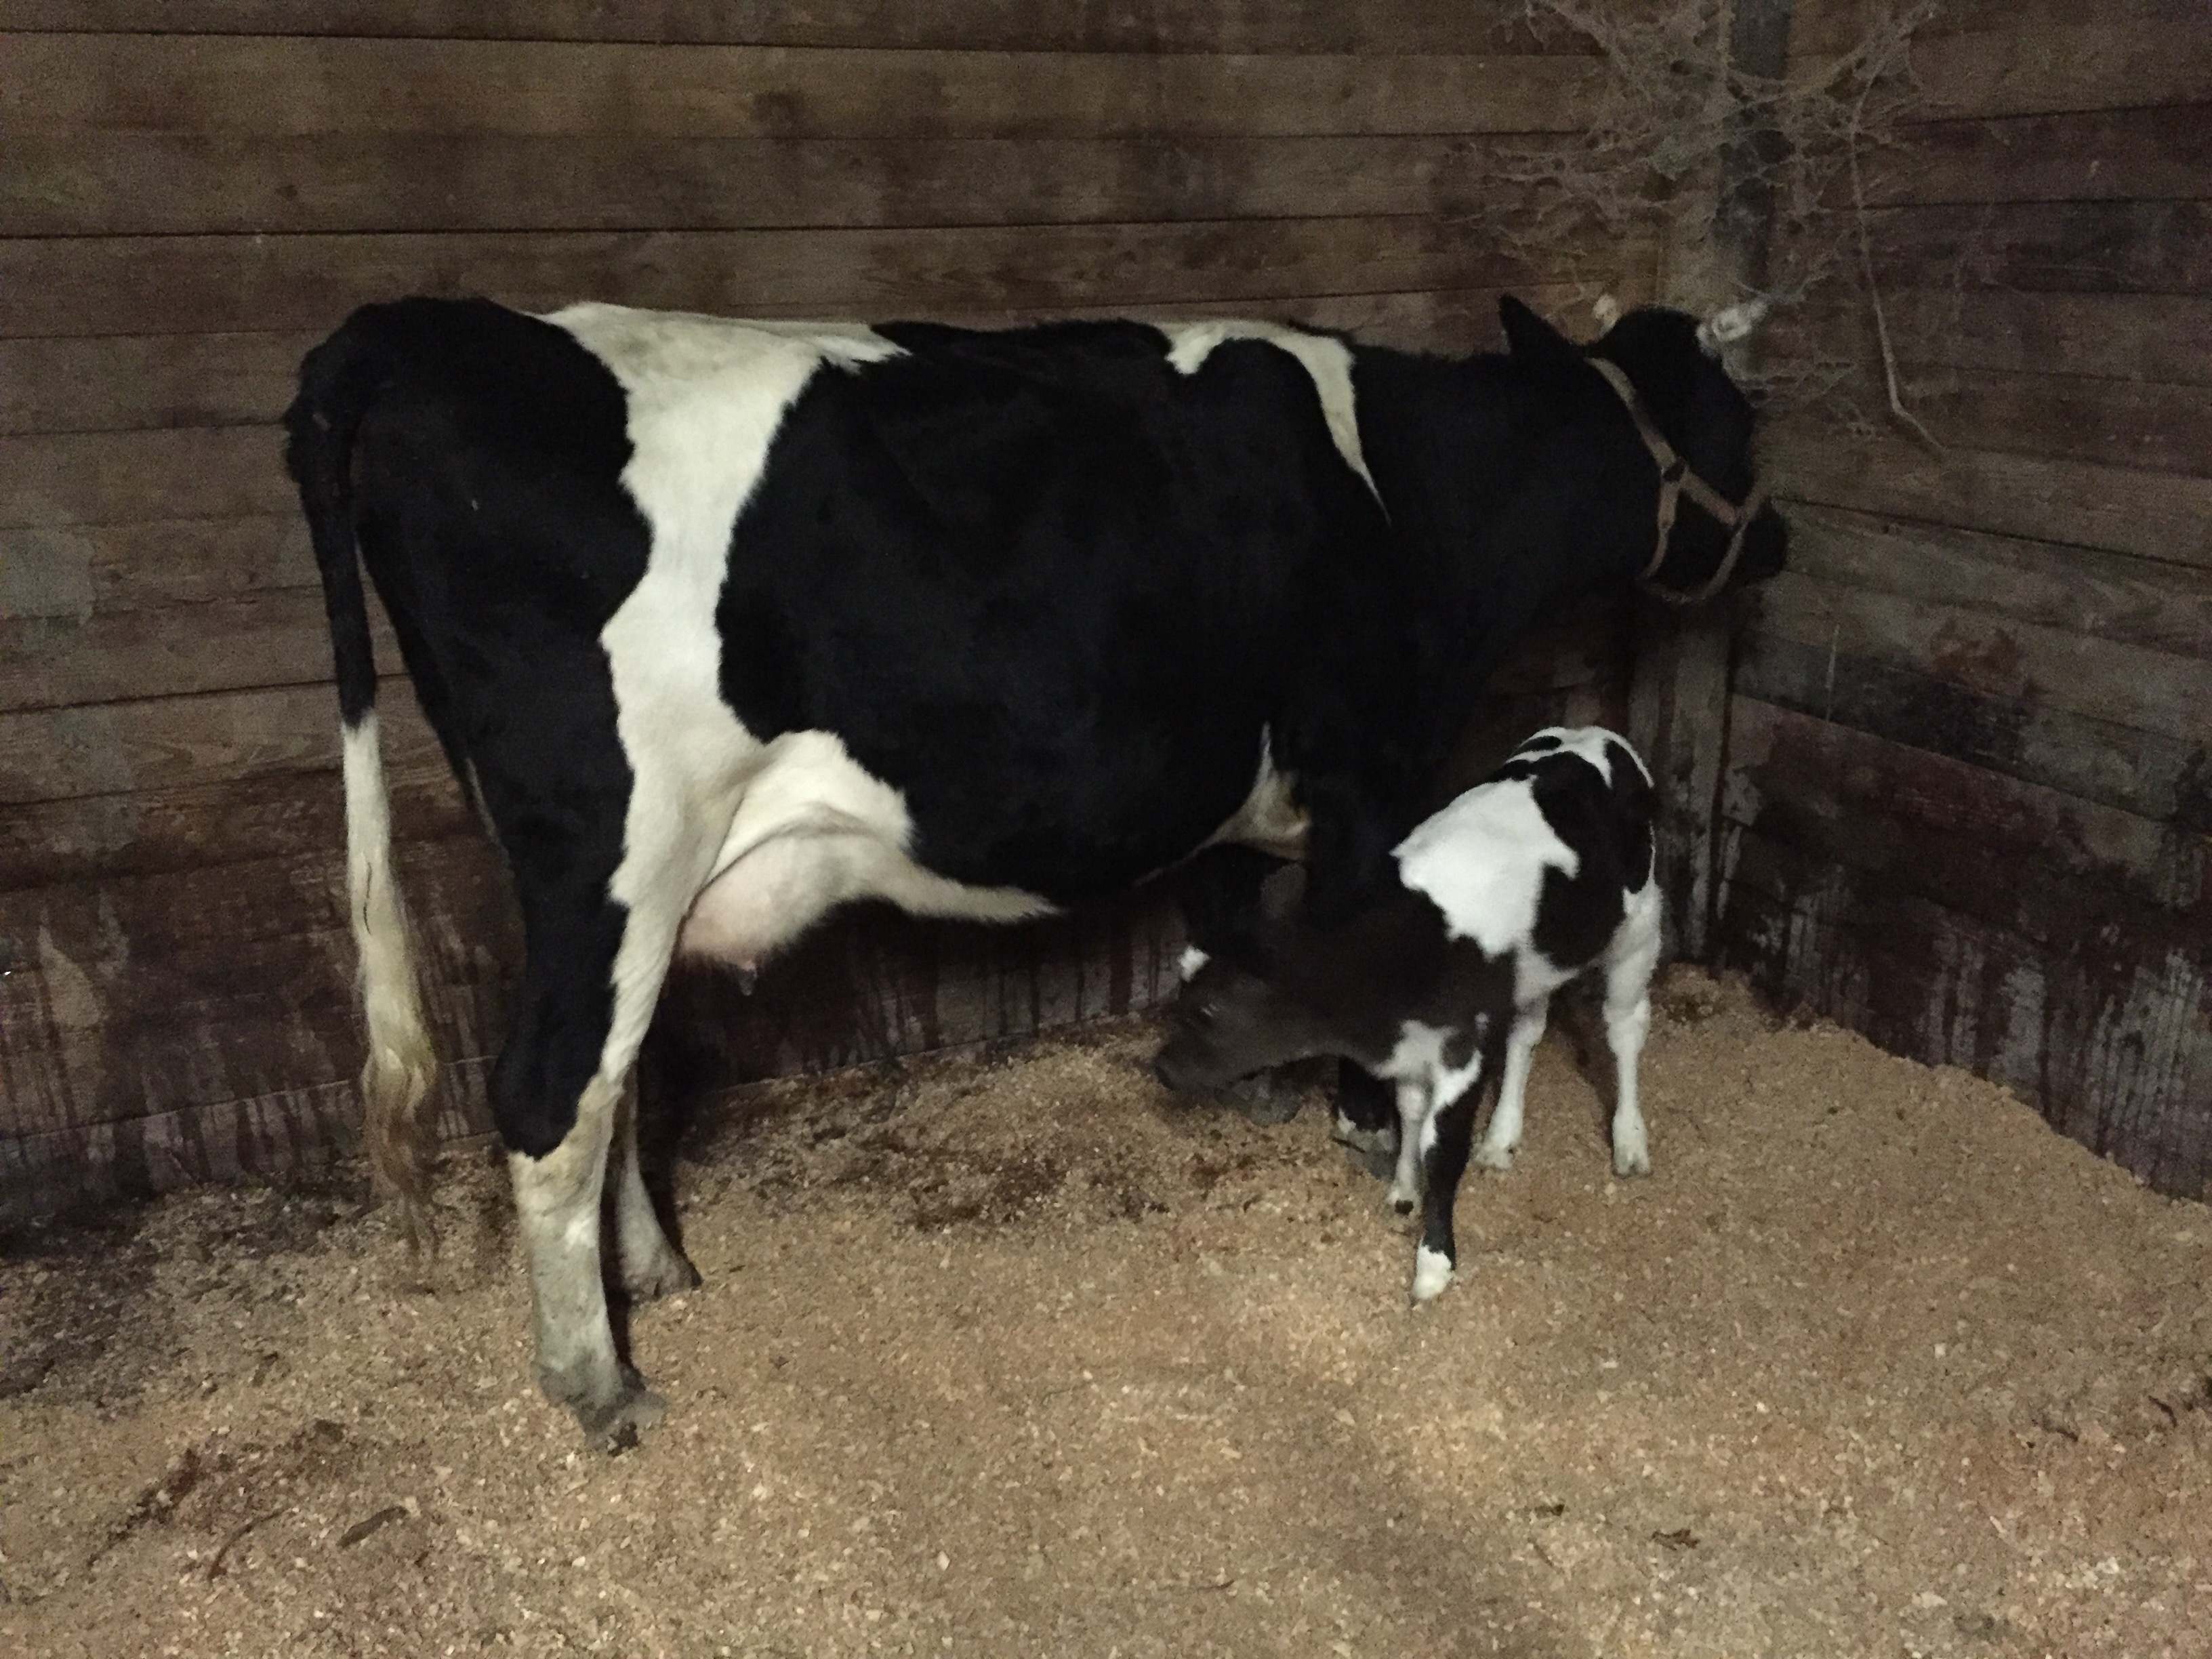
Or maybe even this
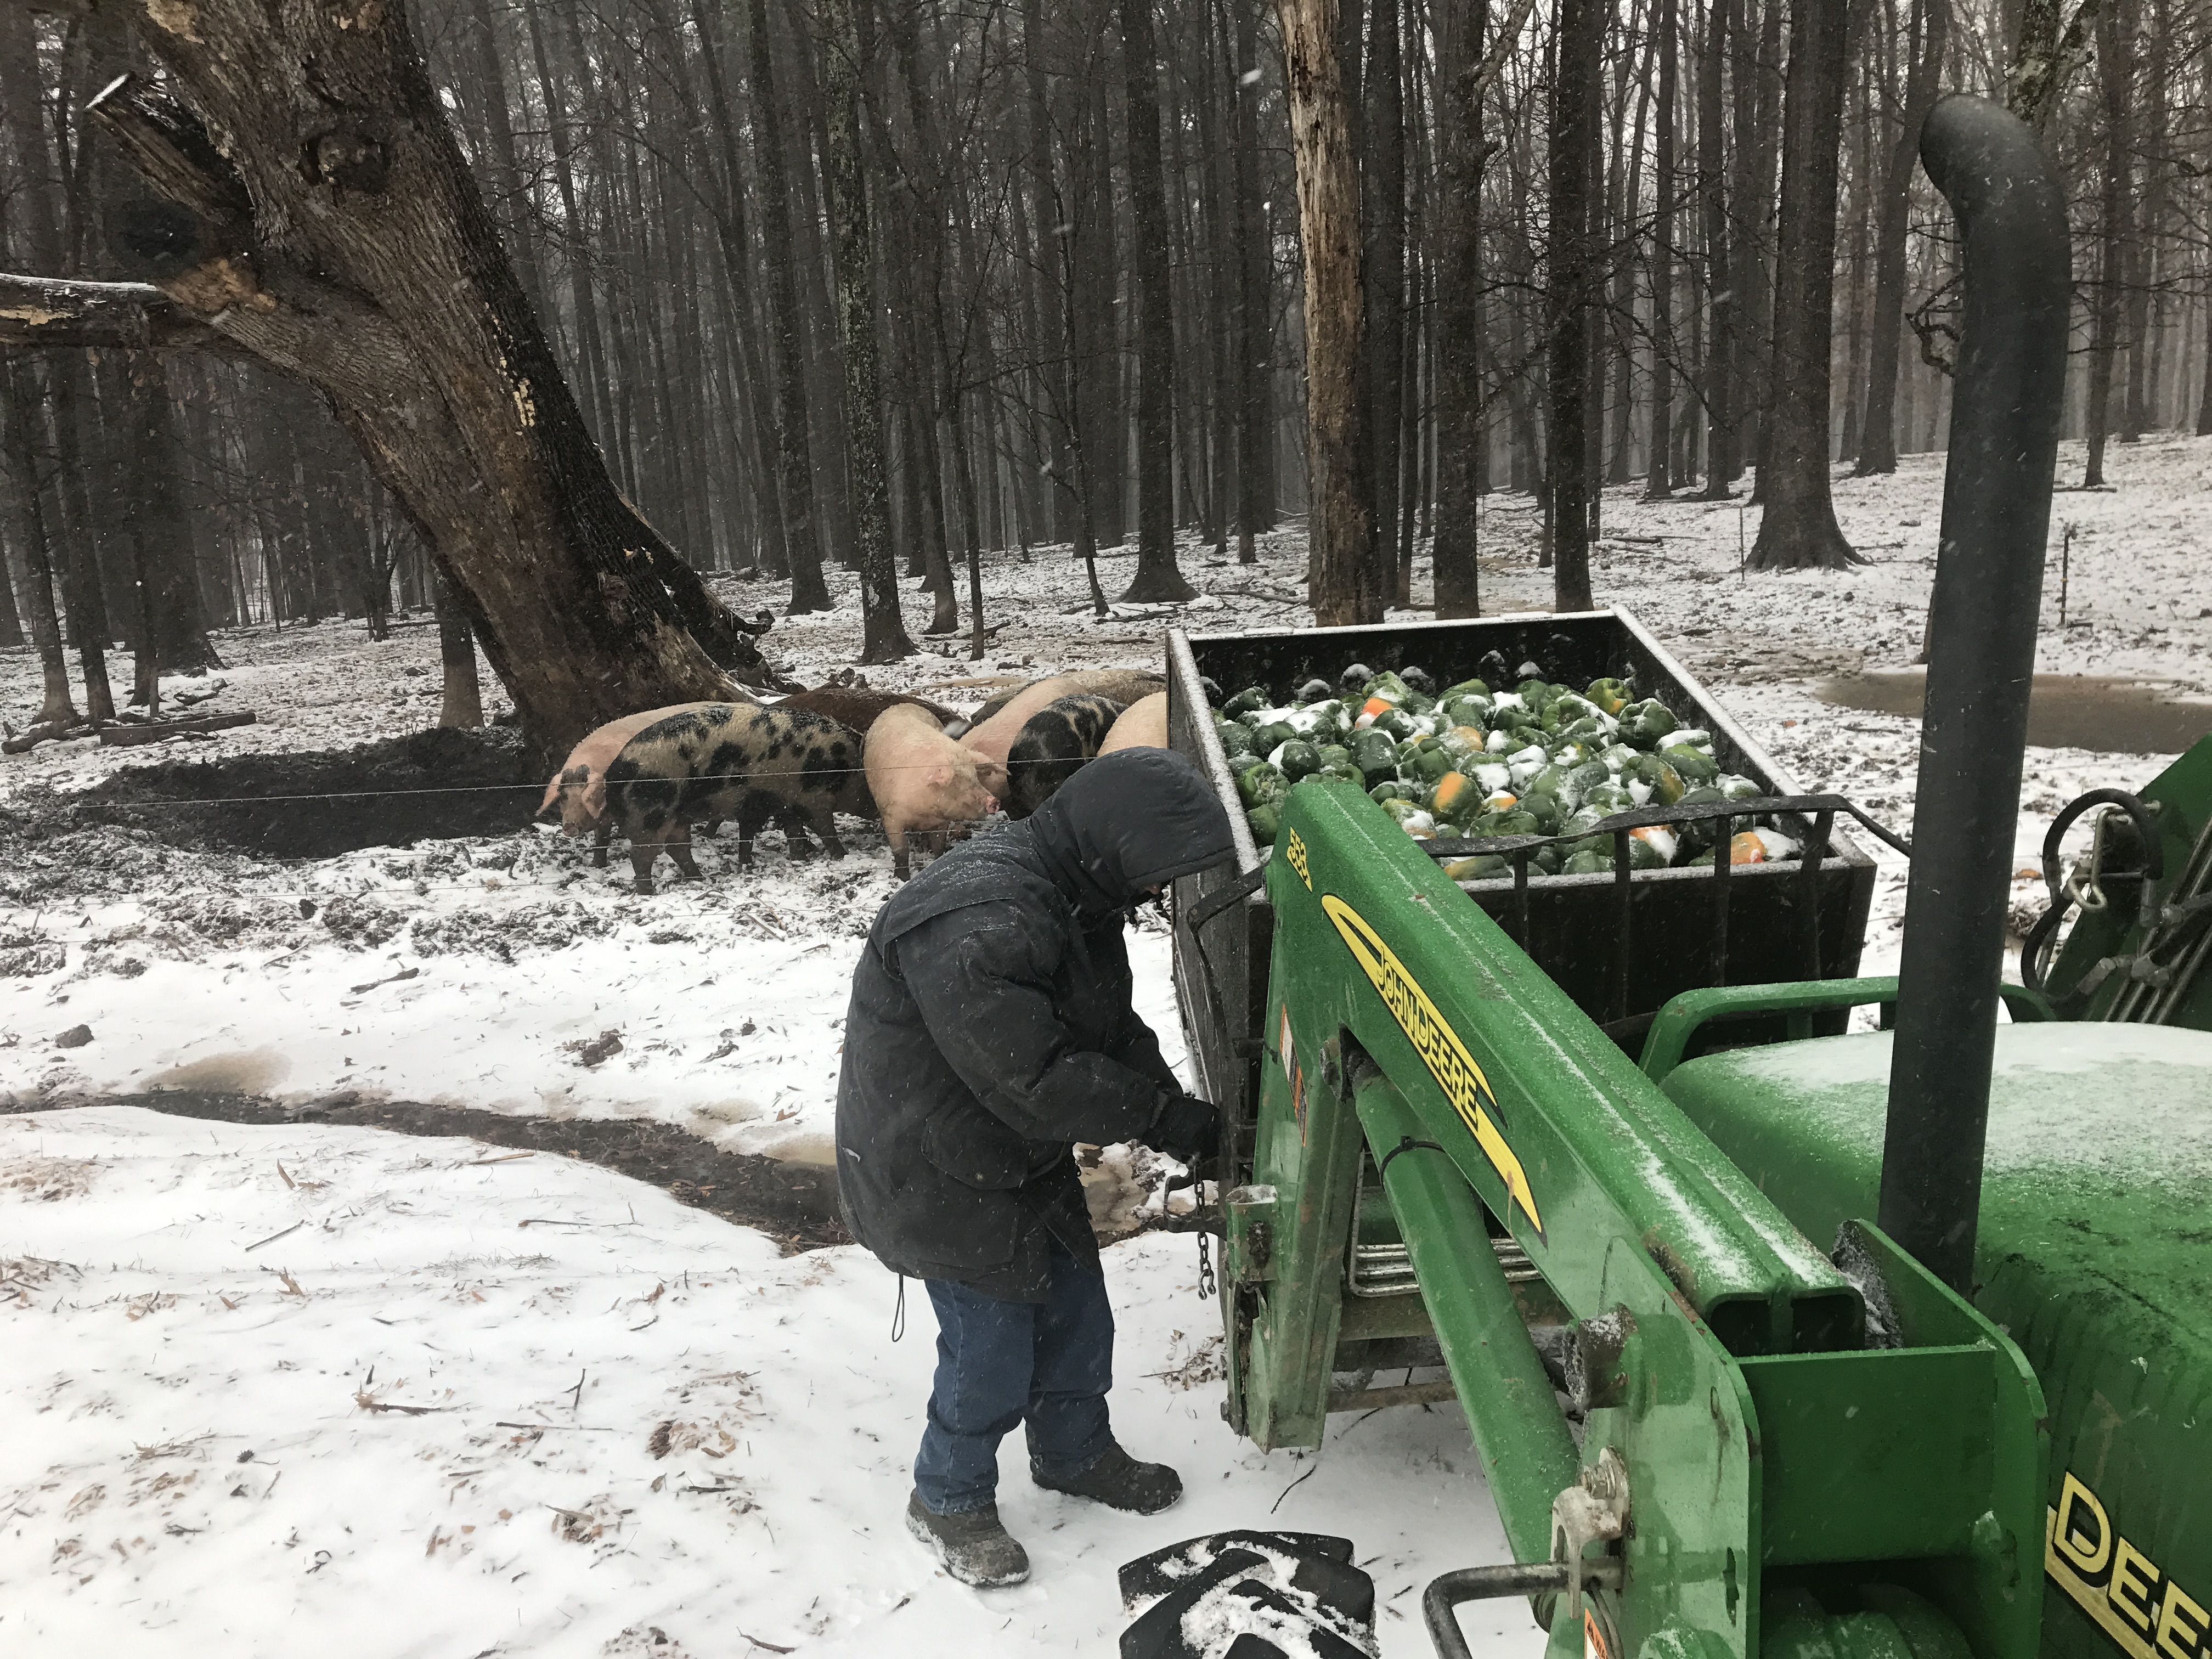
But nobody, unless you are a farmer yourself, thinks of this. 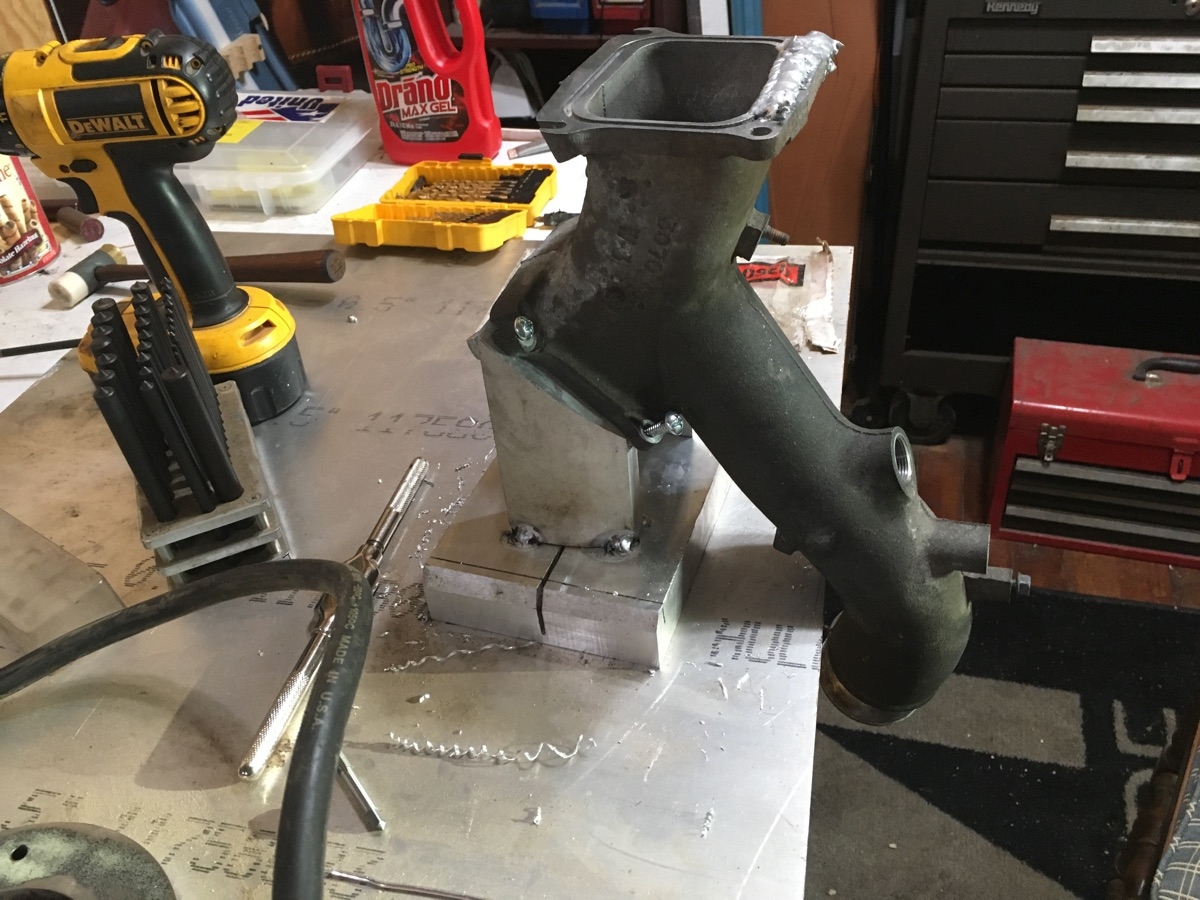
Yep, that’s farming.
Our dually truck that we use daily here on the farm has had some serious ills lately. It began with a set of bad injectors which to you gasoline people, sounds like maybe changing spark plugs. It’s not. On our particular engine, you have to nearly remove the engine to replace the injectors. And the injectors themselves are very costly, there is a comma in the price. So we ordered new injectors, spent weeks working on the truck, and put everything back together. The truck ran much better and everyone was happy.
Except we still had a fuel dilution problem (the reason we knew we had back injectors). That meant that somewhere in our work, there must have been a leak. So apart it came again, and everything was inspected. No signs of a leak anywhere. Maybe it’s the fuel pump? That price has a comma in it as well. Ugh.
In the process of buying fuel injectors, buying gaskets, getting a fuel pump, seals, basically the never ending stream of purchases to work on this engine, Miguel mentioned to me that the Y pipe needed to be replaced as well. What is a Y pipe?
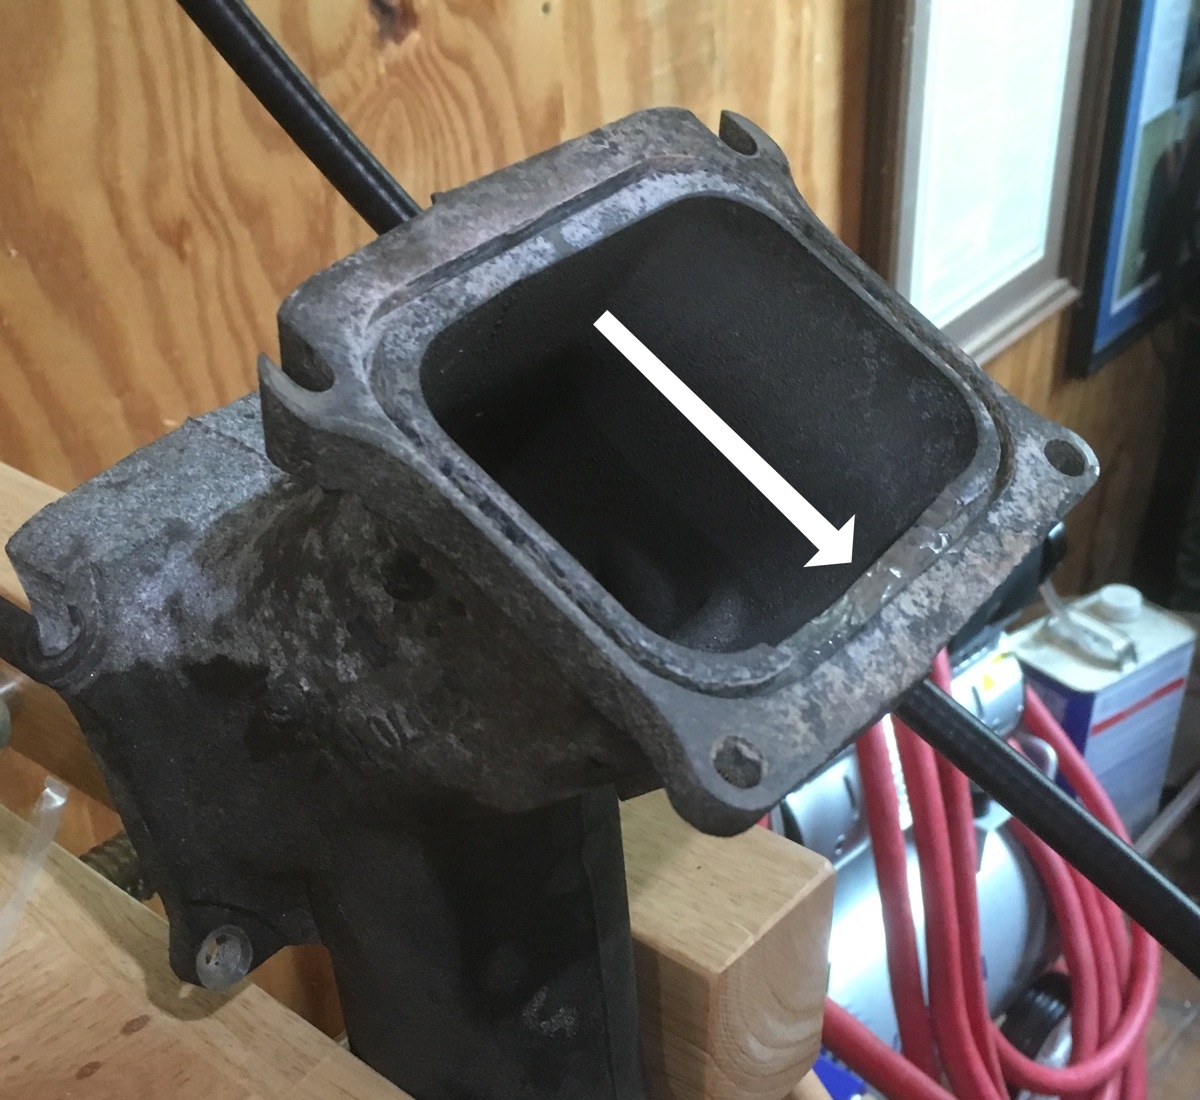
Just a cast aluminum pipe that is part of the intake system of the truck. Basically it feeds air to the engine. Probably another few hundred dollars.
So I ask at my friendly diesel repair place. Nope. They can’t get them. Uh oh, that means going to the dealer, which just doubled the price. Now it will probably cost $500 or more. Maybe I could just weld up the broken bit. But its cast aluminum, and soaked in oil. It will be a MAJOR pain to weld. Nah, better to spend the money and just get it over with.
And then the dealer said they couldn’t be purchased. There were none available in the US, period. Ba ba BUM!! You know it’s bad when you life has a sound track.
I was left with two choices. Scour the junk yards trying to find a truck with the same pipe, take a bunch of tools to the junk yard and work 1/2 of a day to remove the pipe and bring it home. Or weld up the one we had.
Since I’m a welder, not a mechanic, I chose plan B.
Welding aluminum isn’t something I have a lot of experience with. I’ve done a bit of it, basically enough to know I don’t want to do it again. But that was back when I MIG welded aluminum, and now I have a TIG welder so it should be easier.
But its cast aluminum. Cast is much harder to weld because it has a lot of porosity. And it’s prone to cracking from the heating and cooling. And this particular cast is soaked in oil for 300,000 miles. The number one rule of welding aluminum is it must be CLEAN! Brand new cast isn’t clean, and this piece is far from brand new.
You can see how dark and oil soaked this piece is. It’s also brittle from corrosion, which is why it broke in the first place. Step one was to grind out all the broken bits and get down to clean(ish) metal.
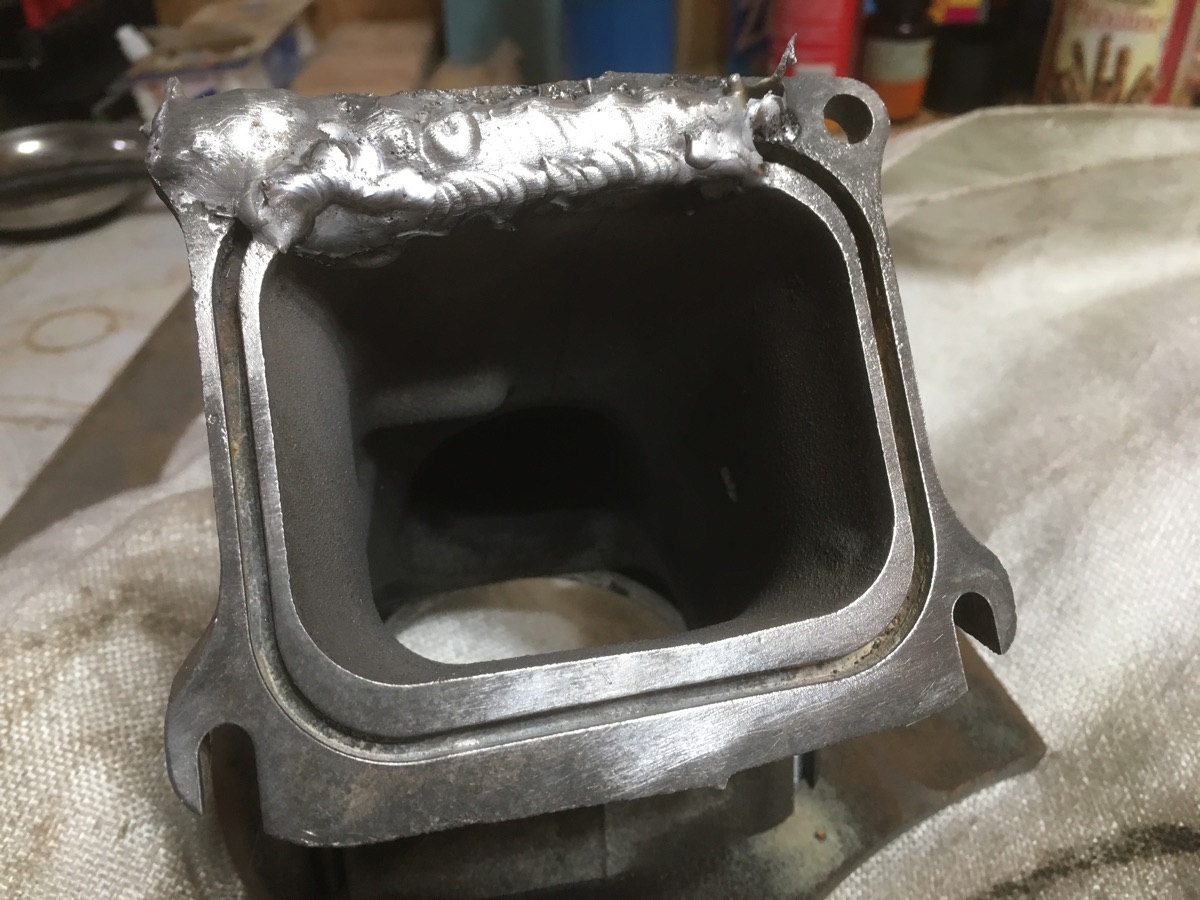
You can see on the face where I cleaned up the metal. Some bits of it are even slightly shiny so there is some good metal in there. It took several days and a trip to the welding supply store to get this finally done correctly. The old guy at the store shook his head and wished me luck. Not a good sign. But I got it welded!
Well, after it cracked and broke an entire corner off. But whatever, I’ll just fix that too. I’m already here. You can see that this is sitting on a white blanket. The piece had to be preheated before welding, and then kept in this blanket during and after welding. This is how we mitigate against cracking. Slow heating and cooling.
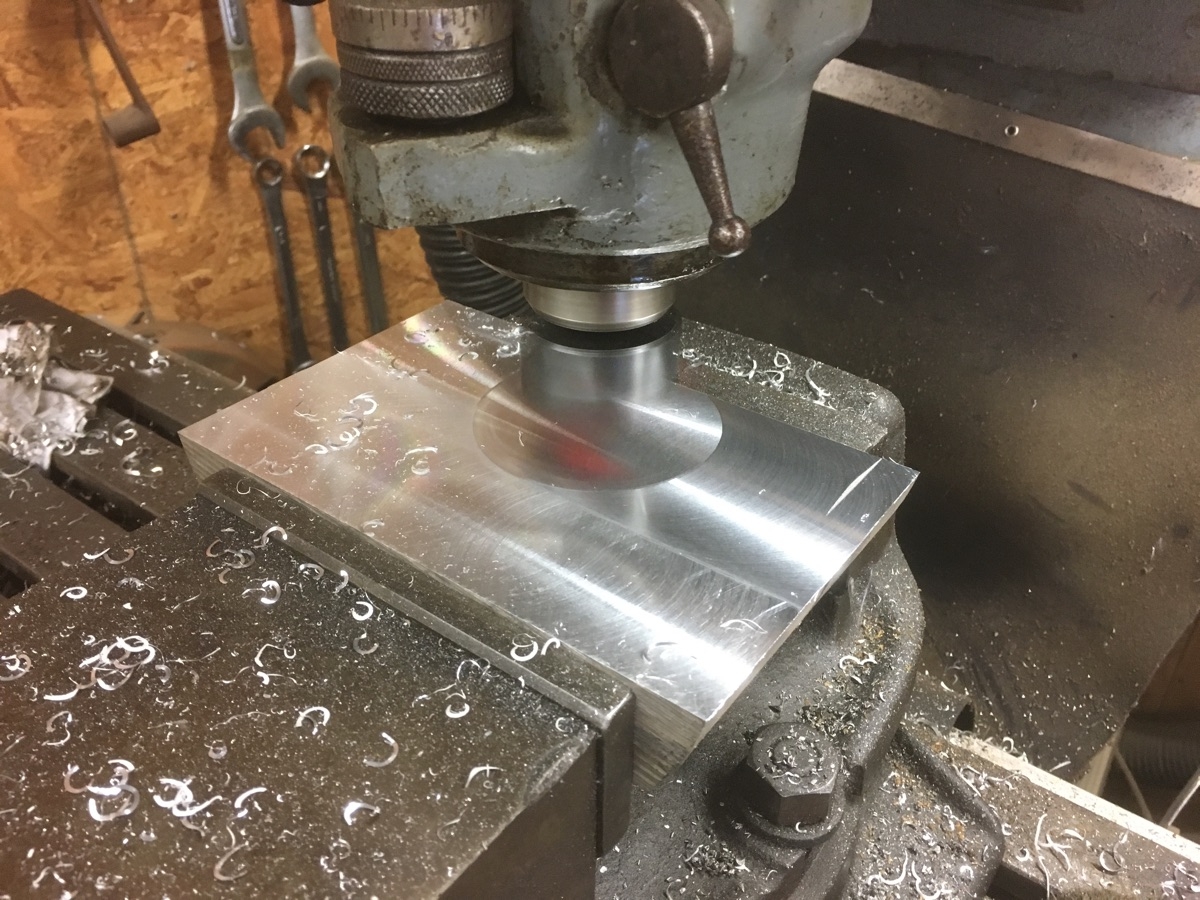
The problem with working on something like this, is that it’s a funky, one off piece. There was no way to hold the Y pipe in the mill for machining. That meant that I needed a special jig to hold it in place, which means making an entire part, just to hold a part. It takes longer to make the jig than it does to repair to actual part, but that’s just the way it goes. I had some aluminum cut offs laying around for just such an occasion so I gathered up likely pieces and began cutting, milling, and shaping for what I needed.
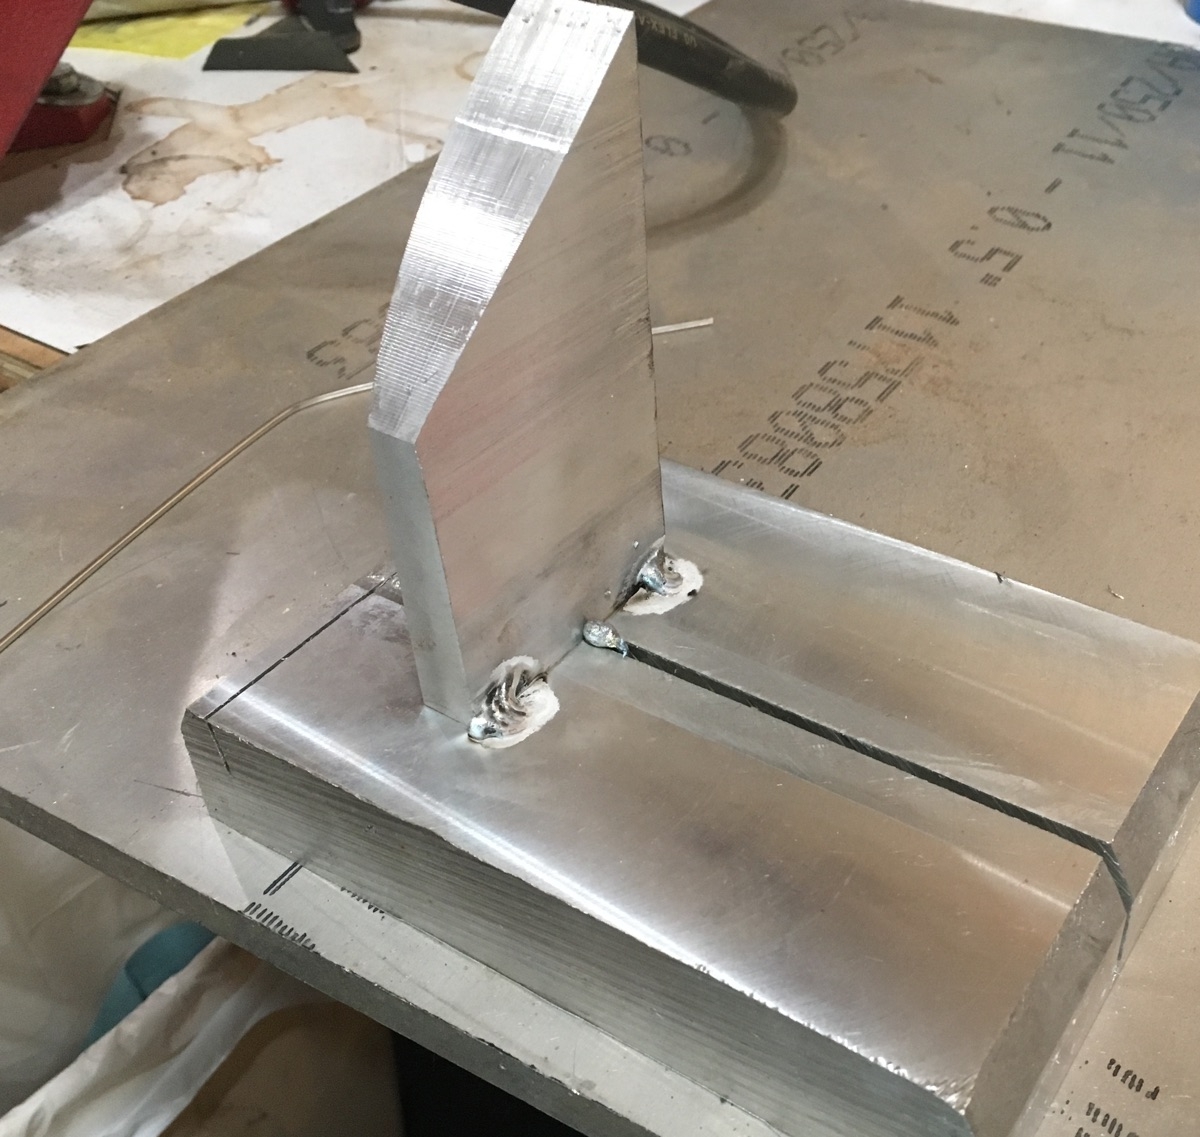
Getting the angle on the cuts just right was the toughest part. Oddly I did it right the first time. Nobody was more surprised than me. Here I’m welding the two legs that the Y pipe will mount to. Time spent machining here is just wasted time so I didn’t cut out any more than I had to. The base plate was trued up, and then the mating surfaces of the legs were trued. Beyond that I didn’t remove any metal. So I have a thick leg, being welded to an even thicker base plate, sitting on my welding table which is 1″ thick aluminum. My poor welding machine was unhappy trying to put heat into this much metal but I managed to squeak by.
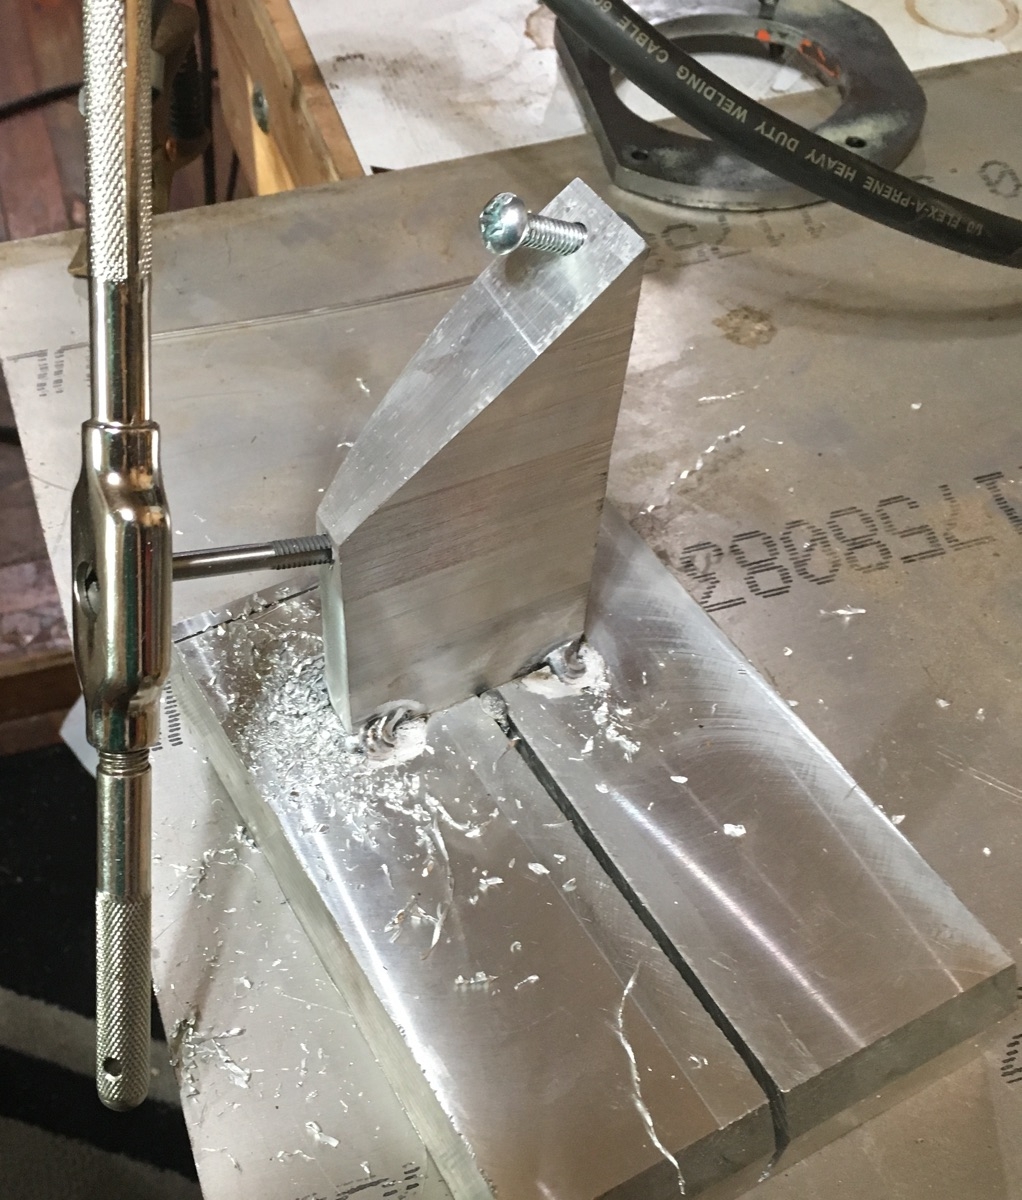
Once the pieces were welded, it was time to drill and tap for the mounting holes. They didn’t have to be pretty, just solid enough to hold the Y pipe for milling.
The pipe is mounted with just hardware store hardware, nothing special. You can see the pipe hanging down below the table. It’s a really funky setup to try and hold square and true.
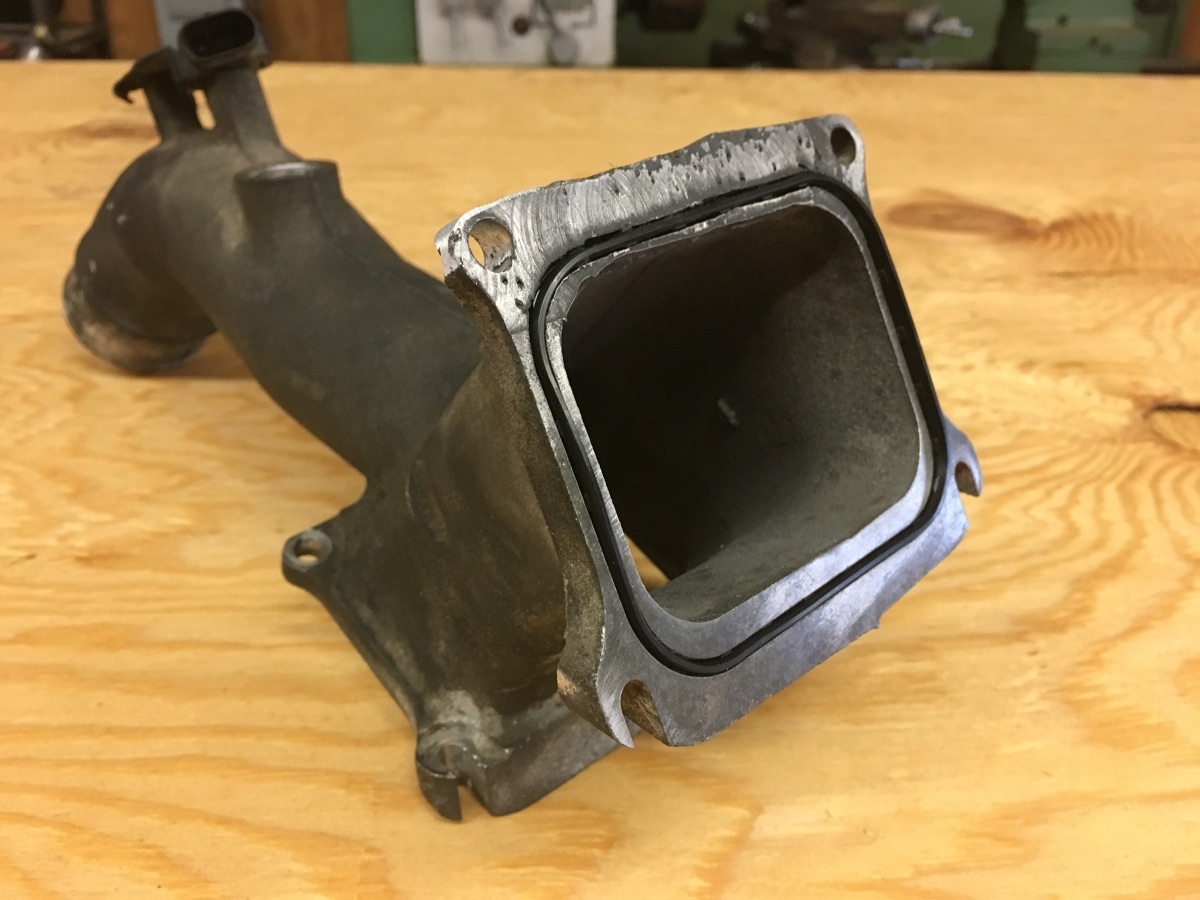
There is some porosity in the outside of the flange, but none on the inside bit which is the part we need correct. It’s also a bit thinner than I wanted, but there was a boo boo in the machining. However it wasn’t so thin we wanted to weld it up again so we let it ride. You can also see the top left corner and hole. That was where the corner broke off. It’s built back and drilled and cleaned up.
Now Miguel is going to put the truck back together, which is the real job. This was just a little side job. All in, I have about 7 hours total in this entire project. If I had to do it again I could do it in half that but that’s the way it is when you are doing something for the first time.
Another glorious day of farming!