This isn’t exactly farming but as I have said here before, this journal has whatever random stuff I need to document. Today I need to document the procedure for changing from wood fired boiler heat to electric heat or electric/LP heat. The reason for this is if I suddenly get hit by a train, I want the Mrs to have a documented procedure. For anyone who is interested in hydronic, well here you go, a behind the scenes look.
The procedure for switching from boiler heat to automatic heat. In all of these pictures, the system is currently set to wood boiler heat.

First go down to the boiler. On the front of the boiler is a switch labeled off/on. Turn the switch off. This disables the boiler blower. Its best to have the fire go out by itself prior to this step.
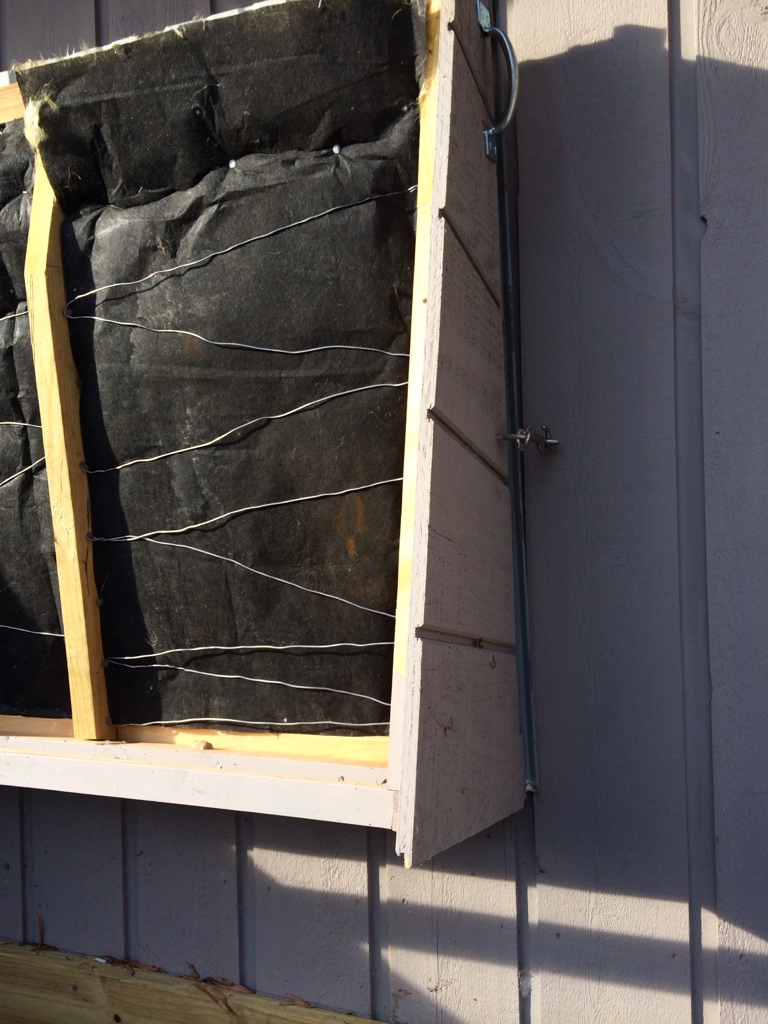
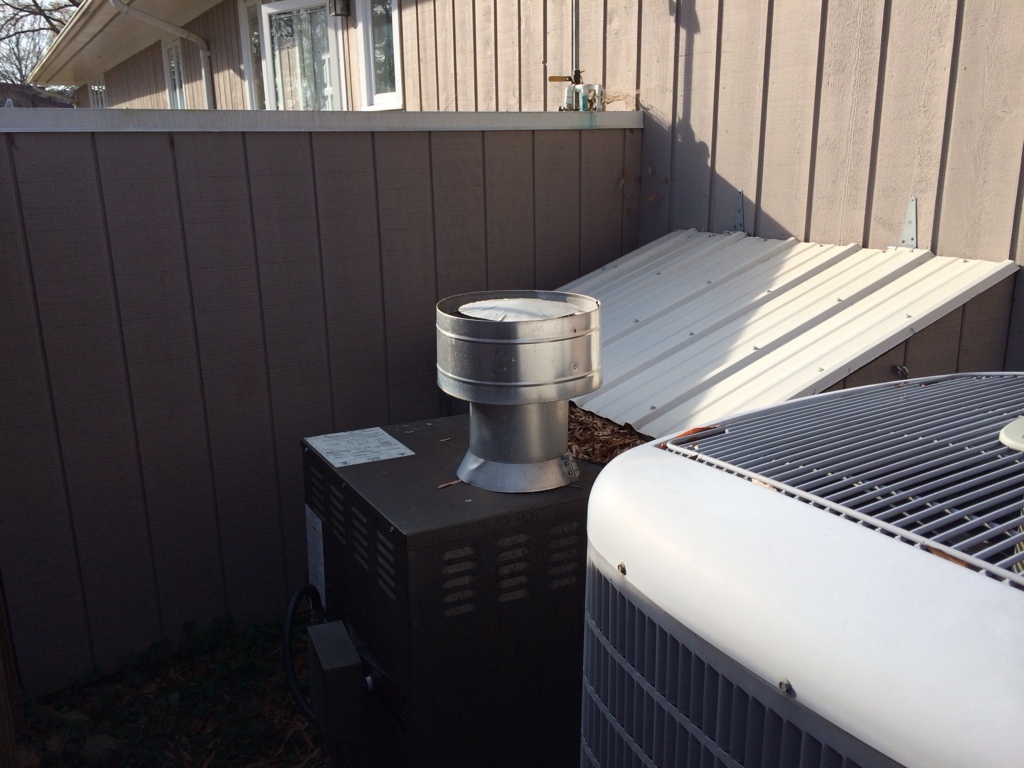
Go to the heat pumps and LP boiler enclosure. Its on the back of the house and looks like a matching half wall coming off the back of the house. Once inside raise the roof behind the LP boiler. There is a hook on the right side as you are facing the house. This hook matches an eye bolt on the wall of the house. Raise the roof on its hinges just like opening a car door and hook the hook into the eye bolt so the roof stays up by itself. Above you can see the roof raised and locked.
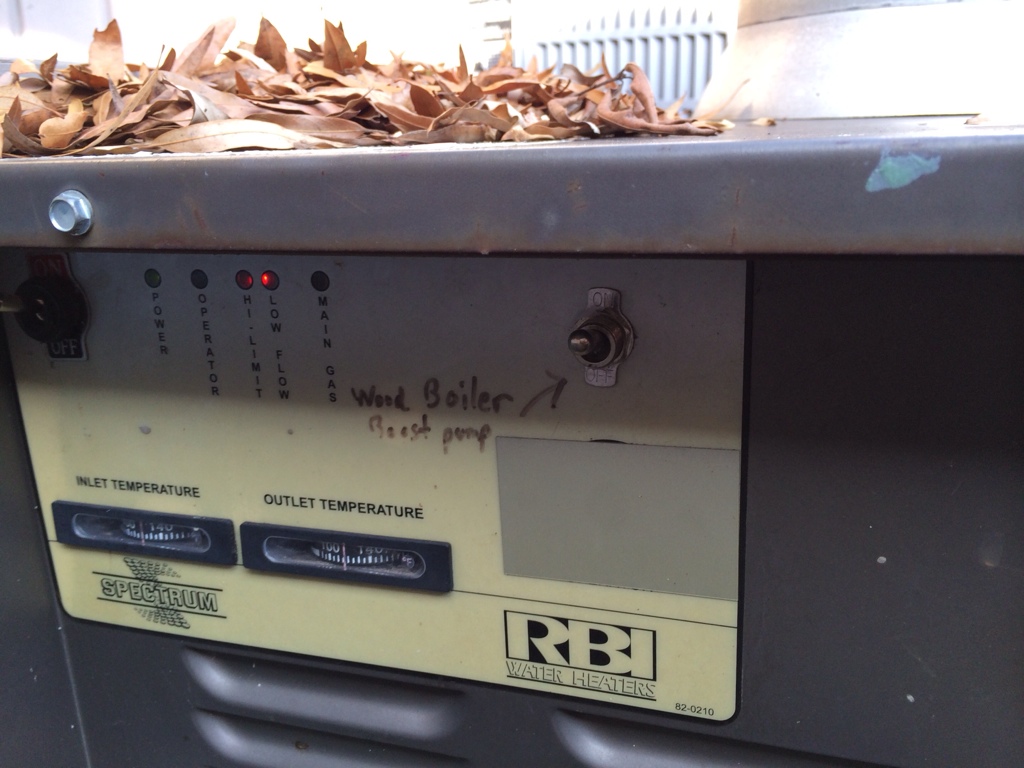
Now go to the left side of the LP boiler and bend down to look at the panel. You will see a switch that has been added and is labeled in sharpie as the wood boiler boost pump. Turn that switch off (down position).
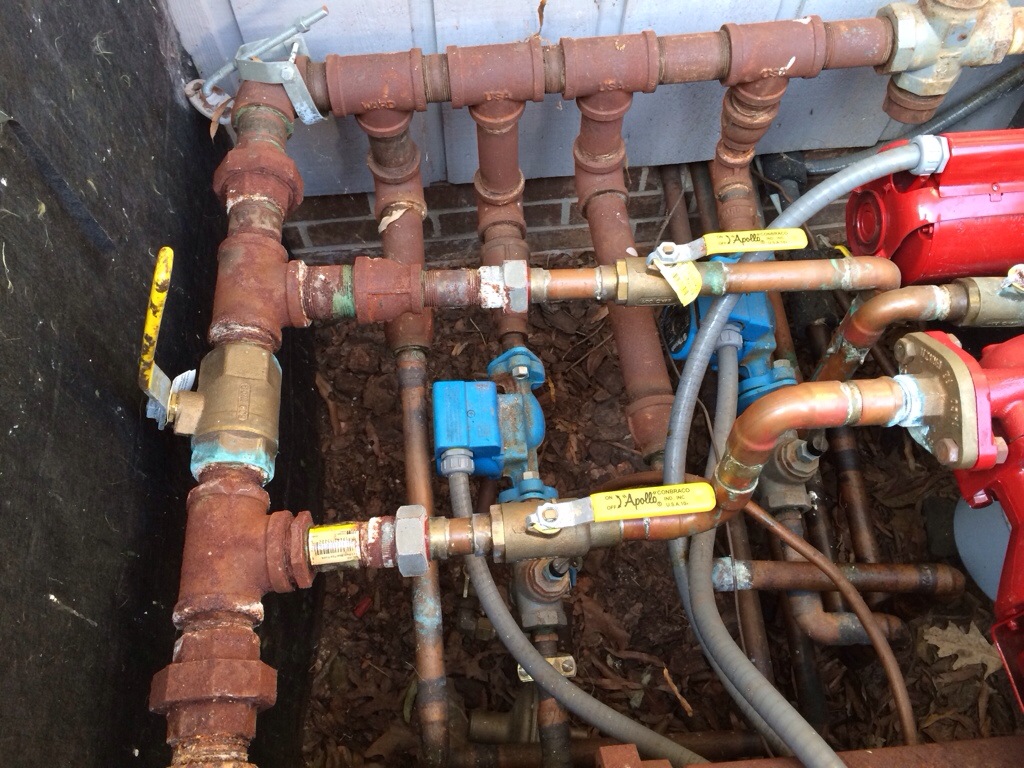
Now look at all the pipes, valves, and pumps under the roof you raised. There are three valves that need to be moved for this step. All are on the left side, have yellow handles, and are pictured above. The big valve that is leftmost will be off. Off is when the handle is 90 degrees to the valve/copper line. On is when the handle is inline with the valve/copper line. For the leftmost valve that is off, turn it on. To the right of that valve are two valves. They are both on. Turn them both off.
DO NOT forget to lower the roof when you are done. It is insulated and keeps the pipes from freezing.

Go in the boiler room in the house. If the heat is going to be off for the summer or a long period of warm weather with no freezing concerns, then pull this plug located just above the hot water storage tank. If there is any concern of freezing then leave this plug plugged in. This is the master power for the pumps and by leaving them running you keep the pipes from freezing. The downside is you are burning electricity.
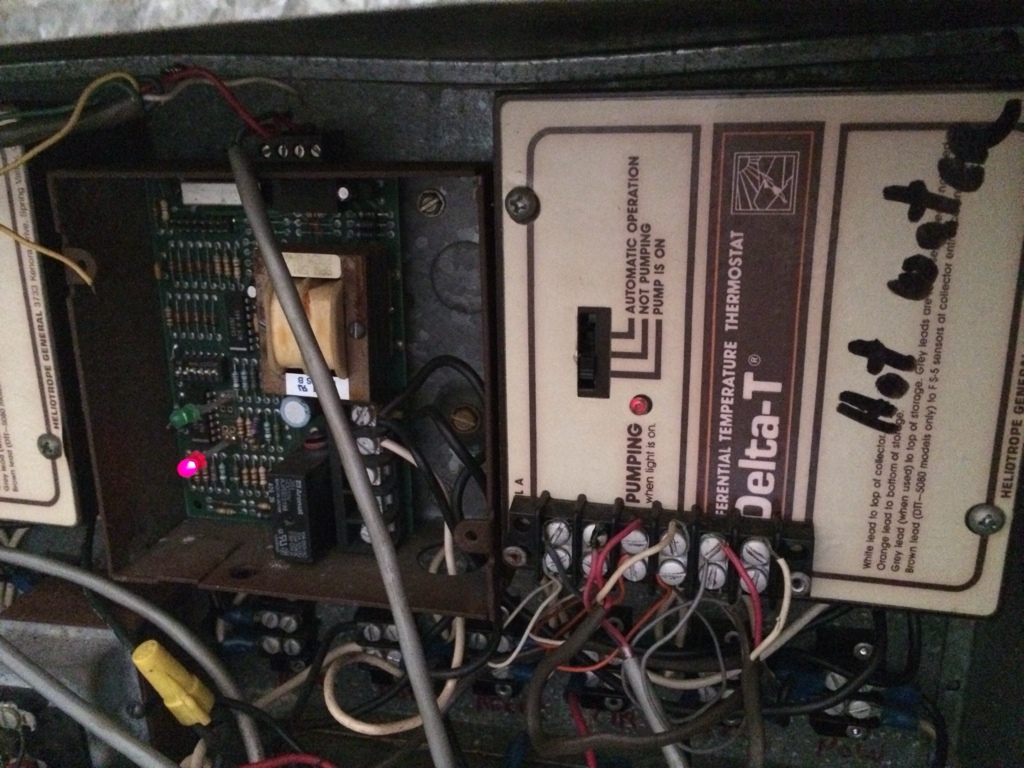
On one side of the hot water tank are two doors. One is large and one is small. If you are standing in the entry door looking at the tank, the doors are on the left hand side. The small door is directly on top of the large door. Open the small door, it is hinged on the top. Inside you will see a set of controls. The one pictured is labeled hot water. There is a small black slider switch that is labeled pump is on, pump is off, and automatic operation. The switch will be in the on position. Move it to “pump is off” and verify that the red light goes out. This turns off the domestic hot water circulation pump.
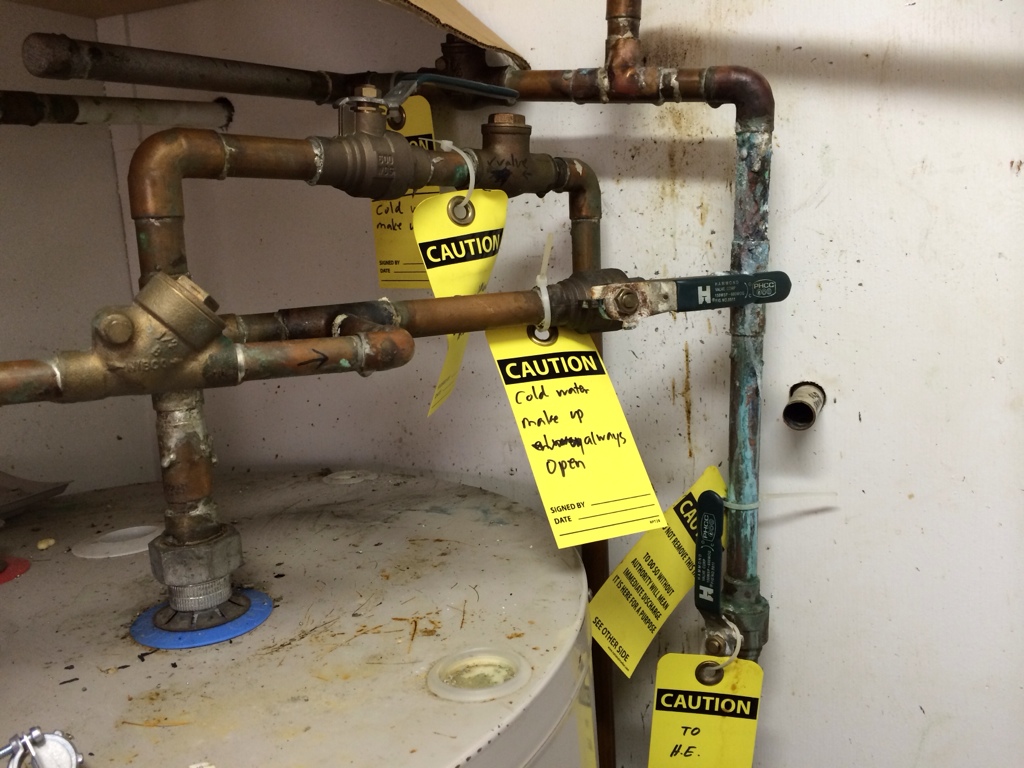
Now go to the utility room nearest the kitchen. Locate the hot water tank and the valves pictured. These valves have hanging labels. The one in the middle is labeled “hot water makeup always open.” The other two are labeled hot water loop. Leave the middle one open and turn off the two hot water loop valves.
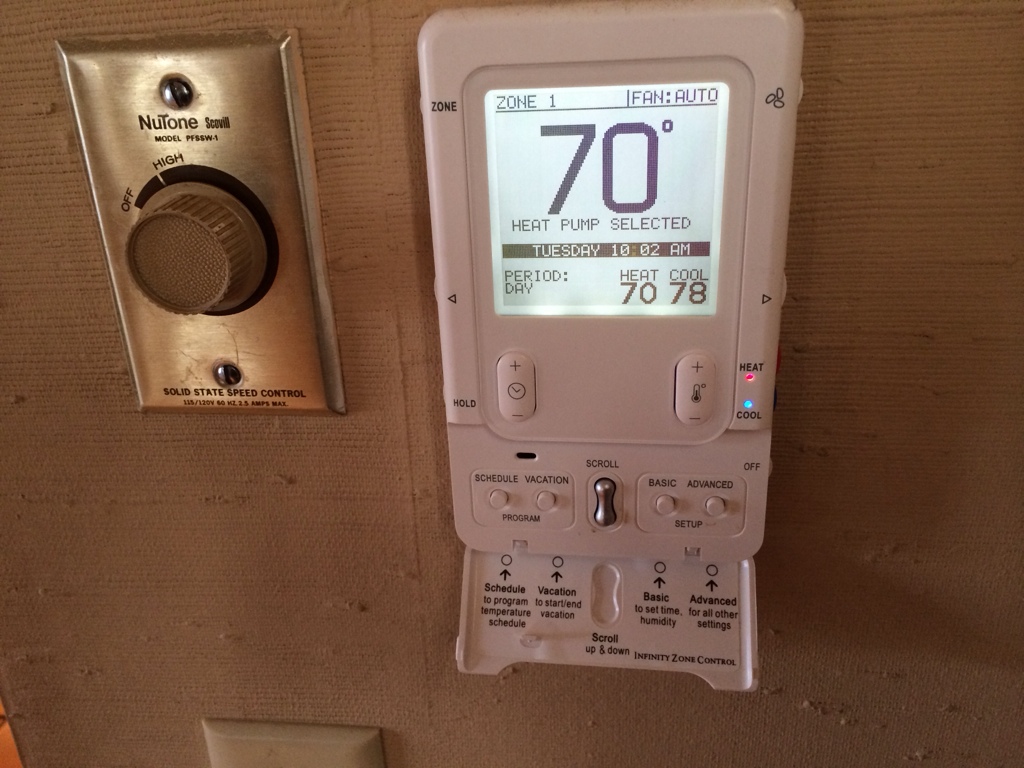
Last step, go into the house to one of the two thermostats. Open the little door on the bottom and click the “advanced” button. Then click the button on the right beside where it says next. Scroll to the last menu which will look like this.

Use the silver scroll button and select “system in control”.
REPEAT THIS STEP on the other thermostat and you are done.
There, you go. Easy! 🙂