Since the gunsmithing has nothing to do with farming, I’m going to make this one long post. For those with no interest, you can skip over this one. For those who are interested, here you go.
Last week I was out of town again taking another gunsmithing class. This time it was AR-15/M4s. Unlike some of my other classes that are mainly working with files and emory cloth to fit and polish, this class was all about taking a chunk of steel and turning it into a shootable gun. That meant that we’d be in the machine shop a lot, something I was looking forward to. As a self taught machinist, I really wanted to get some instruction on what I was doing correctly, and what I was doing wrong.
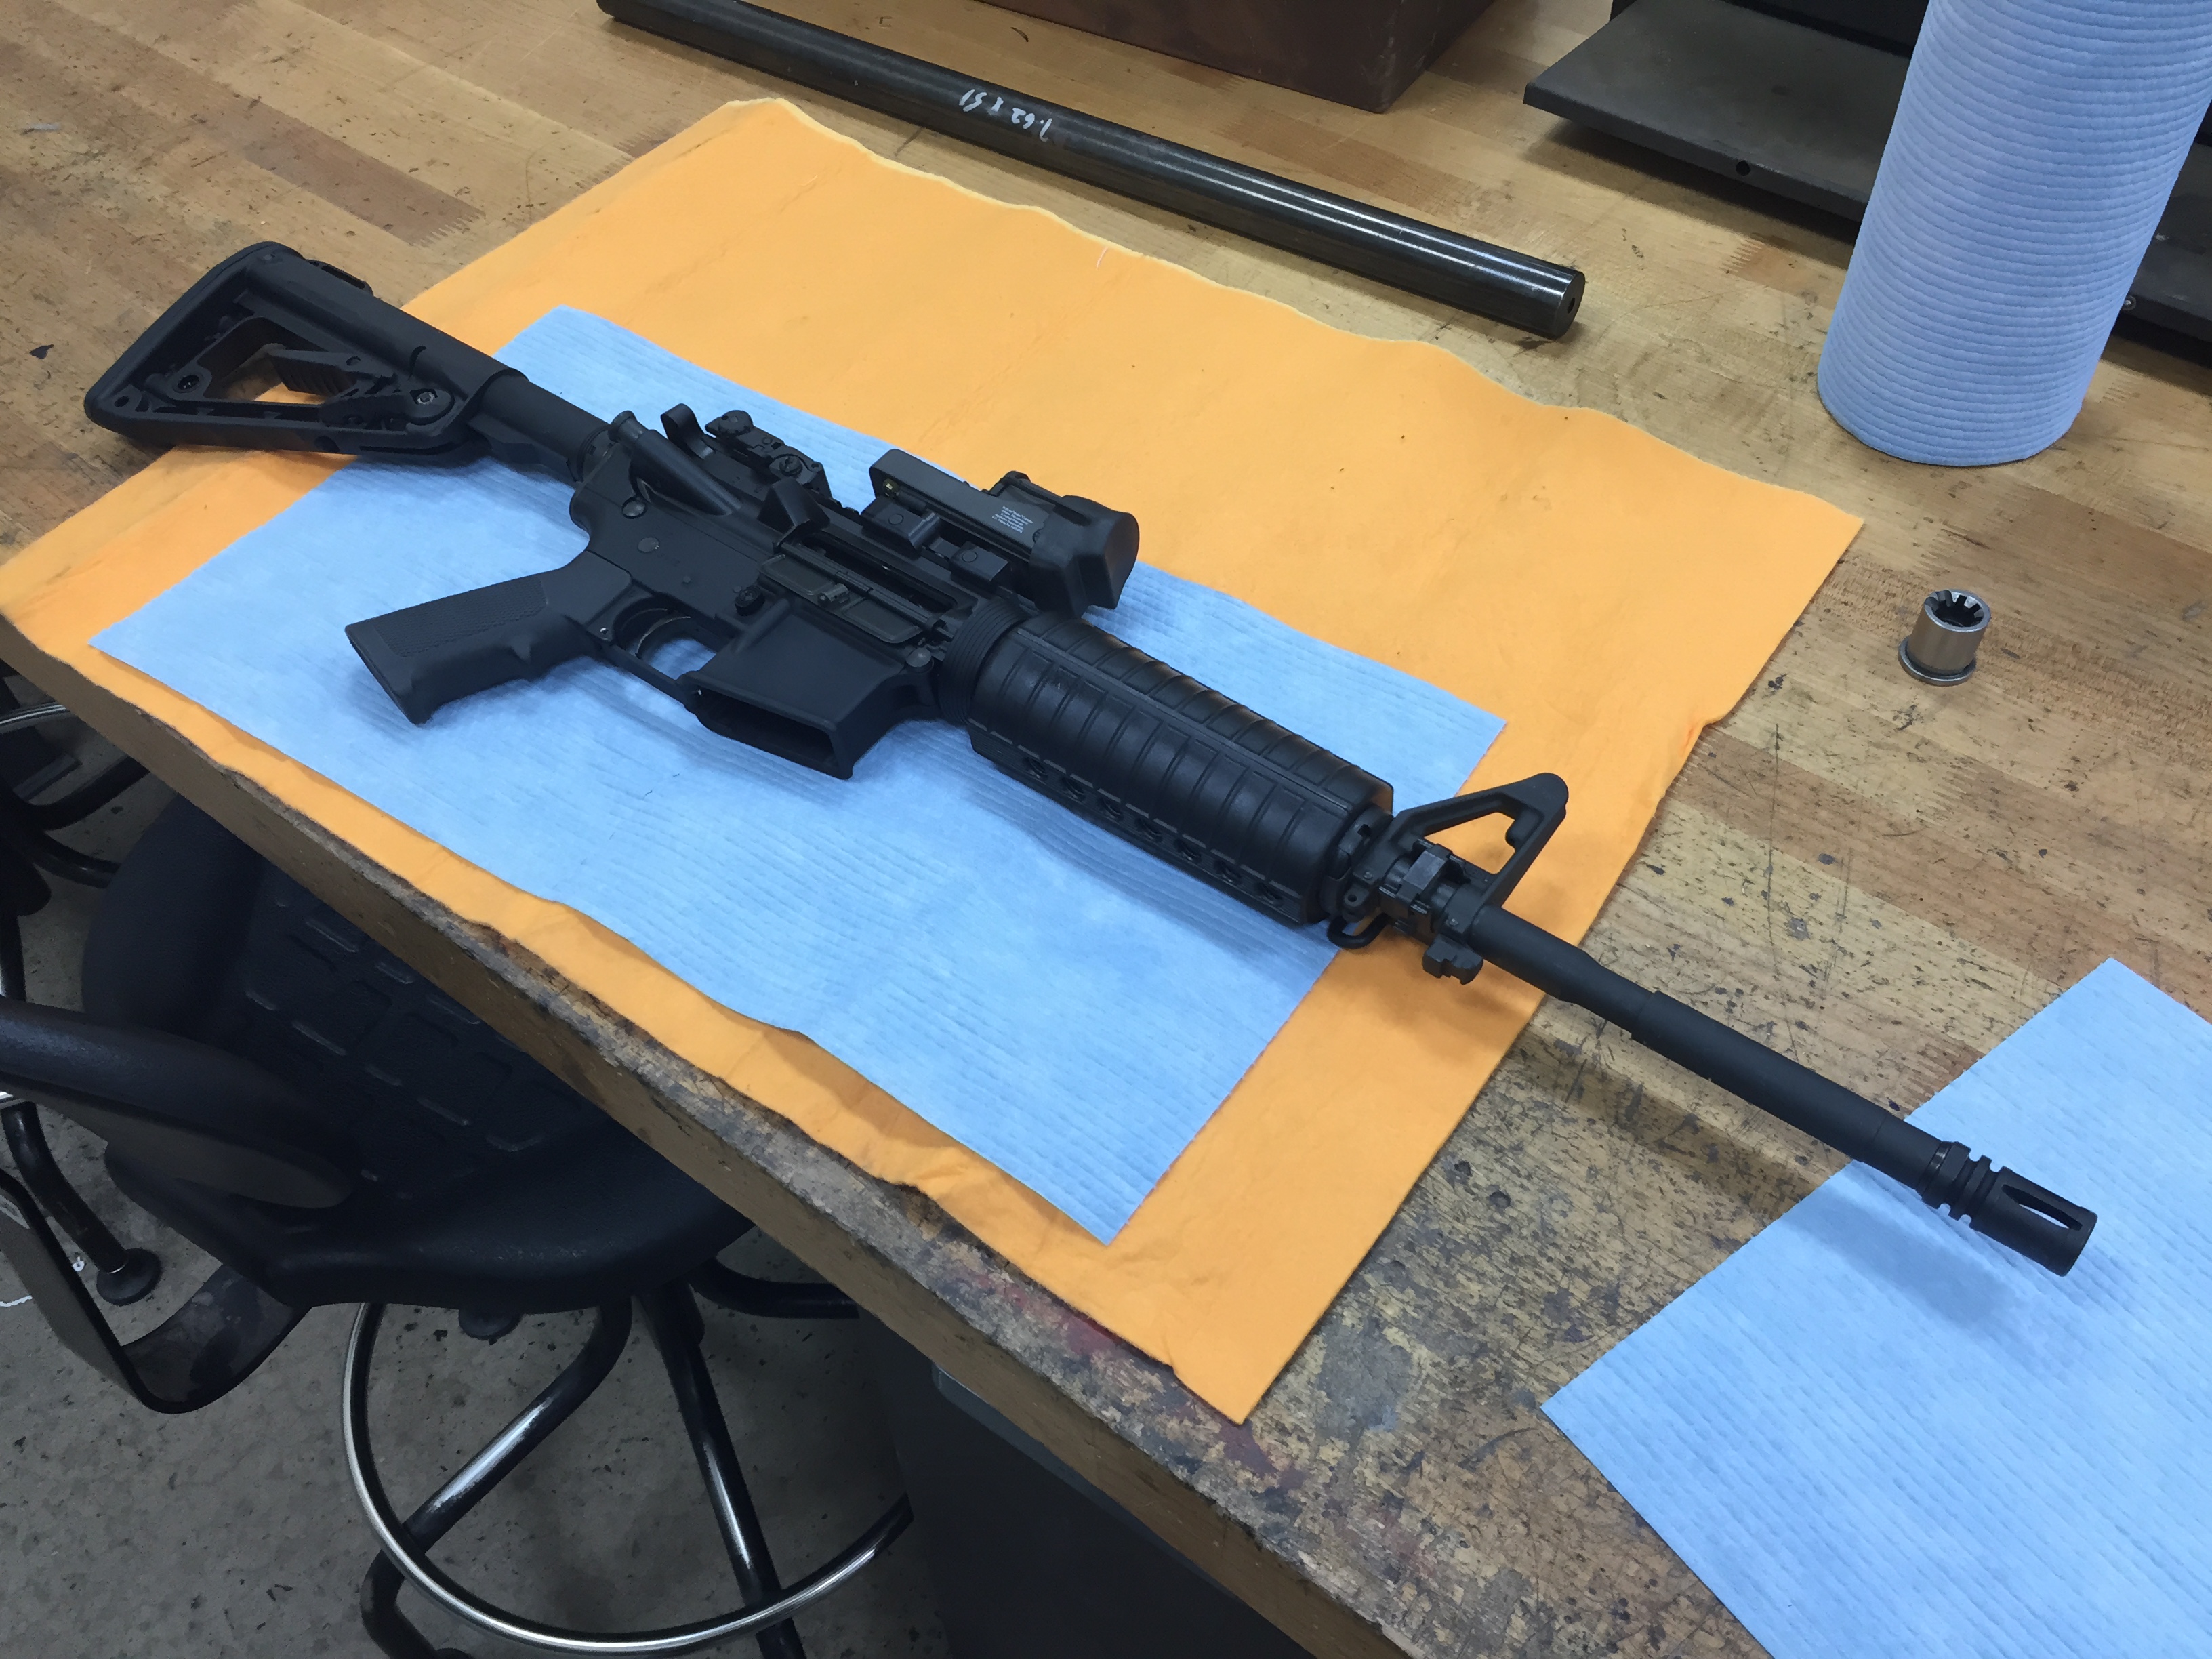
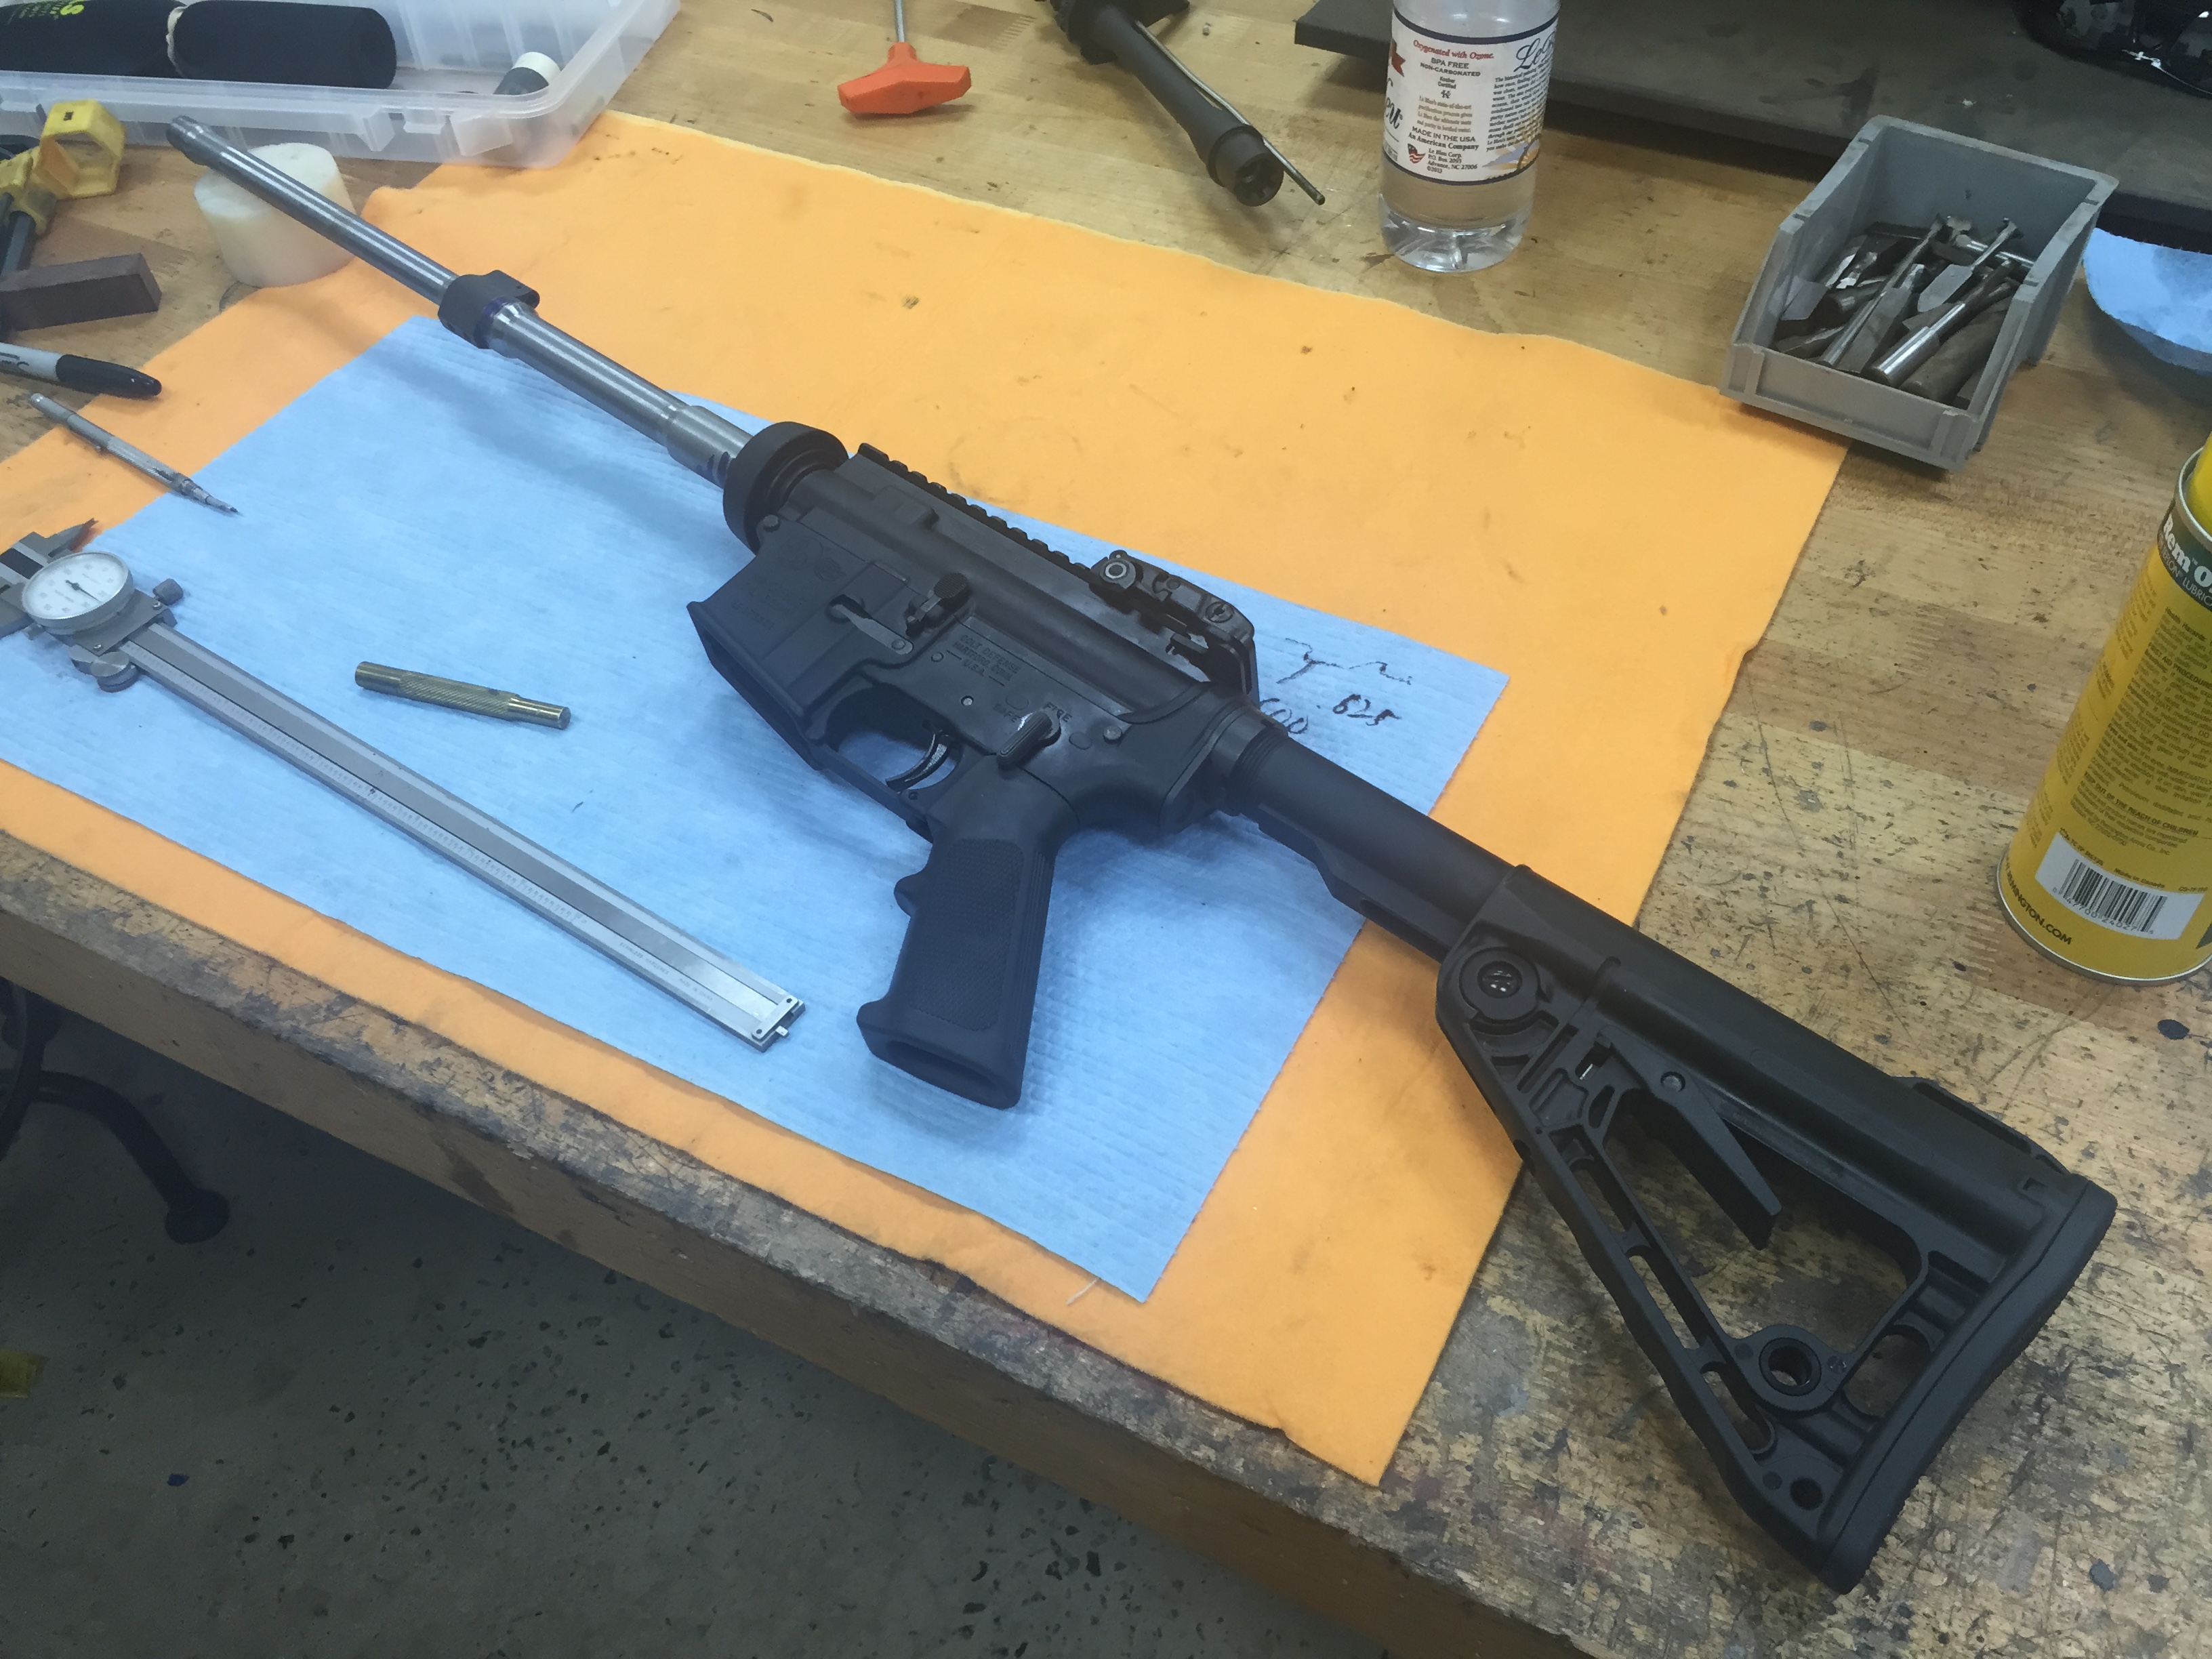
This is a Colt AR-15. It’s standard and normal in all ways. It’s never been fired. I had it in the safe because everyone should have an AR-15 and I’d gotten rid of my last one so I had to get one to replace it. The not shooting part is because I’ve been lazy/busy lately.
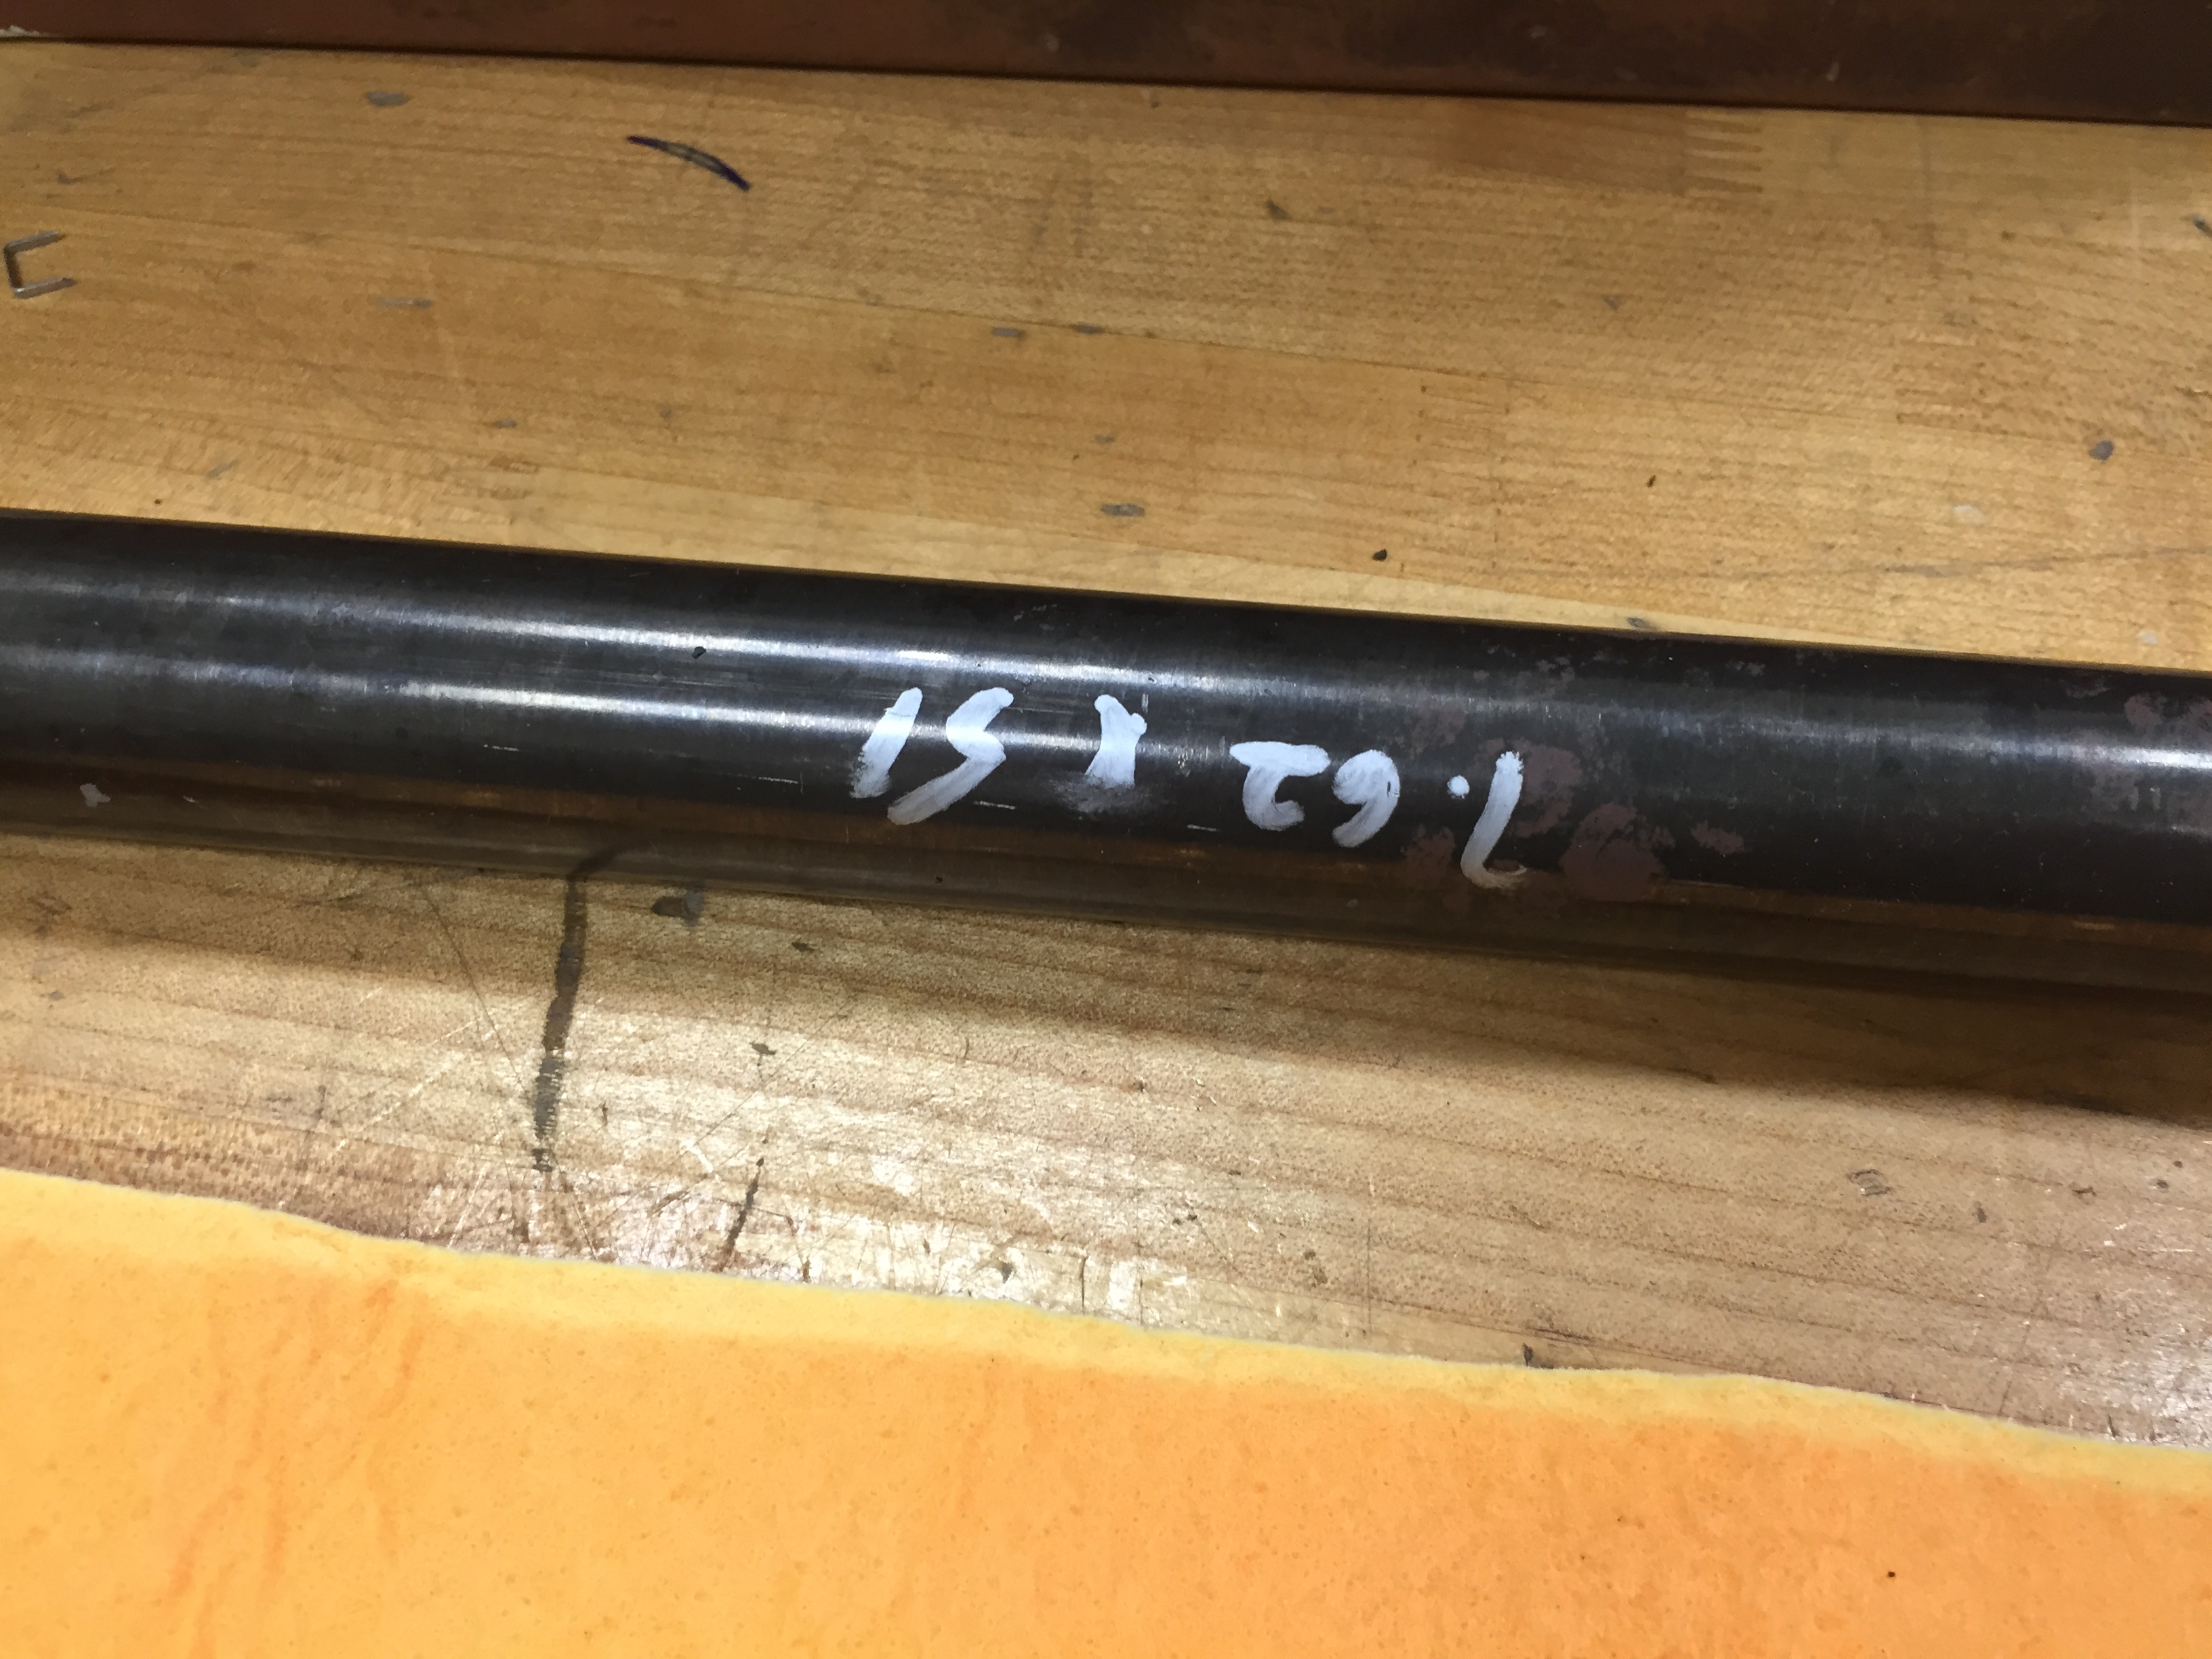
This is our starting barrel. It’s a piece of 4140 steel already drilled and rifled to .300. The markings say 7.52 x 51. We are going to create a .300 Blackout with the ability to add a suppressor later (that will be another project.)
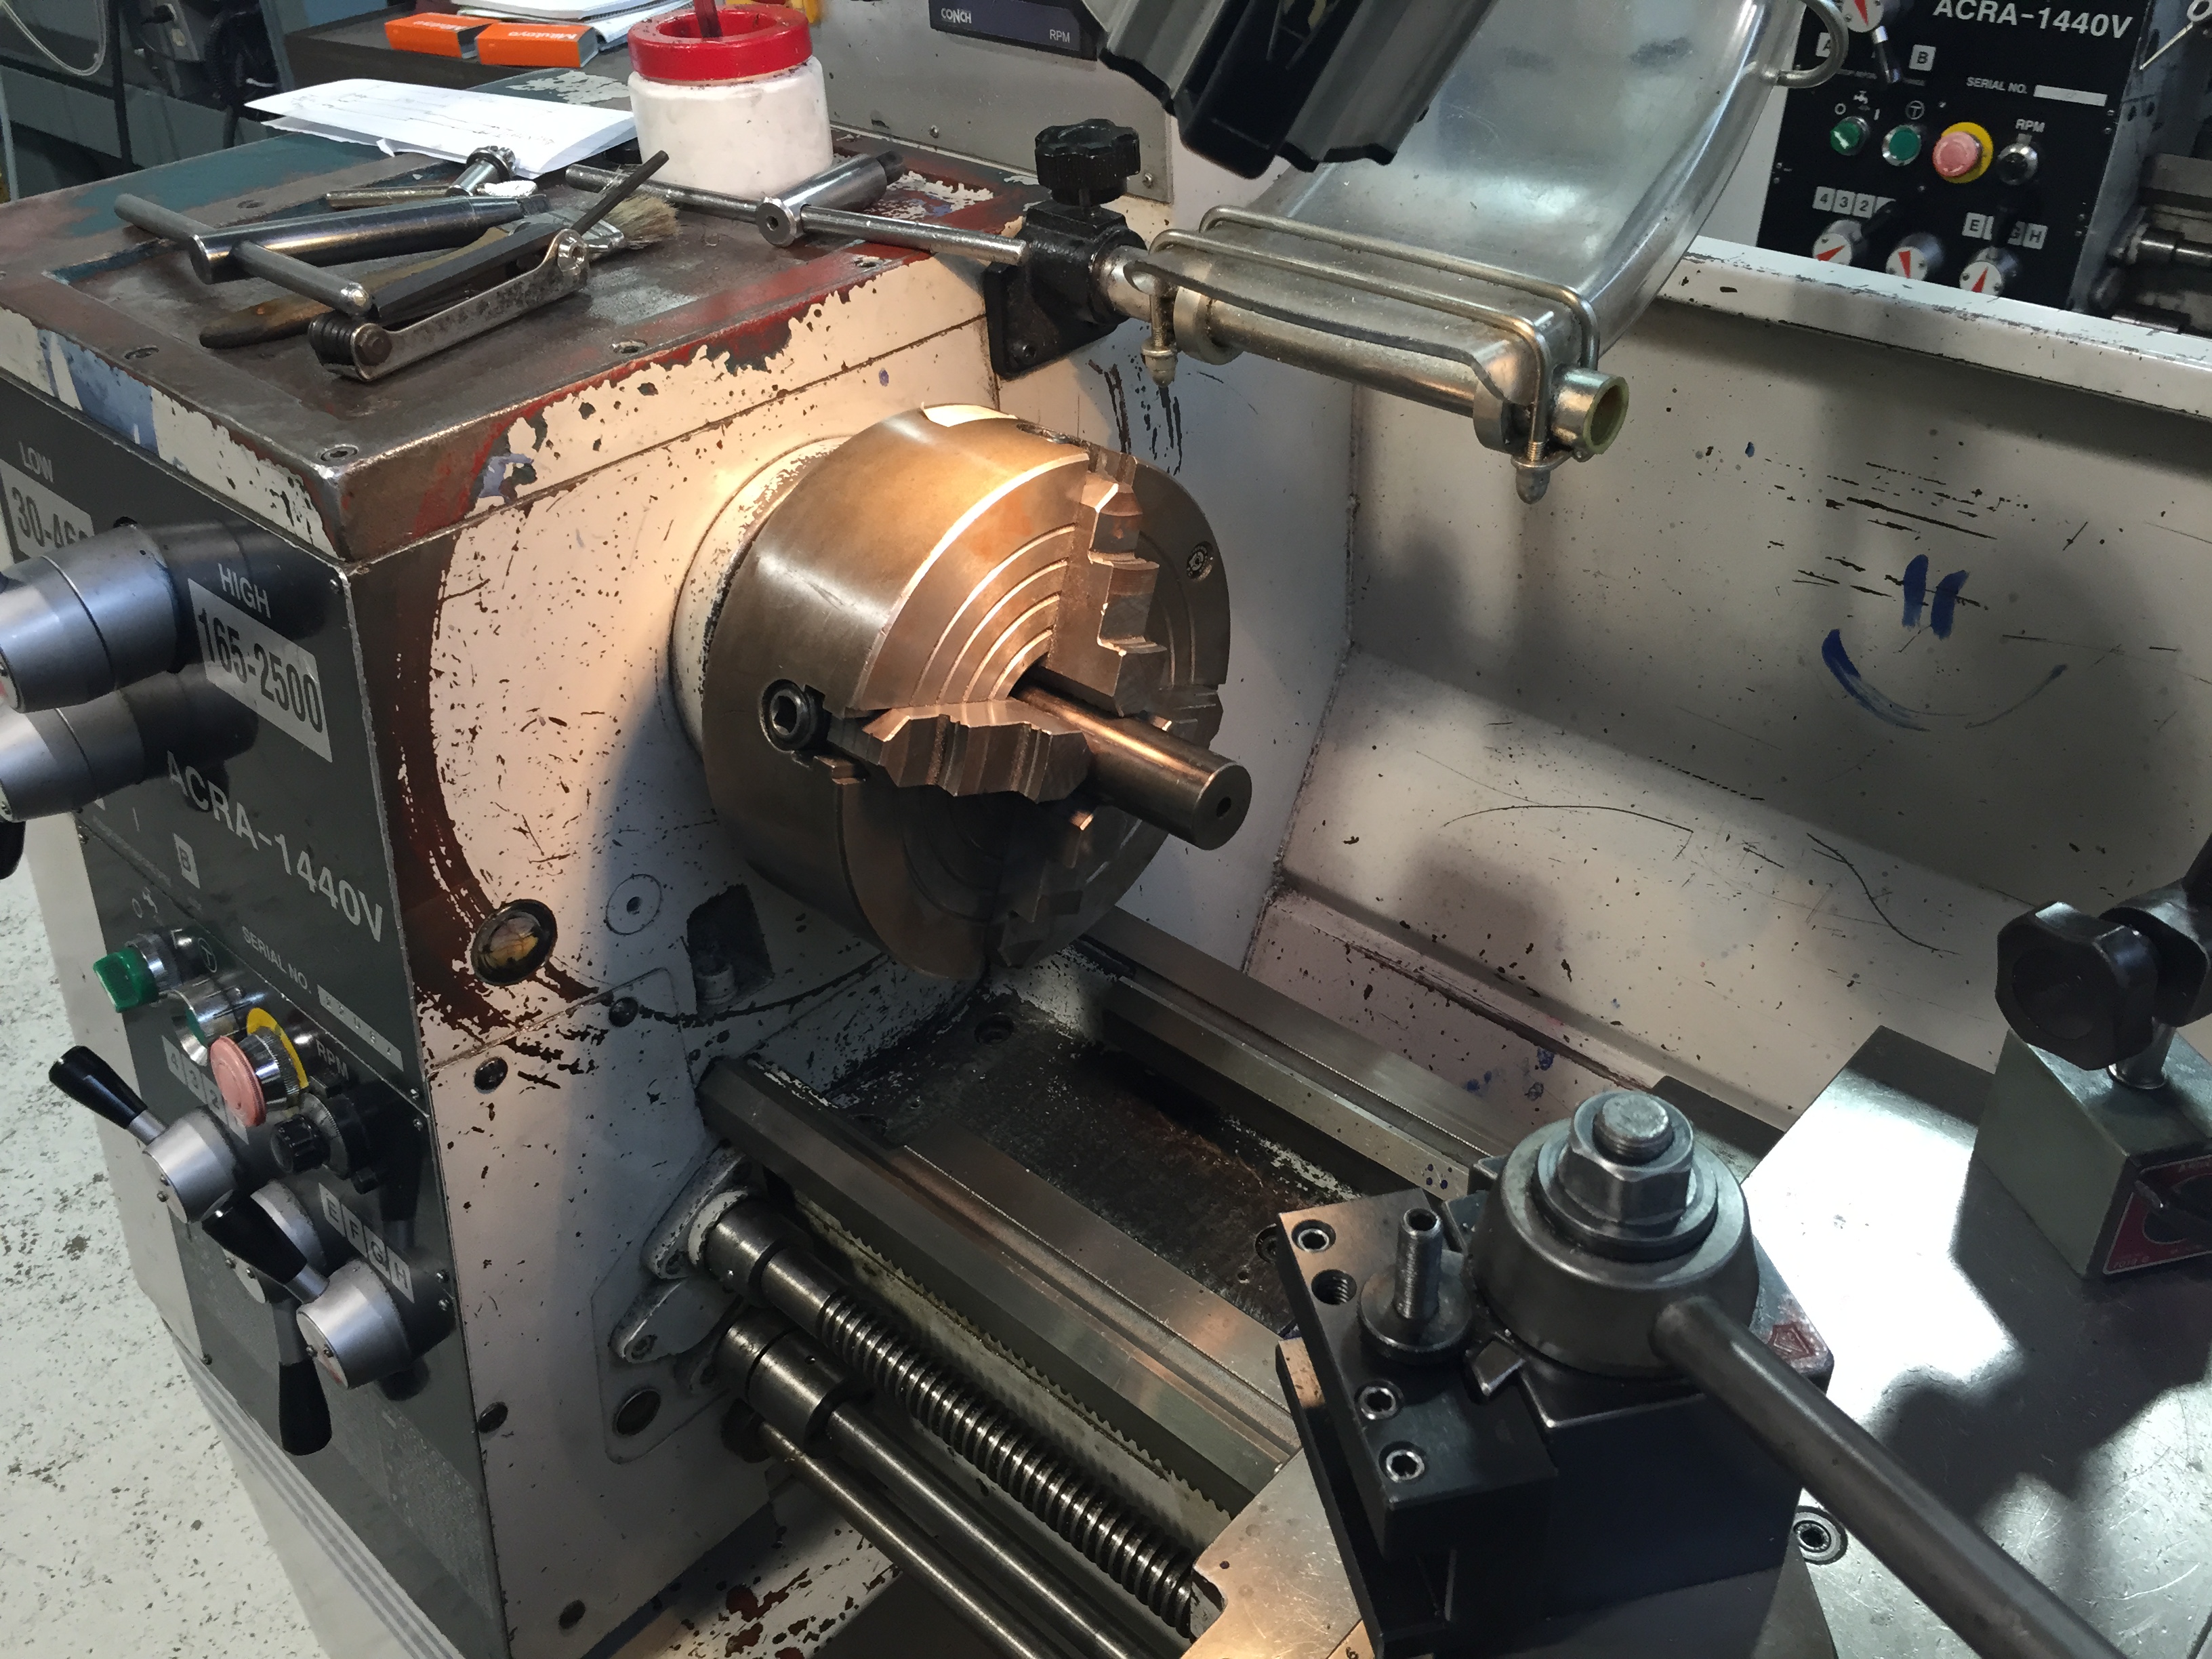
When I got to class, I found that nearly everyone in the class was a recent graduate of the 2 year gunsmithing program at Montgomery Community College. Of the few folks who were not recent graduates, the rest seemed to all be working as full time gunsmiths or in gun manufacturing for names like Remington. I’m a self taught machinist, former iron peddler, farmer. To make it even more interesting, two of the returning full time gunsmiths and the instructor were all former room mates. Maybe I’m fighting above my weight class? Nah, I’m sure it’ll be fine. Our instructor Mongo (seriously) got right to work and spent about 30 minutes talking about what we’d be doing at a 50,000 foot level. Then he said grab your barrel blank and jump on a lathe and lets get to work. Everybody jumped up and ran to a lathe and I stopped them by saying, “Are you going to demonstrate to us what to do?”Mongo assured me he’d stick close to me and keep me out of trouble. Good enough for me.
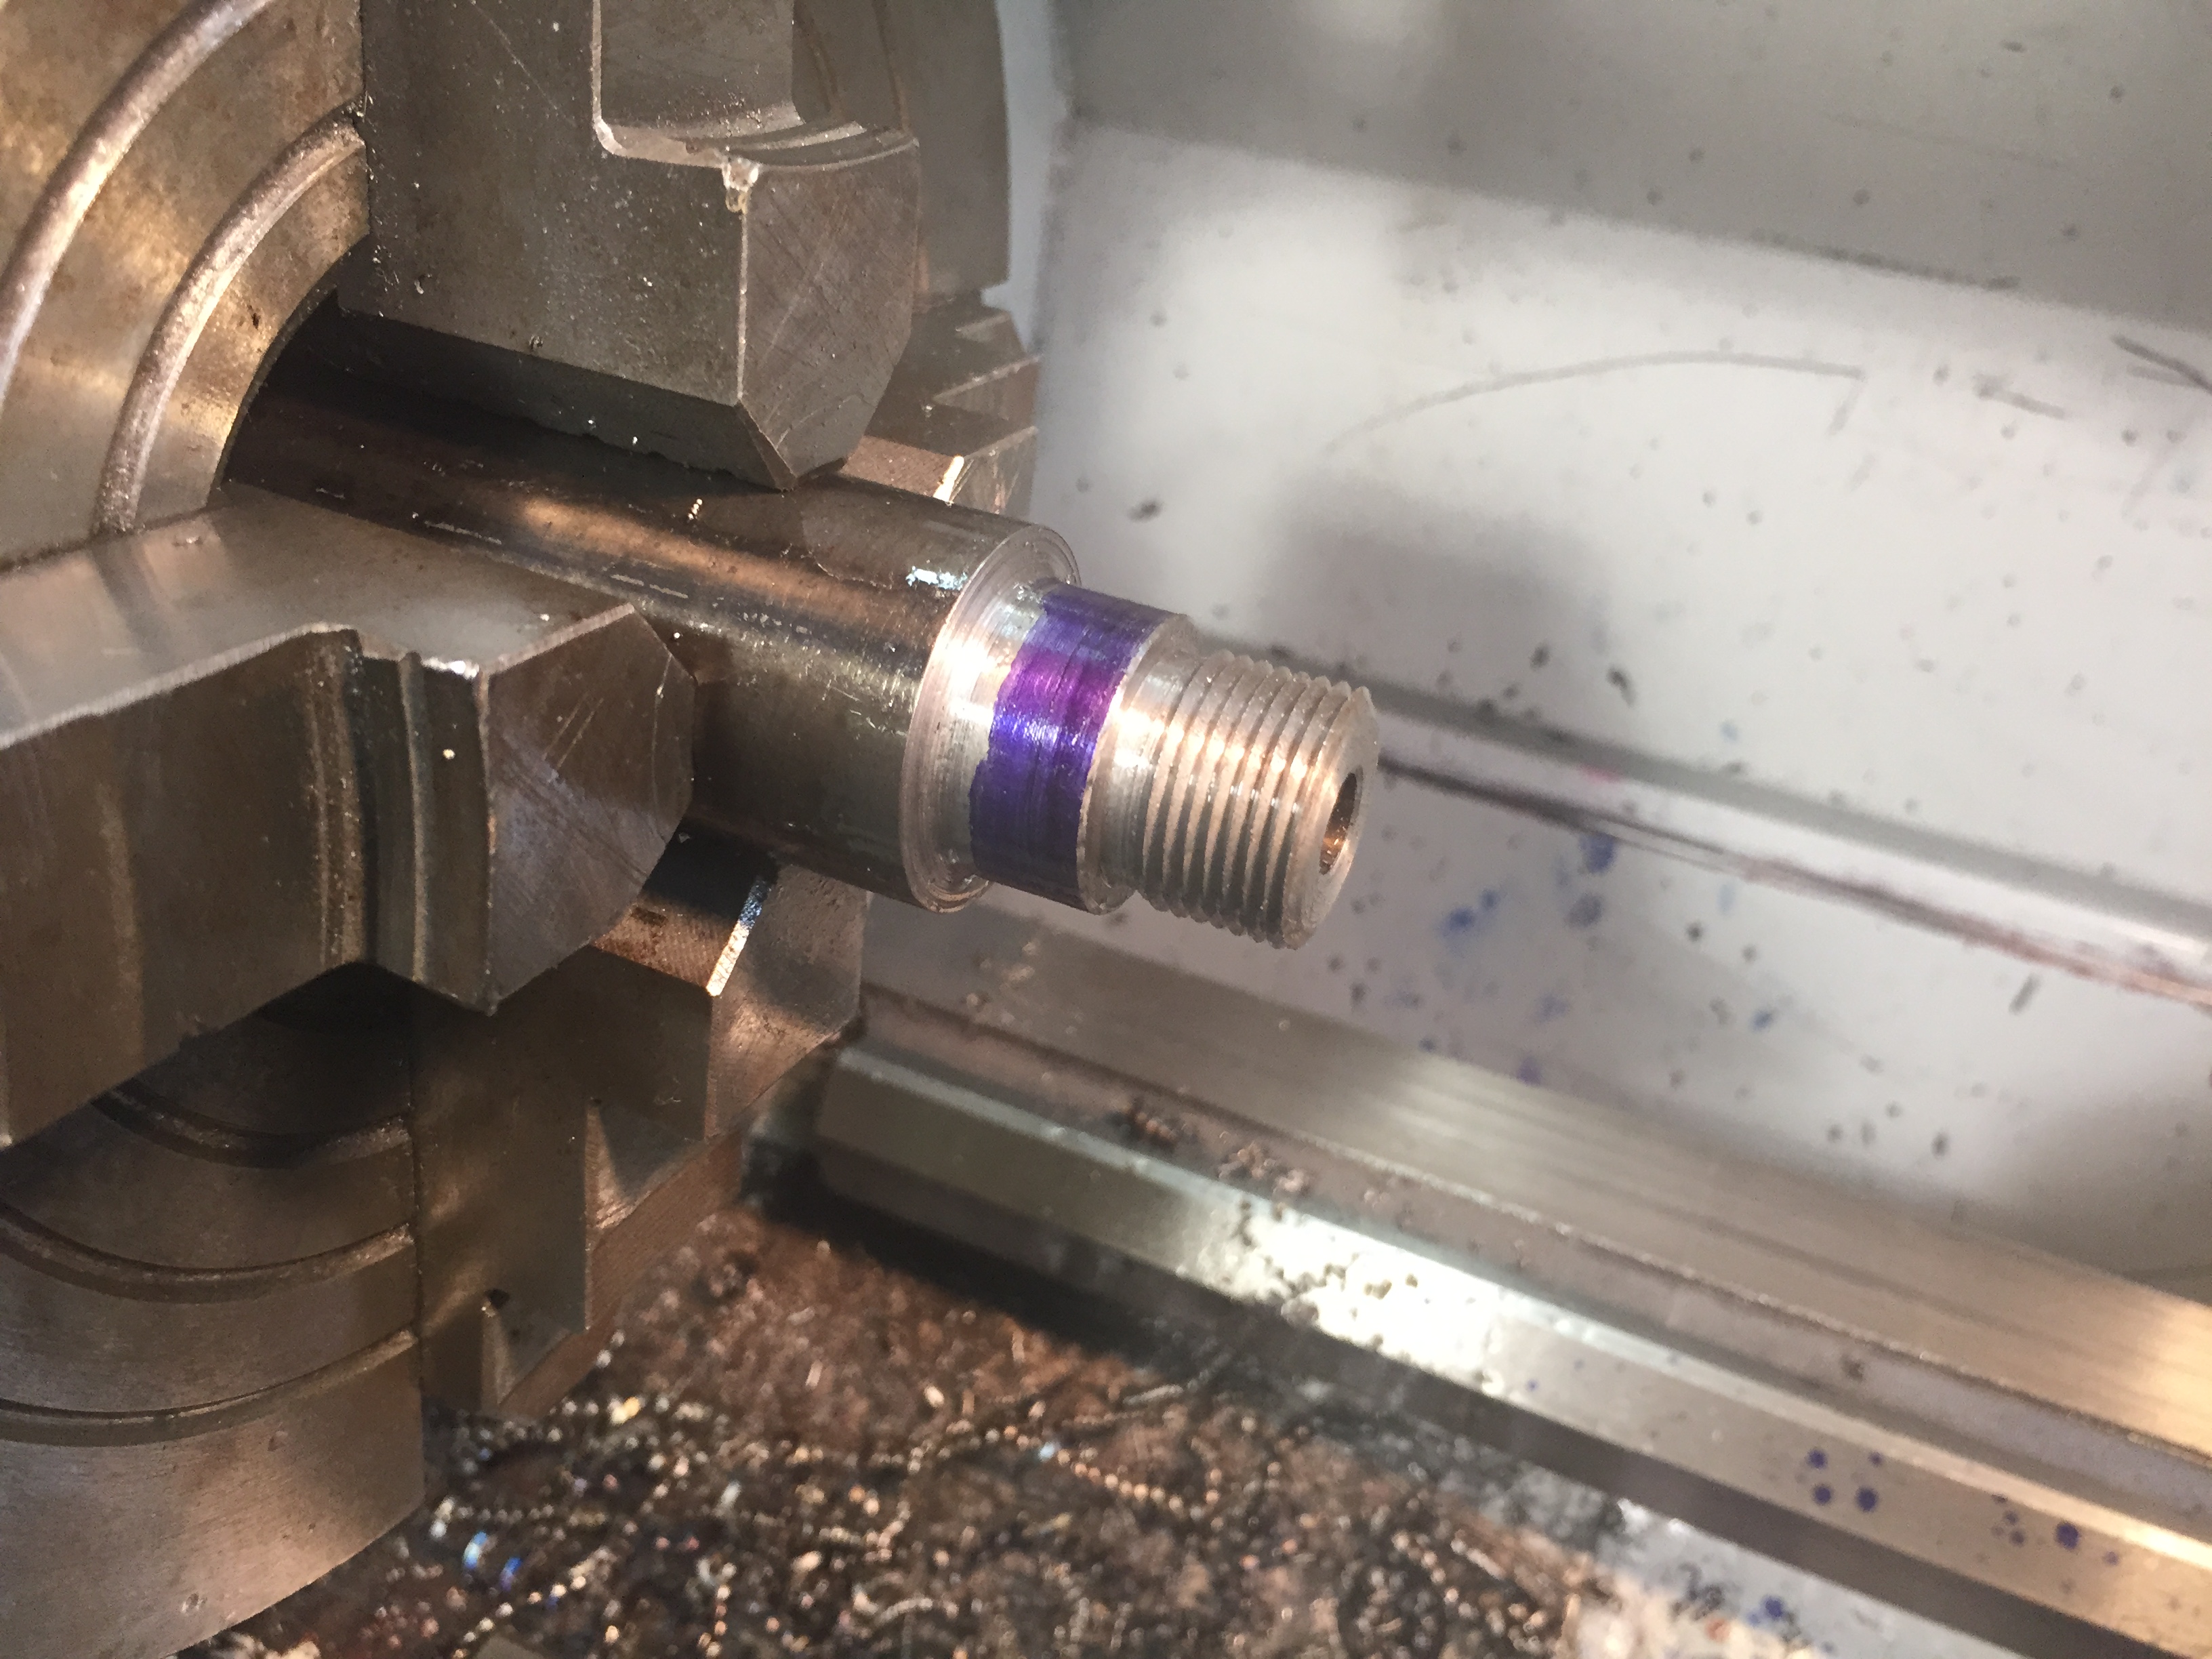
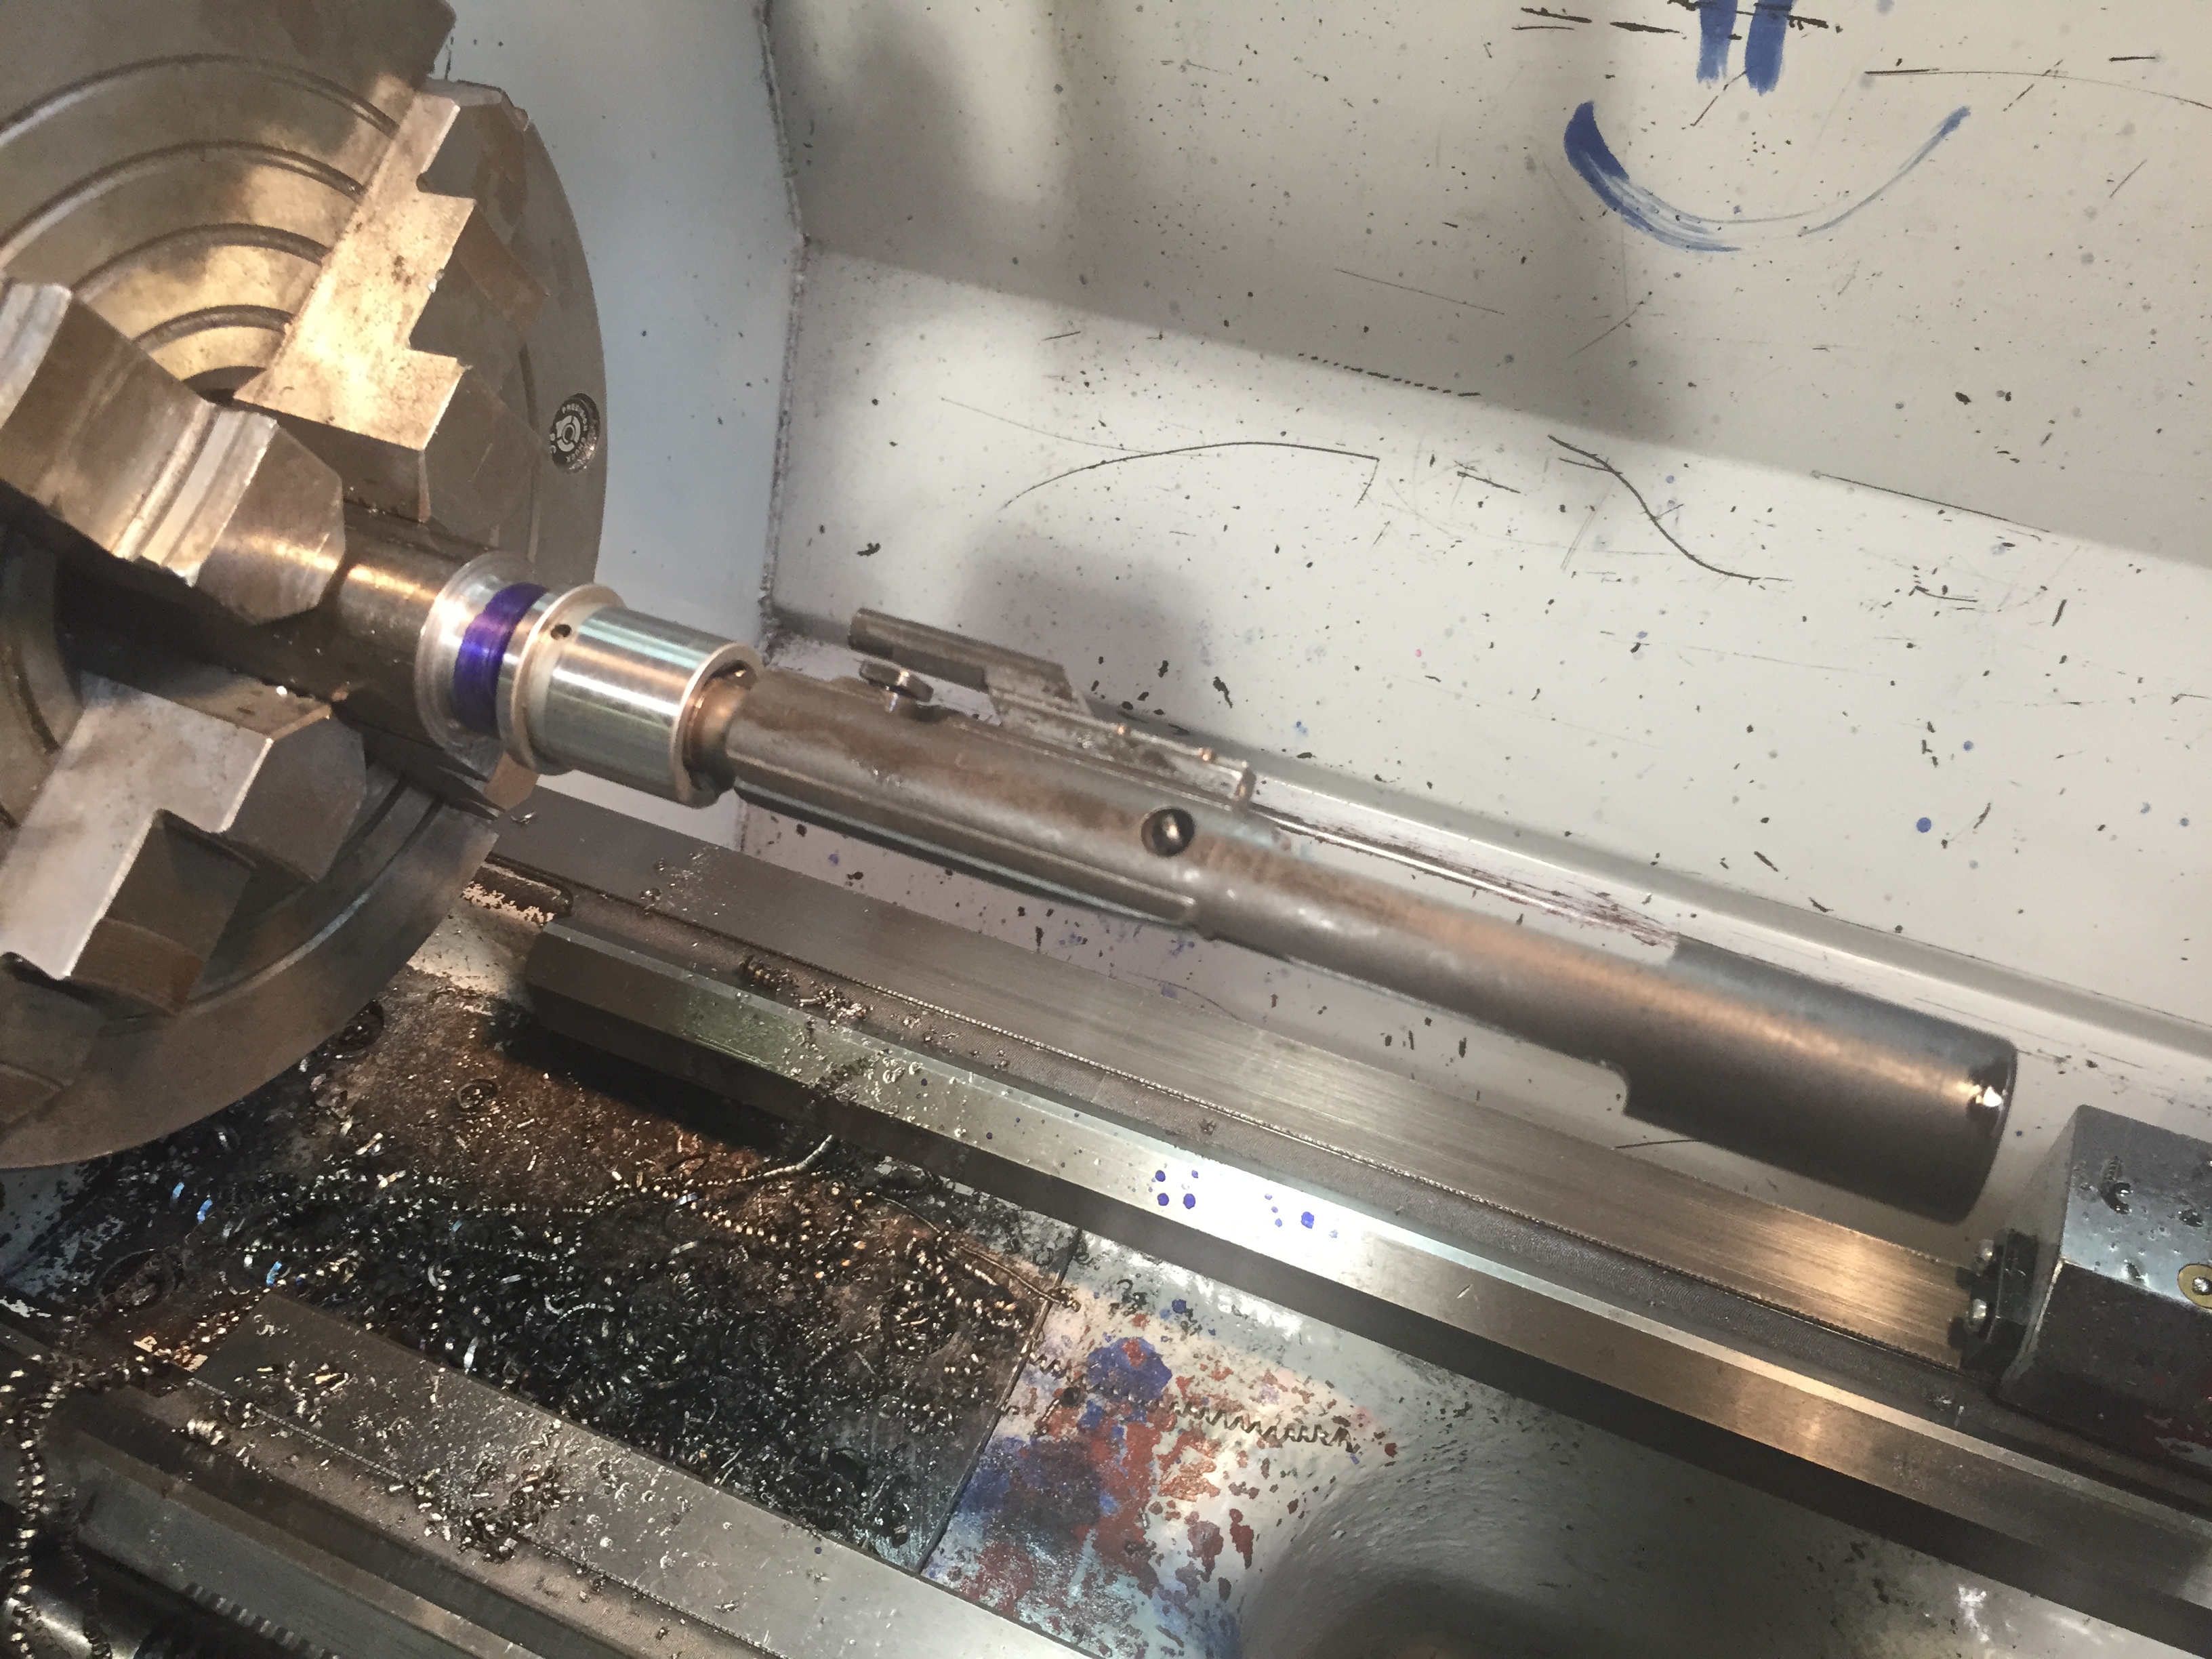
Here you can see what will become the chamber of the barrel. The tenon is cut and the threads have been cut. You’ll note there is a small non threaded area just past the threads but before the shoulder. That’s called an undercut and it makes threaded so much easier. Thanks Mr. Pete for that tip. I saw some folks in the class struggle with this step. I was glad I knew some of these tips for making it easier. I even got distracted during threading (a big no no) and bumped my tool against the shoulder which knocked it out of alignment. I had to completely reset my threading setup mid way through the process. Not something you want to do. As you can see, it all turned out just fine.
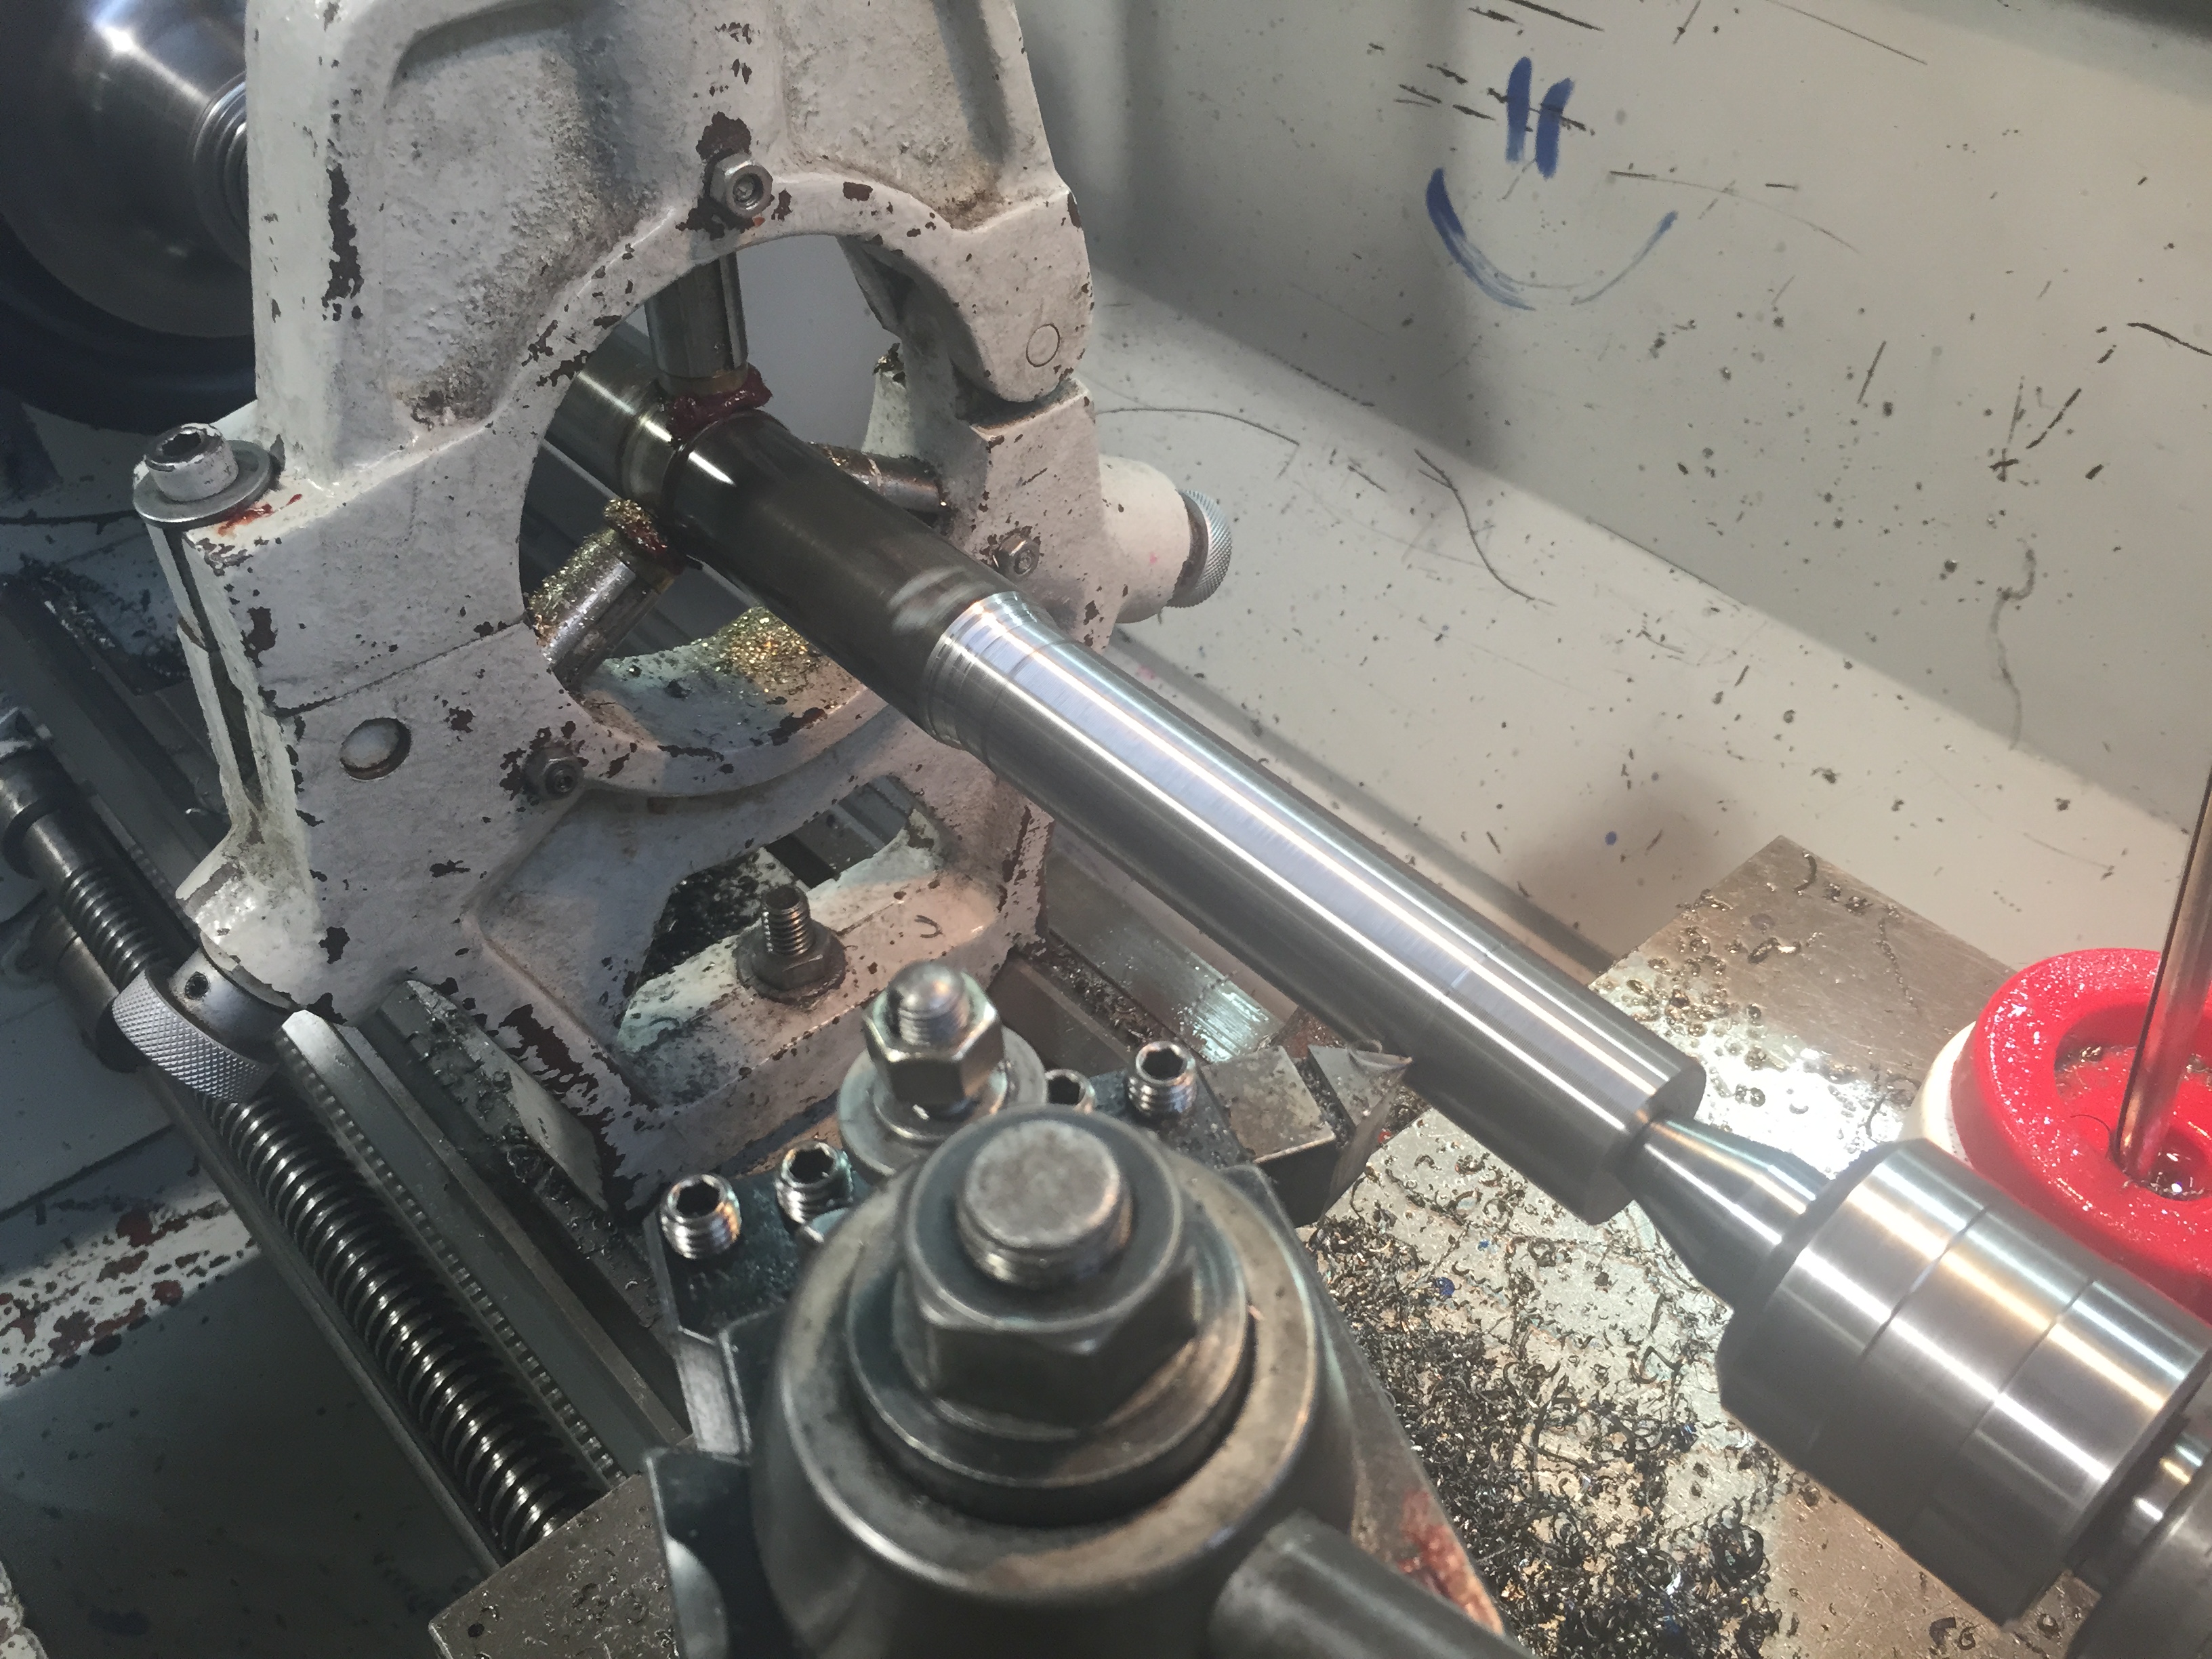
What you see here is a full length, full size barrel blank chucked into a lathe with just a couple of inches sticking out to work on. After threading and chambering, the barrel extension is screwed on and tightened but not torqued. Then a head space gauge is inserted and the bolt and in this case bolt carrier is inserted and locked up. At this point we check for clearance. Then the whole process is repeated with what is called a “no go” head space gauge. The difference between the to gauges? 5 thousandths of an inch. It’s a pretty close fit. This is some of the gunsmith voodoo that I wanted to learn. What you see here is the finished product. All is well.
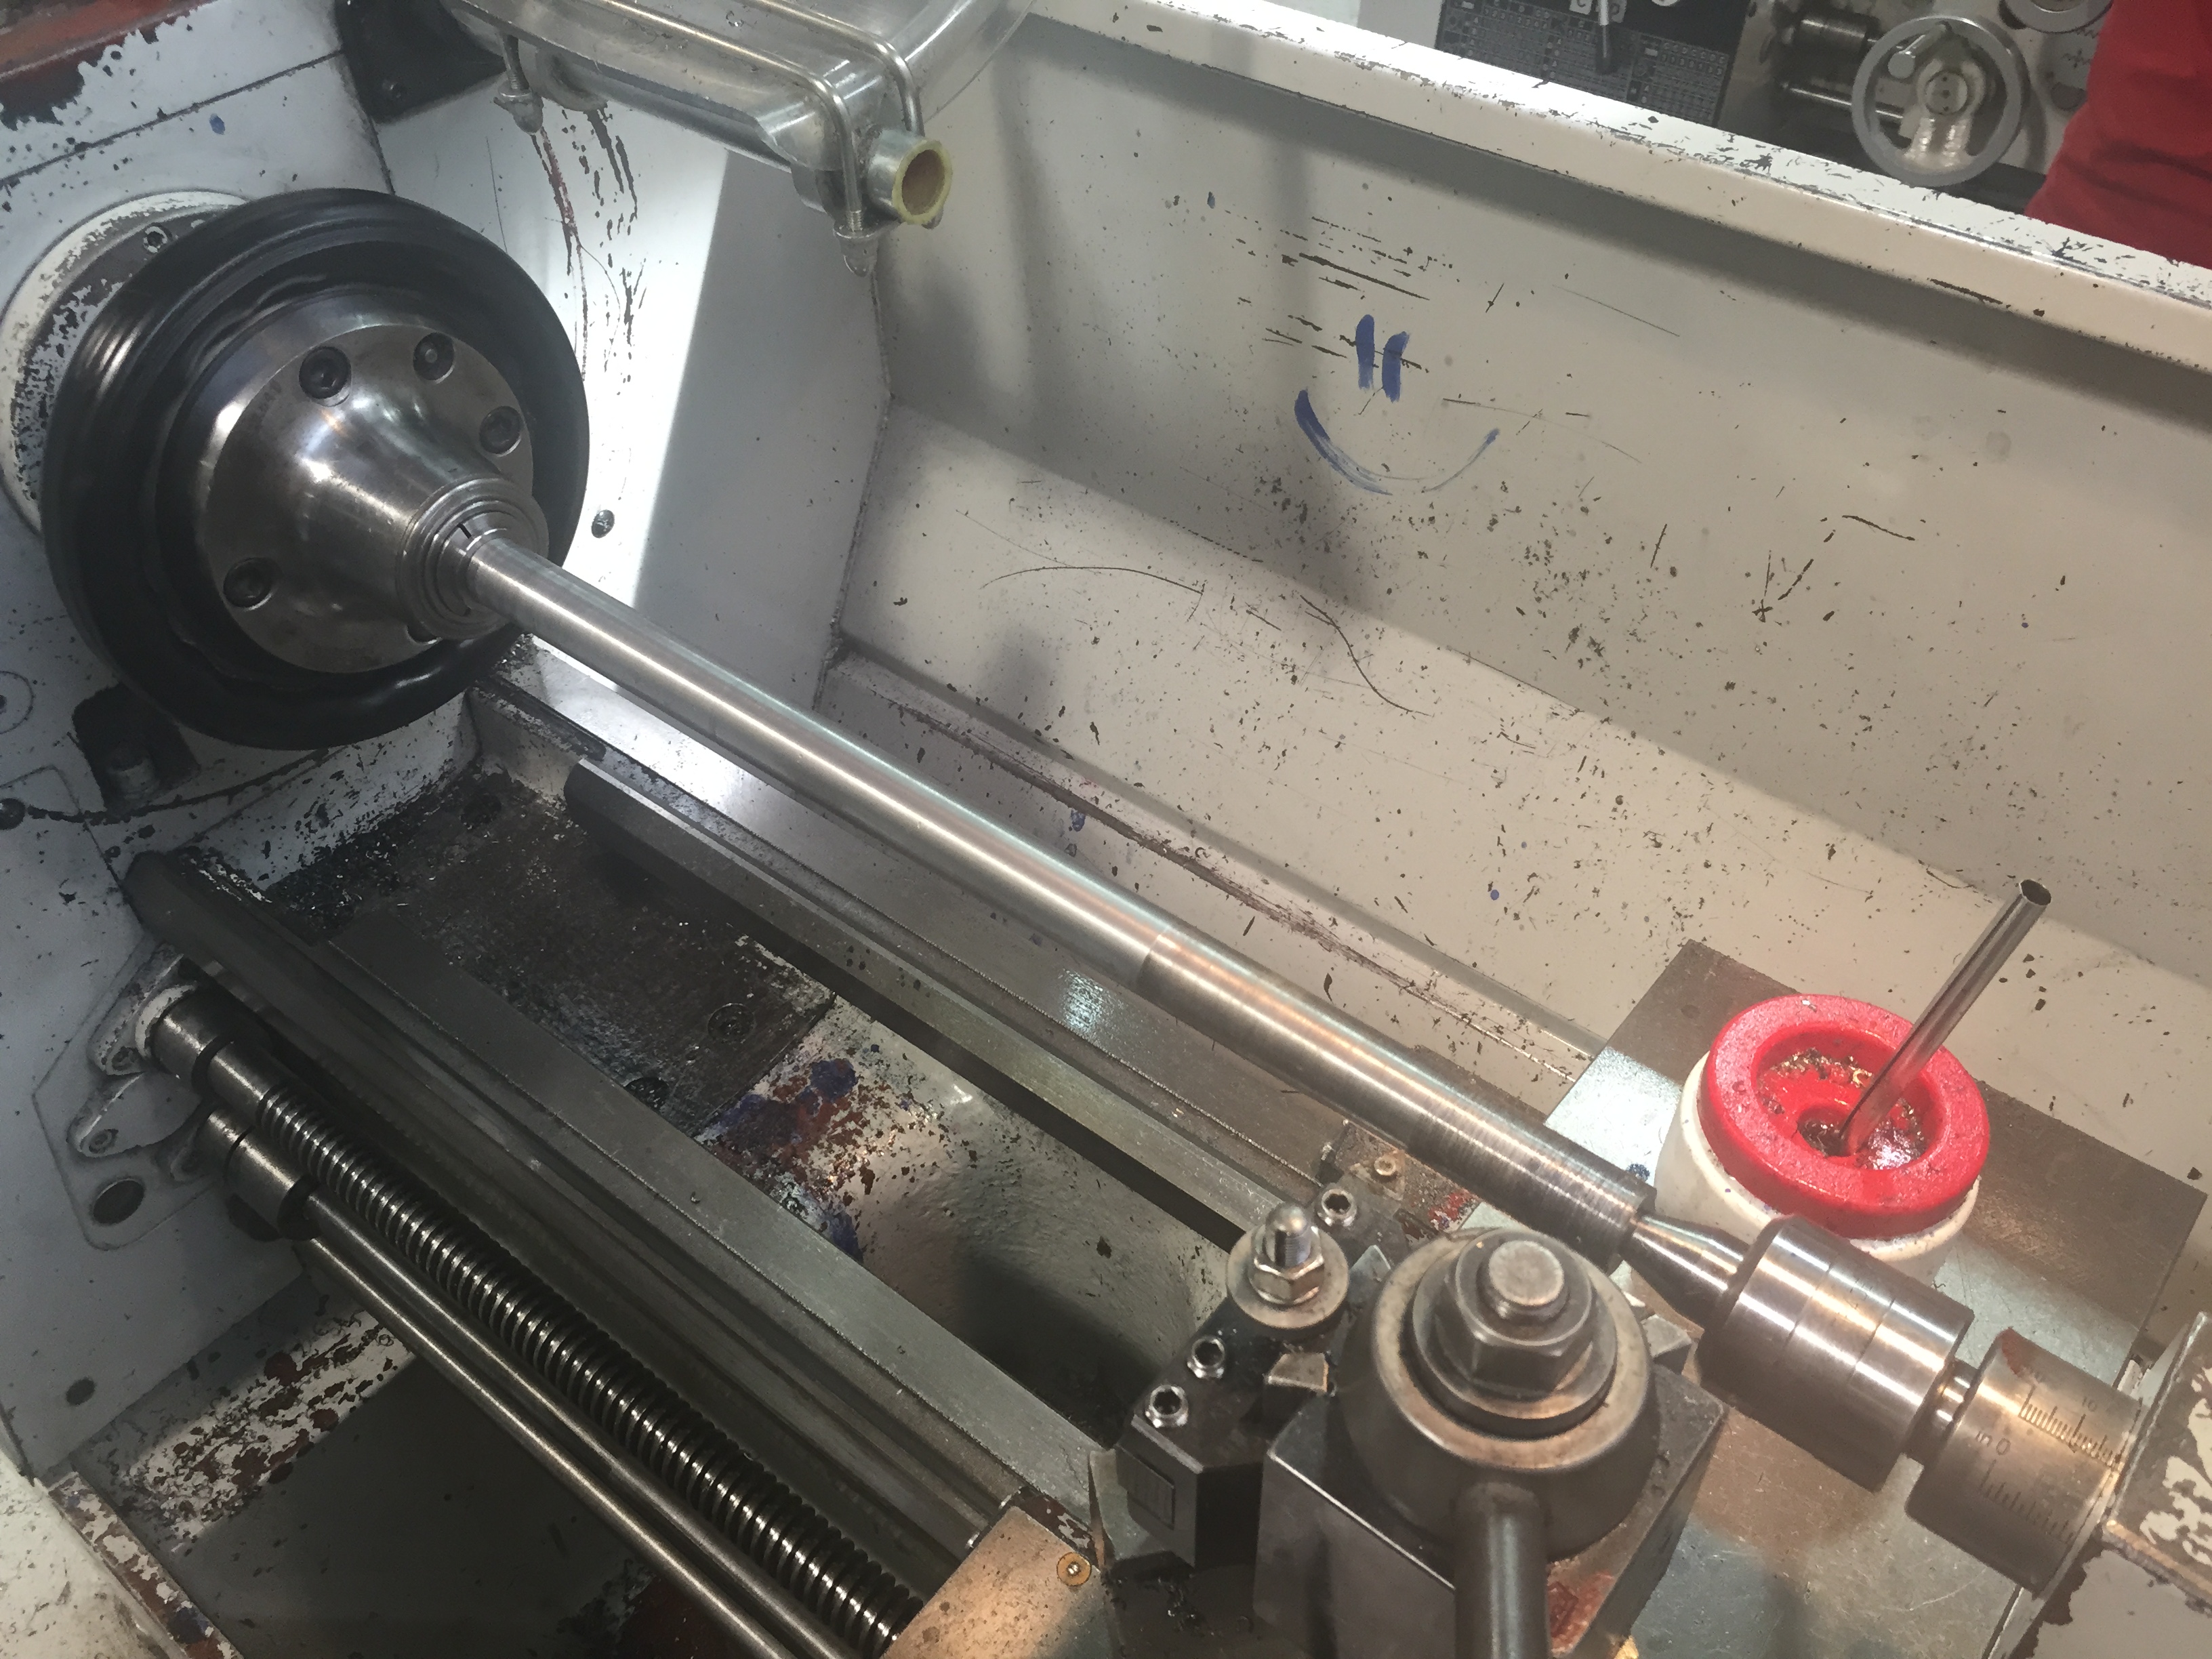
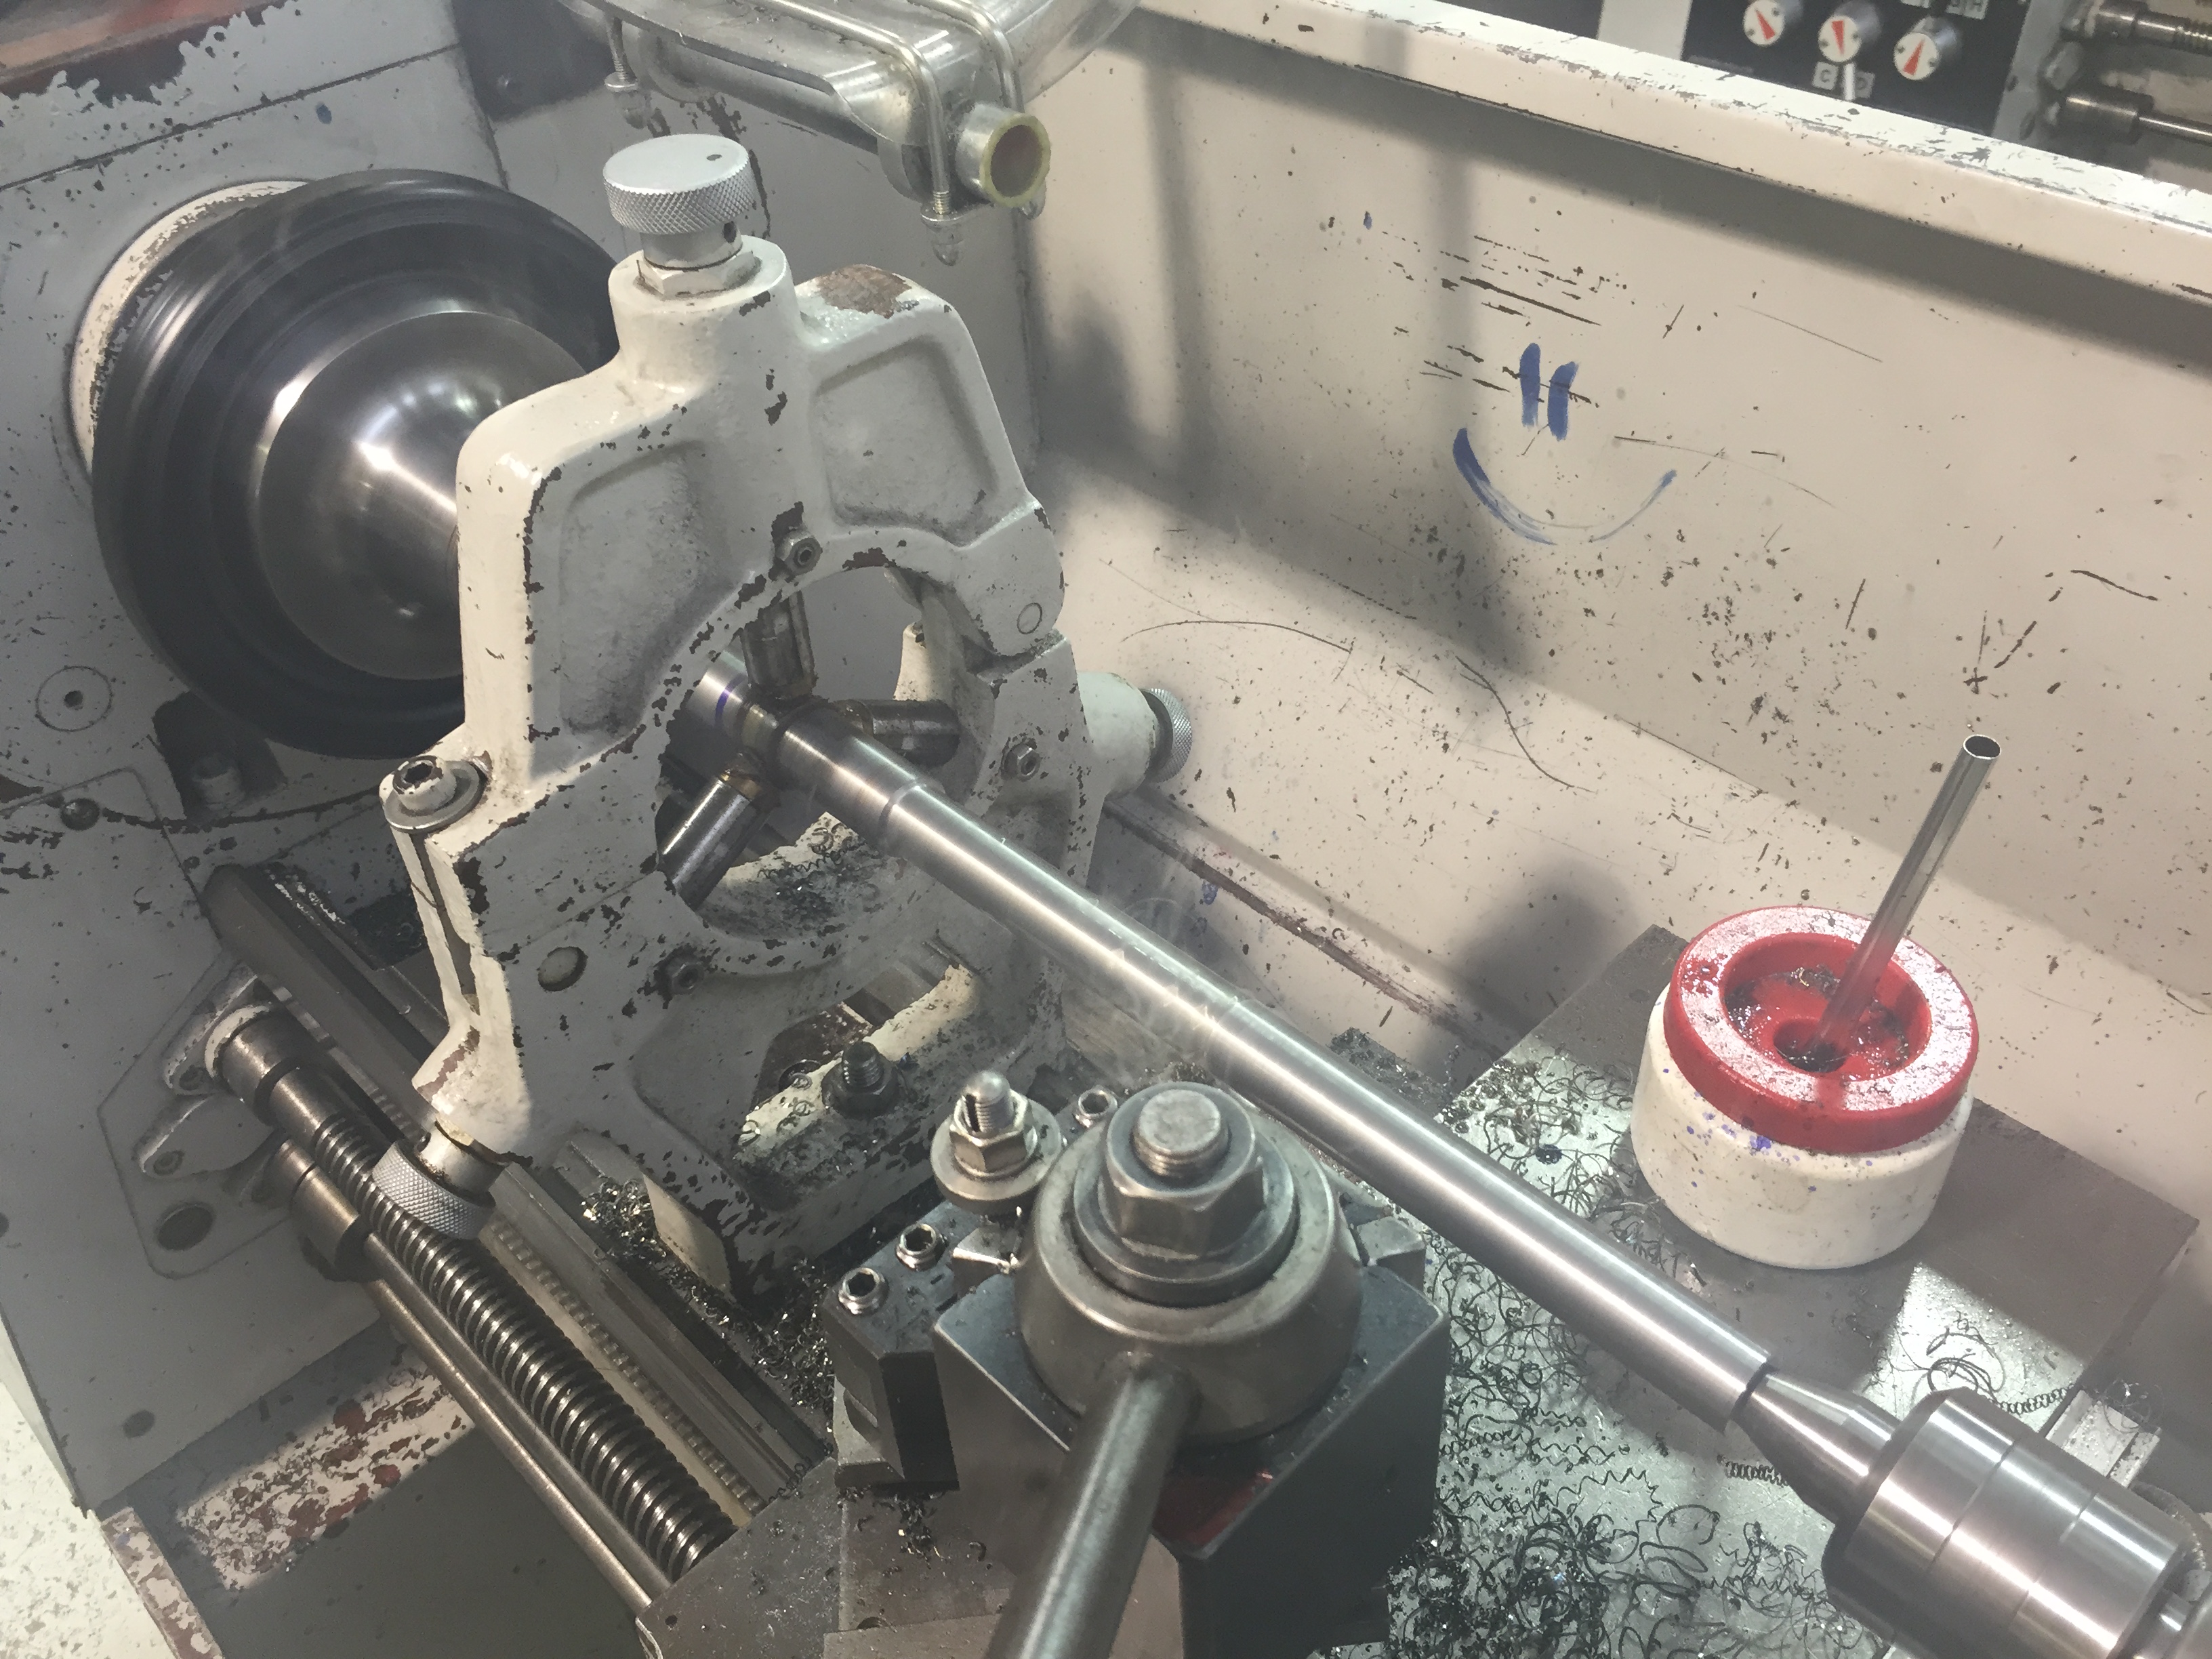
Now we’ve turned the barrel around in the lathe, cut a 60 degree crown into the barrel and chucked the barrel into the lathe between centers with a steady rest. At this point you are only working on a small section at a time because no matter what you are trying to do, the steady rest is in the way. Here I’m simply cutting the barrel down to .750 so we can install the gas block.
Here the barrel has been roughed out, the gas block journal has been cut (that is a precision operation, there is 1/2 thousandth of clearance) and the gas block shoulder has been cut. At this point the barrel is shootable but the gun will not cycle normally. Some gun smiths do the entire operation then test fire. Because this is a class and we are all here to learn, we took our barrels down to the range to try them out. At this point, I should point out that there were only three students who were ready to shoot their guns. Everyone else was either behind, or had some sort of major problem they were trying to fix. I’m proud to say I was one of the three, partly because I’m not a kid and I get there early, stay late, and work hard the entire time. But also because I was careful and stayed on track, plus I had plenty of help. But lastly because my skills on the lathe were there and all my self teaching was paying off. Despite these guys having 2 years of schooling, I probably had more lathe experience than they did. Not in the breadth of what they cover, but in actual time on the lathe. My struggles were with the fact that I’ve only used one metal lathe, mine. I didn’t know how some things worked on their lathe. By this point I’d figured it out thought.

It’s very odd to go to school, walk around with a gun, and shoot on school property. Although I knew they had a firing range, I’d never actually been there. We three plus the instructor walked down to the range, loaded one round, and hoped the gun would go bang instead of BOOM. Here I am just as I’m taking my shot (Thanks Anton for taking the picture and loaning me the bullet.)
The gun did go bang and I extracted the bullet with no issues. Mongo inspected my work by carefully going over everything on the spent cartridge. Whatever you did wrong will show up in the brass. I was very pleased that mine came out 100% correct!
At this point, the barrel goes back into the lathe, gets dialed back in again, and I started taking off more metal. Most of the guys in the class left their barrels long and thick for target guns. They were creating guns that shot different calibers. 300 Blackout is a round that is designed to be suppressed which means it will have a heavy chunk of metal hanging of the end. With that in mind I took as much weight off the barrel as was prudent. That meant I had a lot more material to cut off, plus shoulders to cut at each change in thickness of which there were many.
Here you can see that the gas block is in place. The gas rod hasn’t been installed yet but the barrel has been threaded and crowned. I also made a thread protector to keep things clean till I can get a suppressor made (legally of course). The gas block port has been drilled and the gun function checked (it did great). At this point it’s a finished gun as far as the class is concerned. I’ll take it back at my next class so I can bead blast the barrel and then put a finish on it. I also order a free floating hand guard and then it’ll be a finished gun. This was a fun class and I learned a lot.
Hello, found your website and blog while looking for info on good gunsmithing schools near the Raleigh Durham Cary area. I plan to move to NC when I retire in 2020. I’m currently a law enforcement factory trained armorer on several weapons but no experience with welding or machining. Thanks, M.
I’m sorry, I just saw your comment. Not sure where you are moving from (I’m guessing Lake Erie) but you’ll love Raleigh. It’s a great place to live. And MCC is a great school. I’m taking some classes again this year and the struggle I have is not what to take, but how can I take all the great stuff that is offered.