Marlin model 60 trigger job, and Spork goes squirrel hunting

Transfer bar before polishing

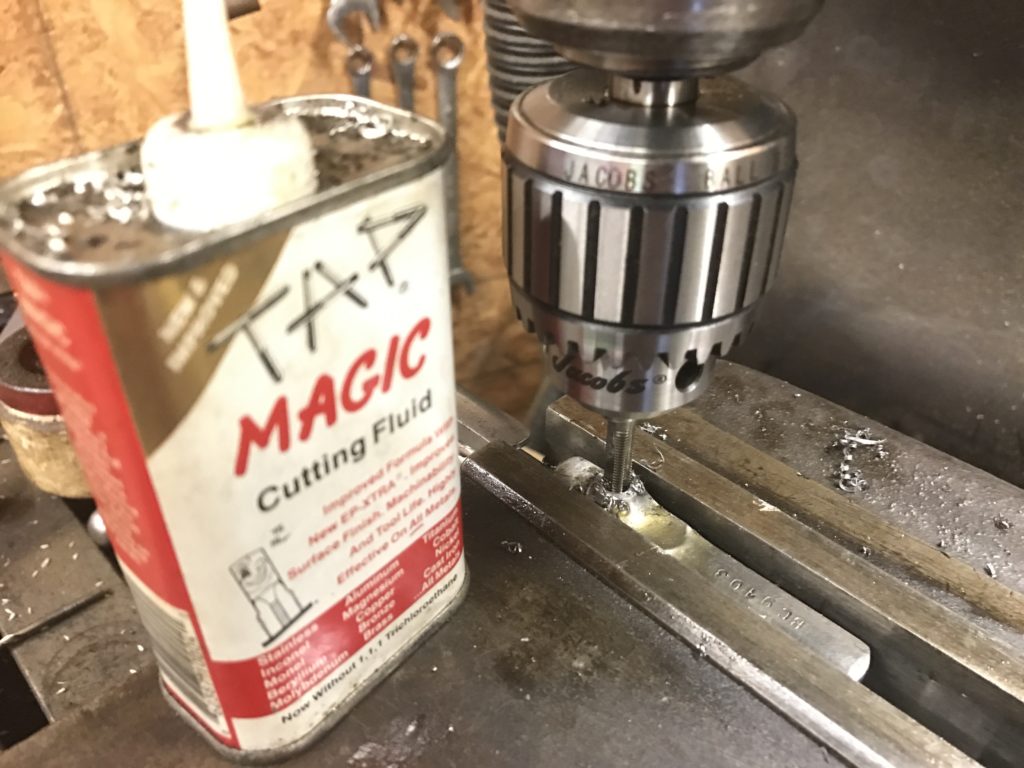
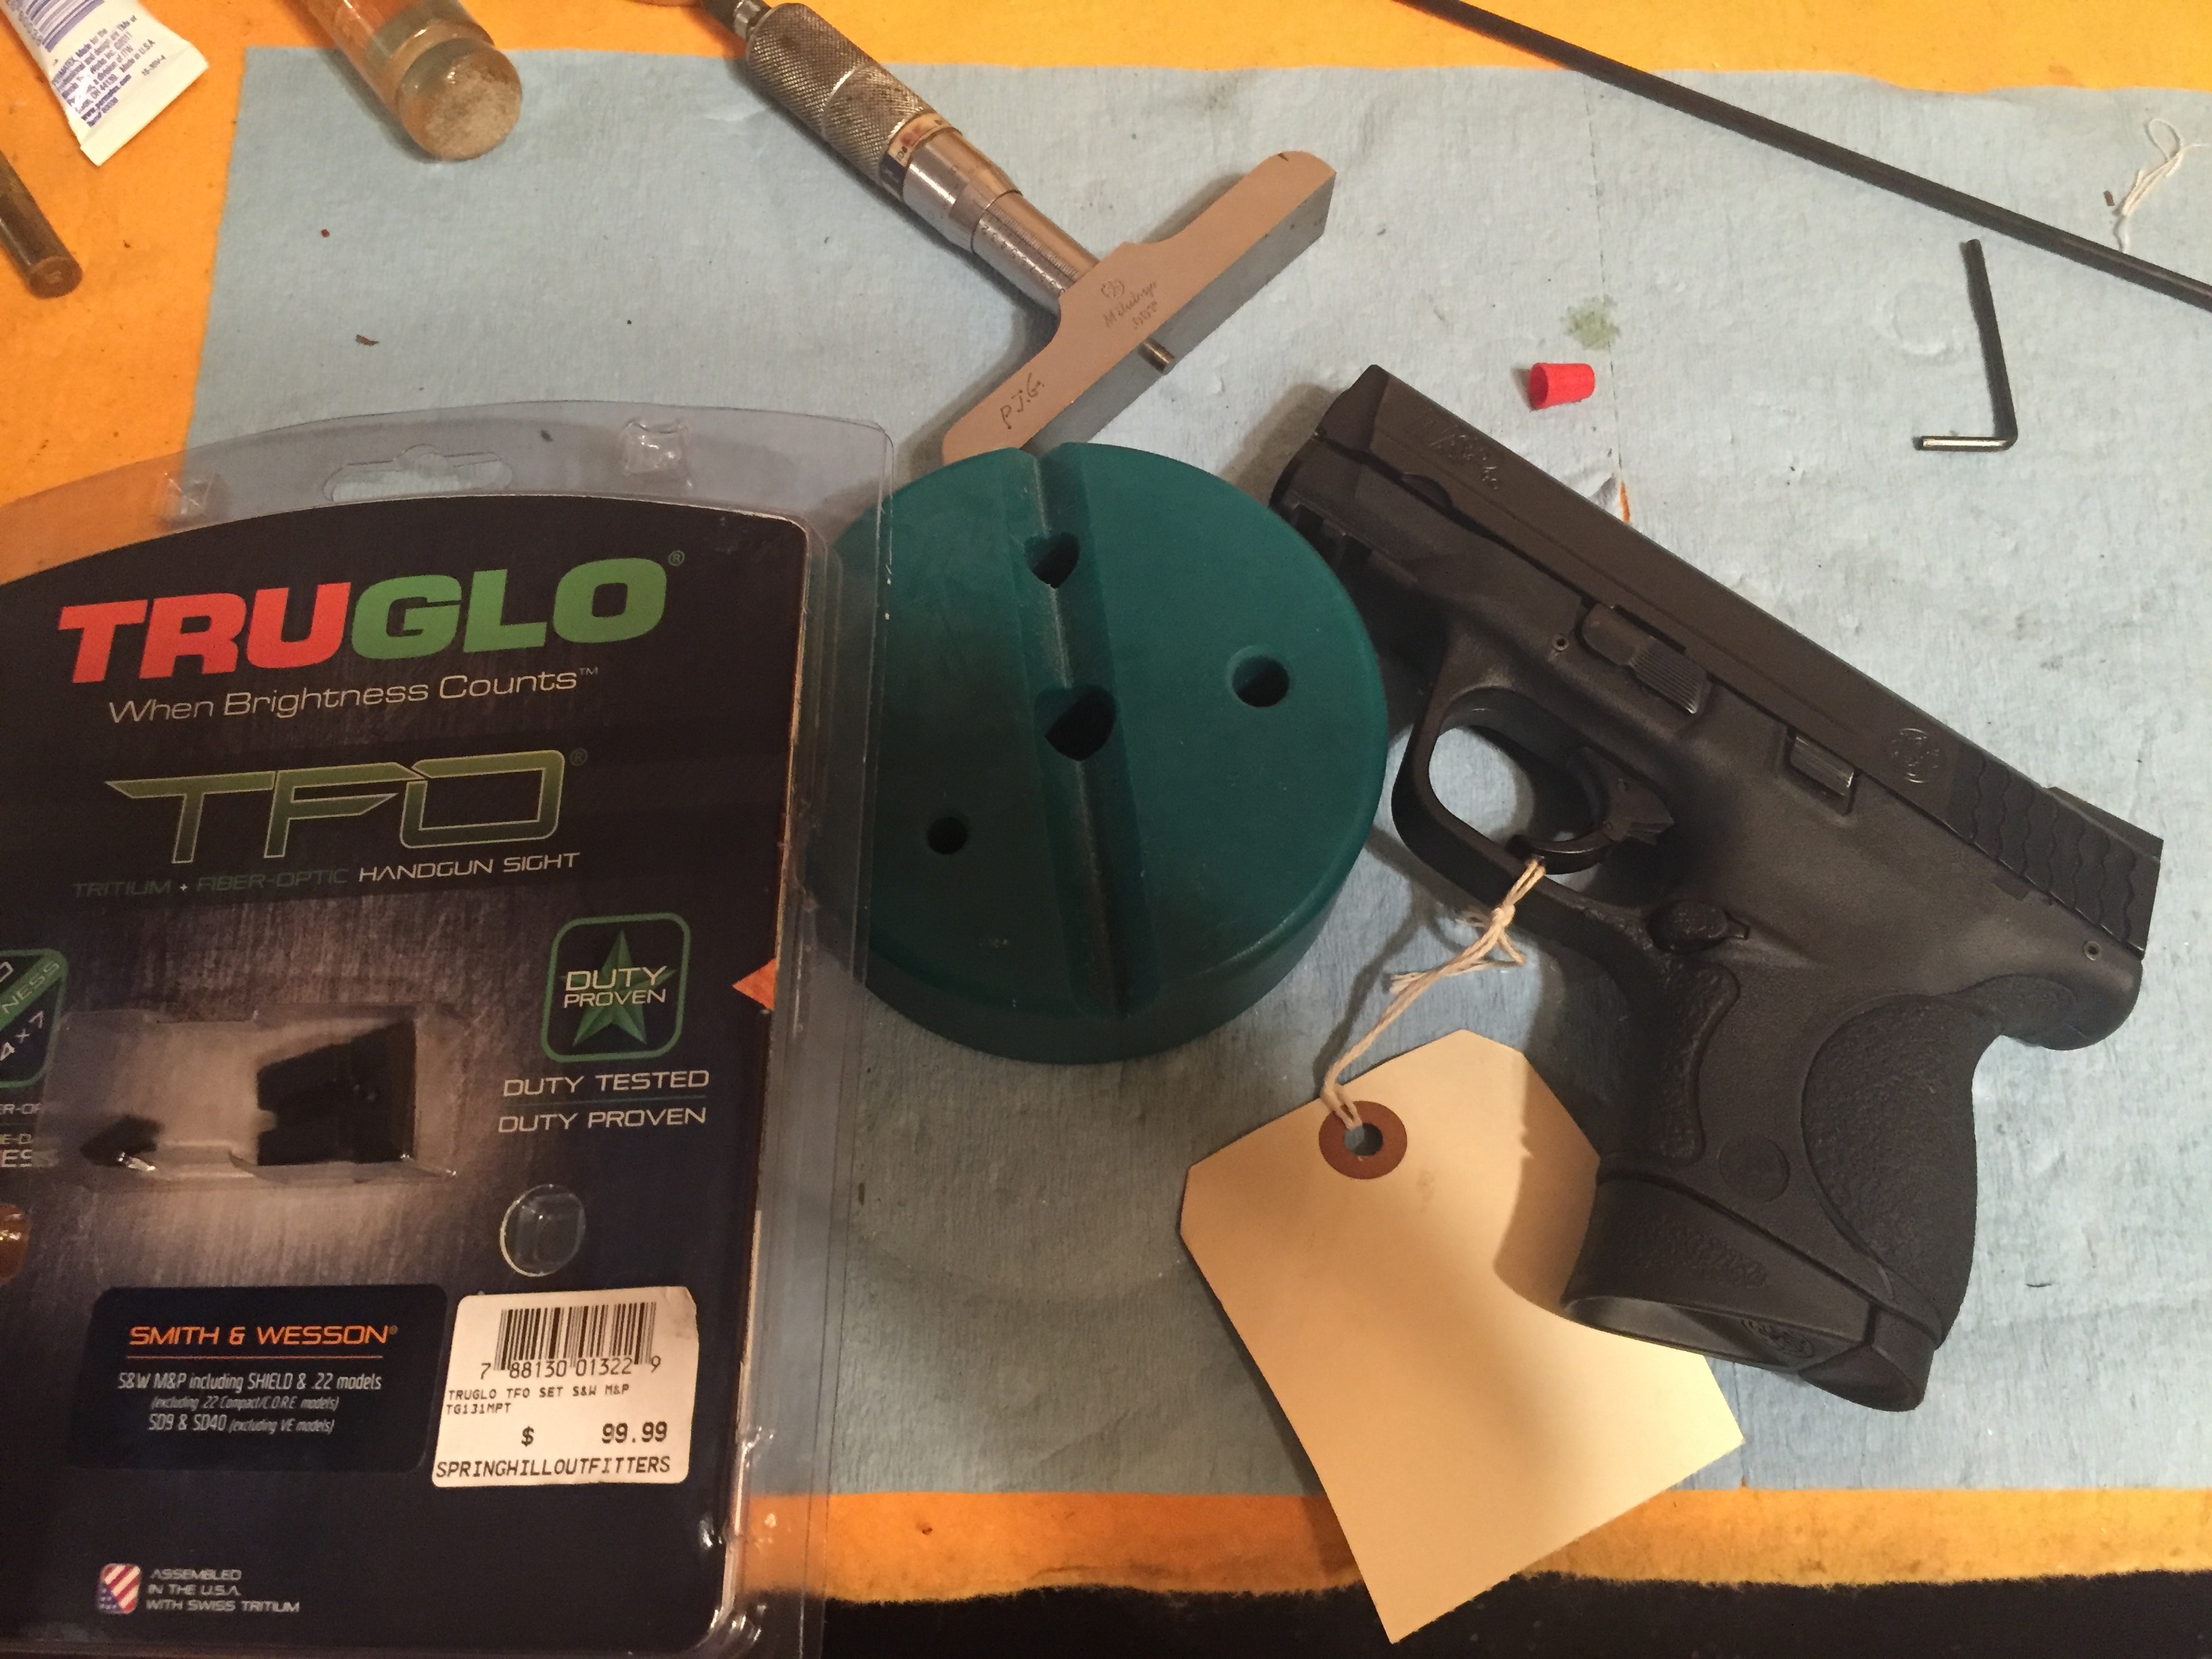
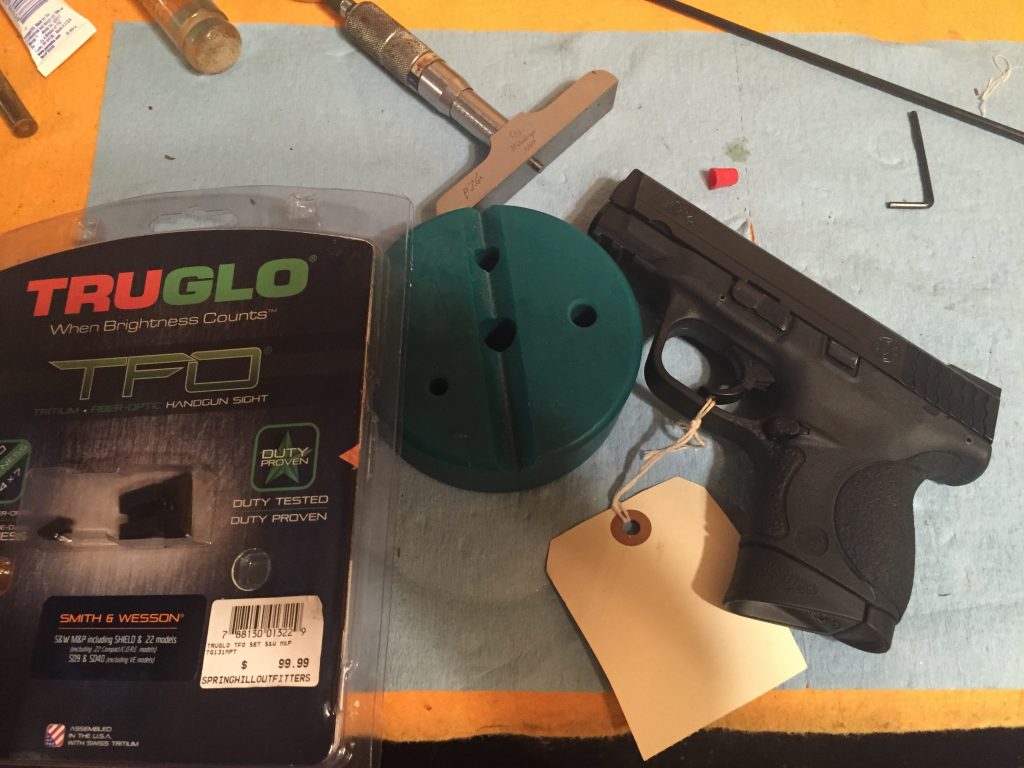
I had a neat job come into the shop recently. Not because the work was especially challenging. It was just a simple Marlin model 60, brand new in the box, with a request for a trigger job. 

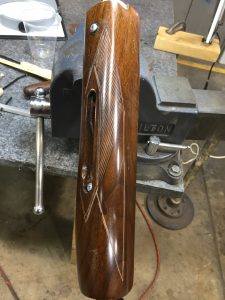
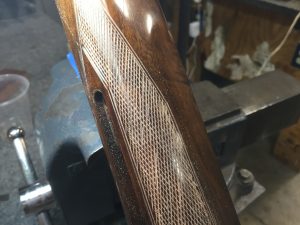
No the reason it was neat was because this was my first rifle. One I still have. Although mine doesn’t look nearly this good. It’s beaten and banged. The stock is gouged and worn from years of a boy carrying it, and a brick of 22s, around a farm plinking at anything that looked good. I don’t know how many rounds have been through my little Marlin, but it’s uncountable.

However, one summer, I decided for some unknown reason to take the trigger assembly apart. Maybe I thought I’d clean it. Maybe I wanted to see the inside. I don’t remember. What I do remember was springs and parts going everywhere. I also remember being terrified to tell my dad. I believe it took the entire summer of pretending it still worked while secretly trying to get the thing back together. I had no manual, no reference books, and NO INTERNET. Can some of you remember what that was like?

Wargames menu selection
The only internet I had back then

Eventually my Marlin went back together and I couldn’t have been more relieved. I swore I’d NEVER take it apart again. And I haven’t.

Trigger assembly of a Marlin model 60

And then this job came in. I have to say, I was geeked to work on this little rifle, and scared all at the same time. Despite years of experience and training, I still remember being that 13 year old kid who was afraid of dad. Heck, I’m still afraid of him, and he’s been dead 14 years.

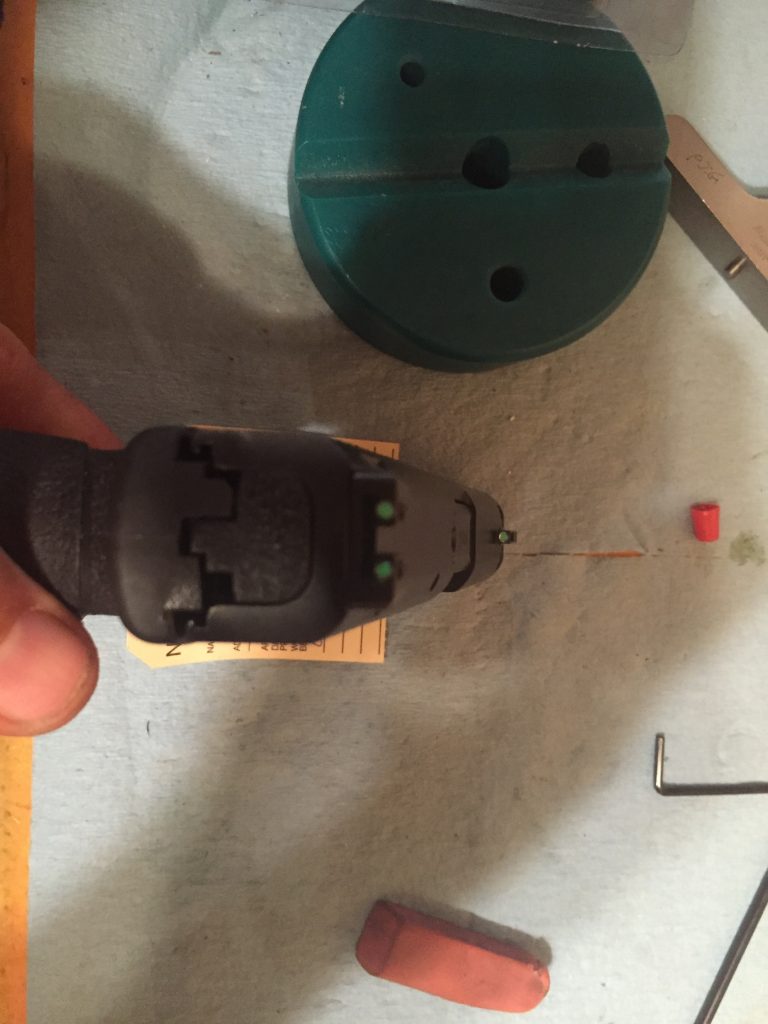
Before we took the gun apart, it needed to be test fired to make sure it worked. Luckily Spork was hanging around and there was a squirrel mocking us through the window. I handed him a few rounds and the rifle and admonished him to be careful. He returned shortly with meat for the table and one less fuzzy tailed rat running around the farm. It worked fine.

Another shot of the workings of a Marlin 60

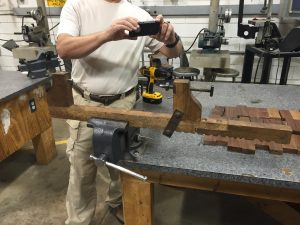
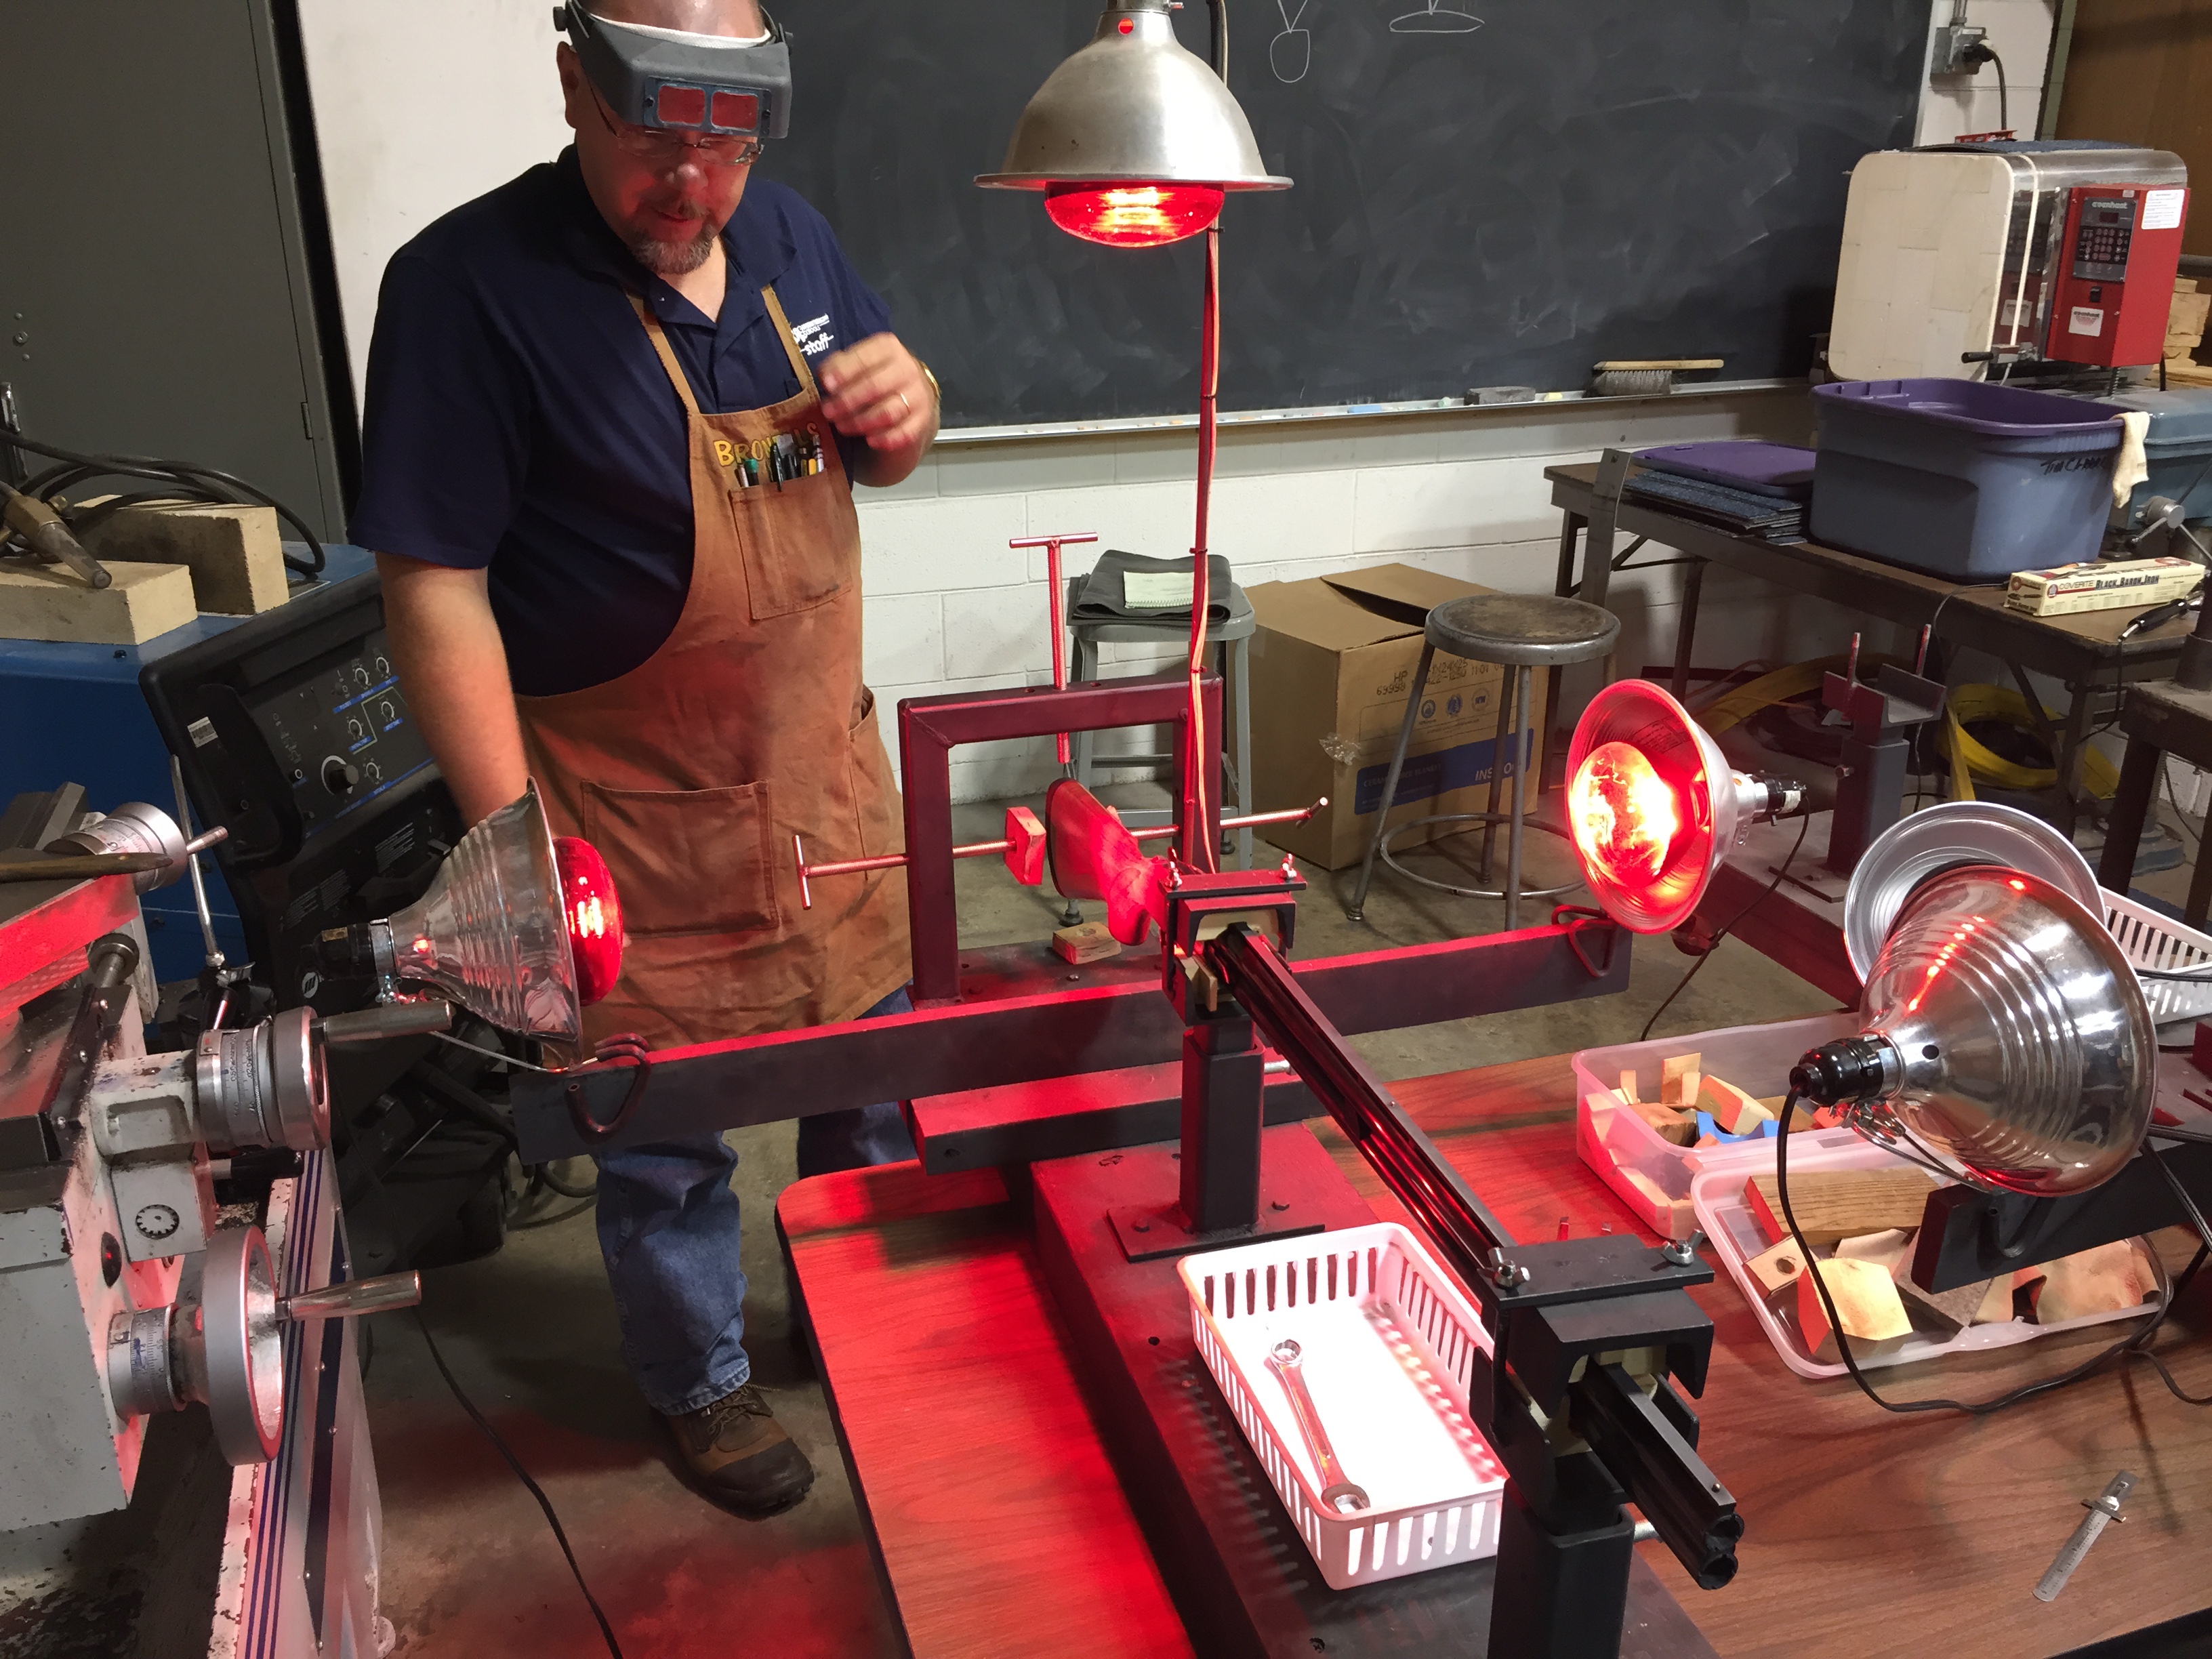
I didn’t have a digital camera back in the 80s to take before pictures with. Now my camera sits on the bench, as important of a tool as any I have. Once the fiddly bits go flying, it’s mighty handy to have shots of the assembly when it was working correctly.

Transfer bar before polishing

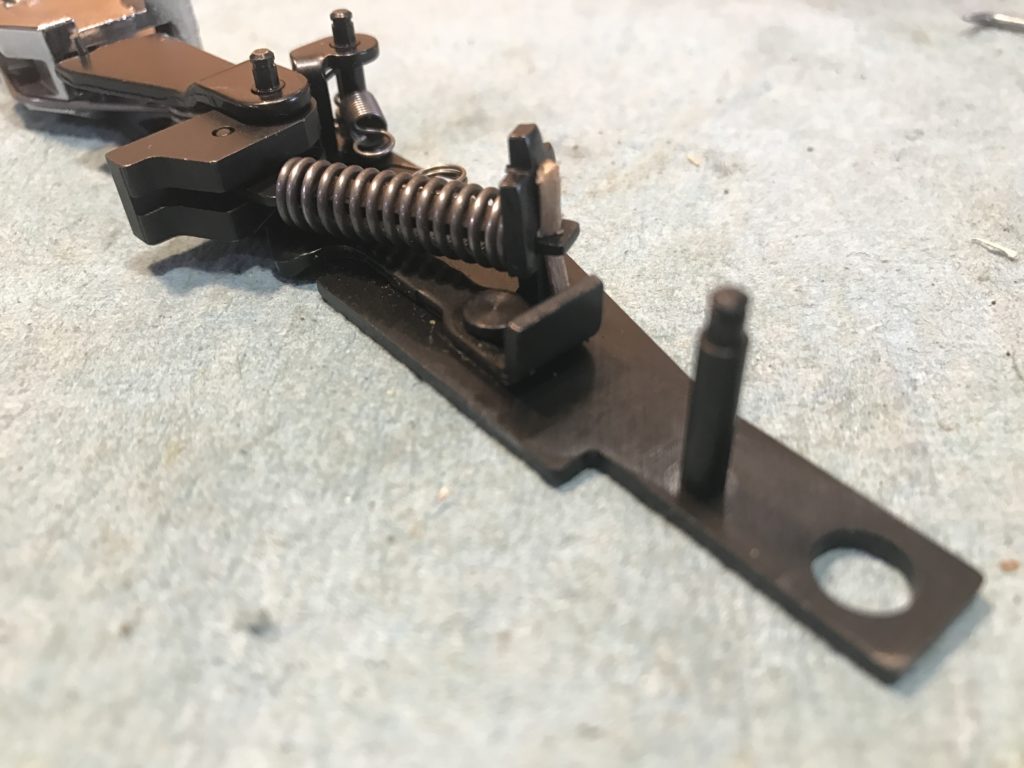
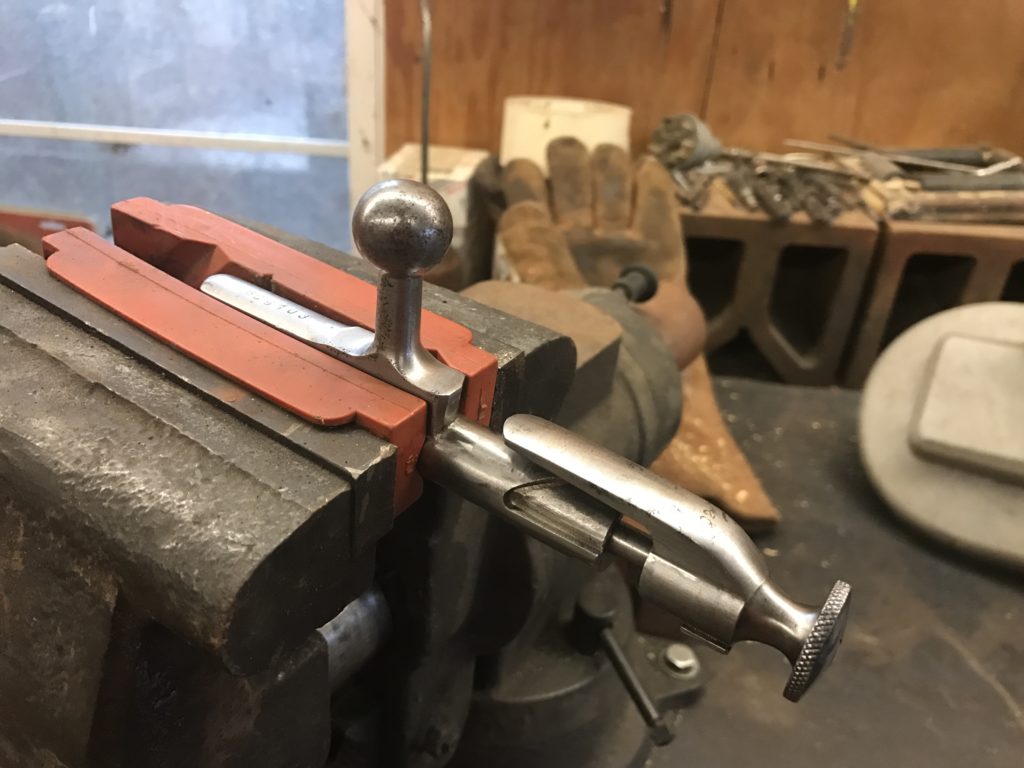
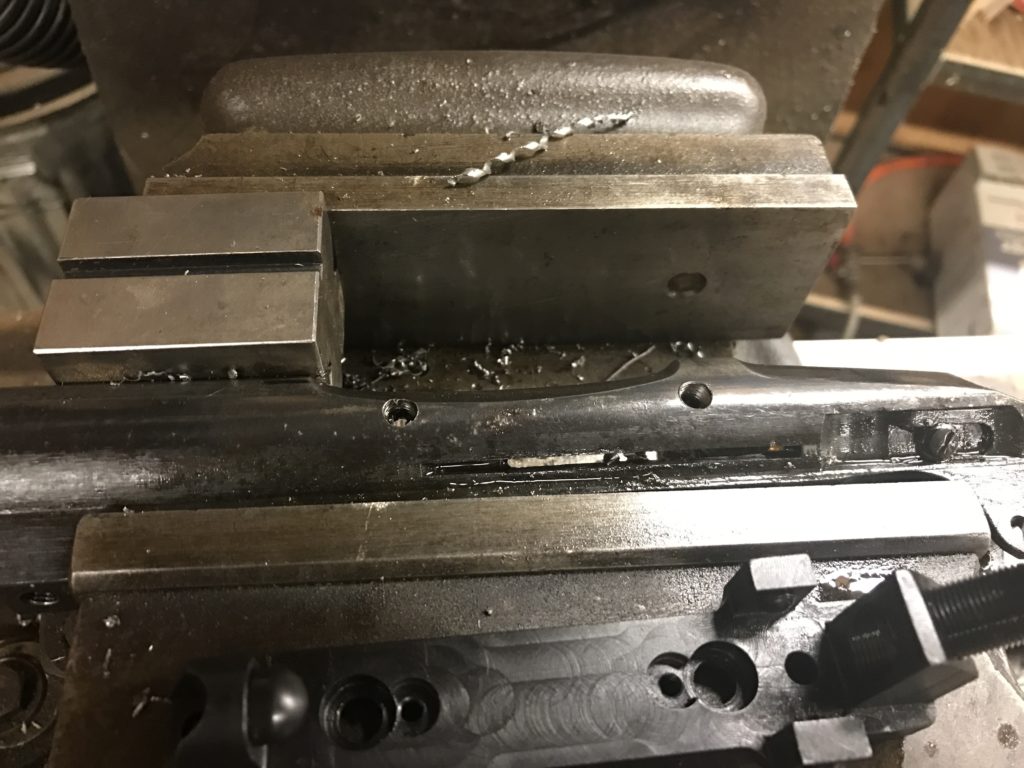
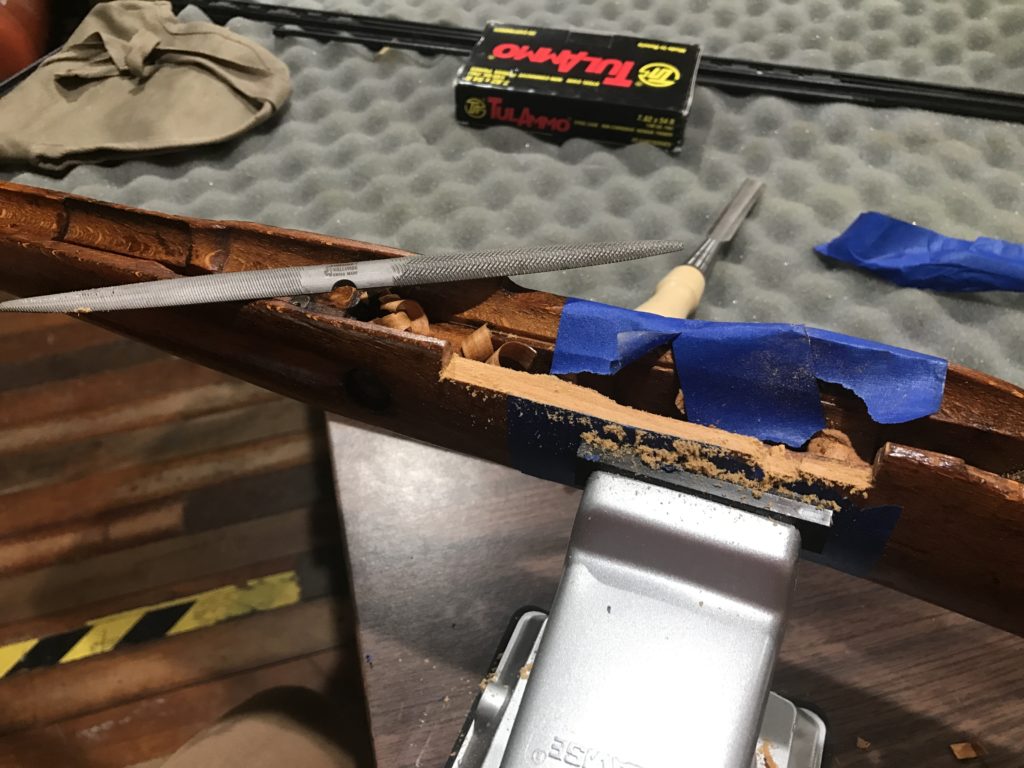
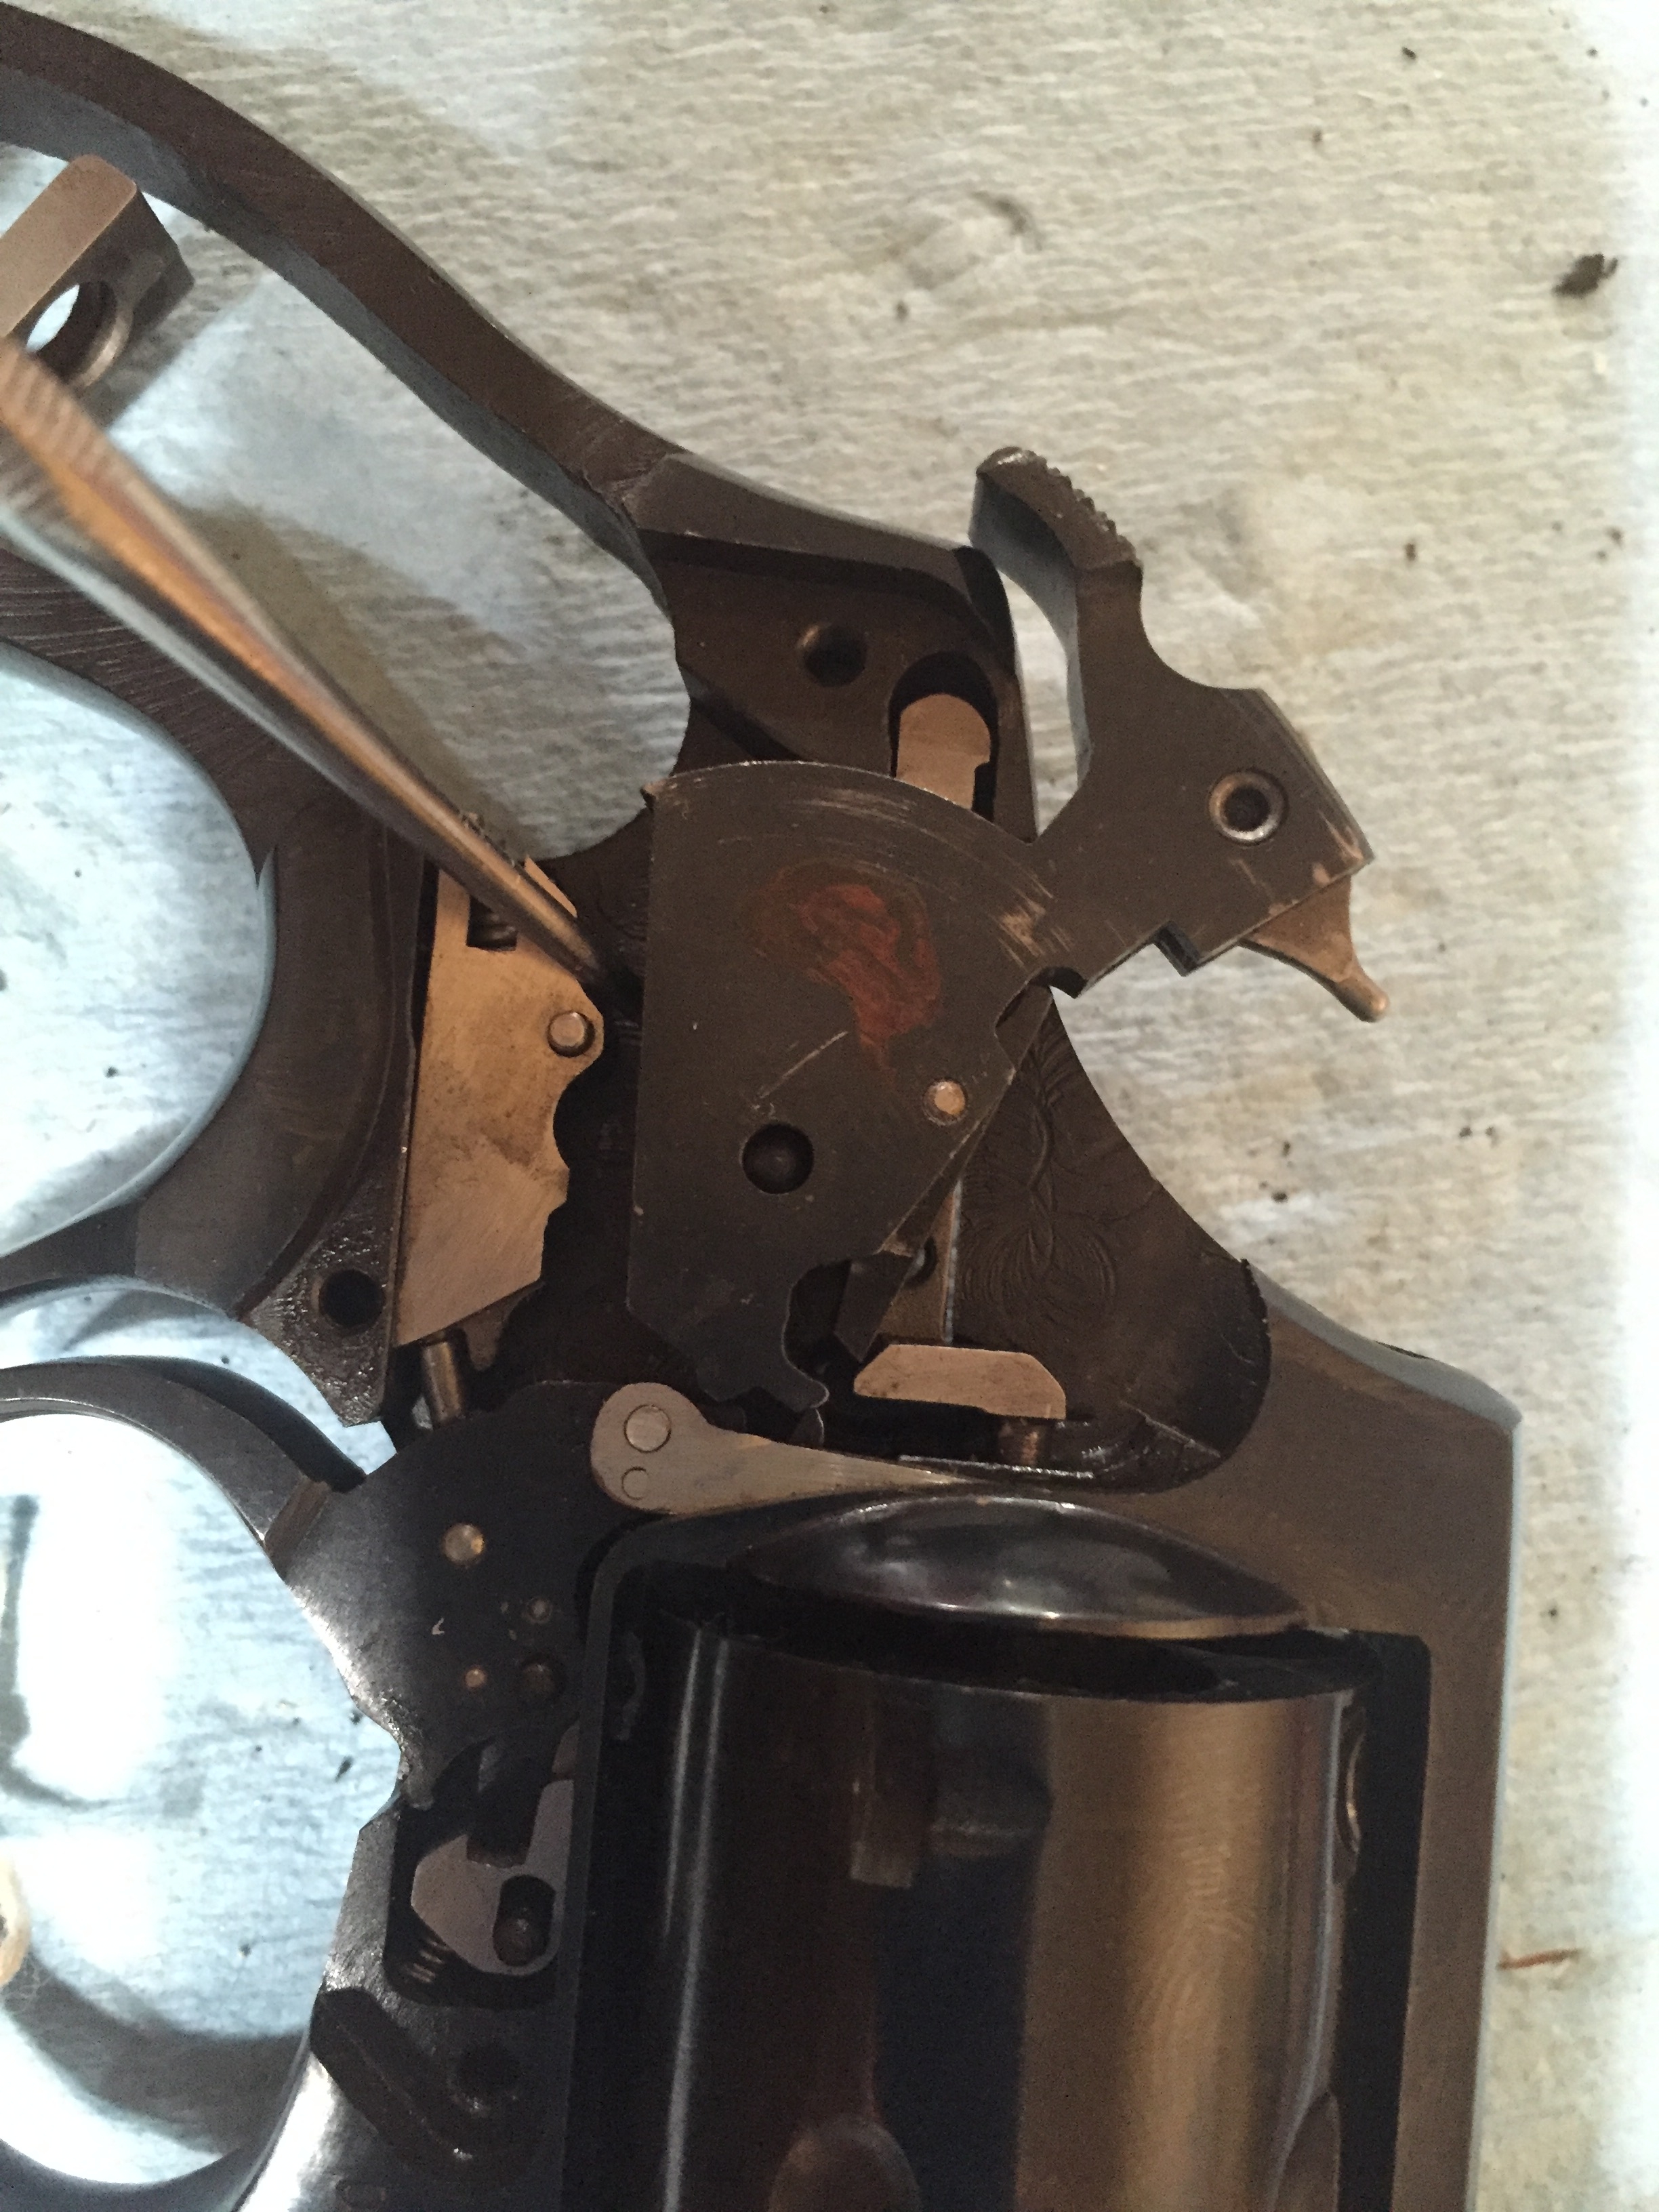
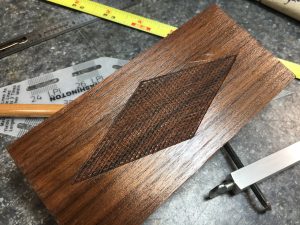
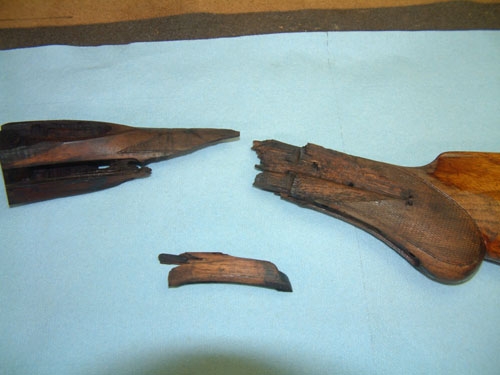
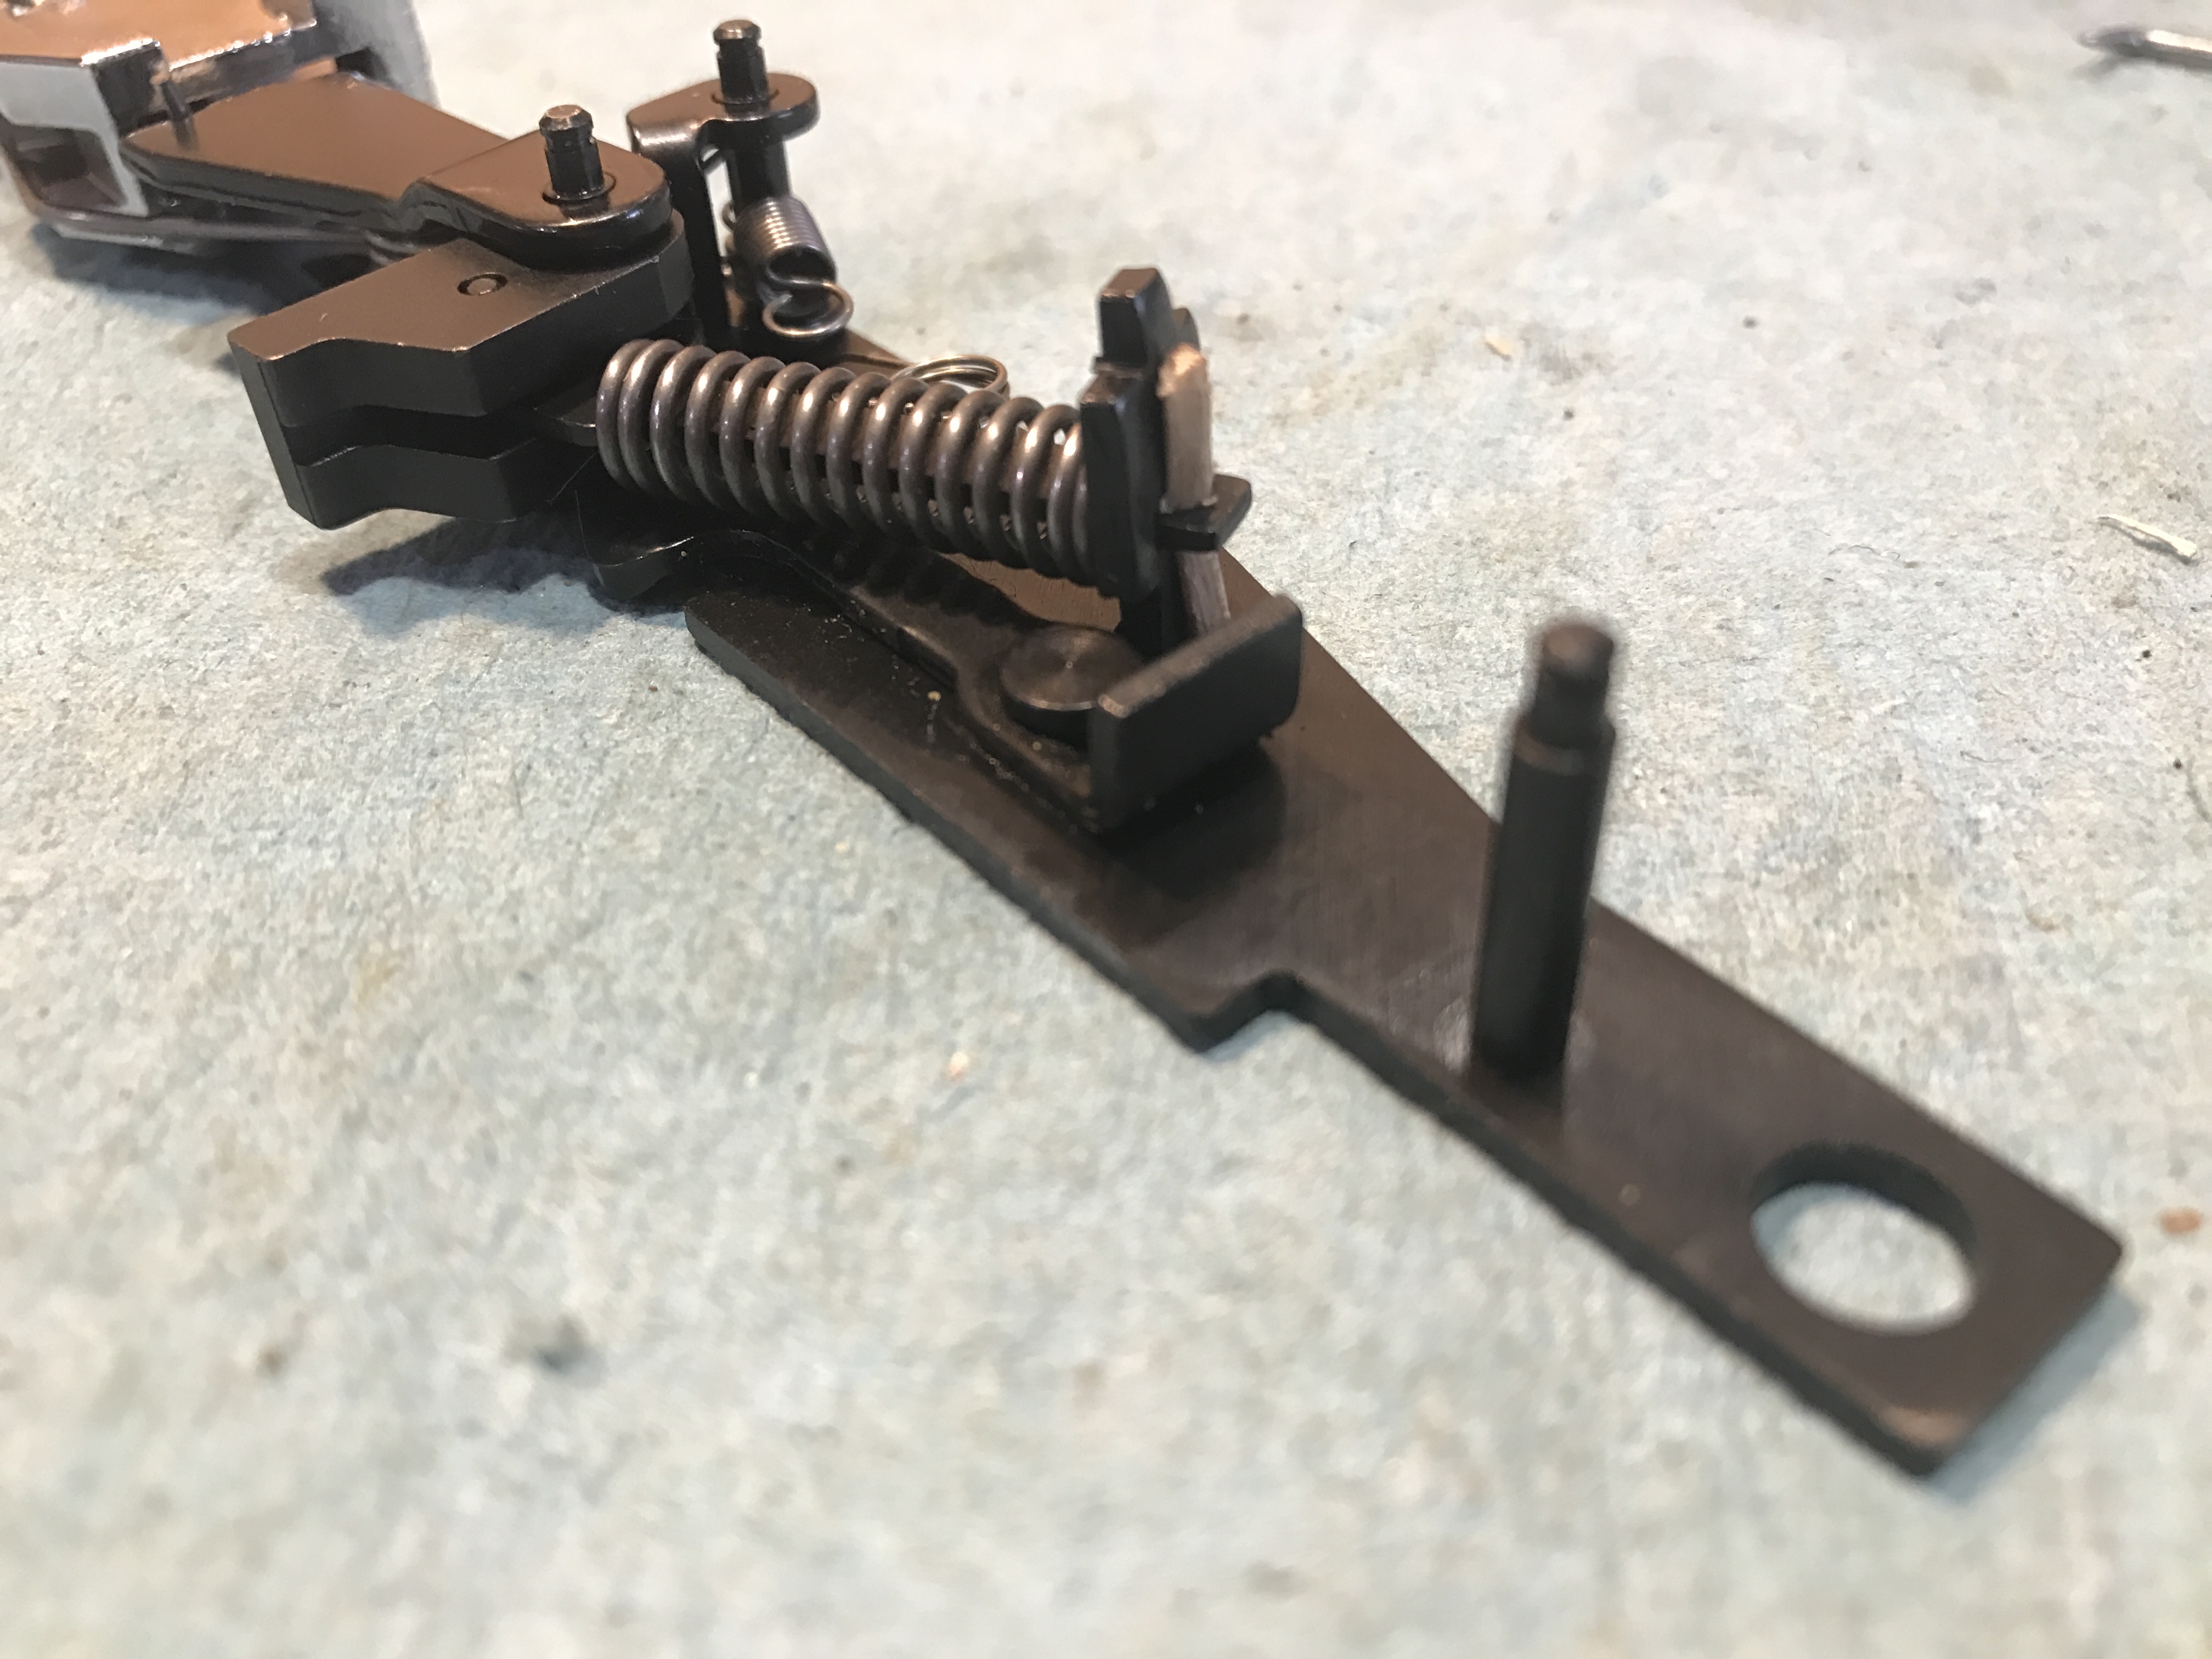
The customer had brought me a spring kit for the gun, along with a new target trigger. To get everything installed, nearly everything in the gun had to come apart. In the picture above, you can see a wooden piece capturing the hammer spring. Just below that you see a metal piece that turns up to vertical. This is the transfer bar that the trigger presses against to trip the sear and release the hammer. This is predominantly what the trigger job is on this rifle, as most of the friction happens right here.

The polished surface of the transfer bar

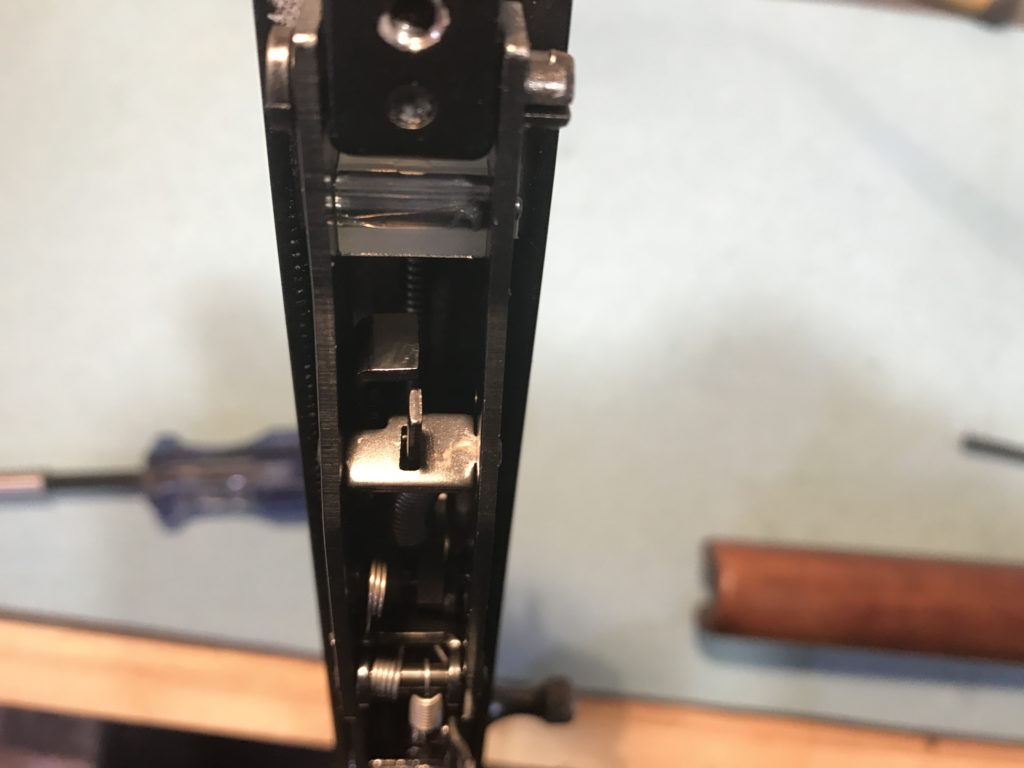
I forgot to take a picture of the transfer bar after polish. Take my word for it. You could shave in the reflection.

Marlin model 60 target trigger
The target trigger and new spring, installed.
Marlin model 60 target trigger
Side view of adjustment screw

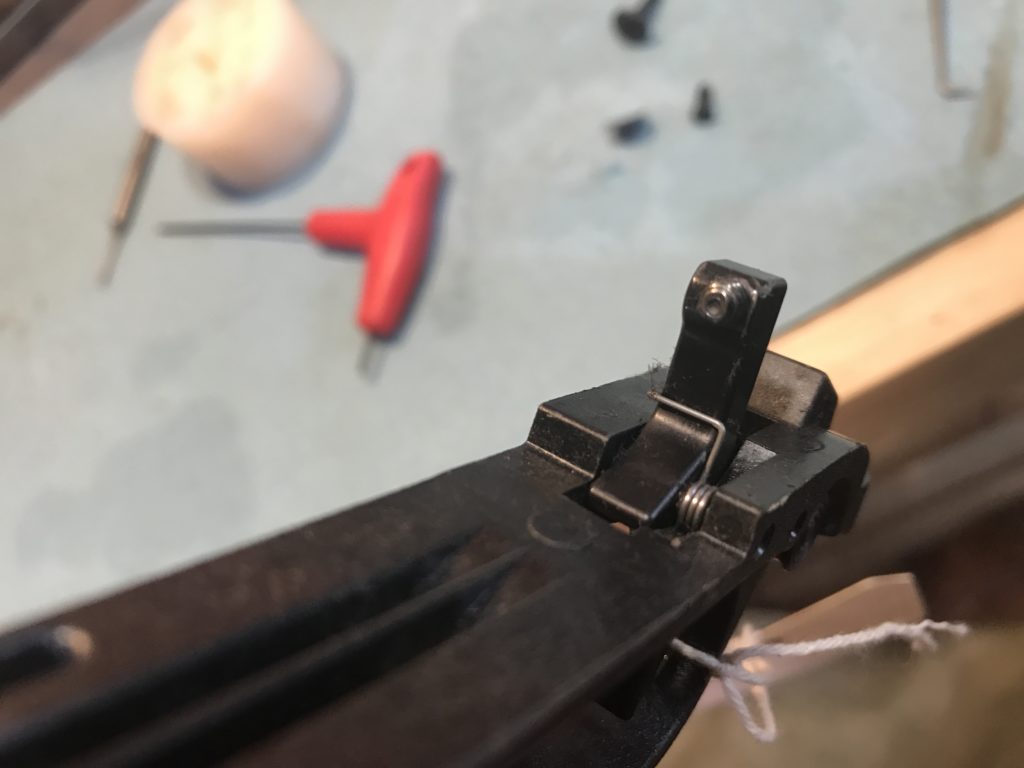
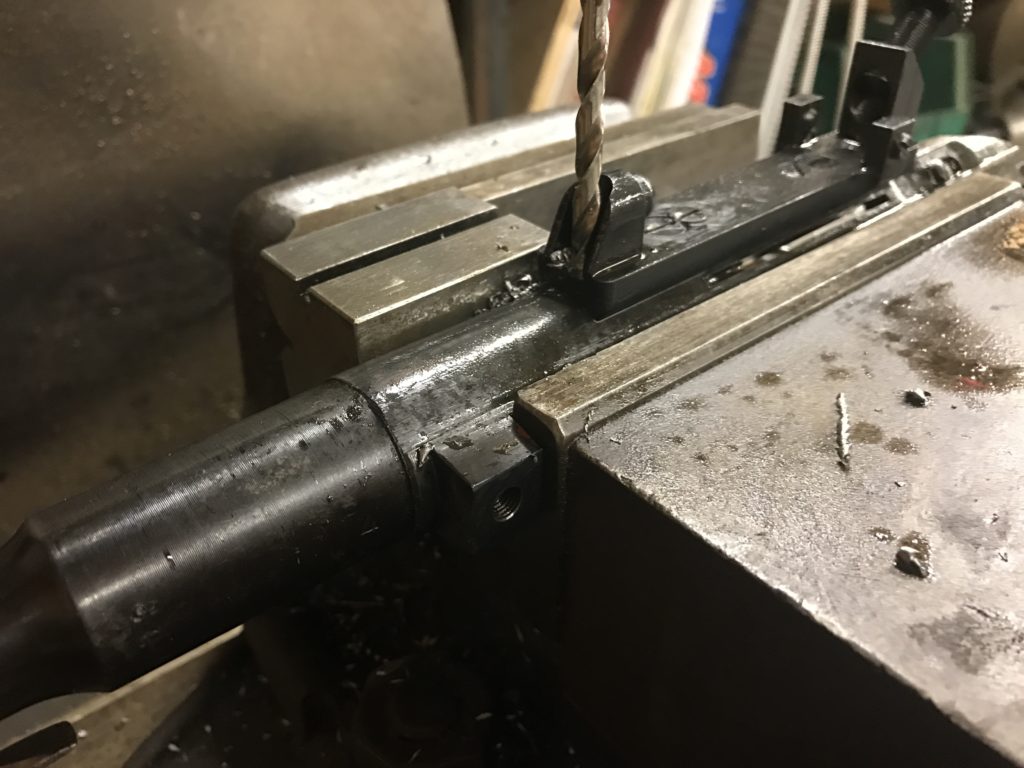
I wasn’t in love with this target trigger. I felt the bearing surface of the adjustment screw was too small compared to the actual bearing surface of the trigger and transfer bar. But, I didn’t buy the thing, I just install it. I would have preferred to see a smaller screw size, but then have two side by side for even pressure. Or some other arrangement. The adjustment screw was an off the shelf allen screw so the head of it was very sharp and rough. I buffed it as much as could be done and then set about adjusting the screw for take up.

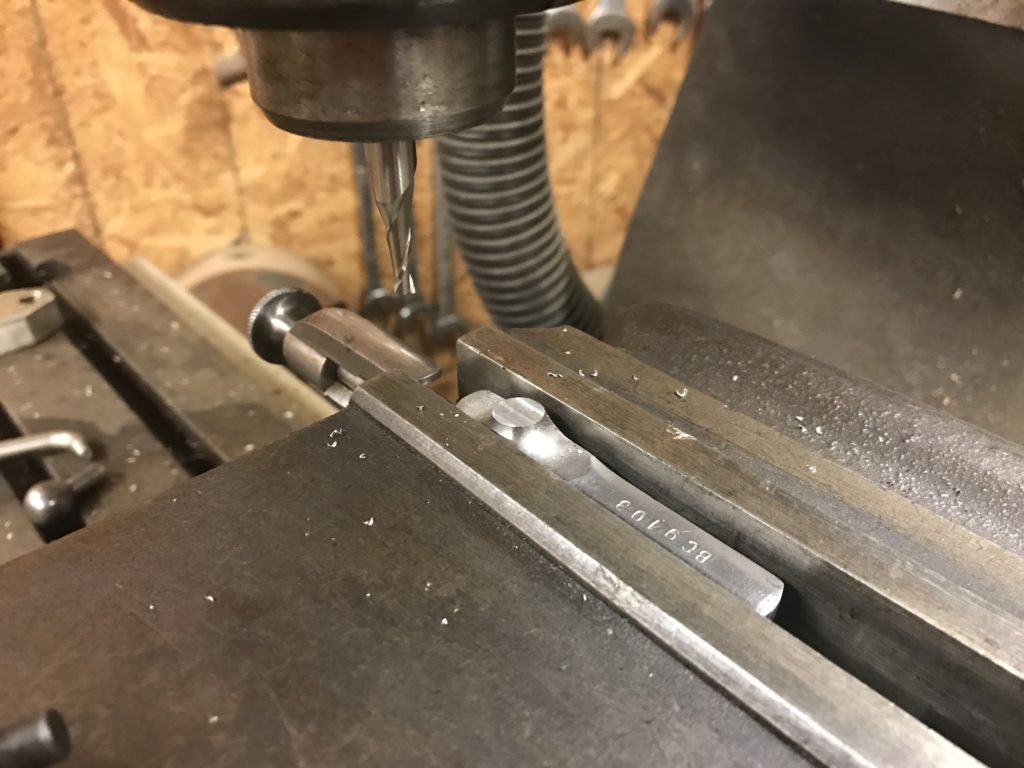
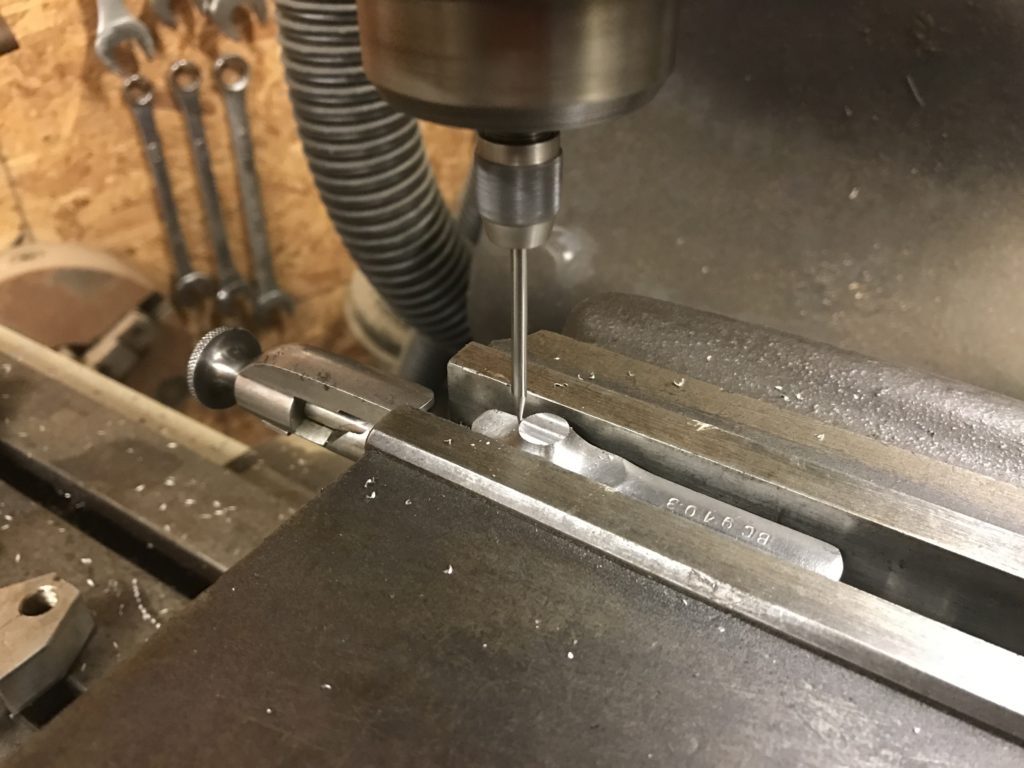
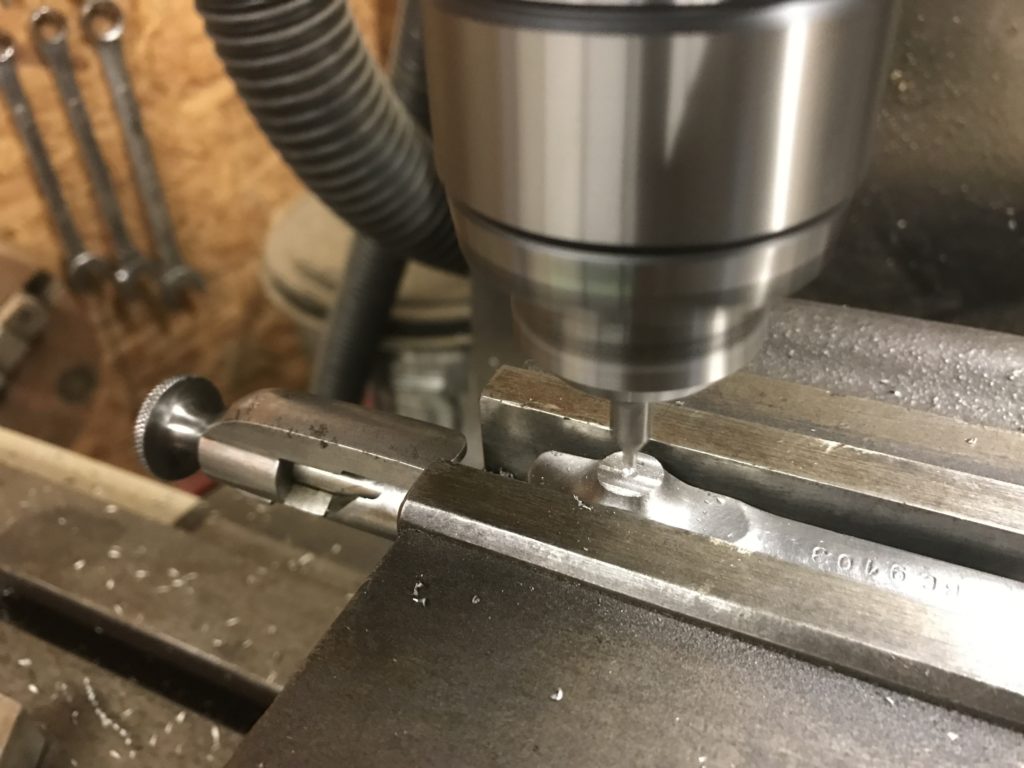
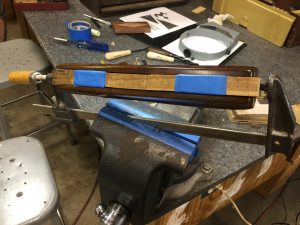
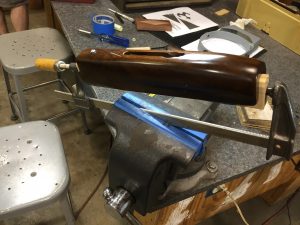
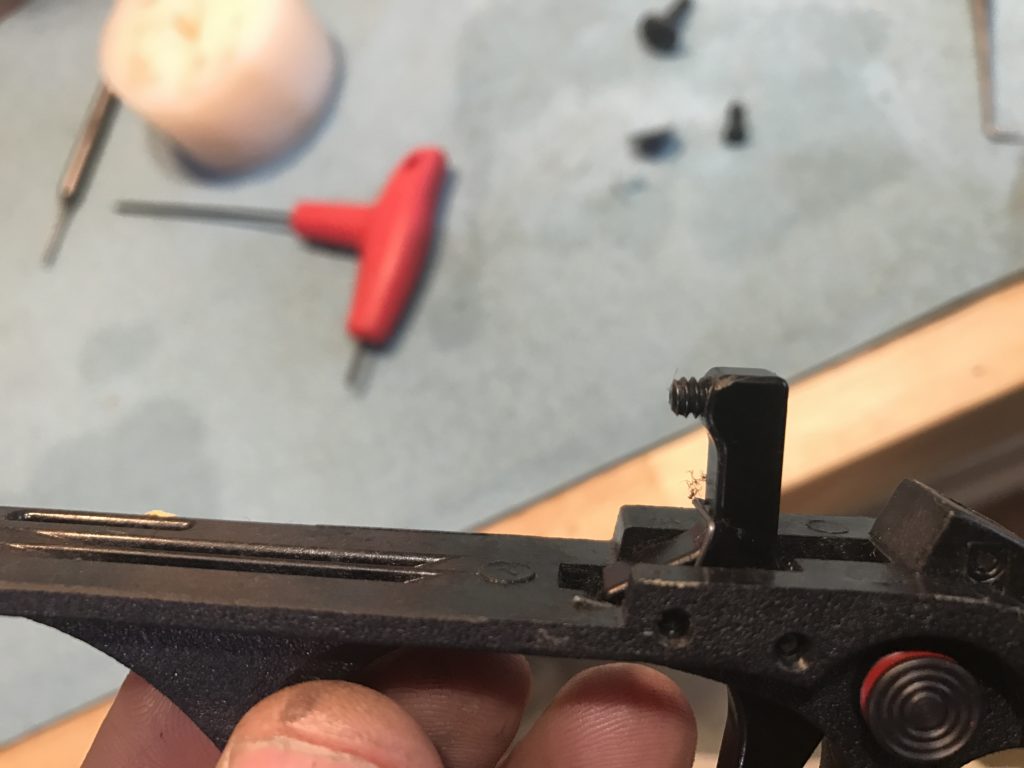
The process was, extend the trigger adjustment screw a bit. Just guessing. Then put the trigger in the stock, with it’s requisite screw and nut. Then put the receiver in the stock with its screws. Insert a brass snap cap into the chamber and test fire a few times. Hmm, still needs more. Then take the gun completely apart, turn the screw pictured above 1/4 turn, and reassemble. Do this till the gun doesn’t work anymore, and then back it down till it’s fires but had very little take up. It only took about 20 times to get it right.

Congratulate self and then put the gun together for real for test firing. The gun now no longer works. Scratch head, then realize that out of laziness, on about the seventh time you put the gun back together you stopped putting all the receiver screws in and the gun wasn’t torqued down all the way. Meaning the adjustment wasn’t correct. Sigh.

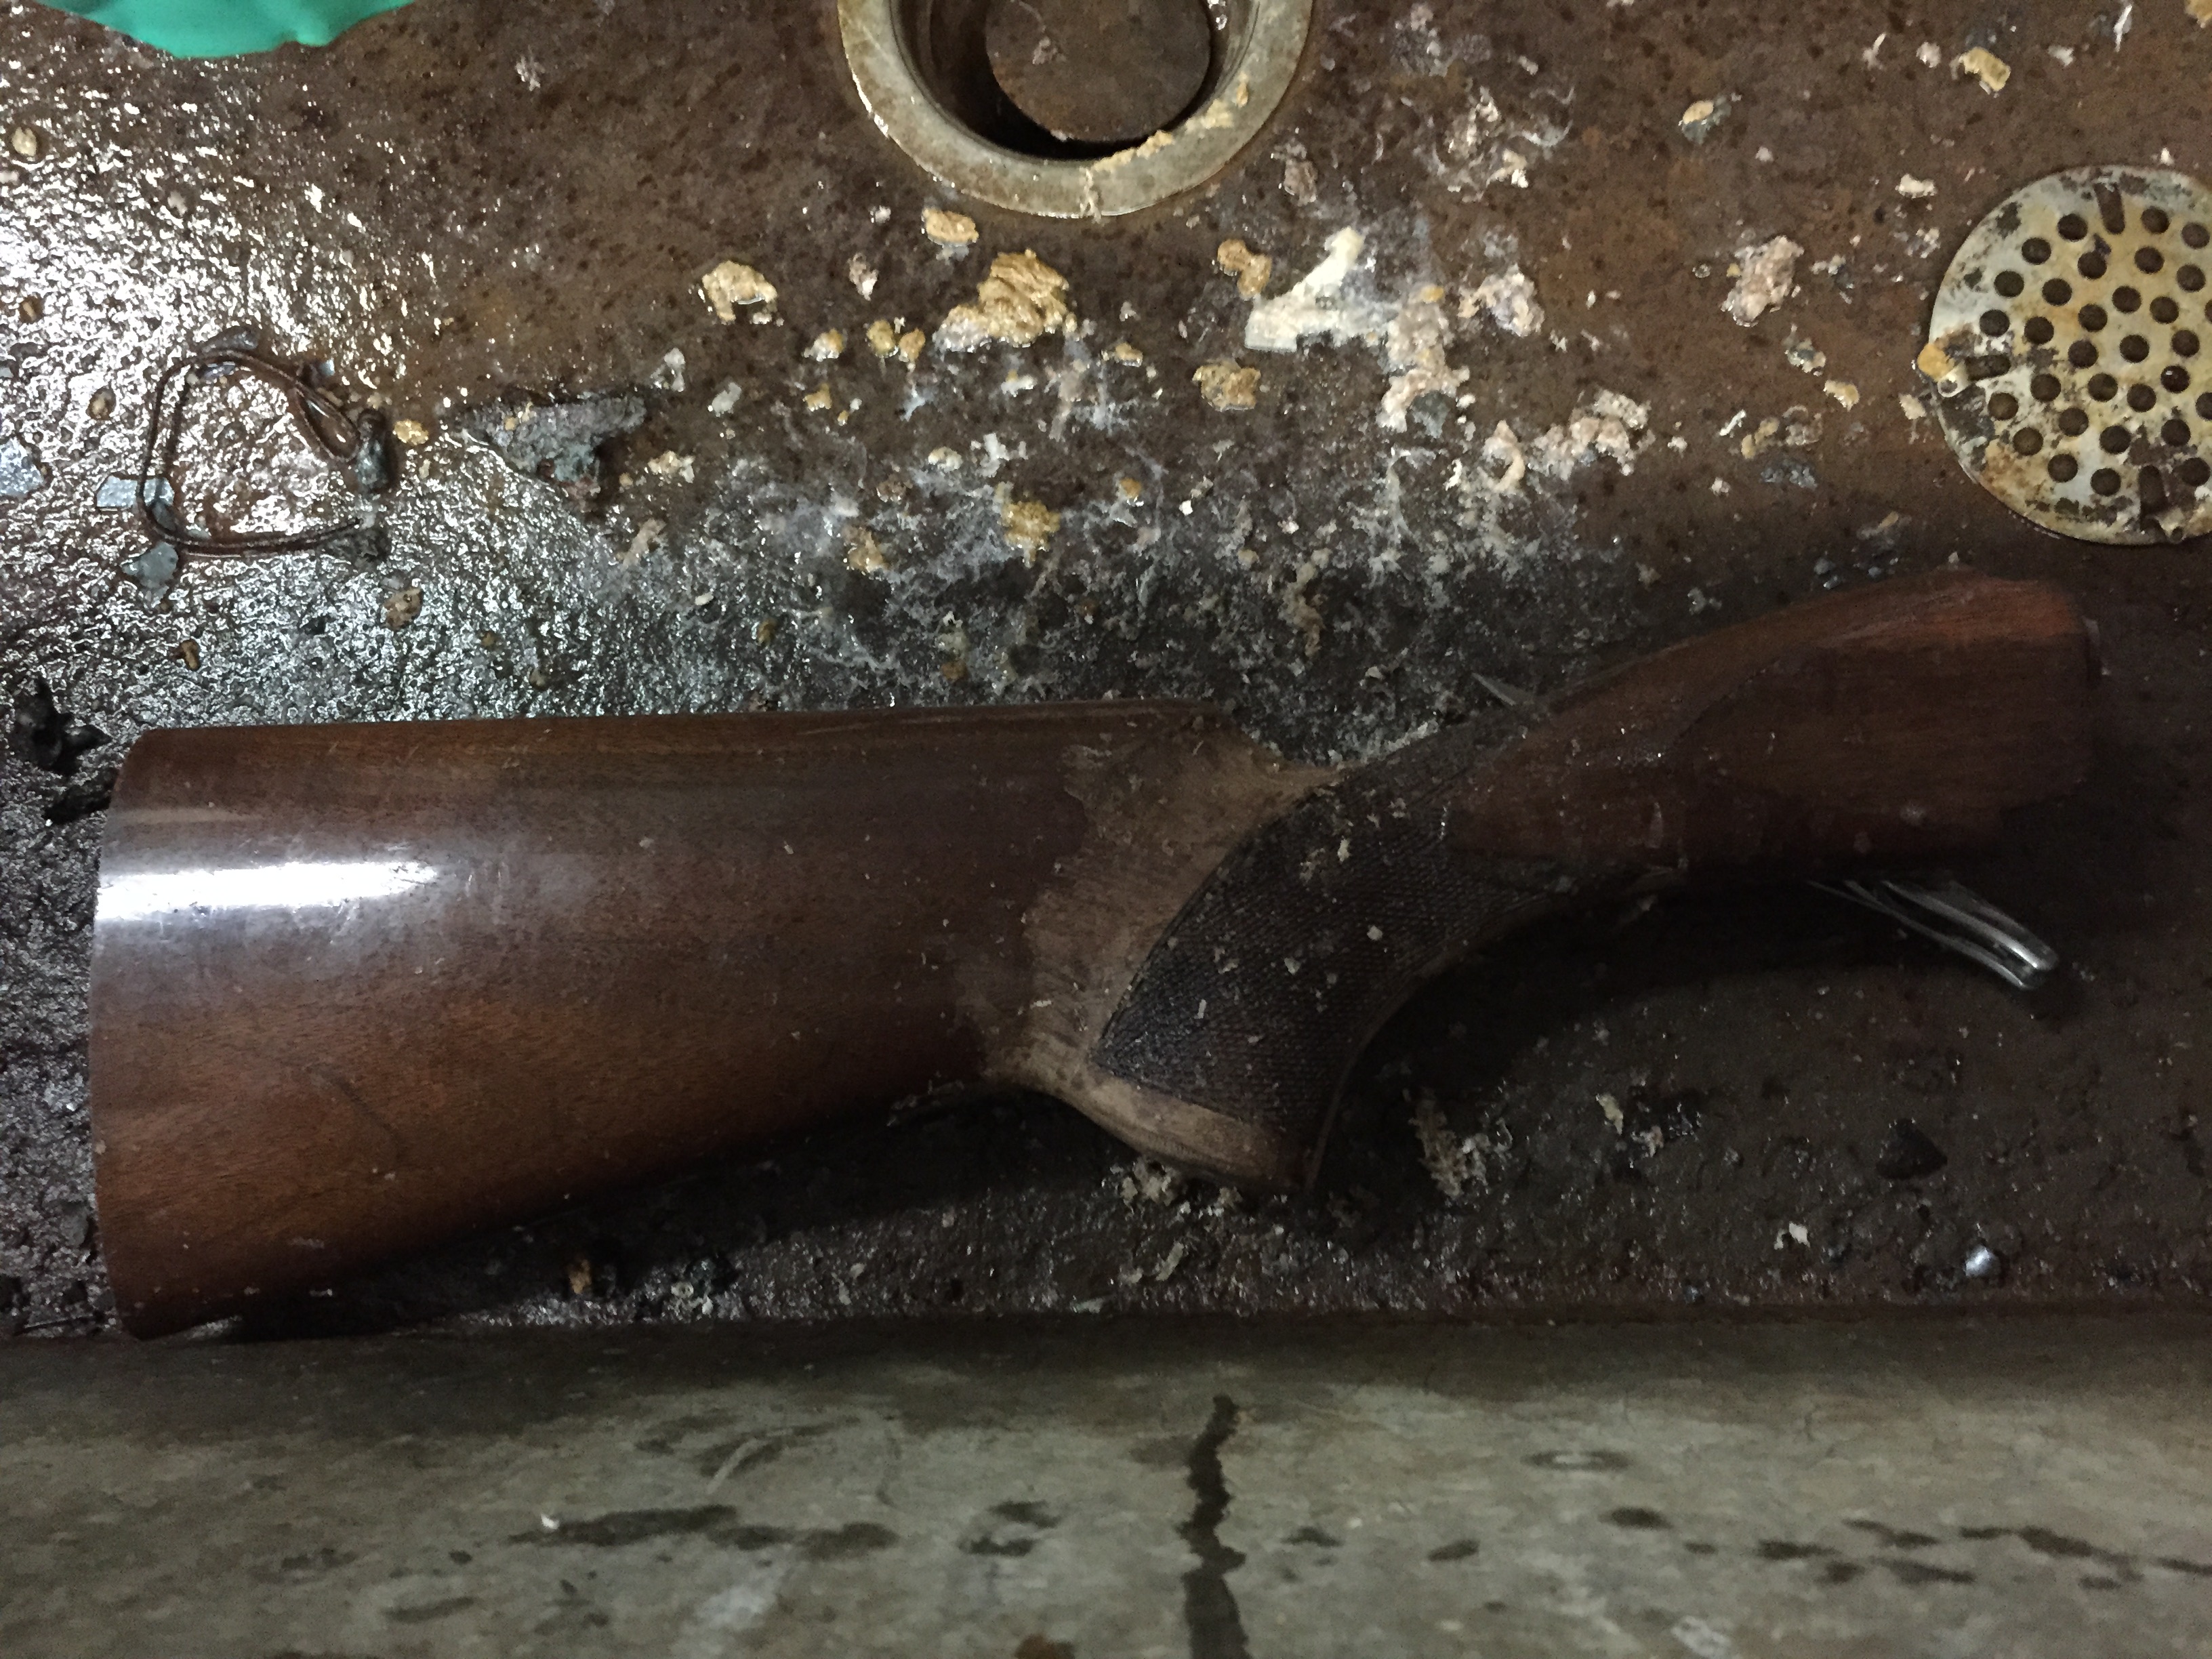
Disassemble and do it all over again. Twenty times. Test fire, and all is good. Disassemble the gun again. Loctite the set screw in place and put the whole assembly in the cleaning tank for a bath and a lube. Blow out all the lube, reassemble the gun for the 50th time, and call the customer.

If I did these trigger jobs on this model gun all the time, then I’d be a lot faster. But when you are using unfamiliar aftermarket parts, it takes a bit of head scratching to figure it out the first time. However after test firing, the gun actually fired very well. I liked the trigger and the break. The parts kit came from MCarbo. Maybe I’ll order a kit for my old, tired gun.

The best part of the whole job was Spork. After having dispatched the squirrel on that test shot in the beginning, he showed up later that day and asked to borrow the Marlin 60 to go squirrel hunting. (No we don’t loan out customer guns.) He said he finally understood hunting and why it was enjoyable. It was both relaxing and exciting at the same time.  And when hunting, when it was time to make the shot, everything else faded away. Distractions, sisters, conversation, noise. You focused 100% on making the shot and you had instant results.

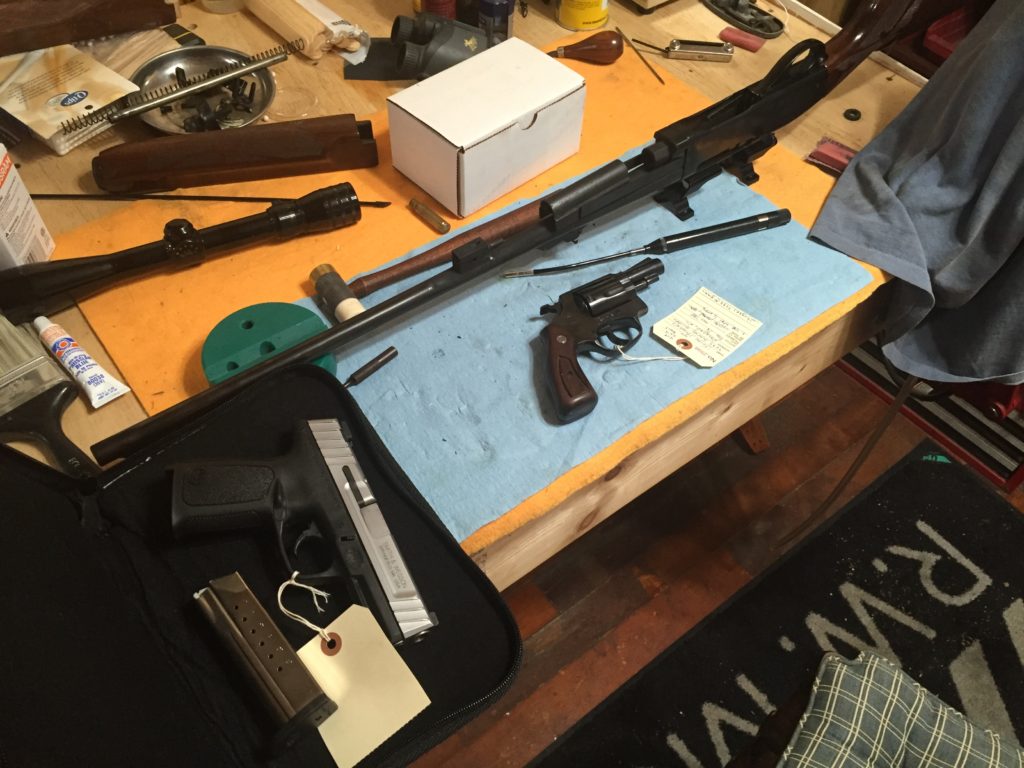
I had already put the customers gun away, test fired, cleaned and ready for pickup. But I did have a nice Ruger 10/22 leaning against the wall that I’d robbed a part off of for another customer. I had the replacement part right here. Maybe he could use that? A quick installation and I sent him to the back pasture with a box of shells, and instructions to not return till he’d shot them all and verified the scope was aligned. He showed up about an hour later, all dialed in and with an empty box of shells.

I think I need to go dig my model 60 out of the back of the safe and clean it up and give it to him. Maybe we can get another million rounds through it with the second generation.

Installing a scope on a mosin nagant

Recently I received a call from a customer asking if I could mount a scope to a Mosin Nagant. He said he had the scope, the mount, drill bits, everything. He’s bought a nice little kit off of Amazon that had everything you needed. He just needed it mounted. It was to be a Christmas present for his son and he’d watched a YouTube video of how to do it but felt it would be better to have a gunsmith do it.

Having gone back and watched the YouTube video he referenced, I sure am glad he brought this thing to me rather than attempting it himself. Some of the key parts that make the thing work properly aren’t installed by anyone I can find showing their methods on the interweb. Reading through the reviews on some of these things, the expected poor results are all over the internet since people aren’t installing them correctly.

There are three main parts to installing this kit. The bolt, the mount itself, and modifying the stock to accept the new mount.

The bolt

Step one was to change the bolt.

The before picture of the Mosin nagant bolt

On some rifles you heat and bend the bolt. This gives clearance from the bolt handle to the scope. It also makes the bolts more “Americanized” and more agreeable to an American shooter. This particular bolt has a short body and the kit came with a new bolt so we just lopped off this old one with the trust Porta-band.

Machining flat the rough cut face of a bolt
Machining flat the rough cut face

Once the handle was off, I moved over to the mill where I machined the face perfectly flat. This made for proper mating of the faces and also made it look considerably better.

Locating the center of the bolt handle face

Once it was flat, I had to locate the center of the circle. This was harder than it looked because the metal was not actually round but misshapen somewhat. I got it as close as possible for the condition of the forging. Within a few thousandths.

Center drilling the hole in preparation for final drilling

Once the center was located, I locked the mill in place and center drilled the initial hole.

Drilling the hole for the new handle.

Then I drilled the hole itself. There is a supplied drill bit and tap that comes with this kit. The drill bit cut very poorly and was obviously made of jello or butter or something equally ineffective at drilling metal. I had to take it to the grinder several times to sharpen it in order to get through the few drilling operations of this job. However with sharpening, it did do the job so it was good enough for this kit. I doubt it would have worked for someone trying to do it like on the YouTube video.

Tapping the 6 x 1mm threads

I wasn’t brave enough to power tap this hole. I simply rotated the mill by hand and everything tapped just fine.

Bolt handle installed and timed

Timing the handle is an issue. It needs to be torqued to the correct spec, and line up at the right position at the same time. I must have been living right this day because it came out perfect on the first try.

I’d given the customer the choice of using Loctite to secure the bolt, or TIG welding it in place. Were it my gun, I’d have welded it but the cost of the extra work was more than he wanted to do. For plinking at the range, a goodly amount of red Loctite will be fine.

The mount

There was a good bit of fiddling with the scope mount to get it in the correct position. This scope mount is made for the eye relief of the standard Mosin Nagant stock. However my customer had added a butt pad/extender to his gun so the eye relief had changed. That meant I needed to move the scope mount back a bit to try and compensate. After positioning the mount about 10 times, I finally had it where I wanted it and marked my position. But first, I had to figure out how this mount was made to go on.

The kit comes with two larger screws, two smaller screws, and two ground stainless pins. There were six holes, and six pieces of something that went into the holes. The larger screws hold the mount to the scope. The smaller screws are mechanical locking screws that hold the large screws in place and keep them from backing out. The pins were index pins that actually hold the mount in place. Easy.

Except the pins didn’t fit the holes. There were no instructions with the kit but the kit is sold as having everything you need to install it. I looked on Amazon for any tips from a previous installer. Nothing.

I watched the videos on YouTube. The pins were shown as part of the kit but they were never installed by the users. I think the assumption is that the screws hold the mount in place and the pins? Meh, must be extra.

Except that’s wrong. The pins are what hold the mount in place. The lock it into one position so it doesn’t move under recoil. The large screws are what keep the mount from backing off of the pins. But they don’t hold the mount in a fixed position. If they did, you’d never get the screws into the holes. They would be too tight. In reality, there is slop in the holes for the screws, as there should be. Without the pins, the mount would shift around under recoil and the gun would never hold a zero. Then the final set of small screws mechanically lock the big screws in place. Kind of a metal version of Loctite. Now that I had a plan, it was onto the work.

Drilled main screw holes in the receiver
Drilled and tapped main screw holes in the receiver

These were located, center drilled, drilled, and tapped just like the bolt hole was previously. Once they were tapped, I could mount the scope base and use it as a guide for the index pins.

Drilling the index pin holes in the scope mount and the receiver

With the mount secured in place by the screws, I drilled through with a #9 drill bit. This bit is .001″ smaller than the pins measured. This was on purpose. We want the pins to be bigger than the hole, but just barely.

Heating the receiver to expand the metal

With all the machining done, I went back to my gun room to do final installation. The index pins went into the freezer and the receiver went into the vice. I cleaned up and did some office work while the pins froze. Then I heated the receiver and the scope mount till it was toasty but not glowing red.

With the receiver hot, and therefore bigger, and the pins frozen and therefore smaller, I tapped the pins into place with a small hammer and punch. The just pressed in under force. I then left everything alone to return to room temperature. When everything cooled, the extra size on the pins locked the mount to the receiver as strongly as could be done with this setup. This is the key to this mount. The screws just keep it from backing off. They don’t actually hold it in place.

The mounted scope and bolt handle

You’ll note that this style of scope sits just to the left of center. That’s they way these things are designed. I did ask the customer if he wanted it fully to the left or rotated some more towards center. This was where he wanted it.

Modifying the stock

Modifying the stock actually takes the most time

Doing the machining work is mostly setup. Once you get everything dialed in and locked in place, it goes pretty quickly. Doing the wood work is all hand work and test fitting. It’s enjoyable work because it’s quiet and meditative but it does take a while.

Filing out the wood on a stock
Nearly finished

The finished product

I simply bore sighted the scope onto the gun and left the dialing it in to the customer.

All in all this was an enjoyable project. For what the customer had in the rifle, the kit, and my labor, I’m not sure he had his money’s worth out of it as a pure shooter but for the cool factor he has a really nice gun.


Repairing bent shotgun ribs

Bent shotgun rib

I haven’t been posting any gunsmithing stuff lately. For some reason, I have it in my head that customers won’t like seeing these jobs on our farm website. This is despite the fact that multiple customers have told me they enjoy reading these posts. I’m gonna work on getting this mental block out of my head because there is plenty of opportunity on these type of posts. I’ve been averaging about two gunsmithing jobs per week for the past few months which is about perfect for me. Slow enough I can keep it organized but quick enough I always have a job waiting on me when I have a few minutes.

Last week I received a call from a customer asking if I could fix his bent shotgun. Bent is always a scary word because some things can’t be easily straightened but it turns out he’d only bent his ventilated ribs. But to add a twist, he had a hunt scheduled with customers on the 8th and had to have his shotgun back before then. Could I get it done in time? Sure.

“Oh, and can you replace the buttstock on it as well?”

“If I have time, I’ll get it done.”

I wasn’t worried about the buttstock so much. But getting these bends out on time was worrying me because I needed a tool from Brownells first to do it correctly and that would take a week. But first, let’s look at the damage.

Bent shotgun rib
The first bend. Not too bad. Certainly recoverable.

Who knows how these things happen. When you are bird hunting, moving from field to field, a shotgun can take a beating getting in and out of the truck. And ventilated ribs are really susceptible to being damaged easily. They are thin between the anchor points and there is no support. These things happen so no fault to the customer.

Bent shotgun rib
This one was much worse

This second bend was pretty bad. It was all the way down to the barrel which leaves no room for getting under it to raise it. That’s solvable as you simply lift from the edges and get just a tiny bit of space to work with. You then inch your way towards the middle, resetting slightly closer each time, then raising a tiny bit, then inching closer, till you can finally get purchase in the middle. However, I decided to start with the easy one first.

The tool is basically like a gear puller but it’s made just for shotguns. Once you get it hooked in, it simply cranks and raises the bent piece back to where you want it. Or at least you hope so. In reality, it raises it up, but not machined flat like the rib is from the factory. So you begin a series of raising an area, checking it for flat, then hammering (with a delrin hammer, non-marring) back down the high spots. This of course isn’t precise so maybe you get the area you want, maybe it dips a bit again. Of course the straight section of metal is now wavy so you raise the new low area and wash, rinse, repeat. Fortunately I have a background as a blacksmith so working with metal is like coming home to me.

So to raise the original bent ribs back takes about 10 minutes. To get it flat again takes about an hour. As usual, nothing is as easy as it appears in the brochure.

Once I had the ribs flat, it was time to sand down the areas on the sides of the rib that were flared. The flaring is either from being bent originally or from the puller marring the rib a bit when did it’s work. Some 400 grit emory cloth, a backing stick, and some elbow grease and we had it back smooth enough to blue.

The gun had some missing bluing already from regular field use so while I was bluing, I went ahead and touched up all the areas that were showing wear, including some spots which had surface rust. Once everything was blued, I burnished it with steel wool to blend the finish.

Shotgun rib, repaired
The finished product. Straight and smooth

If I look close enough, I can find the area where the repair was made because of a few marks on the bottom side of the rib where the puller did it’s work. There is no way to avoid that.

This was a fun job and I had it ready to go on the 4th. Plenty of time for the customer to get here and pick up his gun for his hunt on the 8th. I emailed him to let him know it was ready and he called to check later that day.

“What about the butt pad I asked you about?”

“Huh? What butt pad?”

In my rush to get his ribs fixed so he could make his scheduled hunt, I’d completely forgotten about installing a new butt pad for him. Dope! Not to worry, we can do the butt pad on another trip after the rush. The ribs were a no go item, the butt pad was just an upgrade while I had it. A bit of lost revenue but hopefully he’ll bring it back after bird season and I can get it done for him.

A WWII veteran’s pistol, a Rossi 38 quick repair

Removing the hammer from the Rossi

I had an interesting job come in the shop this week. A small Rossi .38 was jammed with the cylinder unable to open.

Rossi 38 on the bench ready to be worked on

I told the customer that I’d be a few weeks before I could get to this pistol but then I ended up with a few hours where I couldn’t leave, and I didn’t have enough time to start any of my other work so this pistol was a perfect job to tackle in that time.

Plus, this customer’s father flew B-26 Marauders in World War II. My father was a gunner on B-17s so I felt some kinship there.

From the telephone description of what had happened, I’d assumed that the gun had jammed with bullets still in it. Working on something with live rounds in it is never a fun day. Fortunately this one showed up empty and fully functional, except it wouldn’t open.

The Rossi has an easy to remove side plate so access is excellent to all the working parts.

Removing the hammer from the Rossi

Once the side plate was off and a few fiddly bits were removed, I verified that there was no foreign material in the works jamming things up. The gun worked flawlessly, except it wouldn’t open the cylinder. So I removed the hammer spring and the hammer to fully reveal the transfer bar that releases the cylinder.

Once it was exposed I could get full access to it and make it move, or remove it entirely. Even with full force against the bar directly on the pin, it still wouldn’t move. Since it was obvious by this point that something was gumming up the pin that slides through the frame, I decided I’d give it a love tap prior to removing it. A couple of taps with the brass hammer and viola! It moved allowing me to swing the cylinder open.

Once exposed, I could see the problem, there was a bit of rust on the pin in an area where there is very little clearance. That rust has jammed the pin into the frame and that was the issue. There was another spot on the inner workings that showed a small sign of rust as well so the best thing to do was to put the whole thing into the ultrasonic tank and give it a spa day.

I ran the cleaner for about 15 minutes then pulled the gun, blew it out, and returned it to the lube tank. By this point my extra time was up so I left it in the lube tank the rest of the day and returned that evening to put the gun back together. Everything worked perfectly now, and the gun was as clean as new and lubed everywhere after it’s bath. After blowing all the excess lube out, I put grease on all the bits that needed it and reassembled everything.

This was my kind of repair. No parts to order. No waiting on UPS. No keeping up with all the tiny bits till the new part comes in. No craziness of something super complicated. Just a happy customer who gets his gun back earlier than he thought.

A quick sight installation, or so I thought

M&P pistol on the bench waiting on night sight installation

I was contacted recently about a simple job. Removing the factory sights from a M&P pistol and installing aftermarket night sights.

M&P pistol on the bench waiting on night sight installation

The customer was very friendly and accommodating, but he needed the pistol back the same day. Shouldn’t be a problem. It only takes a little bit to swap sights.

Then I started looking for my sight tool. Dustin borrows it, maybe he has it. Nope. Maybe when I reorganized? Nope. Maybe it went into my tool box when I went to school. Nope. Maybe it’s in the wrong drawer in my tool box. Nope. Lost on a shelf? Nope. Behind 500 different things in the gun room? Nope. Under something? Nope.

So all in, I spent about 3 hours looking for the tool to do the 30 minute job. Typical.

M&P 9mm with night sights on the bench
Sights installed and set to the center.

Getting the front sight off was a bear. I guess they didn’t plan on it coming off, ever. But eventually everything worked out and the new sights went on without much fuss. I cleaned up the brass marks and got the pistol ready for the customer.

When he picked it up, he was happy with the work and then inquired if we had any openings for work on the farm. Actually yes, yes we do.

So I made an hours labor off of him for gun smithing, and he made it back plus some on his first day.

I think I went backwards on this job.

Checkering a stock

My first decent checkering pattern

This year, one of my favorite instructors, Tim Carrick, was teaching checkering. You’ll note that the link doesn’t go to his website, or Facebook page, or anything he’s created on the internet. Tim eschews computers and all of his business is word of mouth. When I talked to him last year, and again this year, he is 18 months behind on work, with zero advertising!

Since I know I need to learn checkering, and Tim was teaching it, I signed up for the class. Tim had joked that on day one of class, he’d have 10 students, day two would be 6, and by the last day he’d have a couple left. Checkering is hard. I always enjoy learning from Tim so I knew I’d make it to the end. Well, the day before the end, I had to leave a day early to go get goodies for the farm store.

A gunstock checking cradle

Checkering is the process of filing lines into a wood or metal in a method that creates a pattern. The purpose is to give something that would otherwise be slick a nice grip.

My checkering tools, layout guides, etc.

It also can be very beautiful when done by an artist, which I am not. Since I don’t plan on making stocks anytime soon, cutting in checkering isn’t high on my list of skills needed. But since I do plan on repairing stocks, that means I need to be able to recreate a checkering pattern so that I can make the repaired stock look as good as new. Tim is a master at fixing stocks and I learned a ton from him last time. When I say fixing stocks, I mean going from a stock that is literally shattered into pieces and ending up with something that looks brand new. He routinely works on $50,000+ guns. He knows his stuff.

Luckily, I have a stock from one of my guns that needed the checkering replaced where a previous owner had decided to sand the wood down and then shellac the stock with some horrible finish. I’d already taken the stock all the way down to bare wood and refinished it. Now it just needed to be checkered and I could put the gun back to together and then sell it which would get one gun out of here and money in my pocket instead, which I have much more room for.

But before I could jump right into working on a stock, I had to learn the basics first.

My first decent checkering pattern

This is as simple as it gets. It’s also harder than it looks. This is about 1/2 days worth of work, and it’s not finished! Each line has to be filed or cut about 10 passes, each direction. And with every stroke, it’s hard not to mess it up. If you do mess it up, add more time for trying to fix your mistake before you move on. For Tim, this is about 30 minutes worth of work but we were learning so cut us some slack!

Once I’d gotten good enough that I could cut these patterns with some consistency, it was time to move on to checkering an actual stock.

Browning Citori forend on a custom mandrel

As with a lot of work, you can’t do any actual work till you make the jig to hold the work. This is a piece of pine, custom cut and sanded to be a press fit inside the shotgun forend. Then it is drilled to accept the checkering cradle, which itself is a customized clamp. Before you spend the eight hours it takes to checker this thing, you have to spend another hour making the mandrel and the clamp. Ever wonder why checkering is expensive?

Browning Citori being checkered by hand
Same forend beginning the process of checkering

Once everything is prepped properly, it’s time to do the layout and the checkering. Checkering is the final process on the repair of this shotgun. I have a day in just refinishing the stock. Not the count the days spent overhauling the gun to get it back to better than new specs. When it’s done, this shotgun will be better than new, and it’s only taken me two years to get it that way! 🙂 You never actually work on your own stuff.

The stock, showing the remnants of the old checkering still visible

Here you can see the old checkering I was working off of. You can also see where I’ve outlined the new checkering pattern. This is just the beginning.

Hand checkering a Browning Citori forend
Cutting in the new checkering pattern

This is several hours into the job. It’s also about where I stopped. I had to leave early to get home and pick up stuff for the farm store. So this forend is now laying on my bench waiting for me to have time to finish it. Maybe next year I’ll finally get this thing done. I already have other people’s work starting to come in so as always, paying customers first.

My last gunsmithing class for the year

A Tika rifle in need of a buttpad

I mentioned already that I was gone this past week but I didn’t say where. Once again I was at gunsmithing school at Montgomery Community College. This was my last class for the year and it was the easiest of the bunch. Basic custom installations. Things like installing butt pads, sling swivels, sight bases, lapping scope rings, etc.

However it was taught by the head of the program who recently retired after 30 years so there was some pressure to show up and perform well. I only took two guns with me to this class. One of my own and one that belonged to someone else that needed some work that matched nicely with this class.

A Tika rifle in need of a buttpad
A Tikka rifle in need of a butt pad

This is the gun I was working on for someone else. He already had a butt pad but wasn’t sure how to grind it to fit without messing up the stock. He also had a sling swivel that had pulled out of the gun and needed to be repaired.

Butt pad, ground to fit

The final product. Since the butt pad was already mated up to the gun, all I had to do was grind to fit which made my job pretty easy compared to everyone else who had to fill in screw holes, cut stocks for length of pull, etc, etc. I was done in about 30 mins whereas everyone else worked for about 1.5 days. Having already ground stocks and butt pads before certainly helped as well. In fact, after listening to the instruction, I basically wandered off on my own and did the whole job, then wandered back in and boxed the gun up, done. It does pay to have experience.

Tikka rifle in the case, being shown to the customer
Delivering to the customer, butt pad installed and sling swivel repaired

The proof is in the pudding so I was curious to see how he reacted. The result? Two thumbs up!

My rifle being drilled and tapped for scope bases

The other project gun I brought was one I’d been tinkering with for quite a while. It was actually the first gun I ever owned, a Marlin model 25 bolt action .22. A few years ago I’d pulled the gun from the stock, and the barrel from the received and then cut and threaded the barrel for a screw on suppressor. The gun didn’t have any sling swivel studs so I brought it for class. It also didn’t have scope mounts so I was able to drill and tap the received for scope mounts. It turned out that for the class they were demonstrating how to use a jib for drilling and tapping because most gunsmiths don’t have a mill. I’m not most gunsmiths so I requested that we drill and tap mine on the mill. Unfortunately that took the new head of the program to demonstrate so I had to wait till he was available. Finally on the last day, he got free and we dialed in my action and drilled and tapped the scope mounts. Being familiar with machining jobs, it was fairly basic. Like most gunsmithing operations it was all about dialing in to make sure everything was in line with the action so the scope is straight. We discussed dialing in off of various surfaces on the action but in the end picked the grooves cut into the action for the original scope as they seemed the most true. We located our edges, located center, and then drilled and tapped away. A few minutes later and we had everything done.

Now this gun is on my bench at home waiting on some new parts. Then it’ll go back together and back in the stock with its new sling swivels. Then I just have to get off my butt and finally fill out my Form 1 to get permission from the ATF to make the suppressor and the project I started years ago will finally be done.

Gunsmithing, perfect for people with ADHD

Gunsmithing underway with multiple projects
Multiple projects on the bench

This week in class was interesting because it showed some of the ADHD that gunsmiths needs to have. My first class I worked on one shotgun mainly, and another one as a side project. My second class, I worked my tail off on one big project and not much else. This class was much more indicative of the life of a gunsmith.

I had five guns on the bench simultaneously, some with multiple projects for each gun. Parts were scattered everywhere and there were constant interruptions for questions by students, instruction by Tim, lunch, seeing other students projects, etc. Organization was critical, as was knowing which screw or pin went with which gun. There was always something to do, and always something you were waiting on. For example, I scraped the finish off of this Browning Citori which is a major job.

Browning Citori stock being stripped
Browning Citori stock being stripped.

While the stripper was softening the rock hard Browning finish, I went into the blueing room where one of the students was parkerizing his gun and prepping for cerakote. Since I was going to cerakote my AR-15 barrel, I was part of his project as well. Then back to scraping finish off, then over to the spray cabinet where I shot a coat of finish on some stocks that were ready for it.

Different stocks being shot with finish

Hang the stocks to dry, then back to the sink to scrape more finish off the Browning stock then apply stripper to another section and wait. You get the idea. You are always waiting on a finish to dry, or waiting on something to soak, or sitting at the bench putting something together or taking something apart. And each job is unique unto itself and there are a million opportunities to waste time or be inefficient. Like I said, this class was probably the most like being a gunsmith of all the classes I’ve taken so it was pretty interesting. The week certainly flew by.

Minor and major stock repair, and stock bending

Once again I’ve been off farm for a week of gunsmithing school. You are probably wondering how I’m able to be gone from the farm so much and still be a farmer. Two words. Miguel. Vicente.

We have a very large project coming up that is going to occupy everyone’s time for months so if I ever wanted to go to gunsmithing school, now was the time. Miguel and Vicente not only were able to keep everything running, the farm actually looks better when I get back than when I left. It’s a blessing to have these guys working for me.

Back to the gunsmithing. I’ve gotten favorable comments from some folks that they are enjoying the gunsmithing posts so even though they are incongruous with farming I’m continuing on with them as there is something to post. This past week I was back in Troy, NC taking another continuing ed class. This time it was stock finishing and bending with Tim Carrick.

Tim Carrick bending a stock
Tim Carrick, bending the stock on SWMBO’s shotgun

Tim is a graduate of Montgomery Community College’s gunsmithing program from back in the 80s and has been gunsmithing full time since. He is a prince of a guy and was very willing for everyone to learn anything he knew. He is also a wizard at taking a bit of acra-glass, some shavings, and time and making a stock go from literally broken into multiple pieces like this.

To where you can’t even see the break unless you know what you are looking for. Luckily I had a gun that was in need of some serious repair, and another gun that needed a complete refinish so I had good candidates for class projects. I also brought my barrel from the AR-15 class to do some work on it. But that’s going to be in the next post.

A small gunsmithing update

A gunsmithing vise

I’m continuing to get my gunsmithing stuff set up. I’ve nearly completed installing a DRO on my Bridgeport mill and I’ve done my first job on the mill with what has already been installed. I needed a new vise on my gunsmithing bench and I only knew of one vise to use.

A gunsmithing vise
A proper gunsmithing vise

This looks like a relatively normal vise but it is unique in that is rotates 360 degrees so the bottom jaws can be swapped for the top jaws. Yes that would be 180 degrees but the point is besides clamping and swiveling on it’s base, it also rotates. This means that if you are working on something and you need it held in a different position, you don’t unclamp it. You just loosen it slightly and the vise itself will rotate. This makes it a much more usable vise in my opinion. Also, this particular vise is readily available from my friends at Agri-Supply. Yes this means it’s cheap Chinese junk but I’ve beaten on one of these for years and until I broke it by asking WAY too much from it, it did fine.

I mentioned that I’d done a project on the mill. First, here is what a Bridgeport mill looks like.

A nice clean Bridgeport
A vertical knee mill, a handy piece of equipment for all kinds of work.

It’s an internet image because I’m not at the shop to take a picture. Plus this one is clean and mine is NOT.

And here is what my DRO looks like.

DROPROs digital readout
DROPROs digital readout. Now we’re in the 21st century

This thing is accurate to the tenth of a thousandth of an inch. It also has all kinds of functions that I have no idea how to use. You always want your equipment a bit smarter than you so you have a chance to grow. Kind of like buying shoes when you were a kid.

So back to the vise.

A gunsmithing vise
A gunsmithing vise

If you look, the jaws are black. Those are pieces of Delrin, milled and drilled on the mill to replace the metal jaws the vise came with. This gives the vise semi-permanent soft jaws so I don’t mess up the finish on guns or gun parts. It was a joy to work with the new DRO and making these jaws was a snap. I can’t wait to finish the install of the DRO and move onto the lathe for it’s own DRO. But that will be another post.