Great news after much demand we are now carrying two new items in our store.
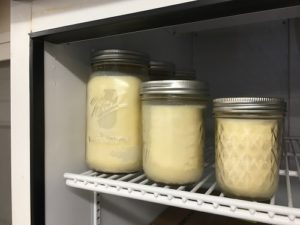
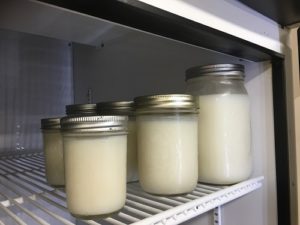
Beef Tallow
1/2 Pint- $7
Pint – $10
Quart- $15
Lard
1/2 Pint- $7
Pint – $10
Quart- $15
Our New Store Hours are Monday, Wednesday, Friday 2-6 pm & Saturday from 9-5. On Saturdays we offer free group walking tours. Please go visit https://ninjacowfarm.com/tours-2/ to schedule your tour today.
There has been a bag of Amish Noodles staring at me from the pantry for a month. In July, my daughter and I traveled to my home state of Missouri, the northwestern corner of the state up by Kansas, where Mennonite & Amish Markets abound. There I bought a bulk bag of Egg Noodles with dreams of Beef Stroganoff.
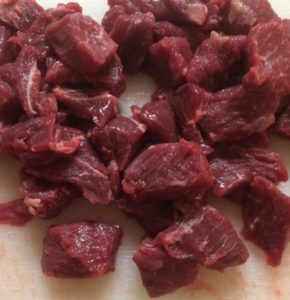
Beef for Stew, cut into bite sized goodness
One of our big sellers is Beef for Stew. I use it for many things soups, stews, kebabs, etc. This meal is larger, feeding up to 8 people (Or my just my ravenous bunch of kids – Editor/Farmer).
Boneless Beef for stew runs $8.99 per pound with all of the ingredients listed you’ll have dinner for roughly $12-$15. If you want to jazz it up a bit use one of our Sirloin Steaks at $14.99 lb, thinly sliced with the fat removed.
Beef Stroganoff
1 lb NCF Beef for stew
2 tbsp Butter (extra virgin olive oil can be substituted)
1 med yellow onion sliced thinly
3 cloves of garlic minced
8 oz Cremini mushrooms
1 cup beef broth (low sodium or no salt)
1 cup Guinness beer or 1 cup Pinot Noir (if you prefer no alcohol double the beef broth)
2 tbsp Worcestershire sauce
1 tbsp Dijon mustard
1 cup sour cream
1 cup fresh peas *optional
salt & pepper to taste
The Beef for Stew chunks are rather large. The first step is to cut them down to bite size removing any left over silver skin, season with salt and pepper.
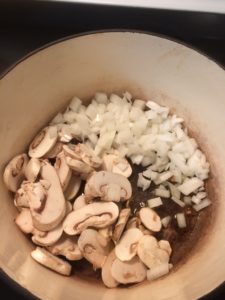
Melt the butter in a large deep casserole or dutch oven over med heat.
Once the butter has melted add in the onions & mushrooms lightly salt, cook until the onions are translucent with a bit of browning showing.
Add seasoned beef and cook till browned.
Toss in the garlic and cook until fragrant, about 1 minute.
Next up add the broth, Worcestershire sauce, Dijon mustard and the beer.
Lower the heat to med low.
Place lid on and simmer for 45 min to 1 hour stirring frequently if the liquid is greatly reduced add a bit more broth.
If adding in peas do so now, let cook for 4 minutes.
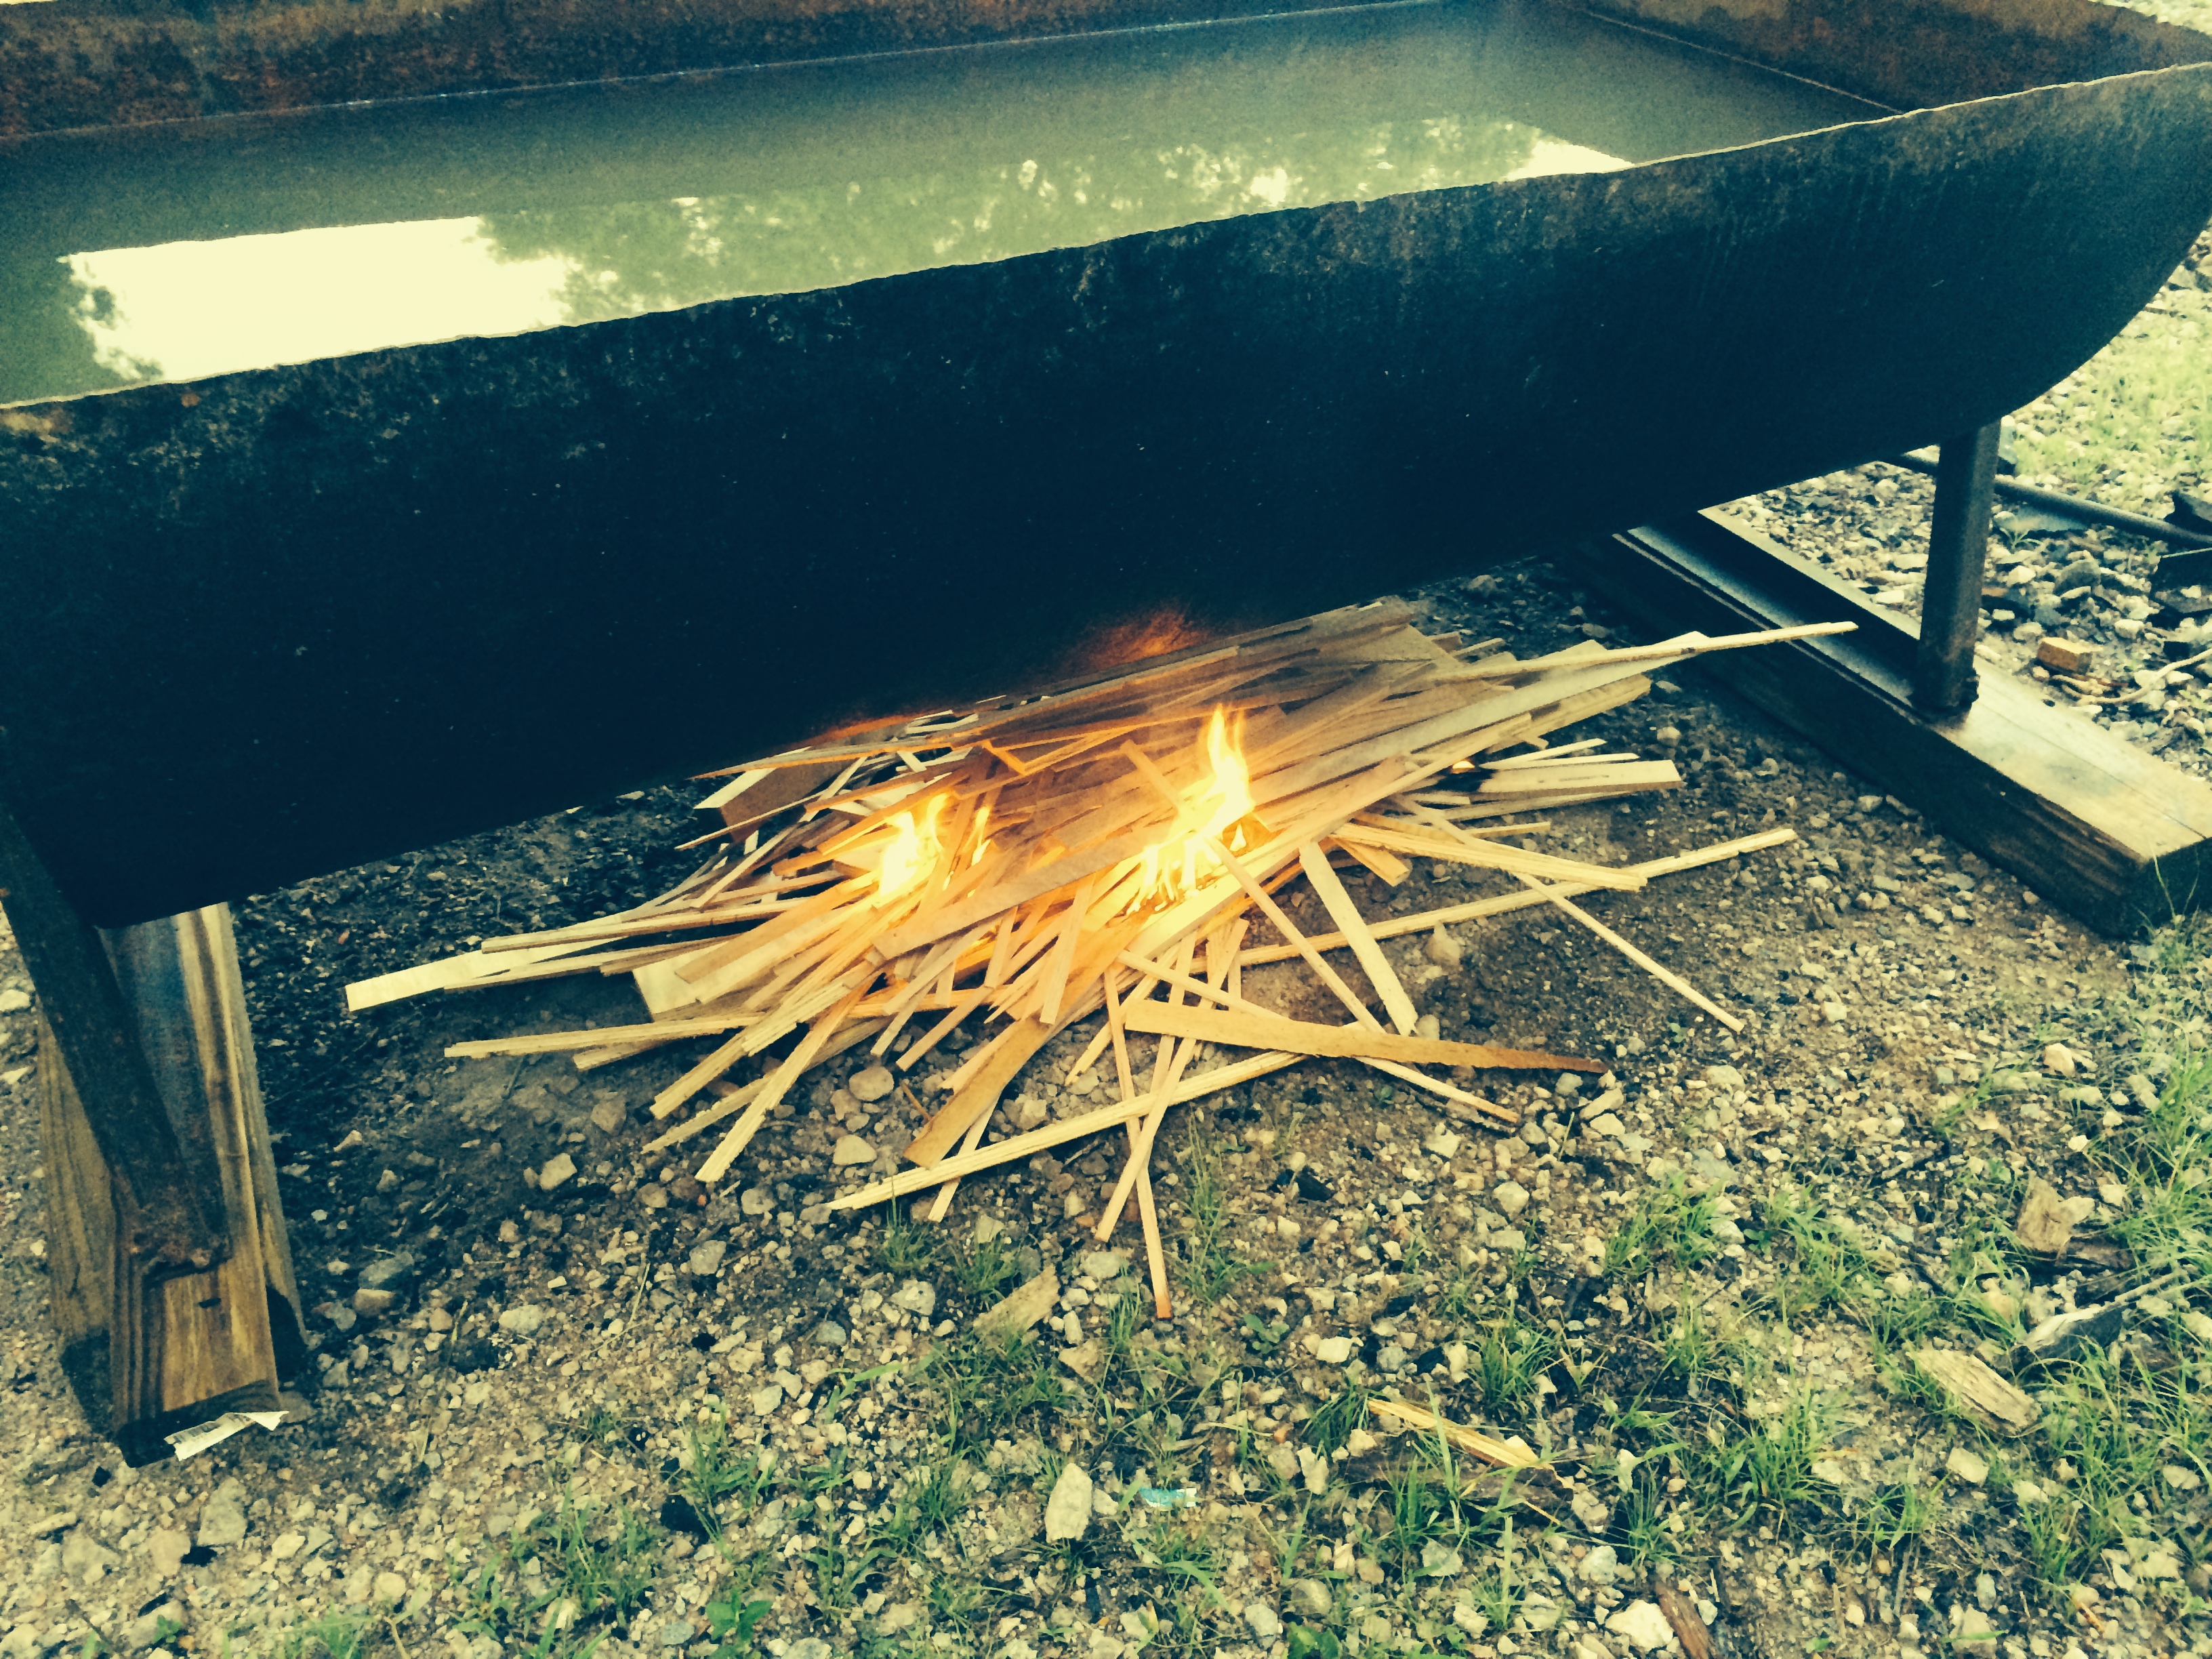
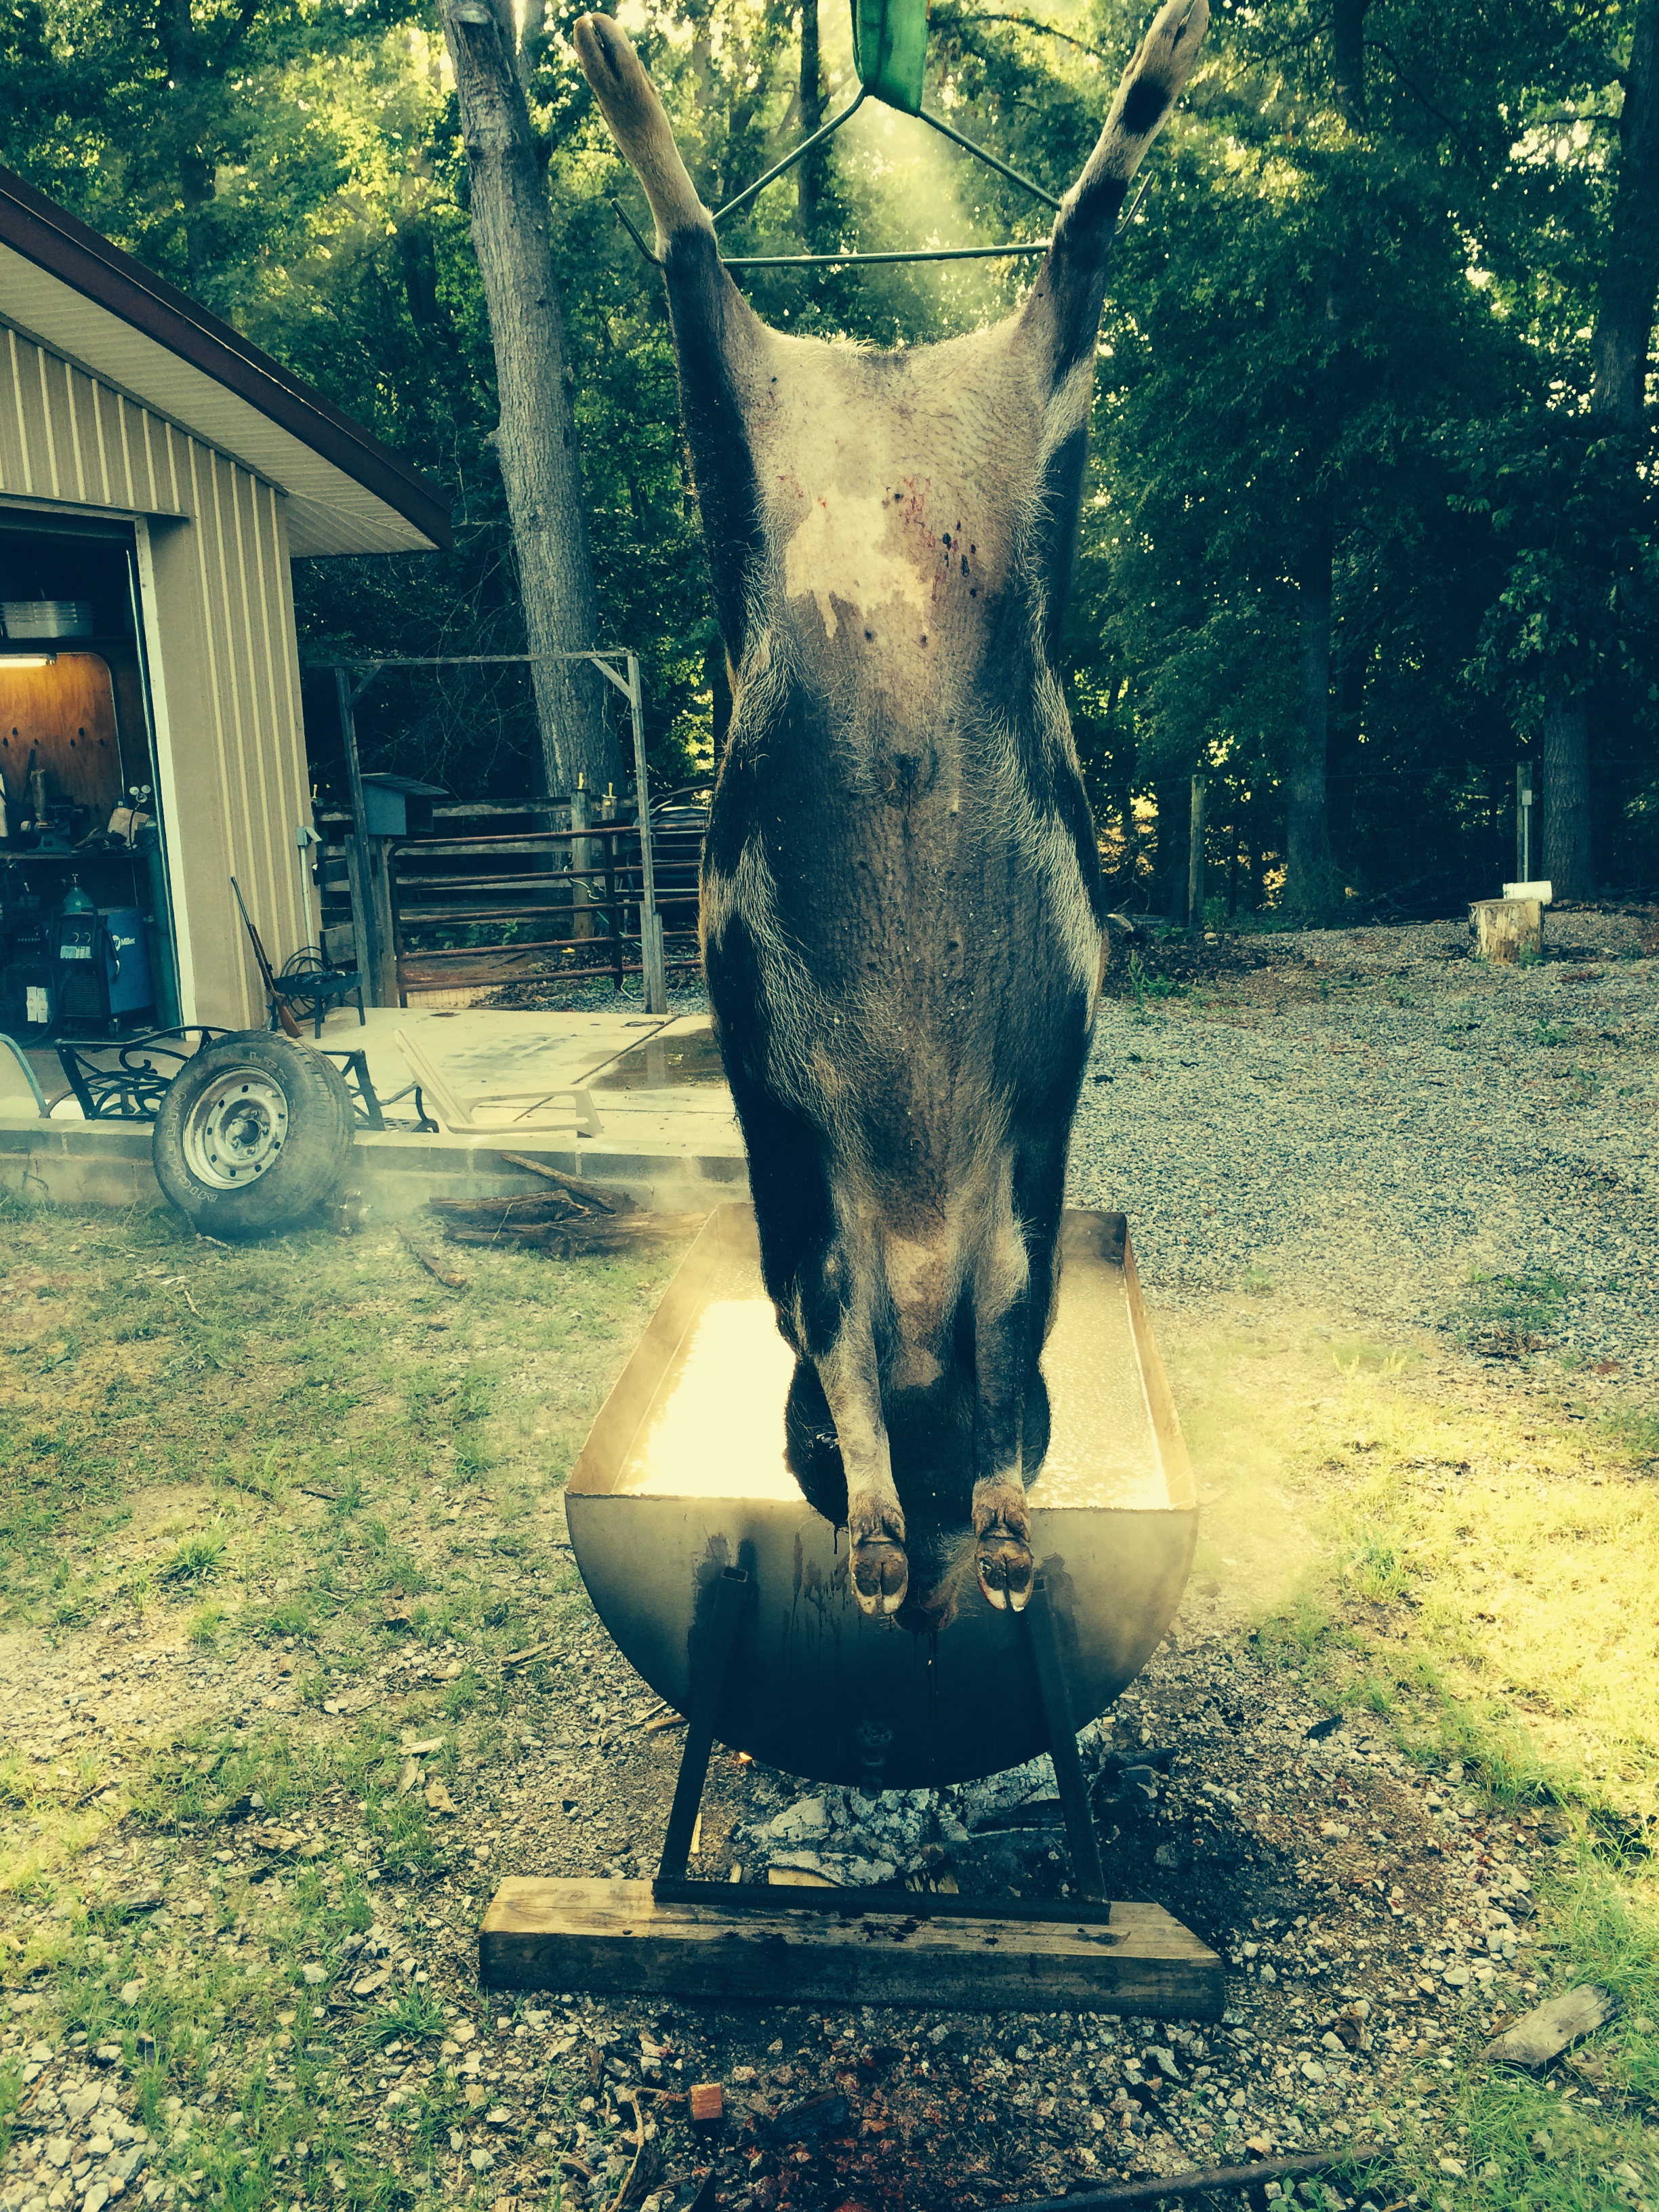
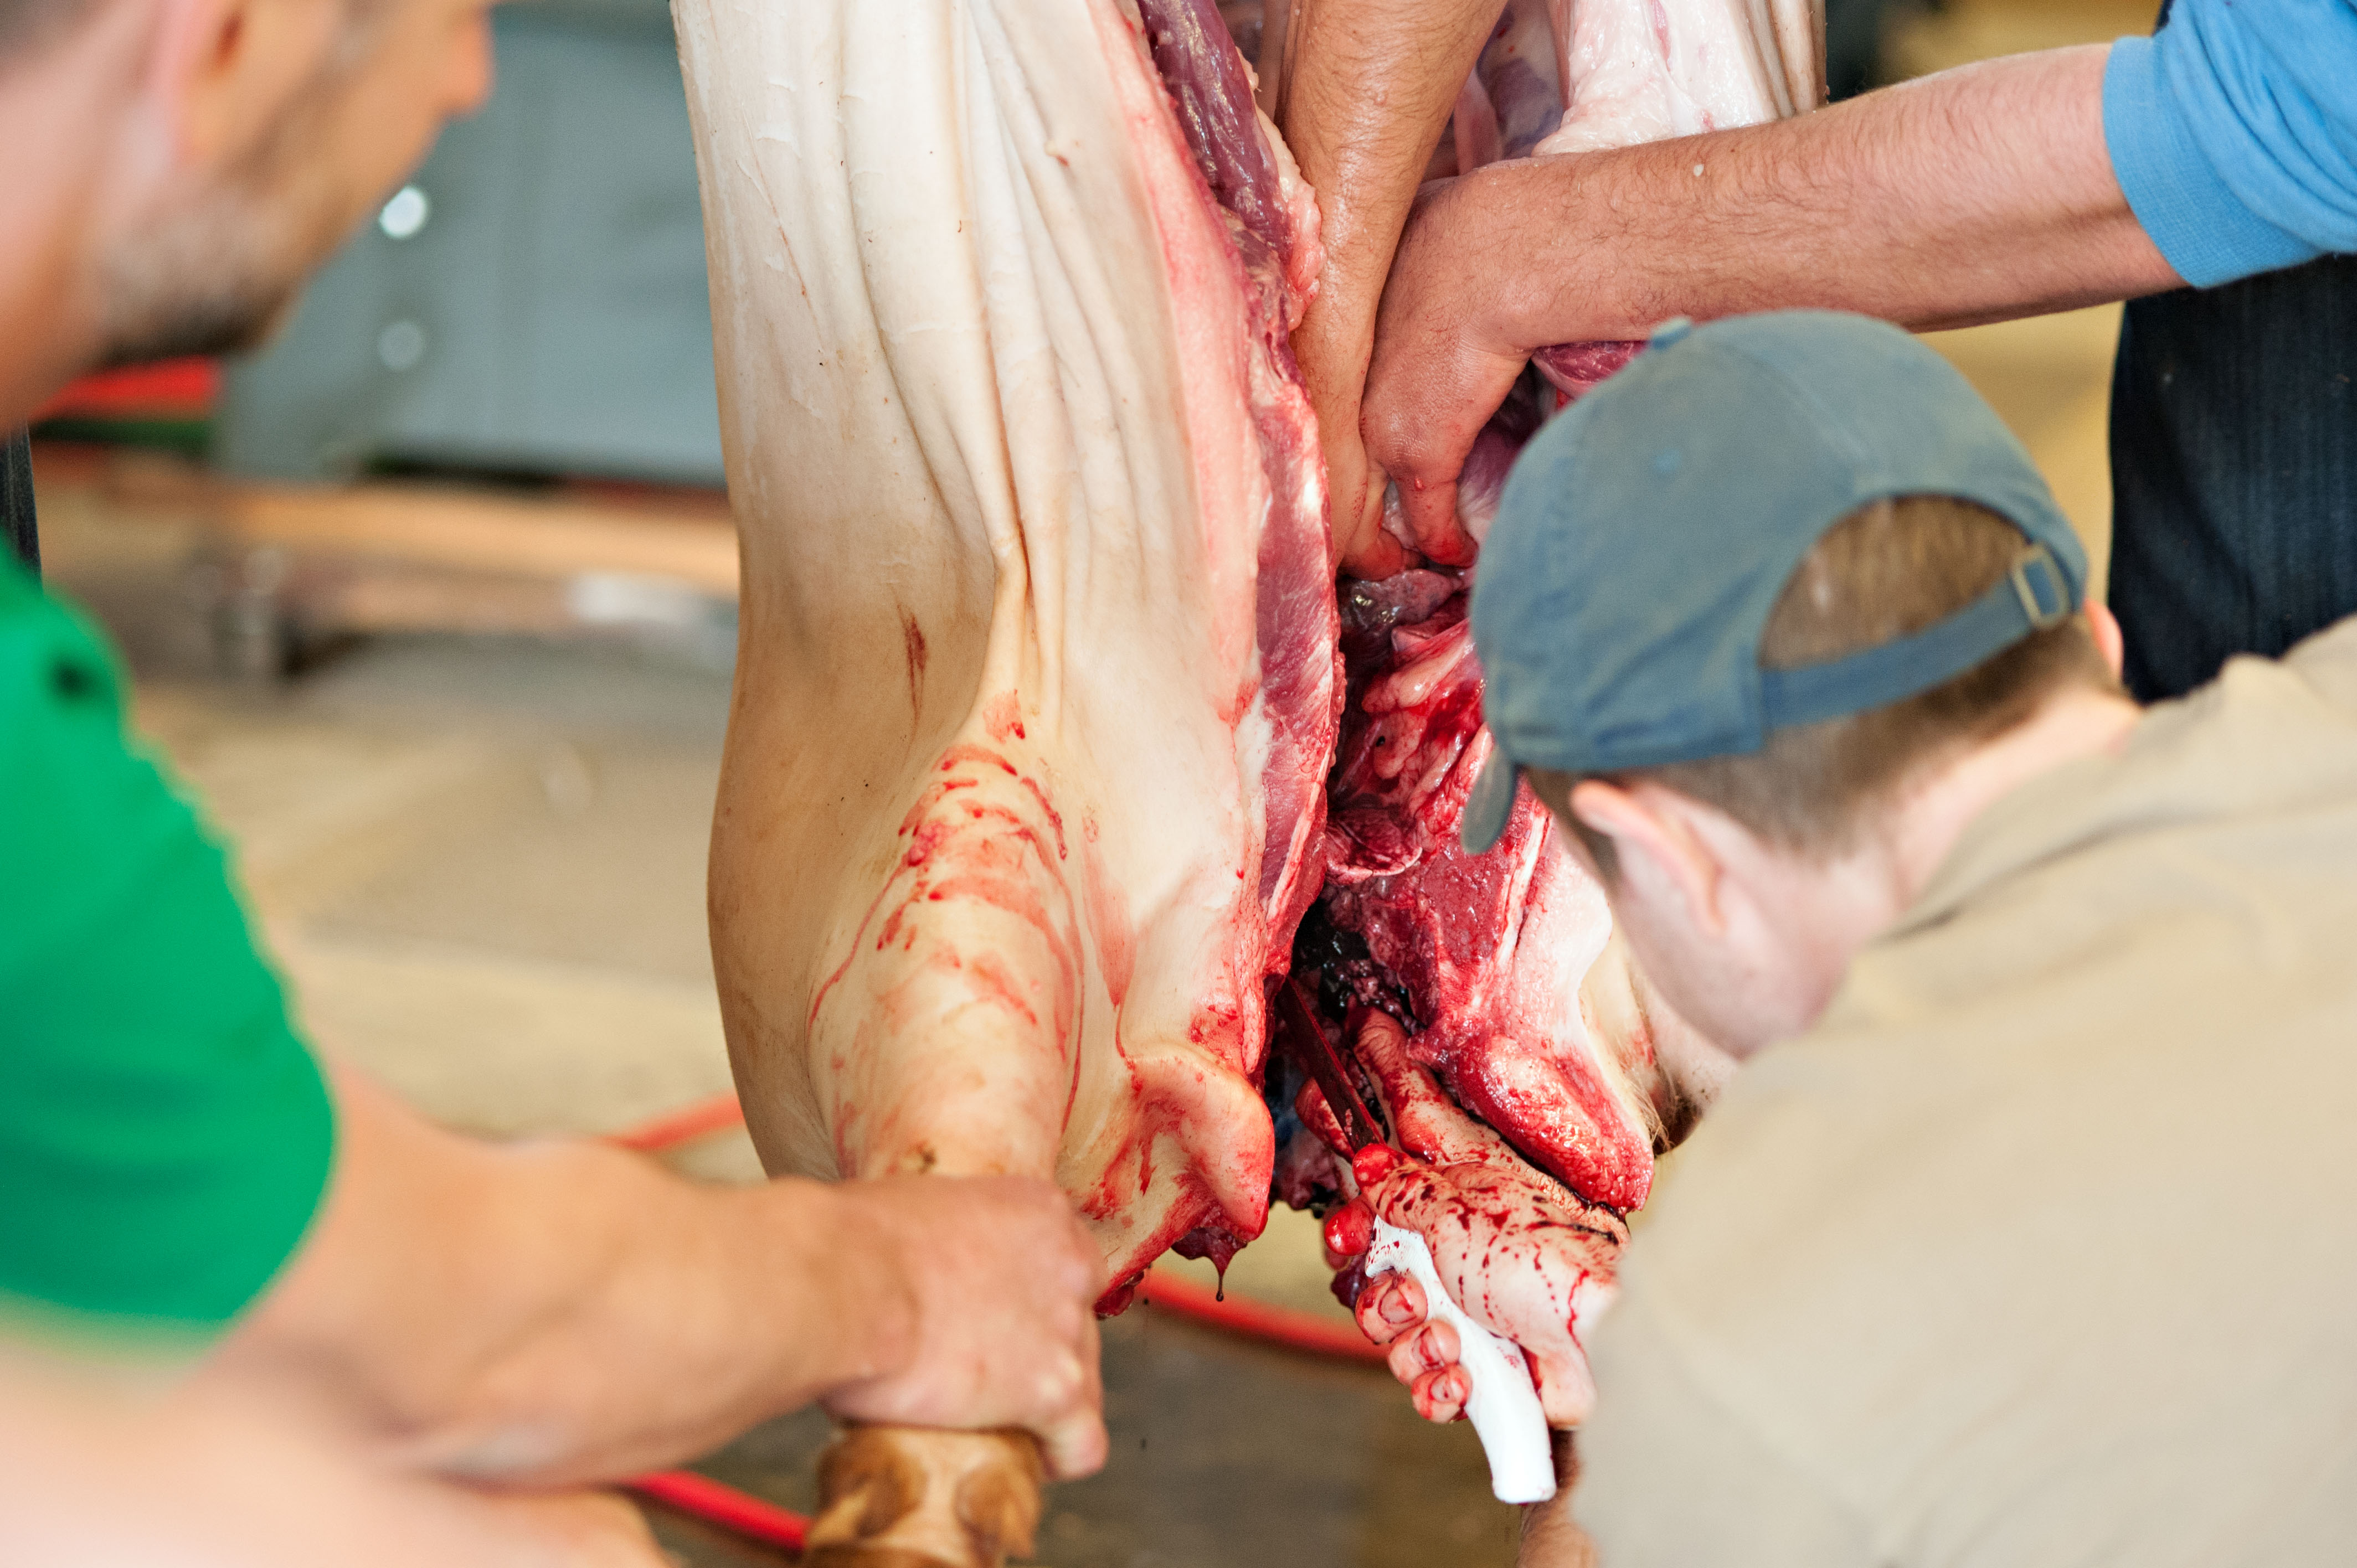
When you come on the 28th to have beer and BBQ, you’ll be having an Ossabaw hog that was born and raised here on our farm. He never had one ounce of commercial feed and has lived in the open in our woods since birth. He was born here, and died here, having never ridden in a truck, been in a cage, or had a bad day. On his last day he had a breakfast of farmers market sweet corn and never knew what happened.
This is as good of pork as we can produce and we’re excited to have Mike of Mike’s BBQ try his hand at our pork.
Ossabaw hog going into the scalding tank, 140 degrees.
If you don’t have your tickets yet, better get them soon. The 28th is coming.
I’ll be delivering this hog to Mike on Monday so he’ll have all week to do his magic with brines and rubs.
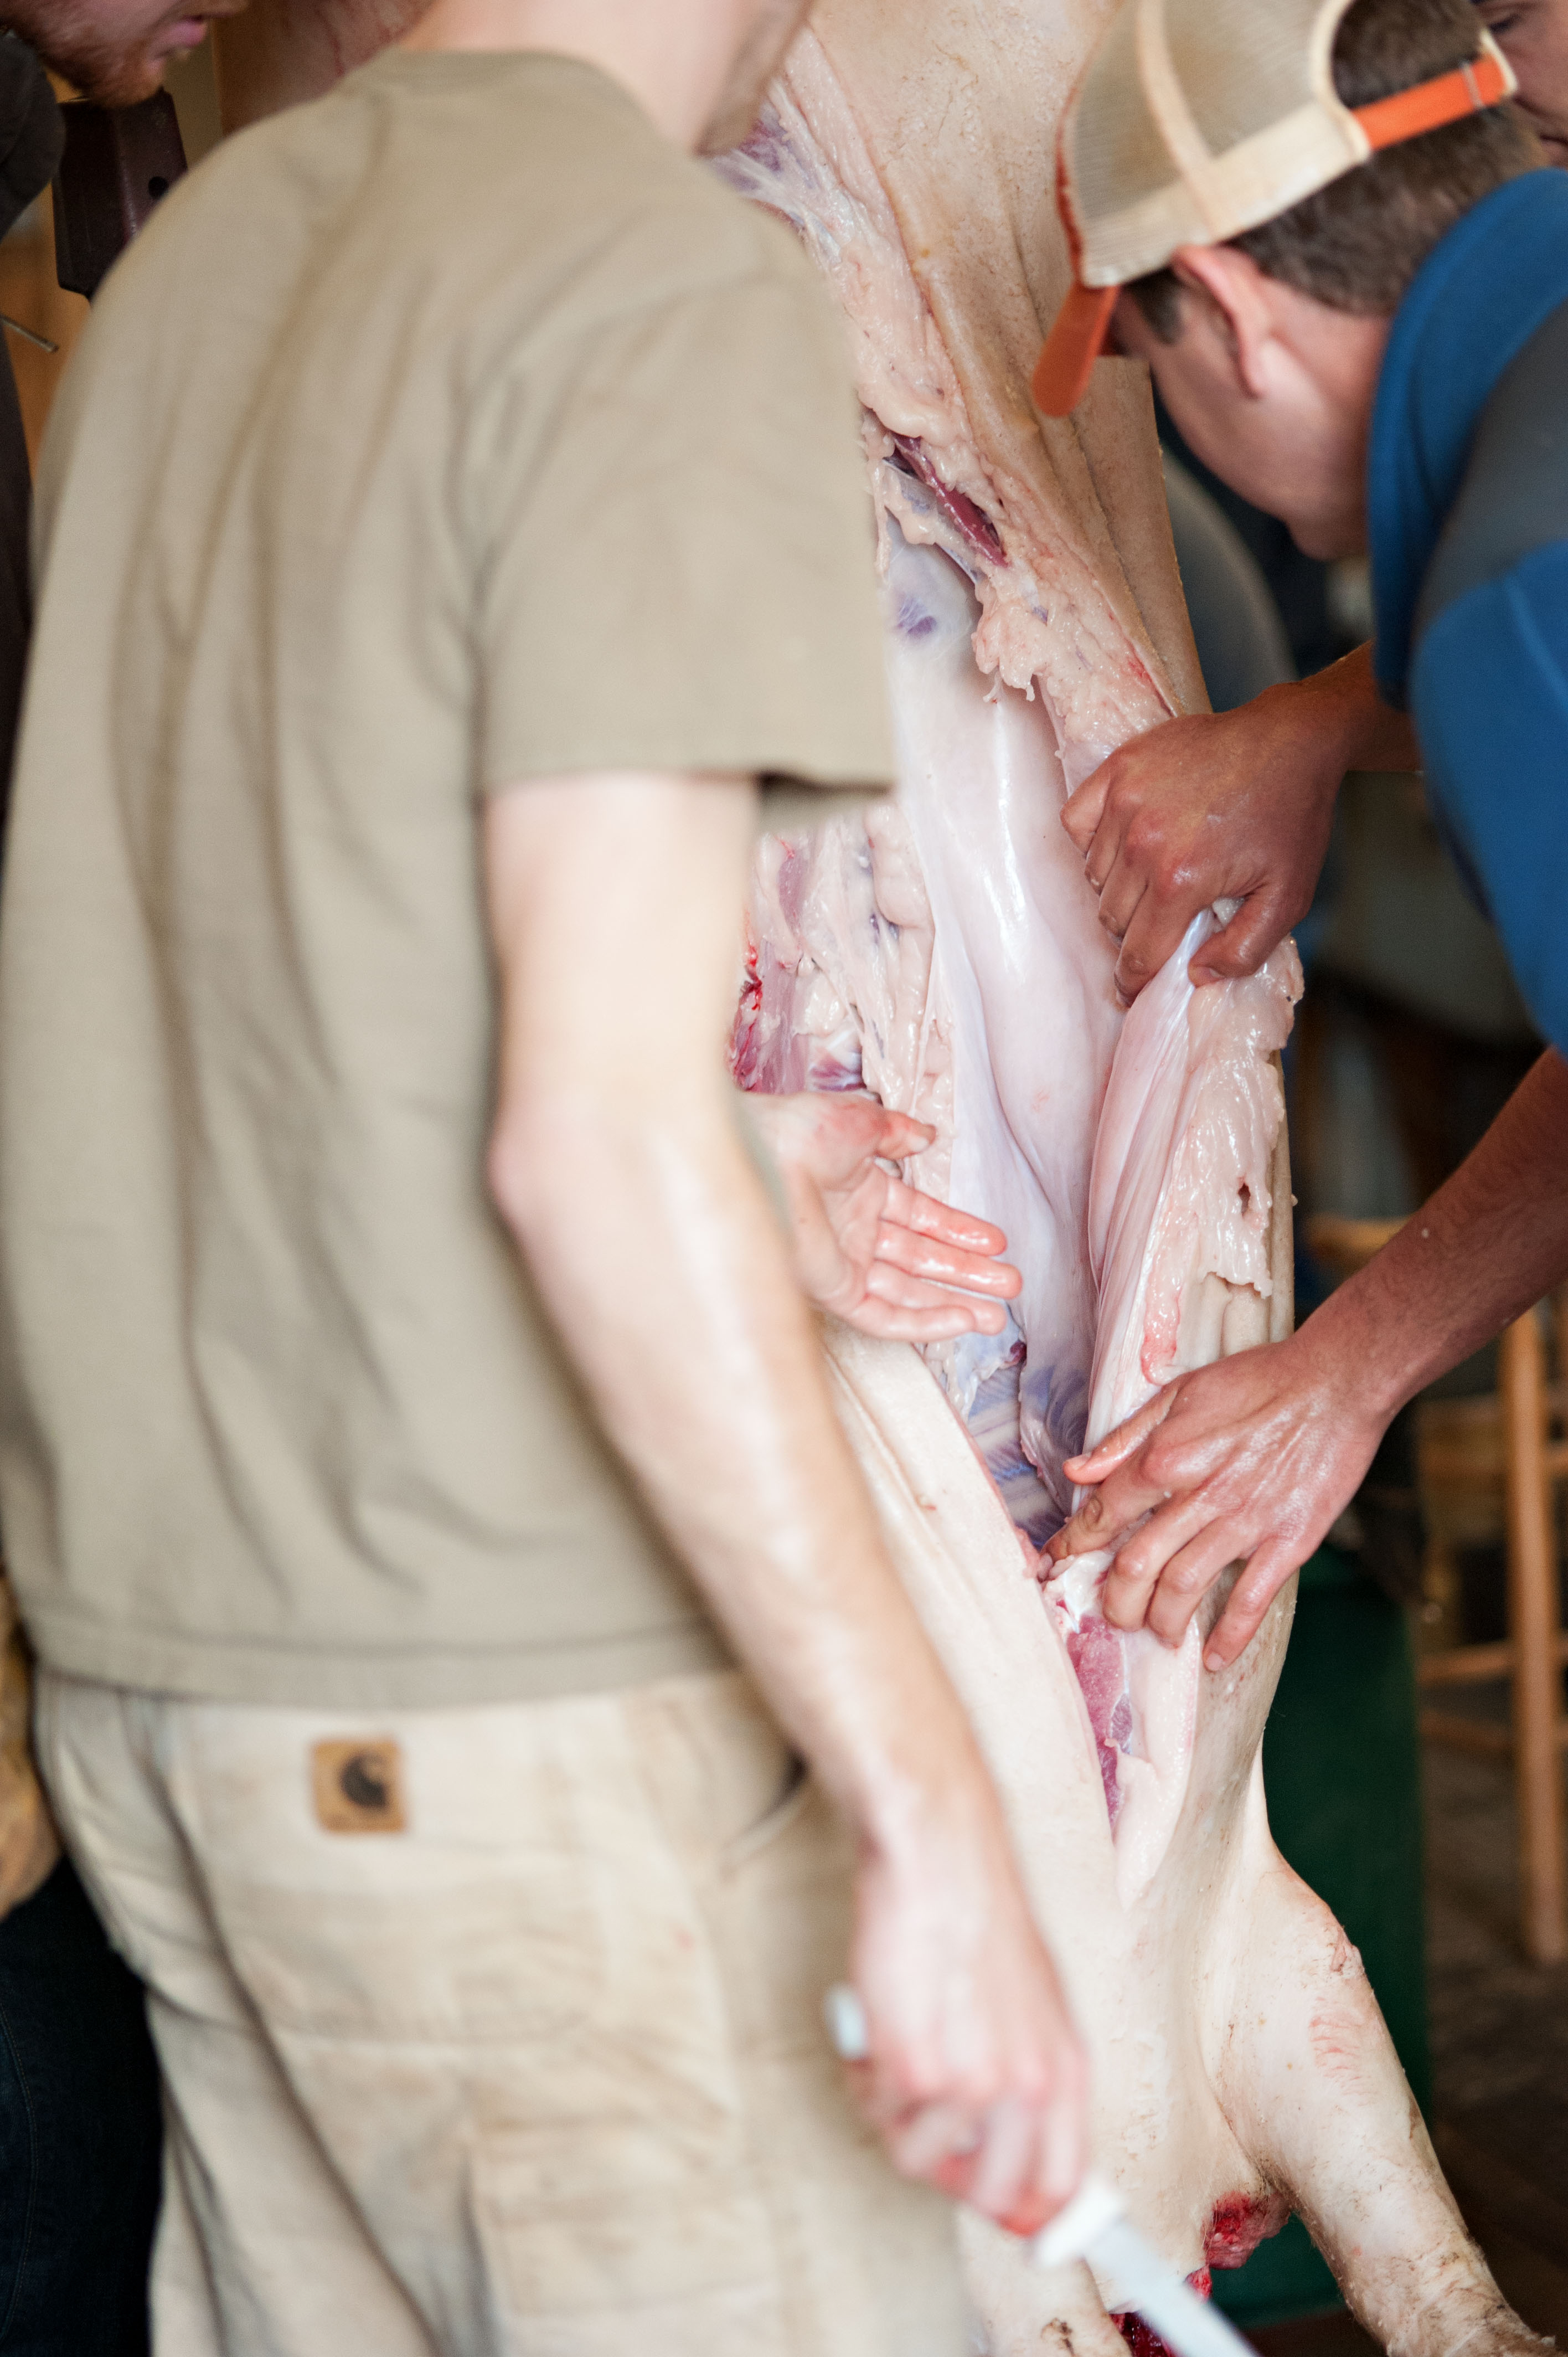
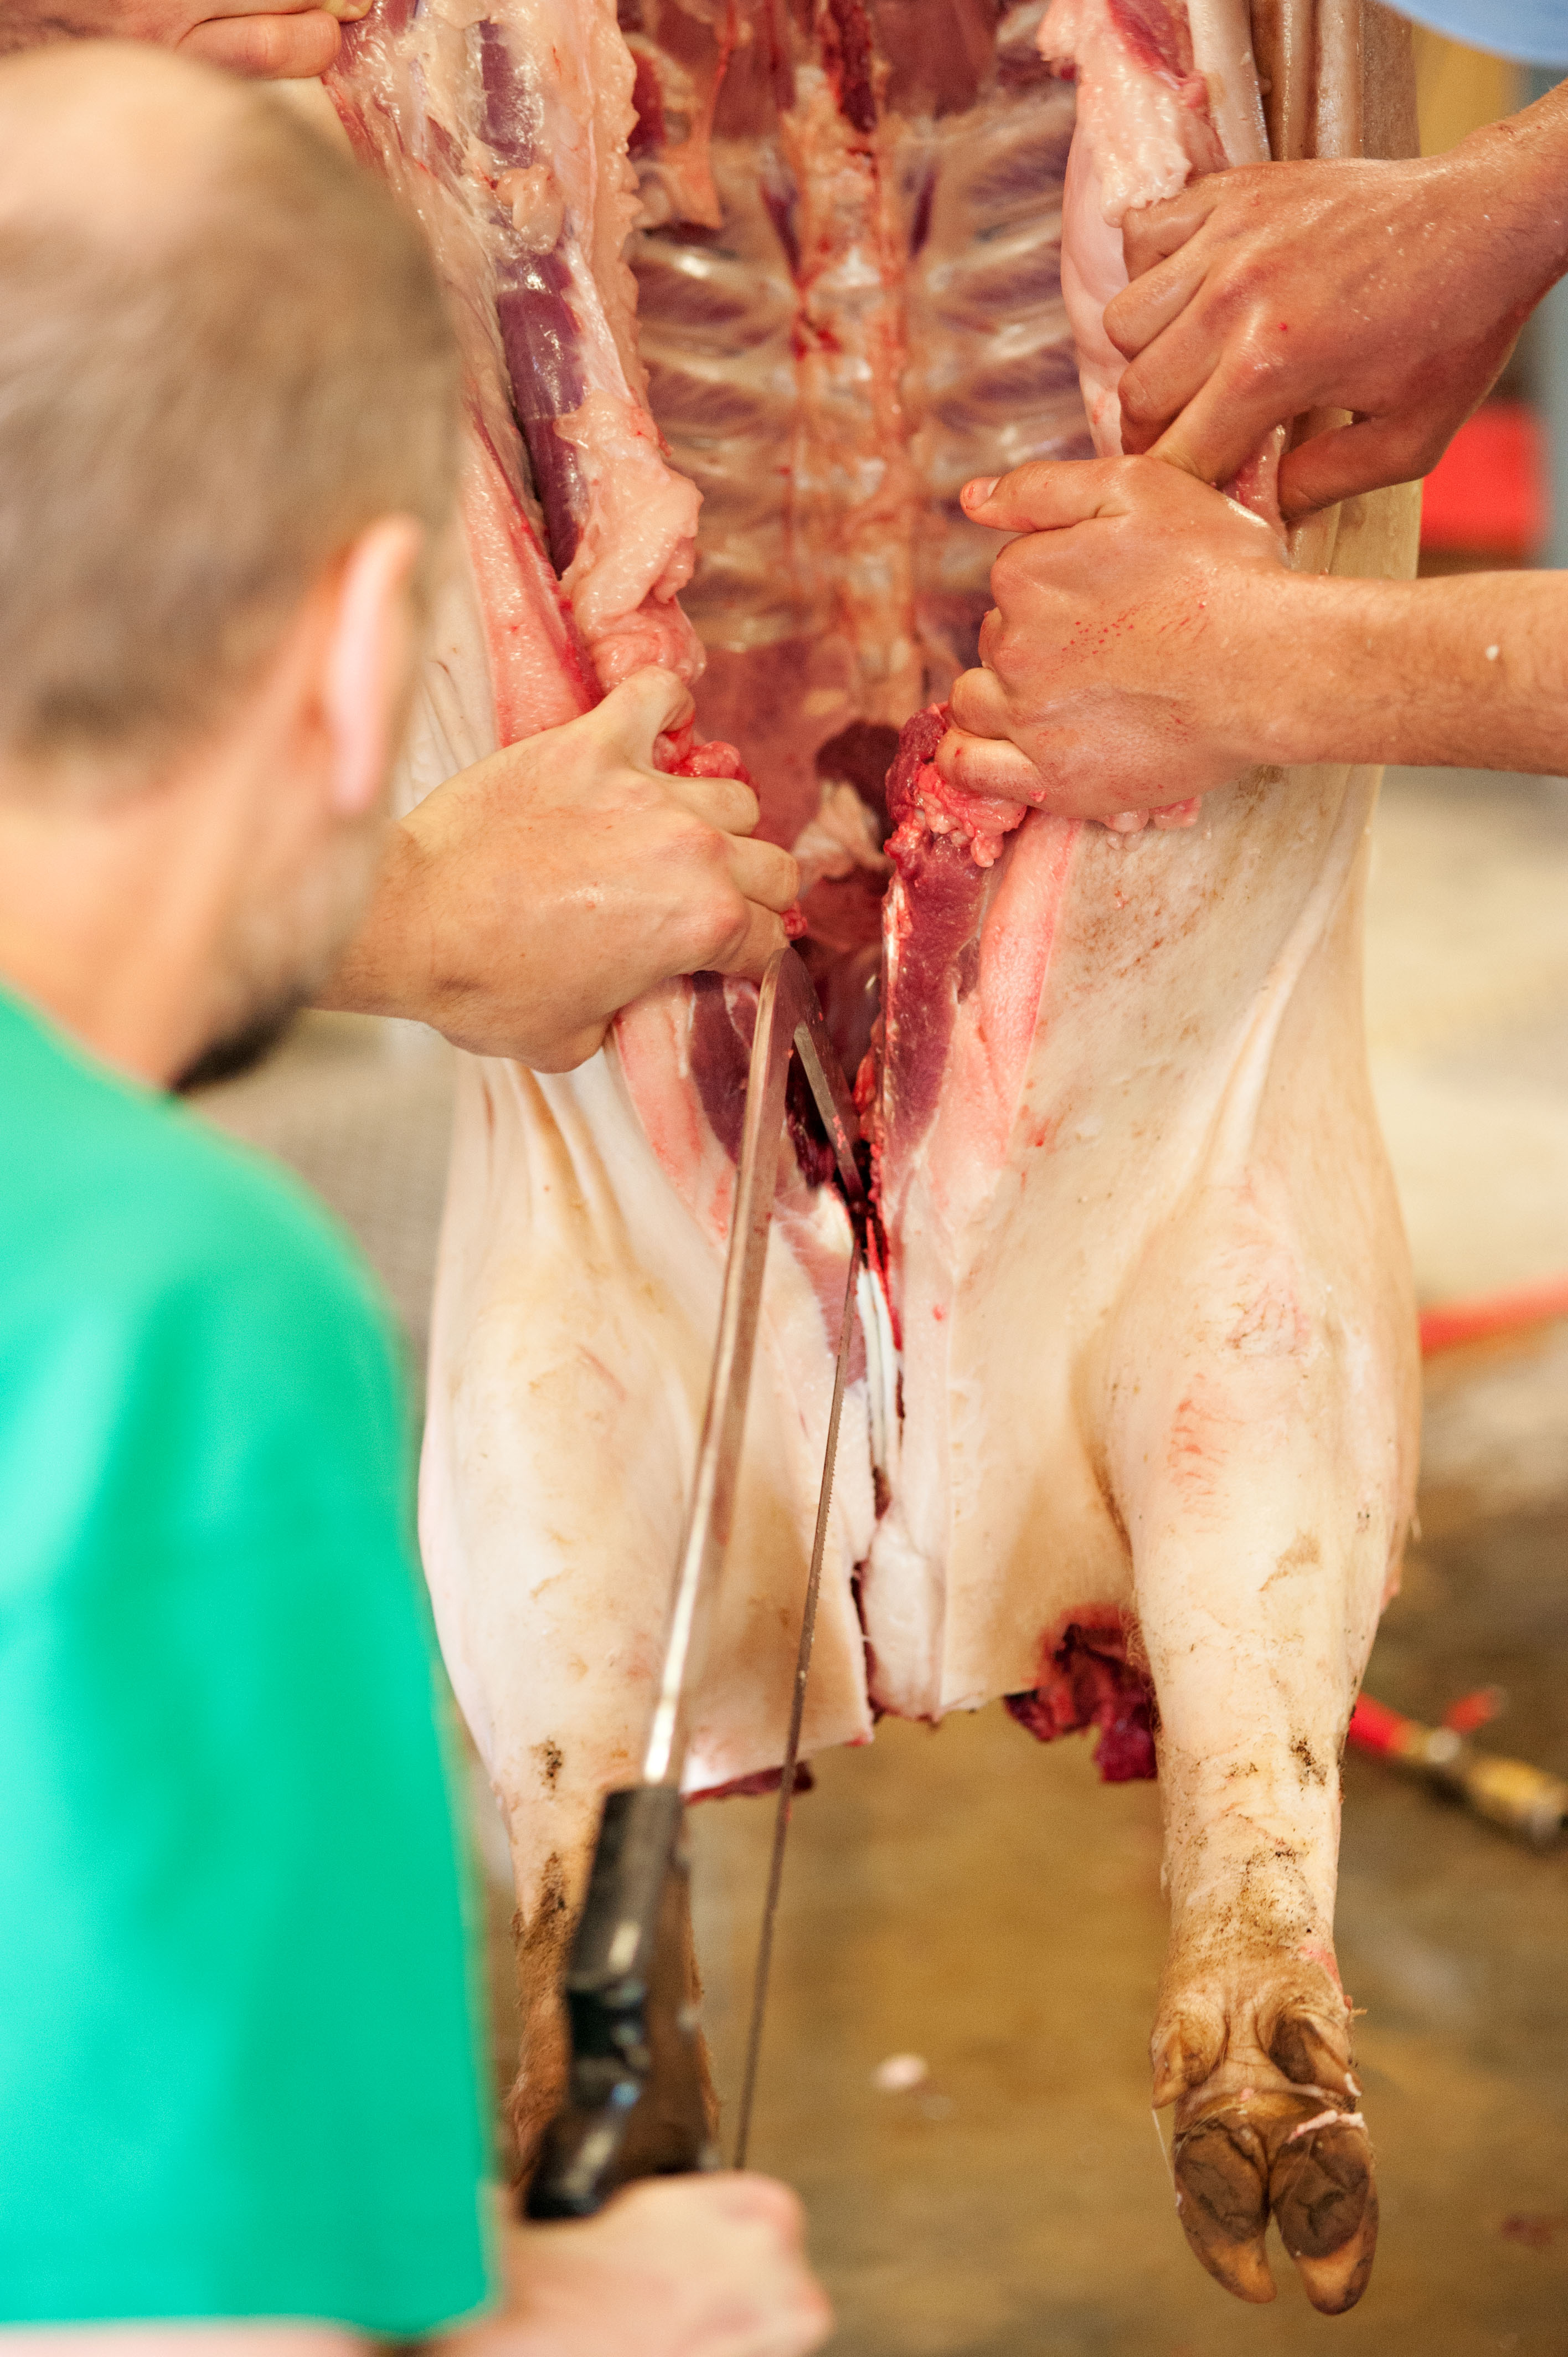
You may have noticed that I stopped posting pictures from our hog class a while back. The reason is, some of our followers, who love us and love our food, just weren’t excited to see hog parts on their daily feed (Hi Kelsey). While knowing your food and your farmer is very important, I think we can put the killing in it’s own box for a while. I’ve uploaded the rest of the pictures to the gallery so anyone who wants to see the details from our class can scroll to their hearts content. Everyone else can use our feed to stay up on what is happening currently.
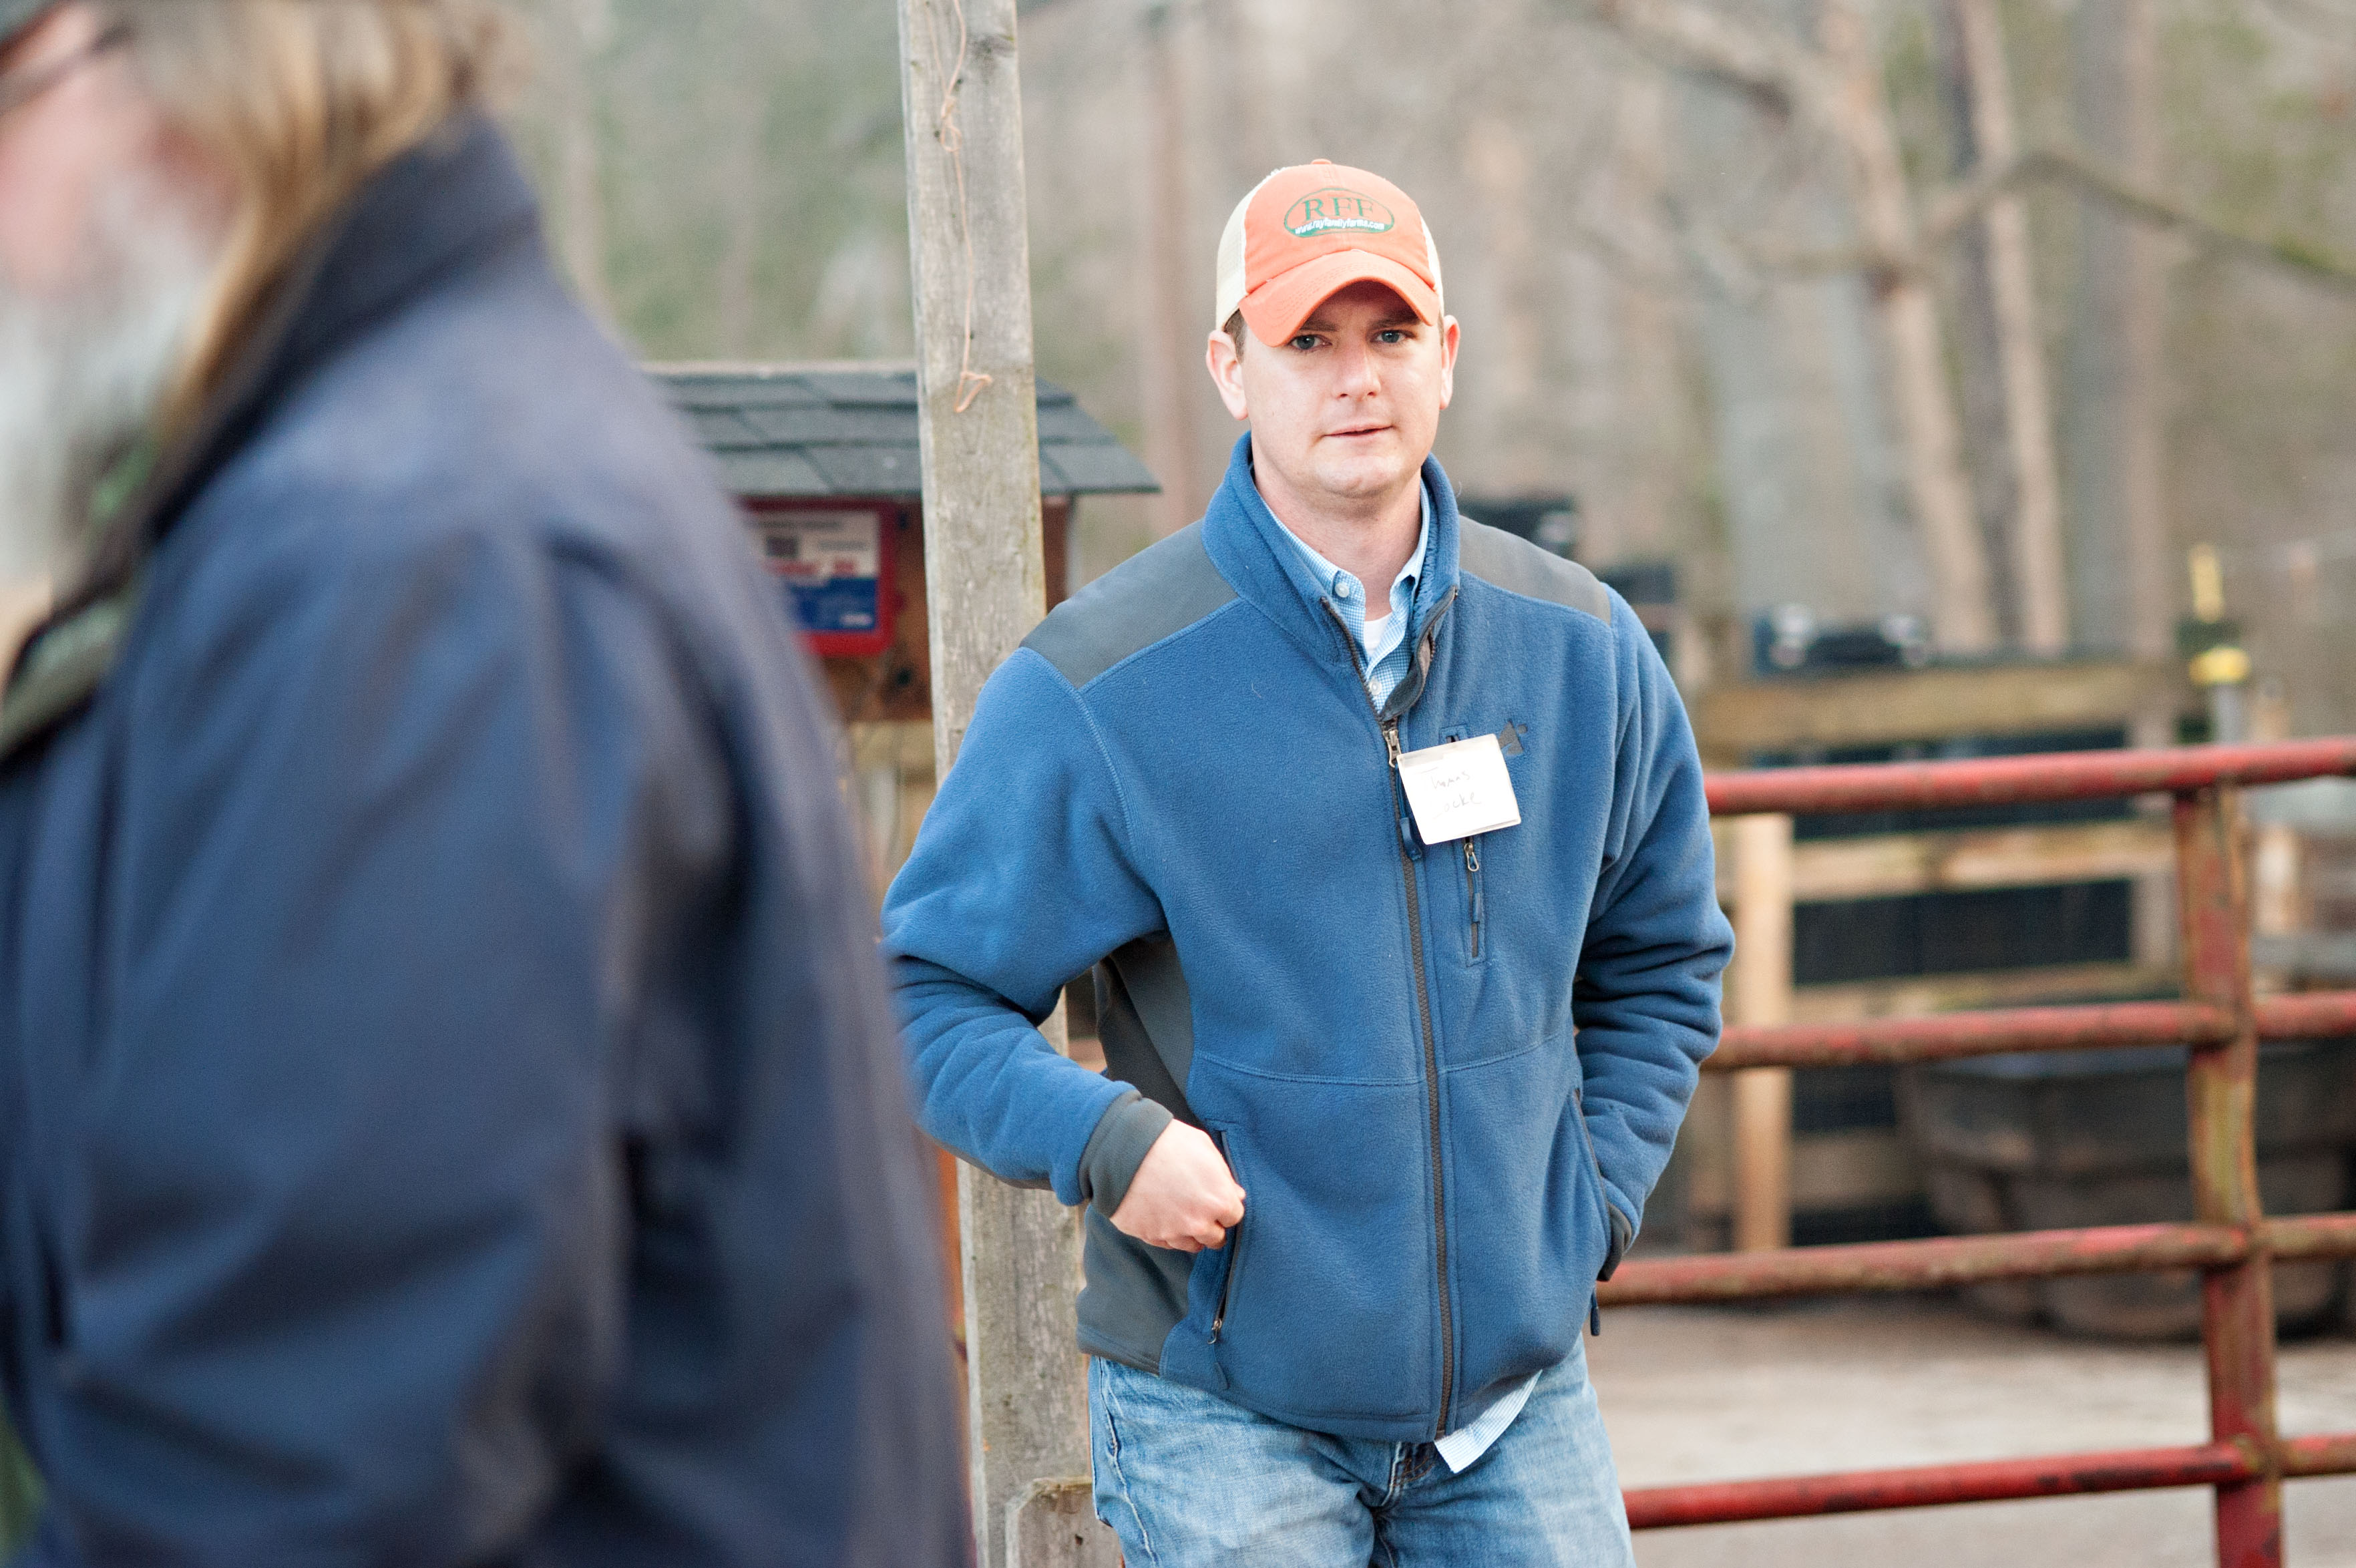
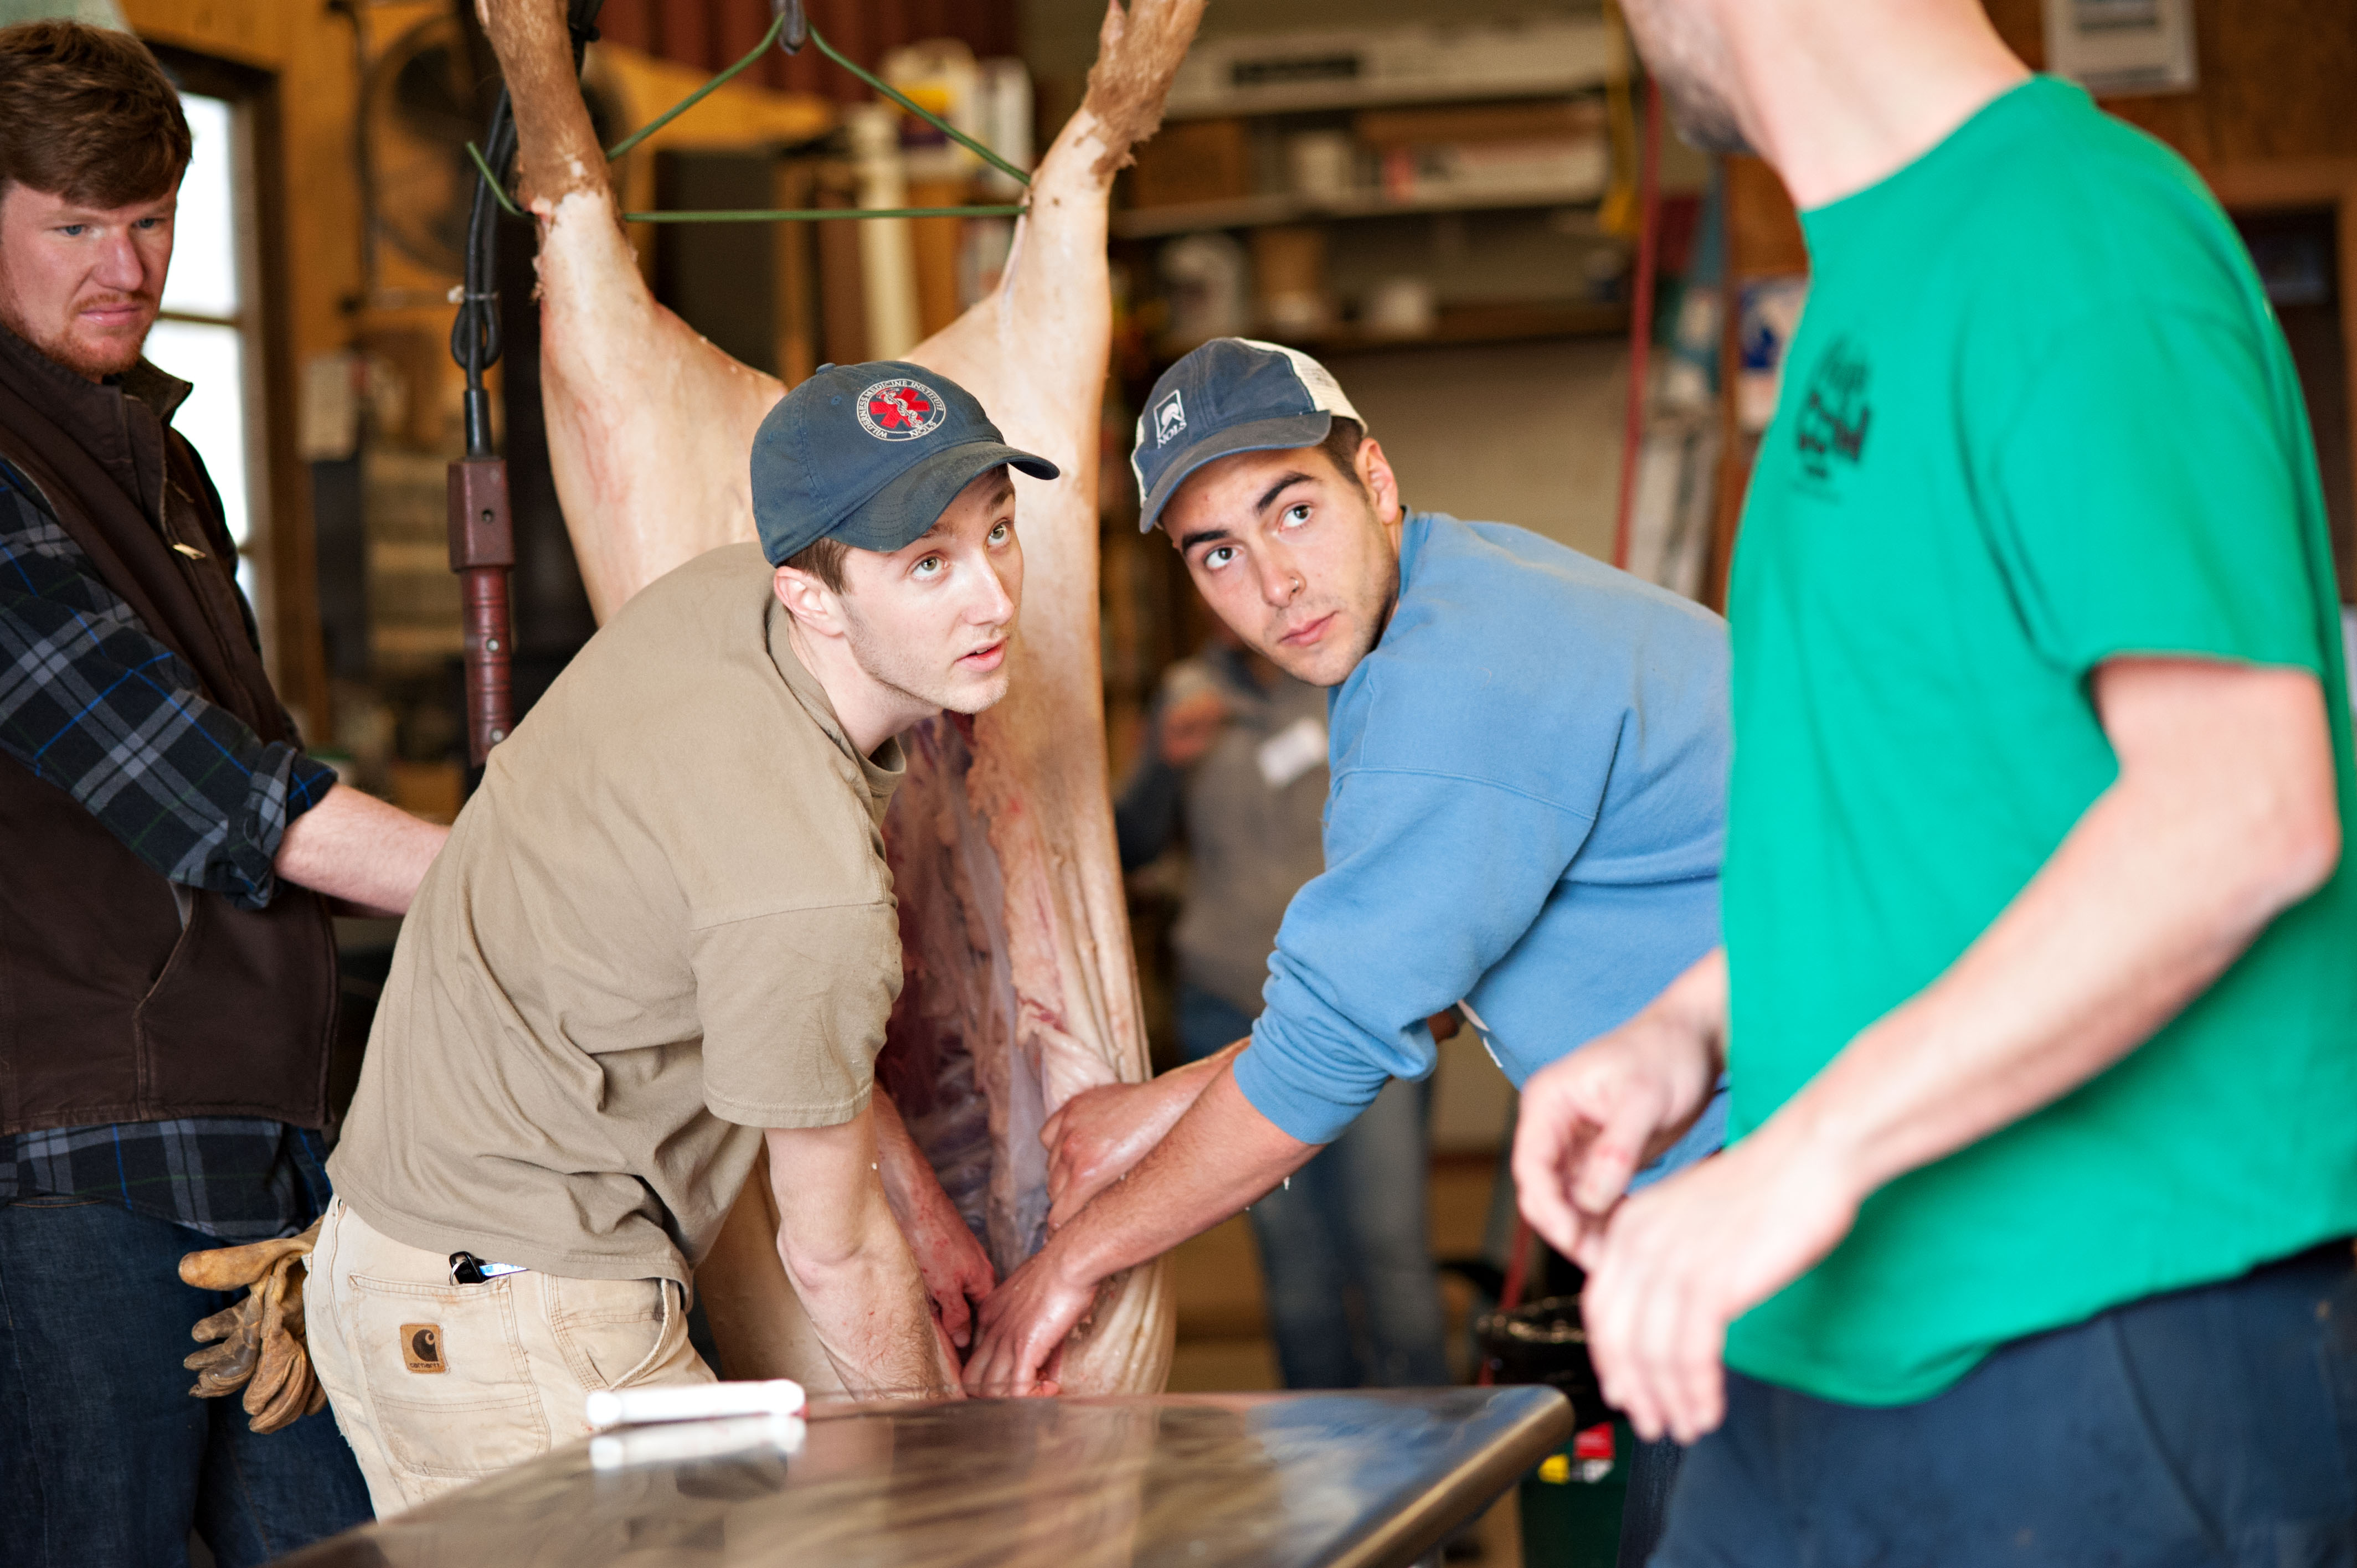
Your author Thomas, on class day.
Just because we’ve stopped posting pictures doesn’t mean we have given up on our hog class. Thomas Locke, from CFSA attended our class and fully participated. He also went home and wrote up a very nice article on the class and posted it on CFSA’s website. I can’t thank Thomas enough for his and CFSA’s support of our farm. If you aren’t familiar with CFSA, they are a great organization that is behind a lot of what we enjoy in our vibrant farming community.
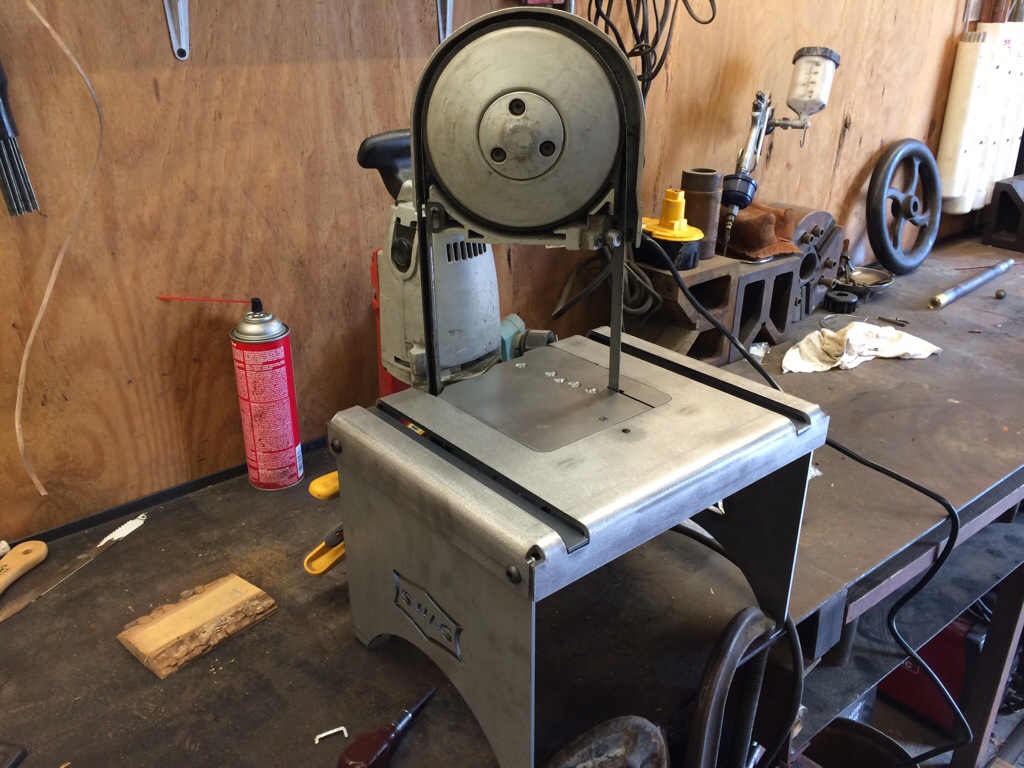
Upgraded porta band bandsaw with Swag off-road bandsaw table
I was able to get some time in the shop to finish the apple press and some other projects that were in pieces on my work bench. Knowing everything was going to sit in pieces all summer was eating at me so I started about 4:30am and worked till about 6pm and knocked out everything on the list. The apple press was only part of what I worked on that day. Now I have a perfectly clean work bench and I can go in good conscience to the lake and have fun with the kids.
Pictured above is a conversion kit from Swag Offroad mounted to my Porter-Cable portaband bandsaw. This allows me to use my portable bandsaw as a bench mount saw. I have a big cut-off saw that I never use as the portaband does everything so well I always grab it first. The only thing lacking was a mounted option. I’ve had this kit in the box most of the winter. Doing the final work on the apple press knives caused me to finally pull it out and put it to work. It worked perfectly.
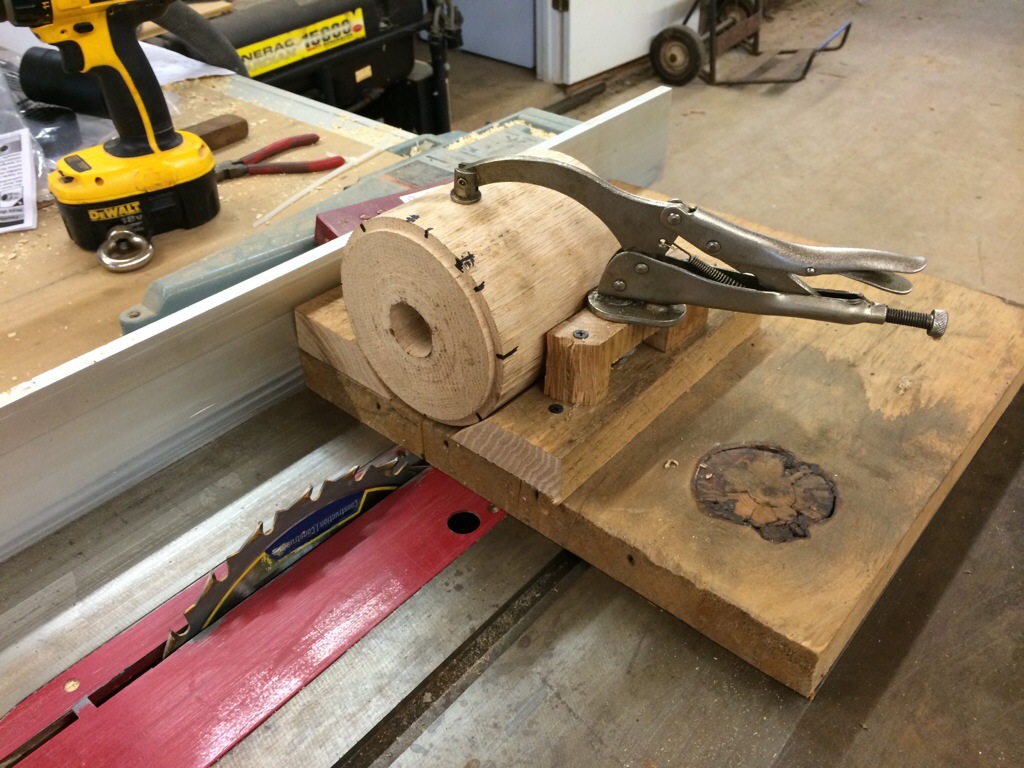
Home made sawing jig for sawing the slots in the apple press macerator drum.
Sawing the slots in the drum was tricky. They had to be at the correct place on the drum so it stays balanced. They also had to fit closely to hold the knives in place. Plus they had to be at the correct depth, straight, etc. All that precision required a 15 minute jig made of scrap lumber lying around the shop. Here you can see the drum marked up for where each slot will be. A hold down vice grip was borrowed from the drill press and we had all the slots cut in another 15 minutes.
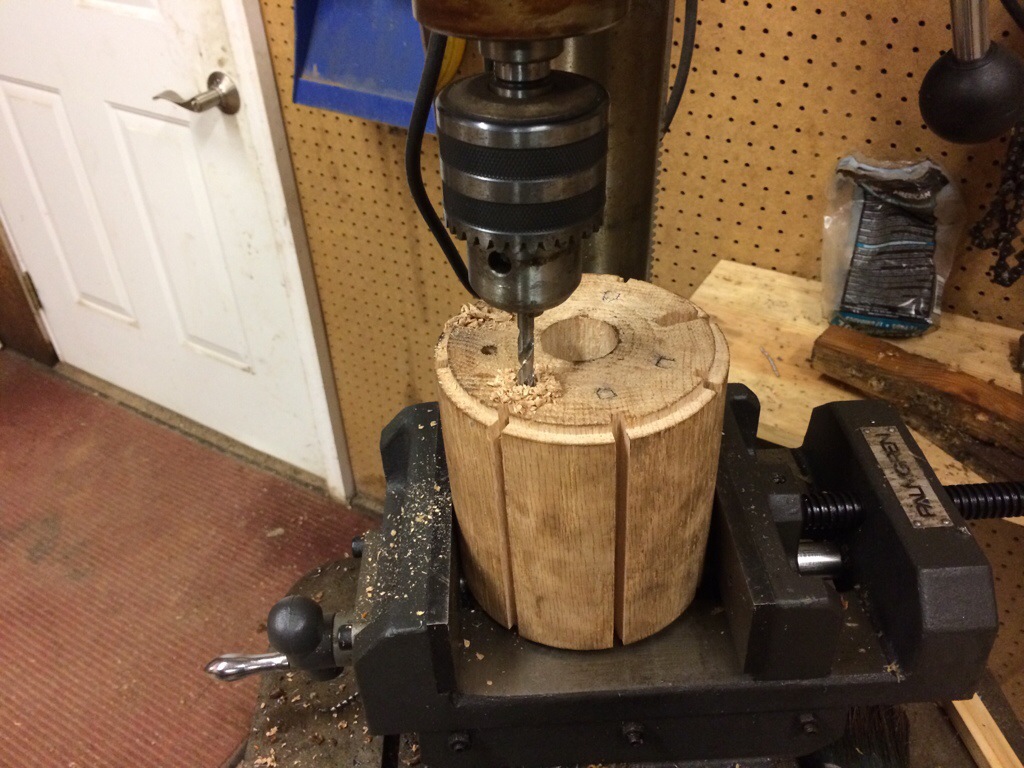
Drilling retention holes in drum for holding knives.
You can see the other holes marked on the drum. This was Miguel’s idea I tried to describe in a previous post. The idea was to have a positive retention system for the knives utilizing this hole. The idea worked, but it didn’t hold the knives in place well enough to be the primary retention system and the work to make the knives in this shape was too much to justify the time and tooling.
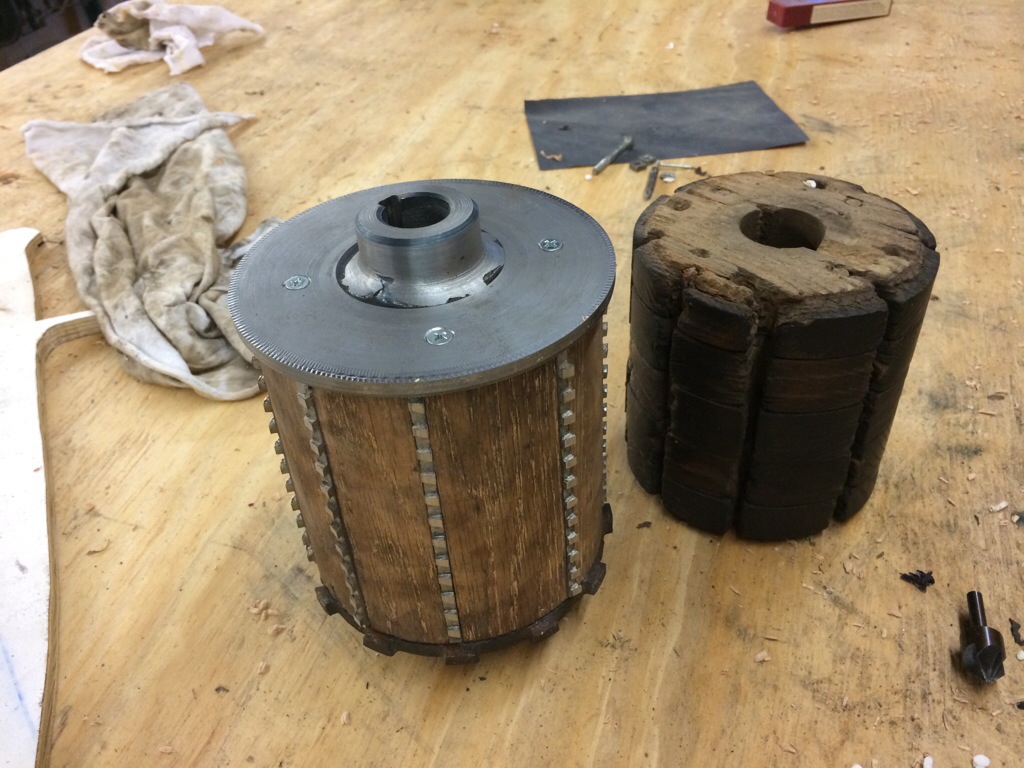
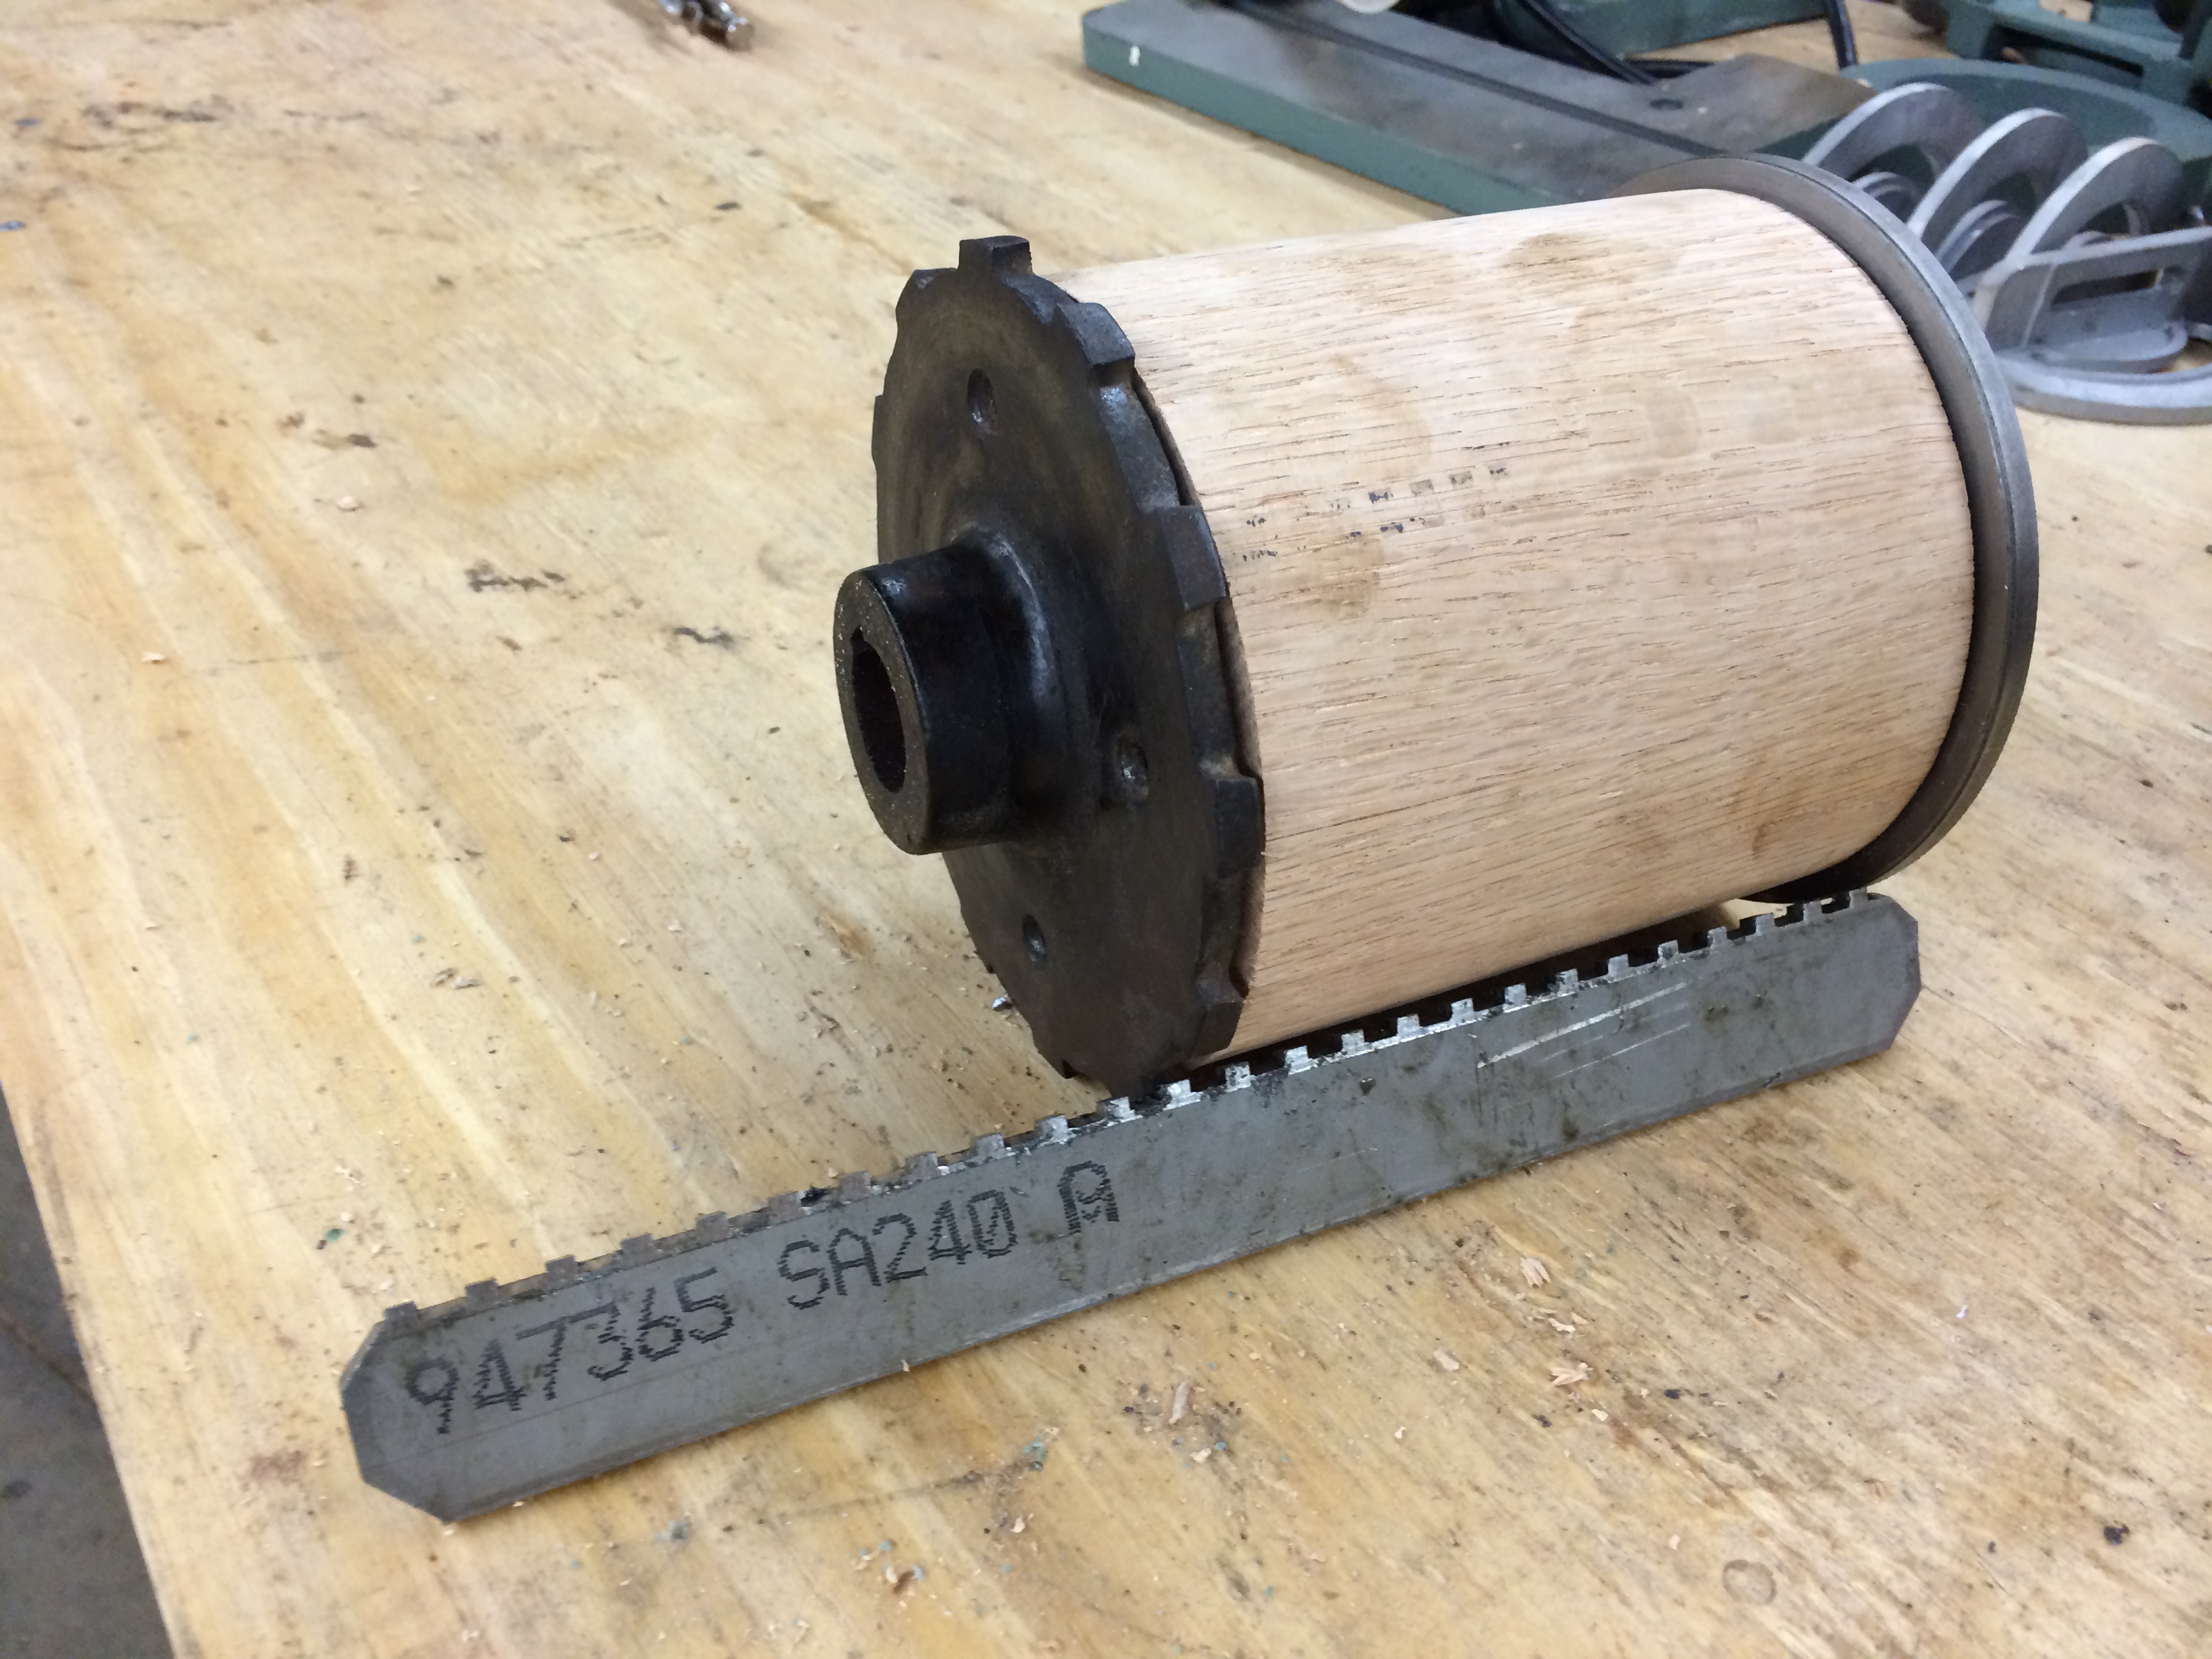
The finished apple press macerator drum beside the old drum.
What all this work was for. A new drum, made from laminated red oak which should last past my lifetime and maybe my kids. New knives made from 304 stainless steel, twice as thick as the previous knives. Again, these should last well beyond my need.
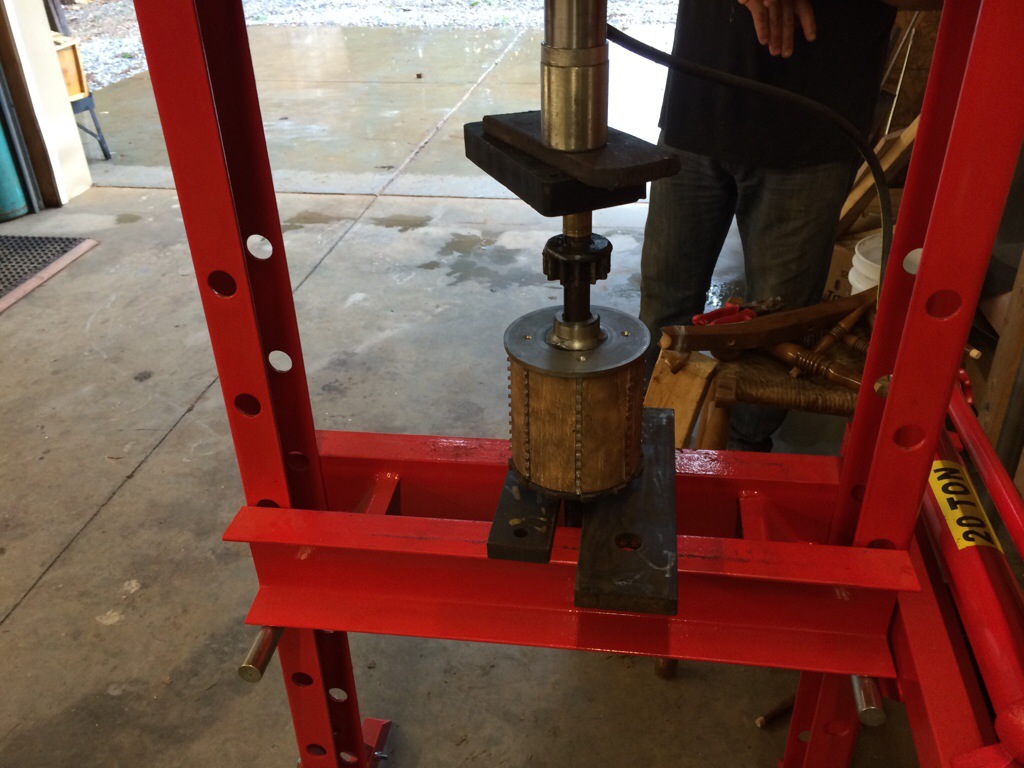
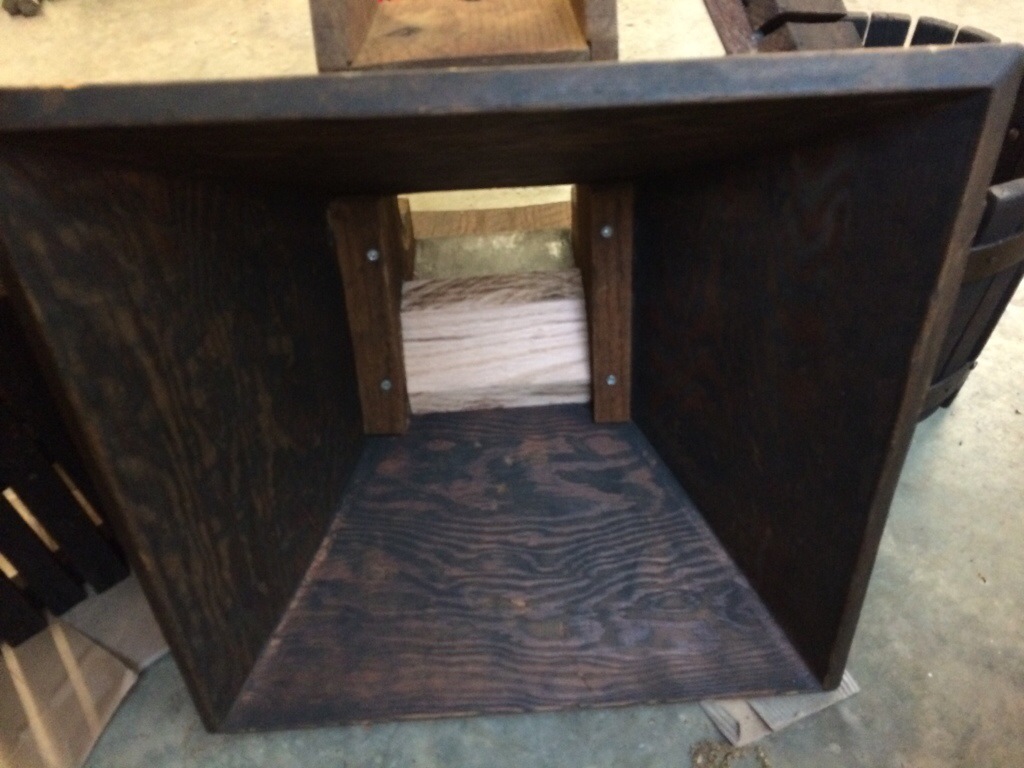
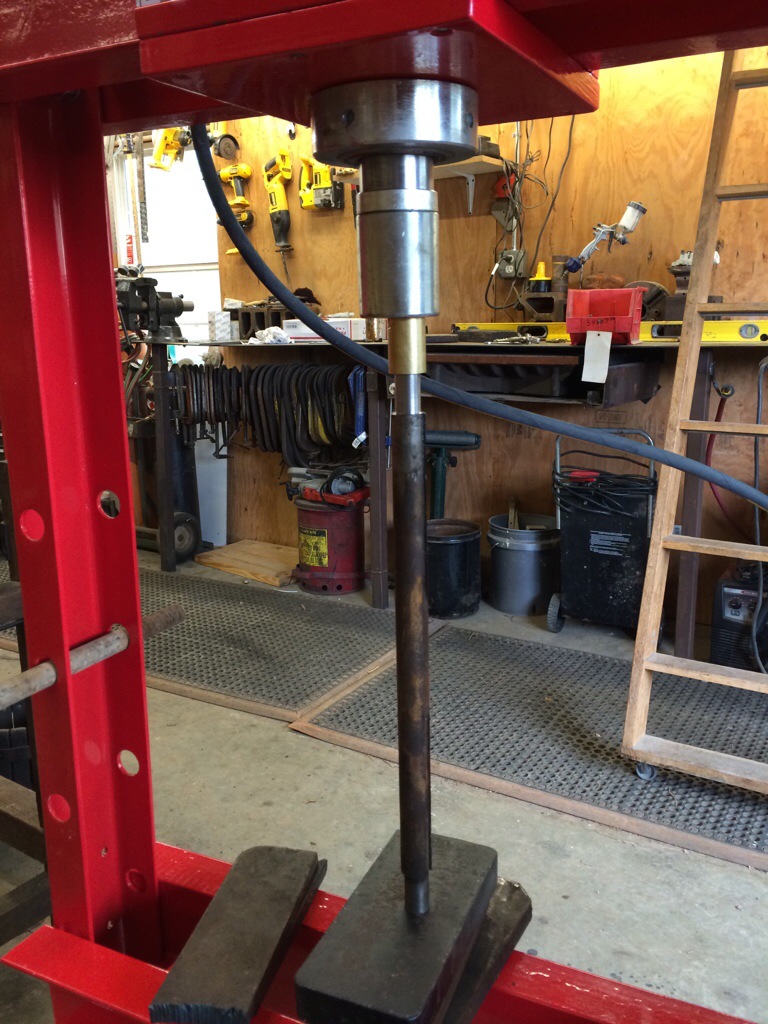
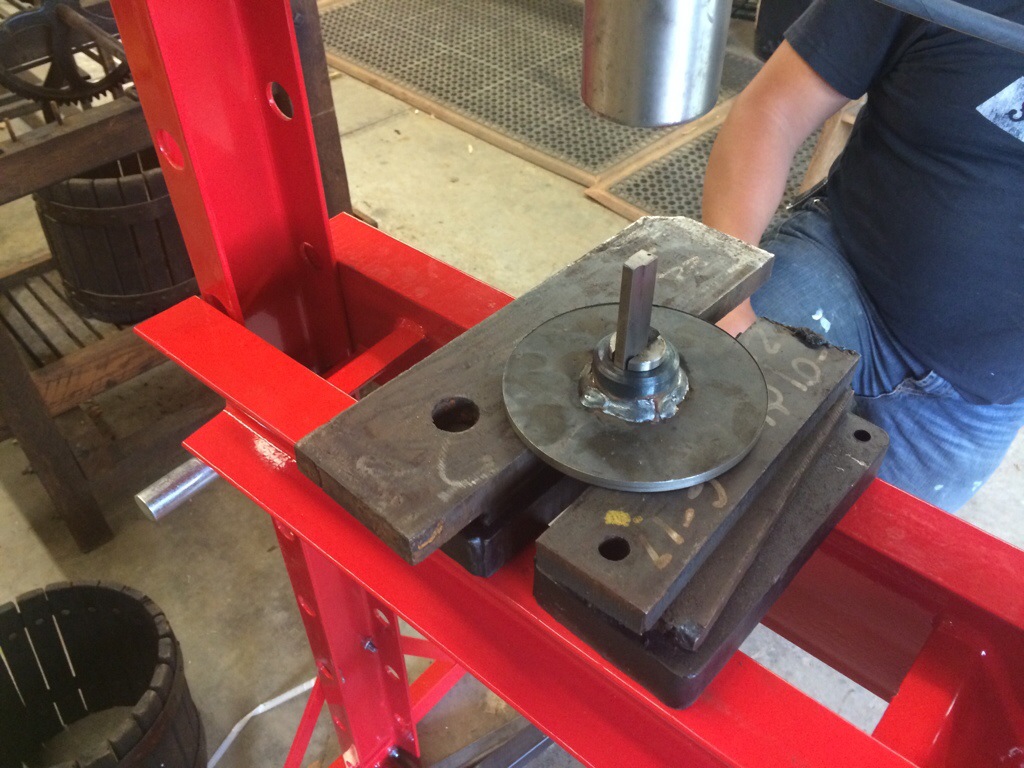
The part we’ve been waiting for. Reassembly of the moving parts of this apple press.
We had to use our press again, this time to put things back together. The drive gear went on my hand but the macerator and the flywheel both had to be pressed back onto the shaft. I didn’t clean the shaft before putting it back together because the marks where everything was seated originally were still plain. This made it easy to put everything back together.
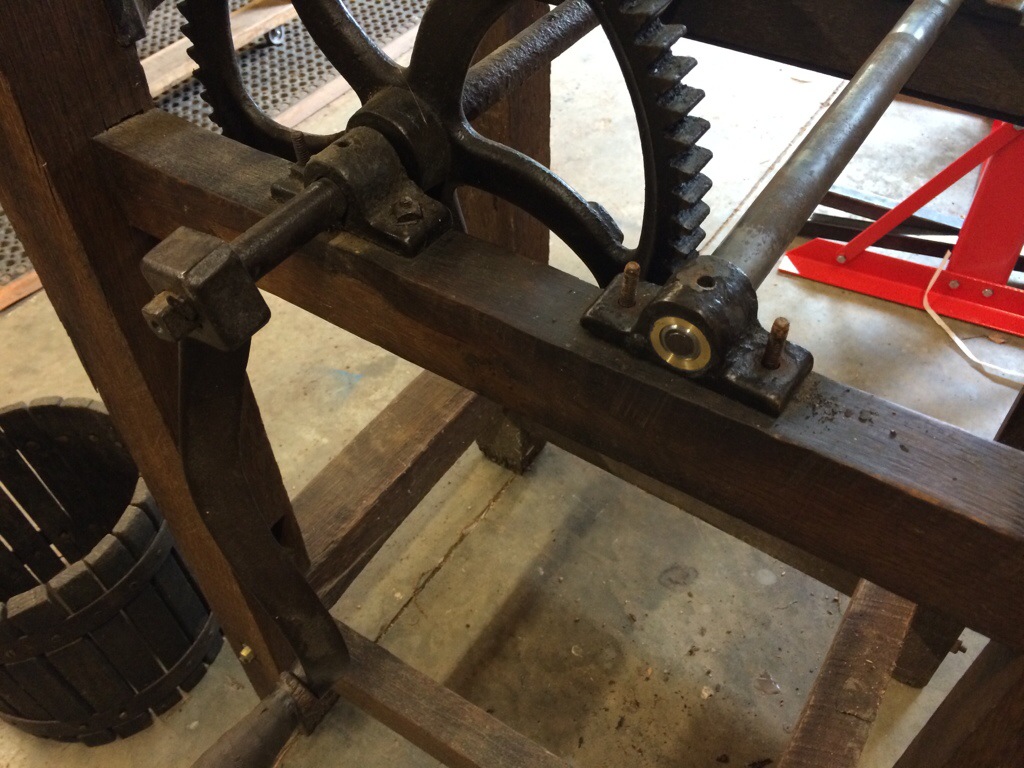
Here you can see everything back in place on the shaft.
It was interesting putting it back together at this point. When we gave it a test run the drive gear sloughed off a bunch of gunk because the drive teeth were properly engaging for the first time in many years. We’re back to metal on metal the way it was intended.
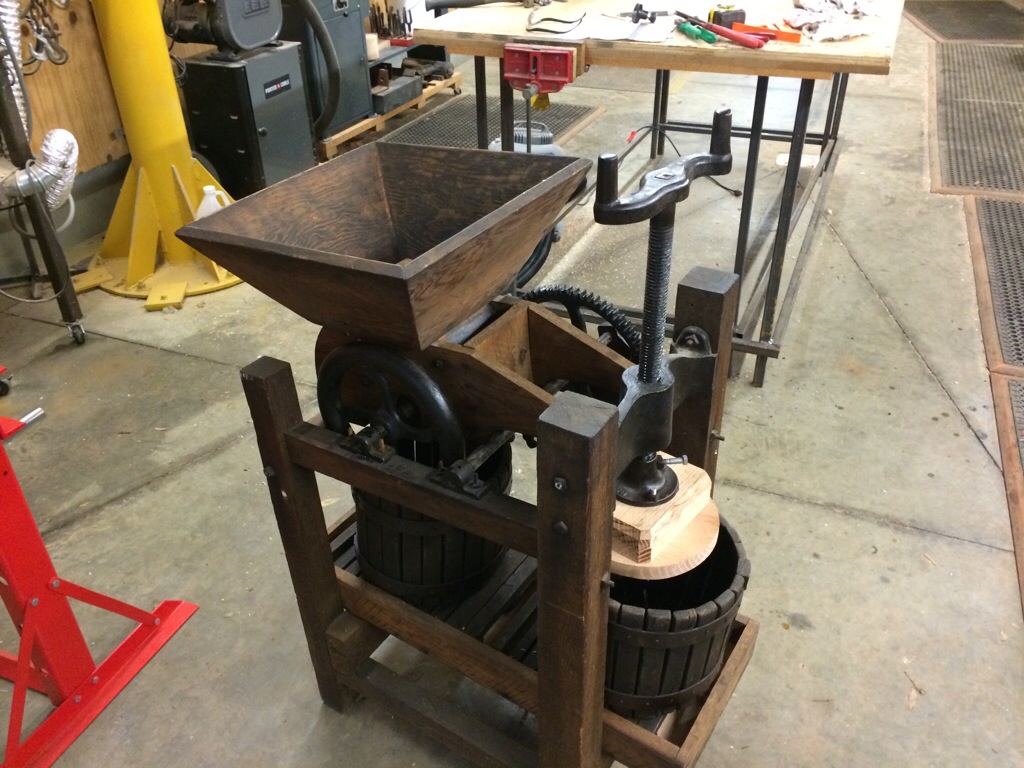
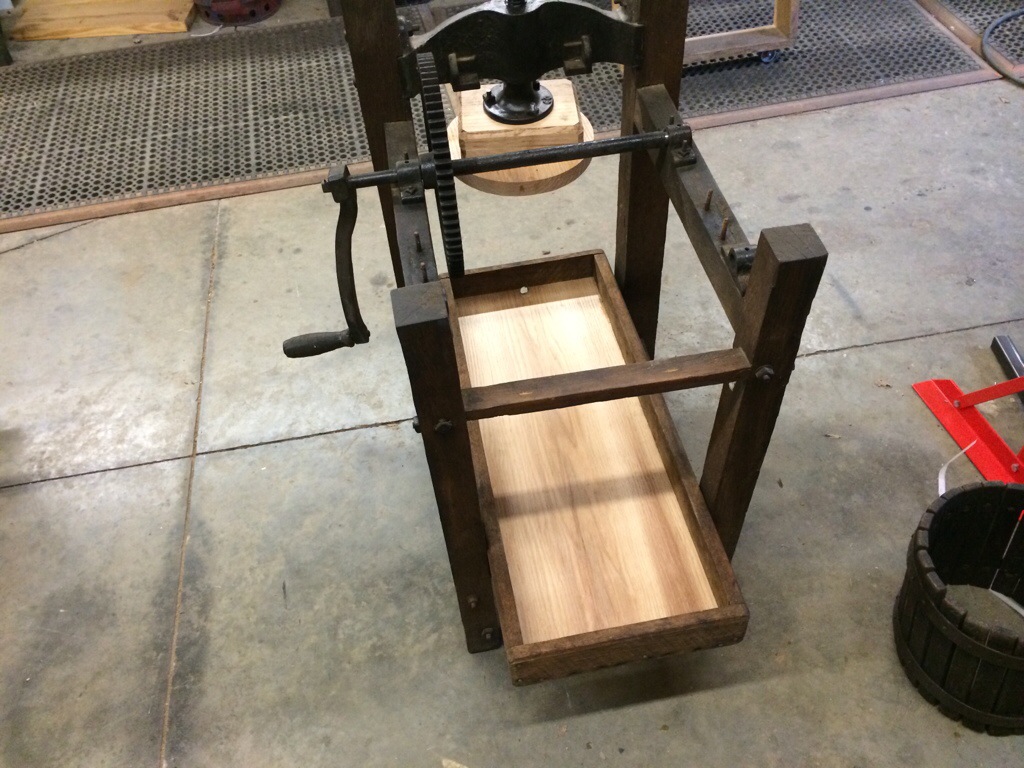
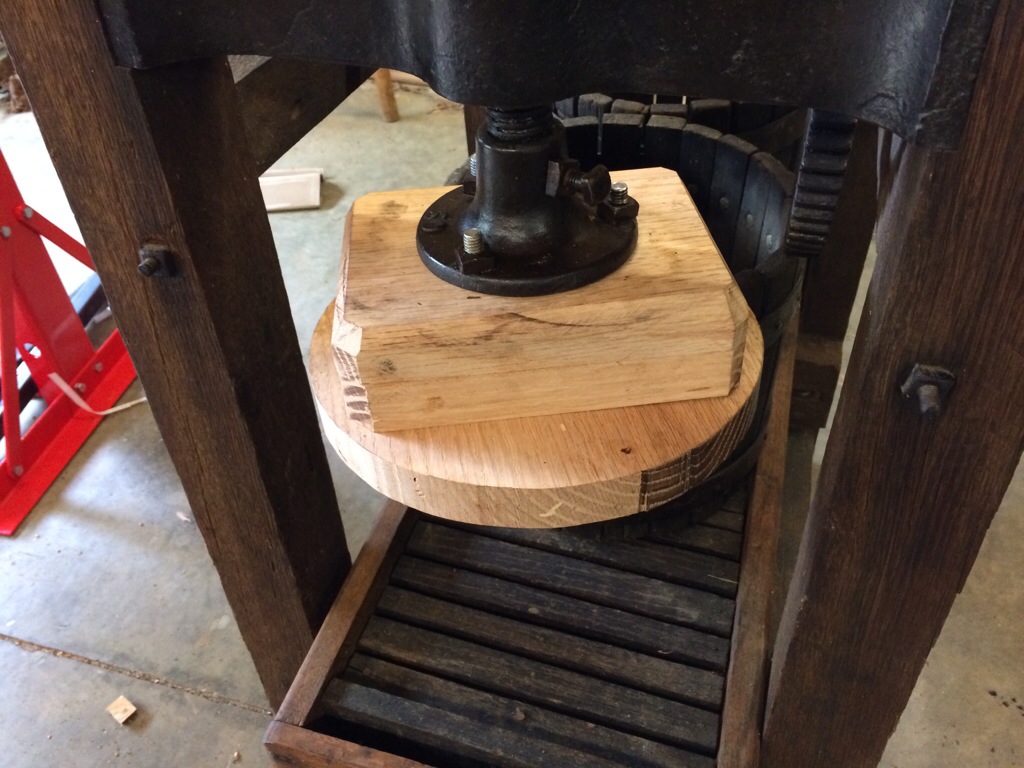
The picture I’ve been waiting to see. The fully restored and reassembled antique apple press, ready for apples.
And here it is. Six posts and many man hours later, all finished and waiting on apples. I told Miguel I think we used every tool in the shop on this restoration. We even ended up using the new (to us, very used otherwise) Piranha ironworker to finish making the knives. Now we just need some apples!
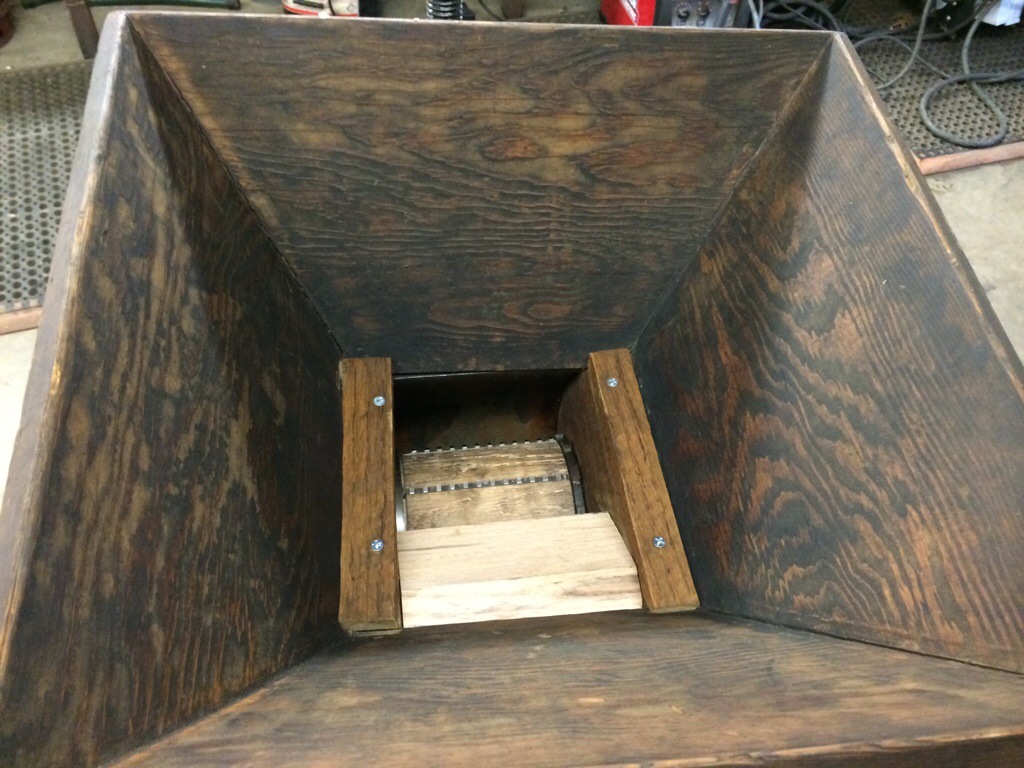
New macerator drum, inside the hopped, all geared up and waiting for apples.
It appears that everything works correctly and all this thing needs is a few bushels of apples. Before we use it, everything will get a good bath and a wash down with bleach. No sense in being too fussy at this point since it’s just going to sit in the barn till fall apple season anyway.
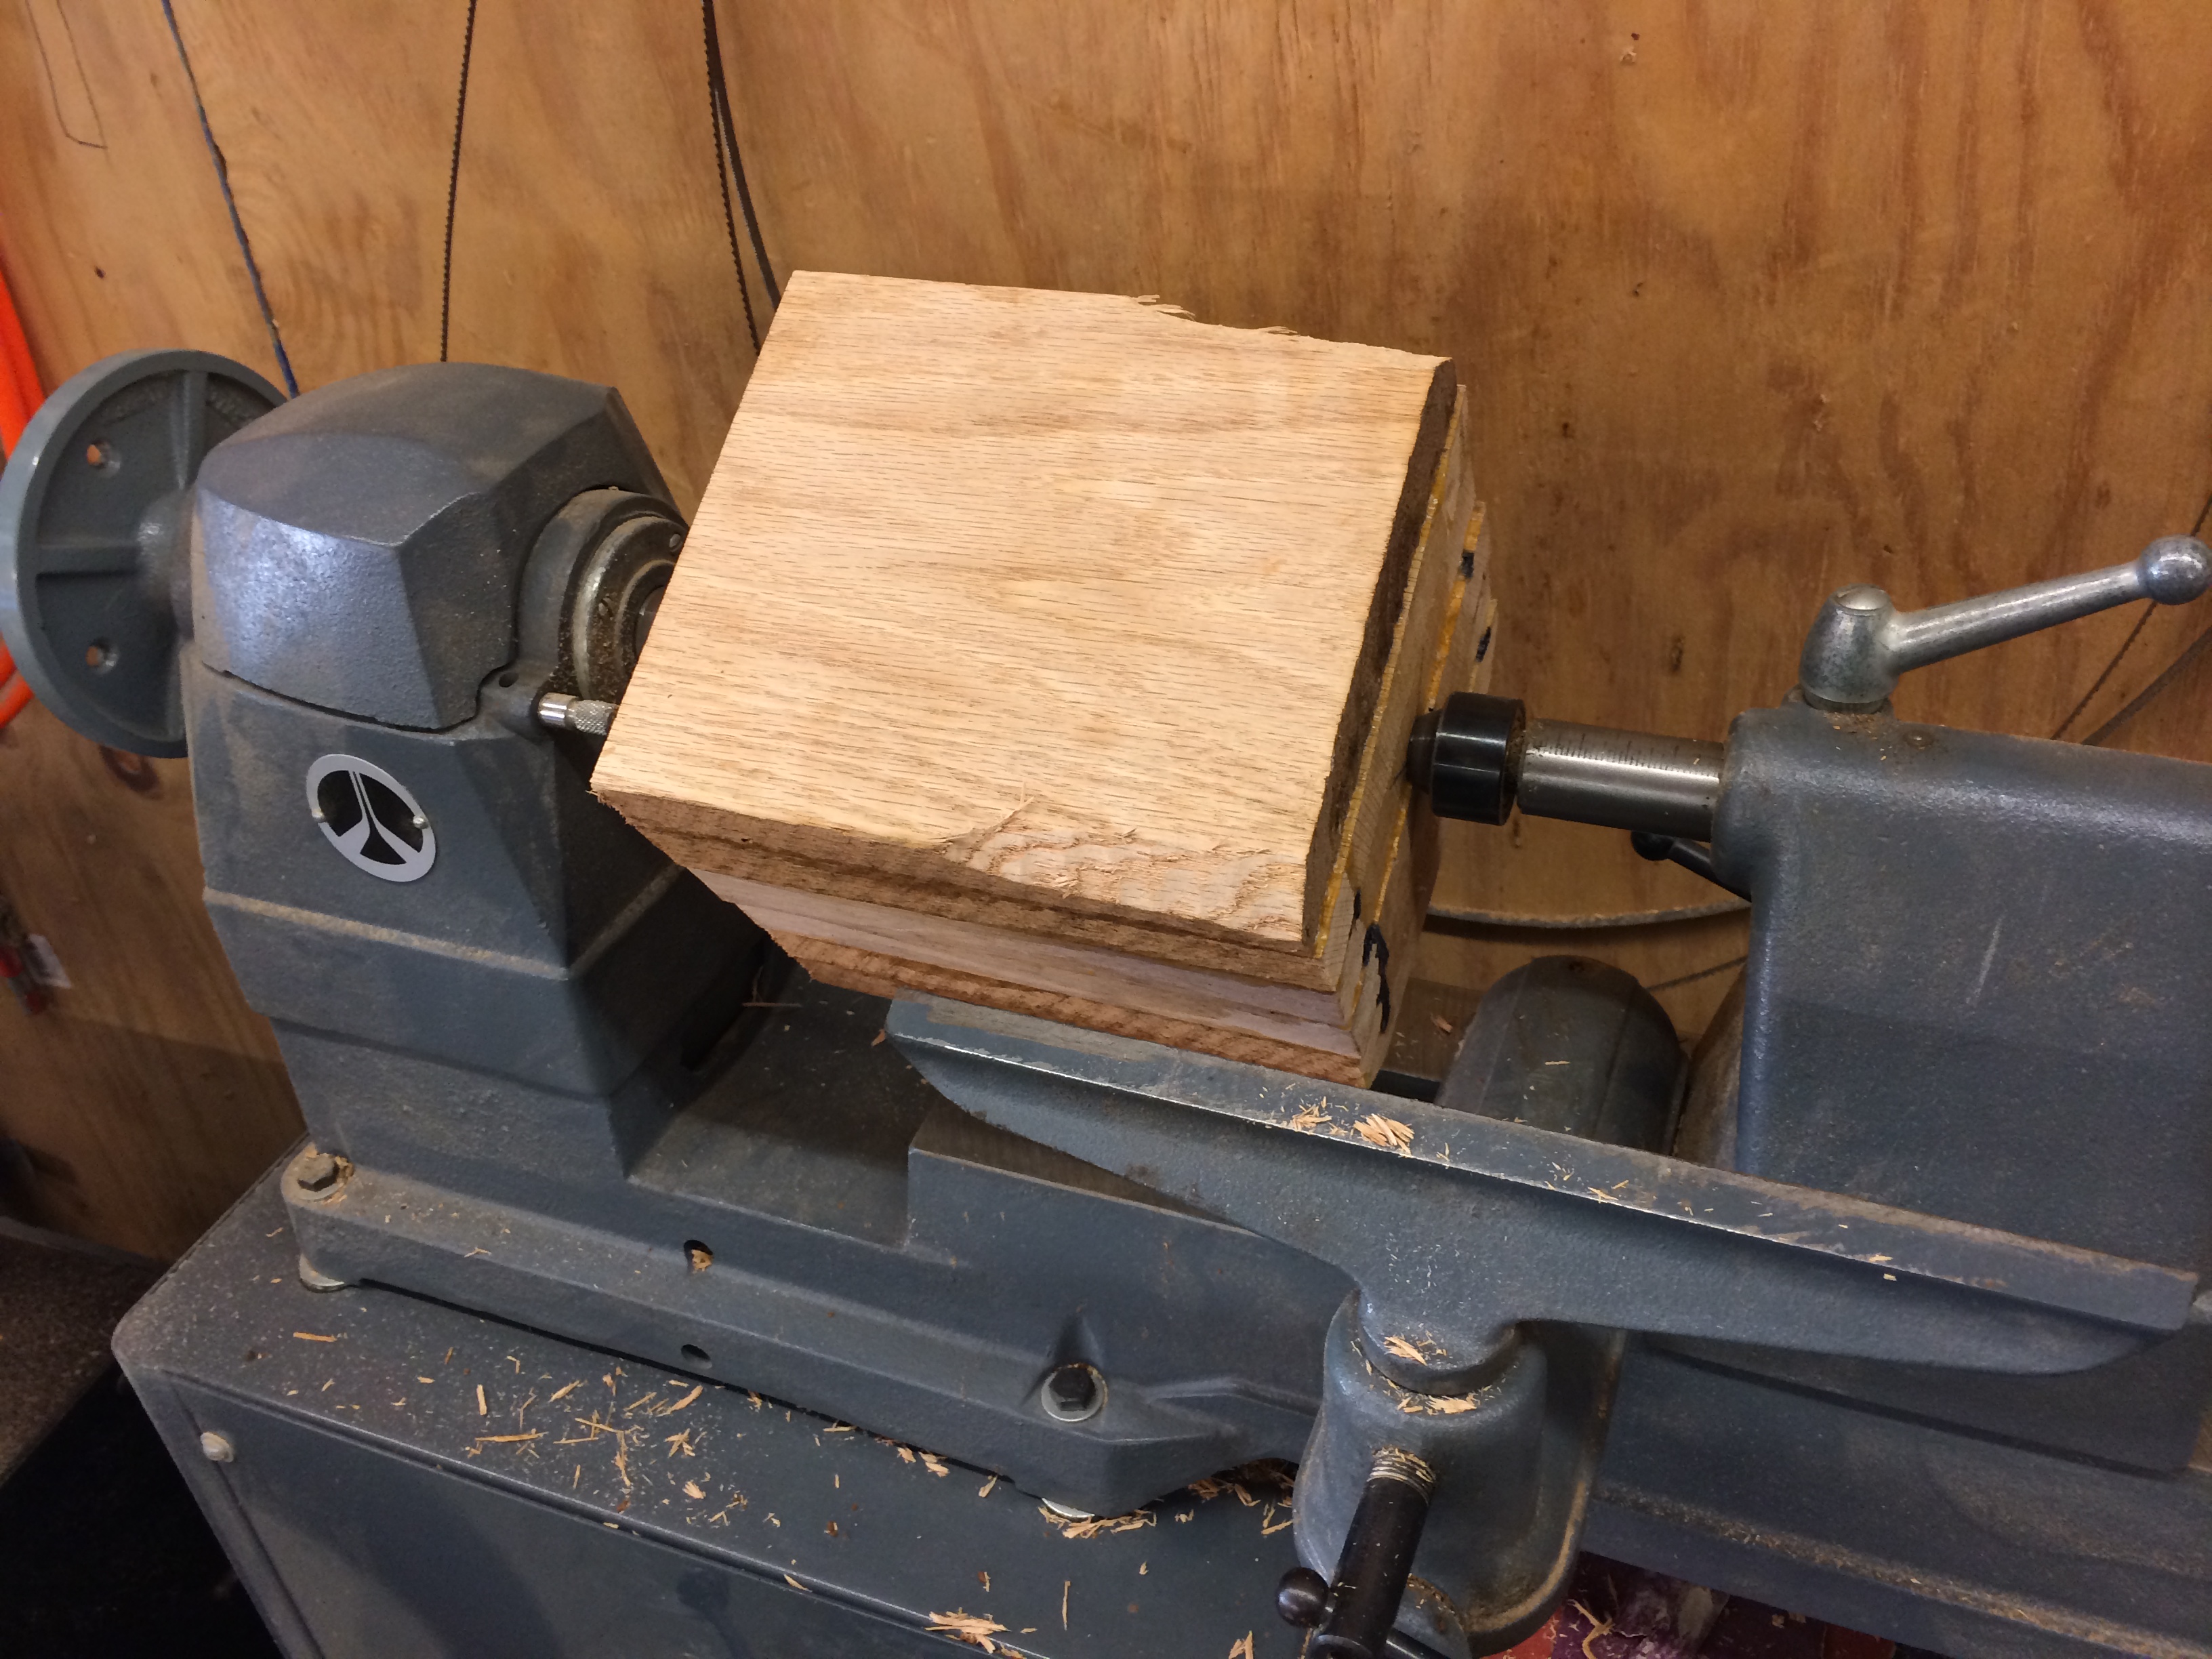
Here you see the block of laminated red oak, cleaned up and chucked into the lathe ready to get started.
The apple press restoration is close to being done, but getting further and further away as the days get warmer. You see, once warm weather hits, I lay down my shop tools and pick up my gardening implements. Not because I cannot stand the heat, but because I can’t spend but so much time in the shop working on projects like this. When it’s cold, snowy, rainy, sleety, miserable, I head to my shop where it’s warm and comfy. Nobody misses me much because they don’t want to be outside with me anyway. But as spring rolls around, things like taking the kids boating, going for a gator ride, seeing new calves, etc. all start sounding good to my crowd. So I put down my chisel and hammer and try to concentrate on projects that involve more of the family. That means that while I’m very close to finishing, I’m also very close to putting all this in a box till this fall. Maybe this weekend I’ll get it finished up and put back together. Maybe not.
Roughing out the wood. There are already a lot of chips of the ground at this point.
It’s a joy to get back on the wood lathe for this project. I enjoy a lot of different types of work, but working on a wood lathe is one of my favorite things to do. It’s more artistic than scientific. Not so much on this particular job but on many others. I spent a lot of time on a lathe when I was younger and any time I can get a gouge in my hand and make some chips fly is a good day.
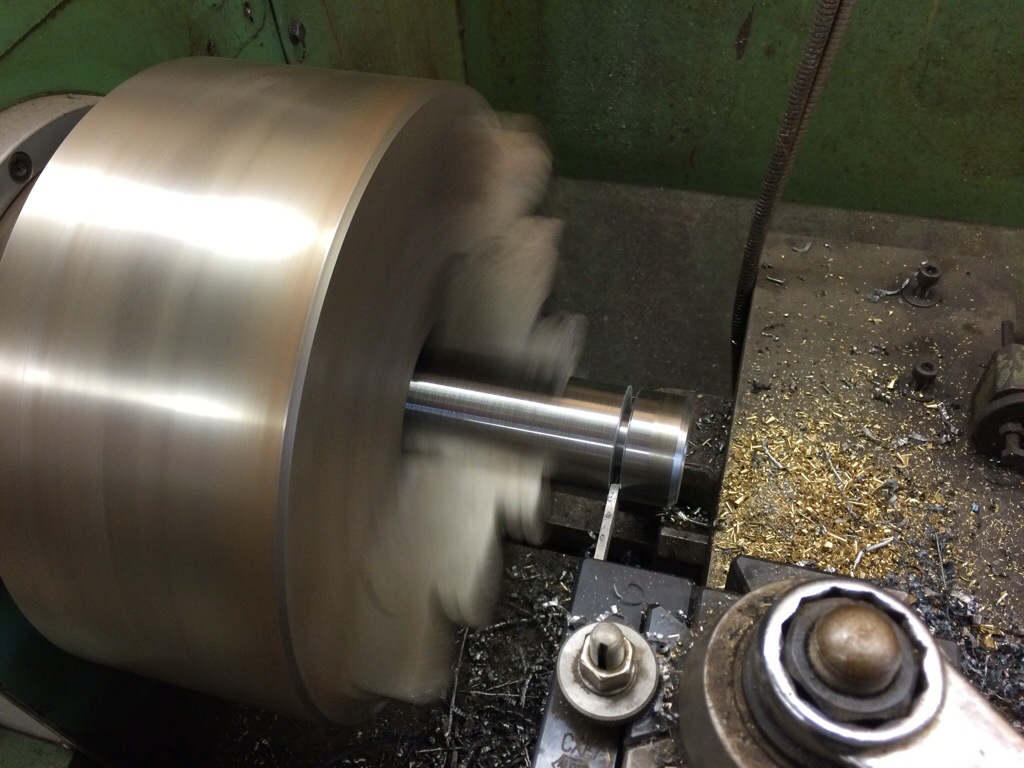
The finished product. Turned true and to size, with a center hole drilled through for the shaft.
I wasn’t able to grip the drum in my wood lathe for drilling the center hole so I had to cover up my metal lathe and do the drilling in the big chuck on the metal lathe. I try to limit any wood getting around my metal working tools, as wood can be bad for them. However I’ve gotten sloppy by having a big metal lathe. I’m used to being able to grab most anything in the 100 pound chuck. My wood lathe chuck, which weighs about 2 pounds, wasn’t even close to holding this drum, something I didn’t check till after I’d already parted off the finished drum. Oh well, you cannot win them all.
Pictured with the drum is a nearly completed knife. You can see the teeth which are .250″ between teeth, and cut at a 15 degree relief, the same as the original knives. Miguel had what I think is a good idea. Since we have such large pieces of metal for the new knives, let’s drill pockets in the solid drum and cut the knives as long two tine forks instead of single piece knives. To insert a knife, you put the dull end (non machined) of the fork into the hole drilled cross wise in the drum, then the sharpened end of the knife goes into the slot cut to hold it, just like the old slots. The makes for a very positive retention system for the knives, stronger than the wedge system in the old setup. It’s overkill for what this thing does, but since we already have the large pieces of metal, why not? I have to ponder on it a bit more and make sure it’s going to work but for now it’s sounding like a good idea.
Hopefully we’ll get these last steps done shortly and button this thing up for the summer. I’d like to have it ready to press apples come fall, not be scrambling to get it working at the last-minute. I hate unfinished projects.
The apple press restoration made some progress lately. Thanks to Miguel’s “wife” I was able to get some stock of stainless steel for making my knives. Miguel doesn’t have a wife, it’s a joke between he and I.
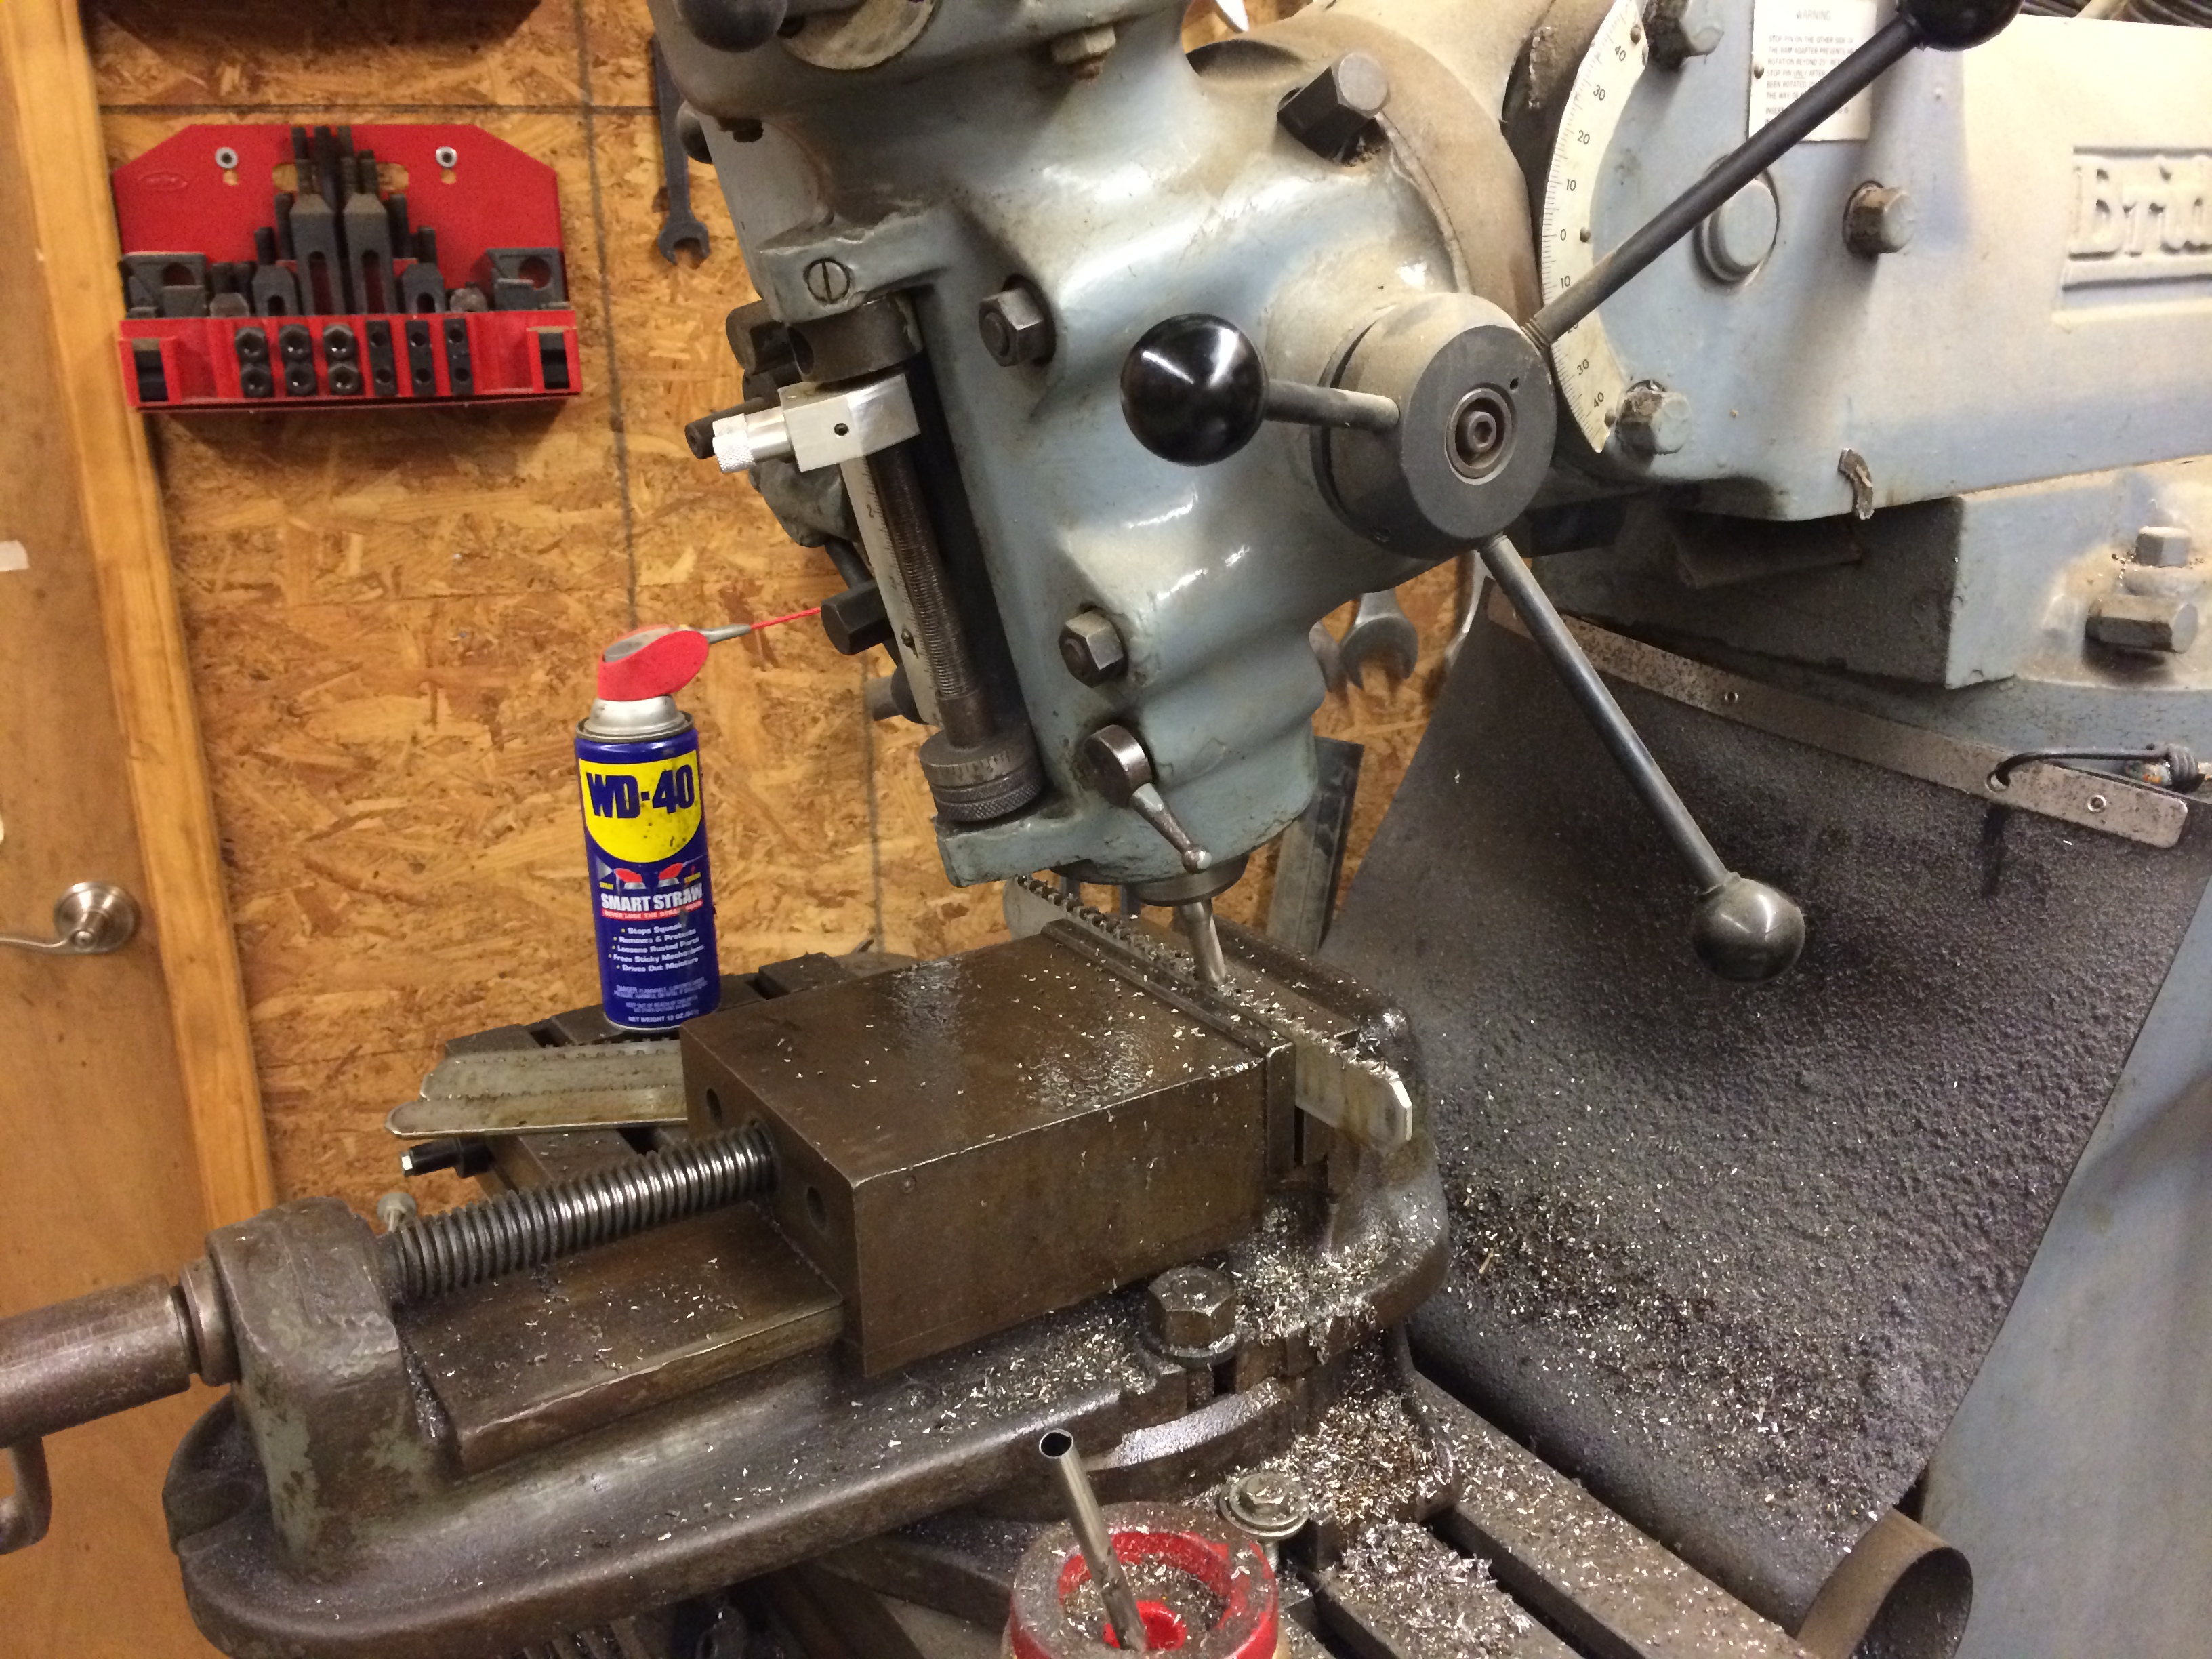
Machining the knives.
I used the old knives for dimensions and used a .250″ end mill to cut the slots you see on the three knives on the left. It’s a very simply machining operation, and it only burned up one end mill on the stainless. Luckily I had a spare.
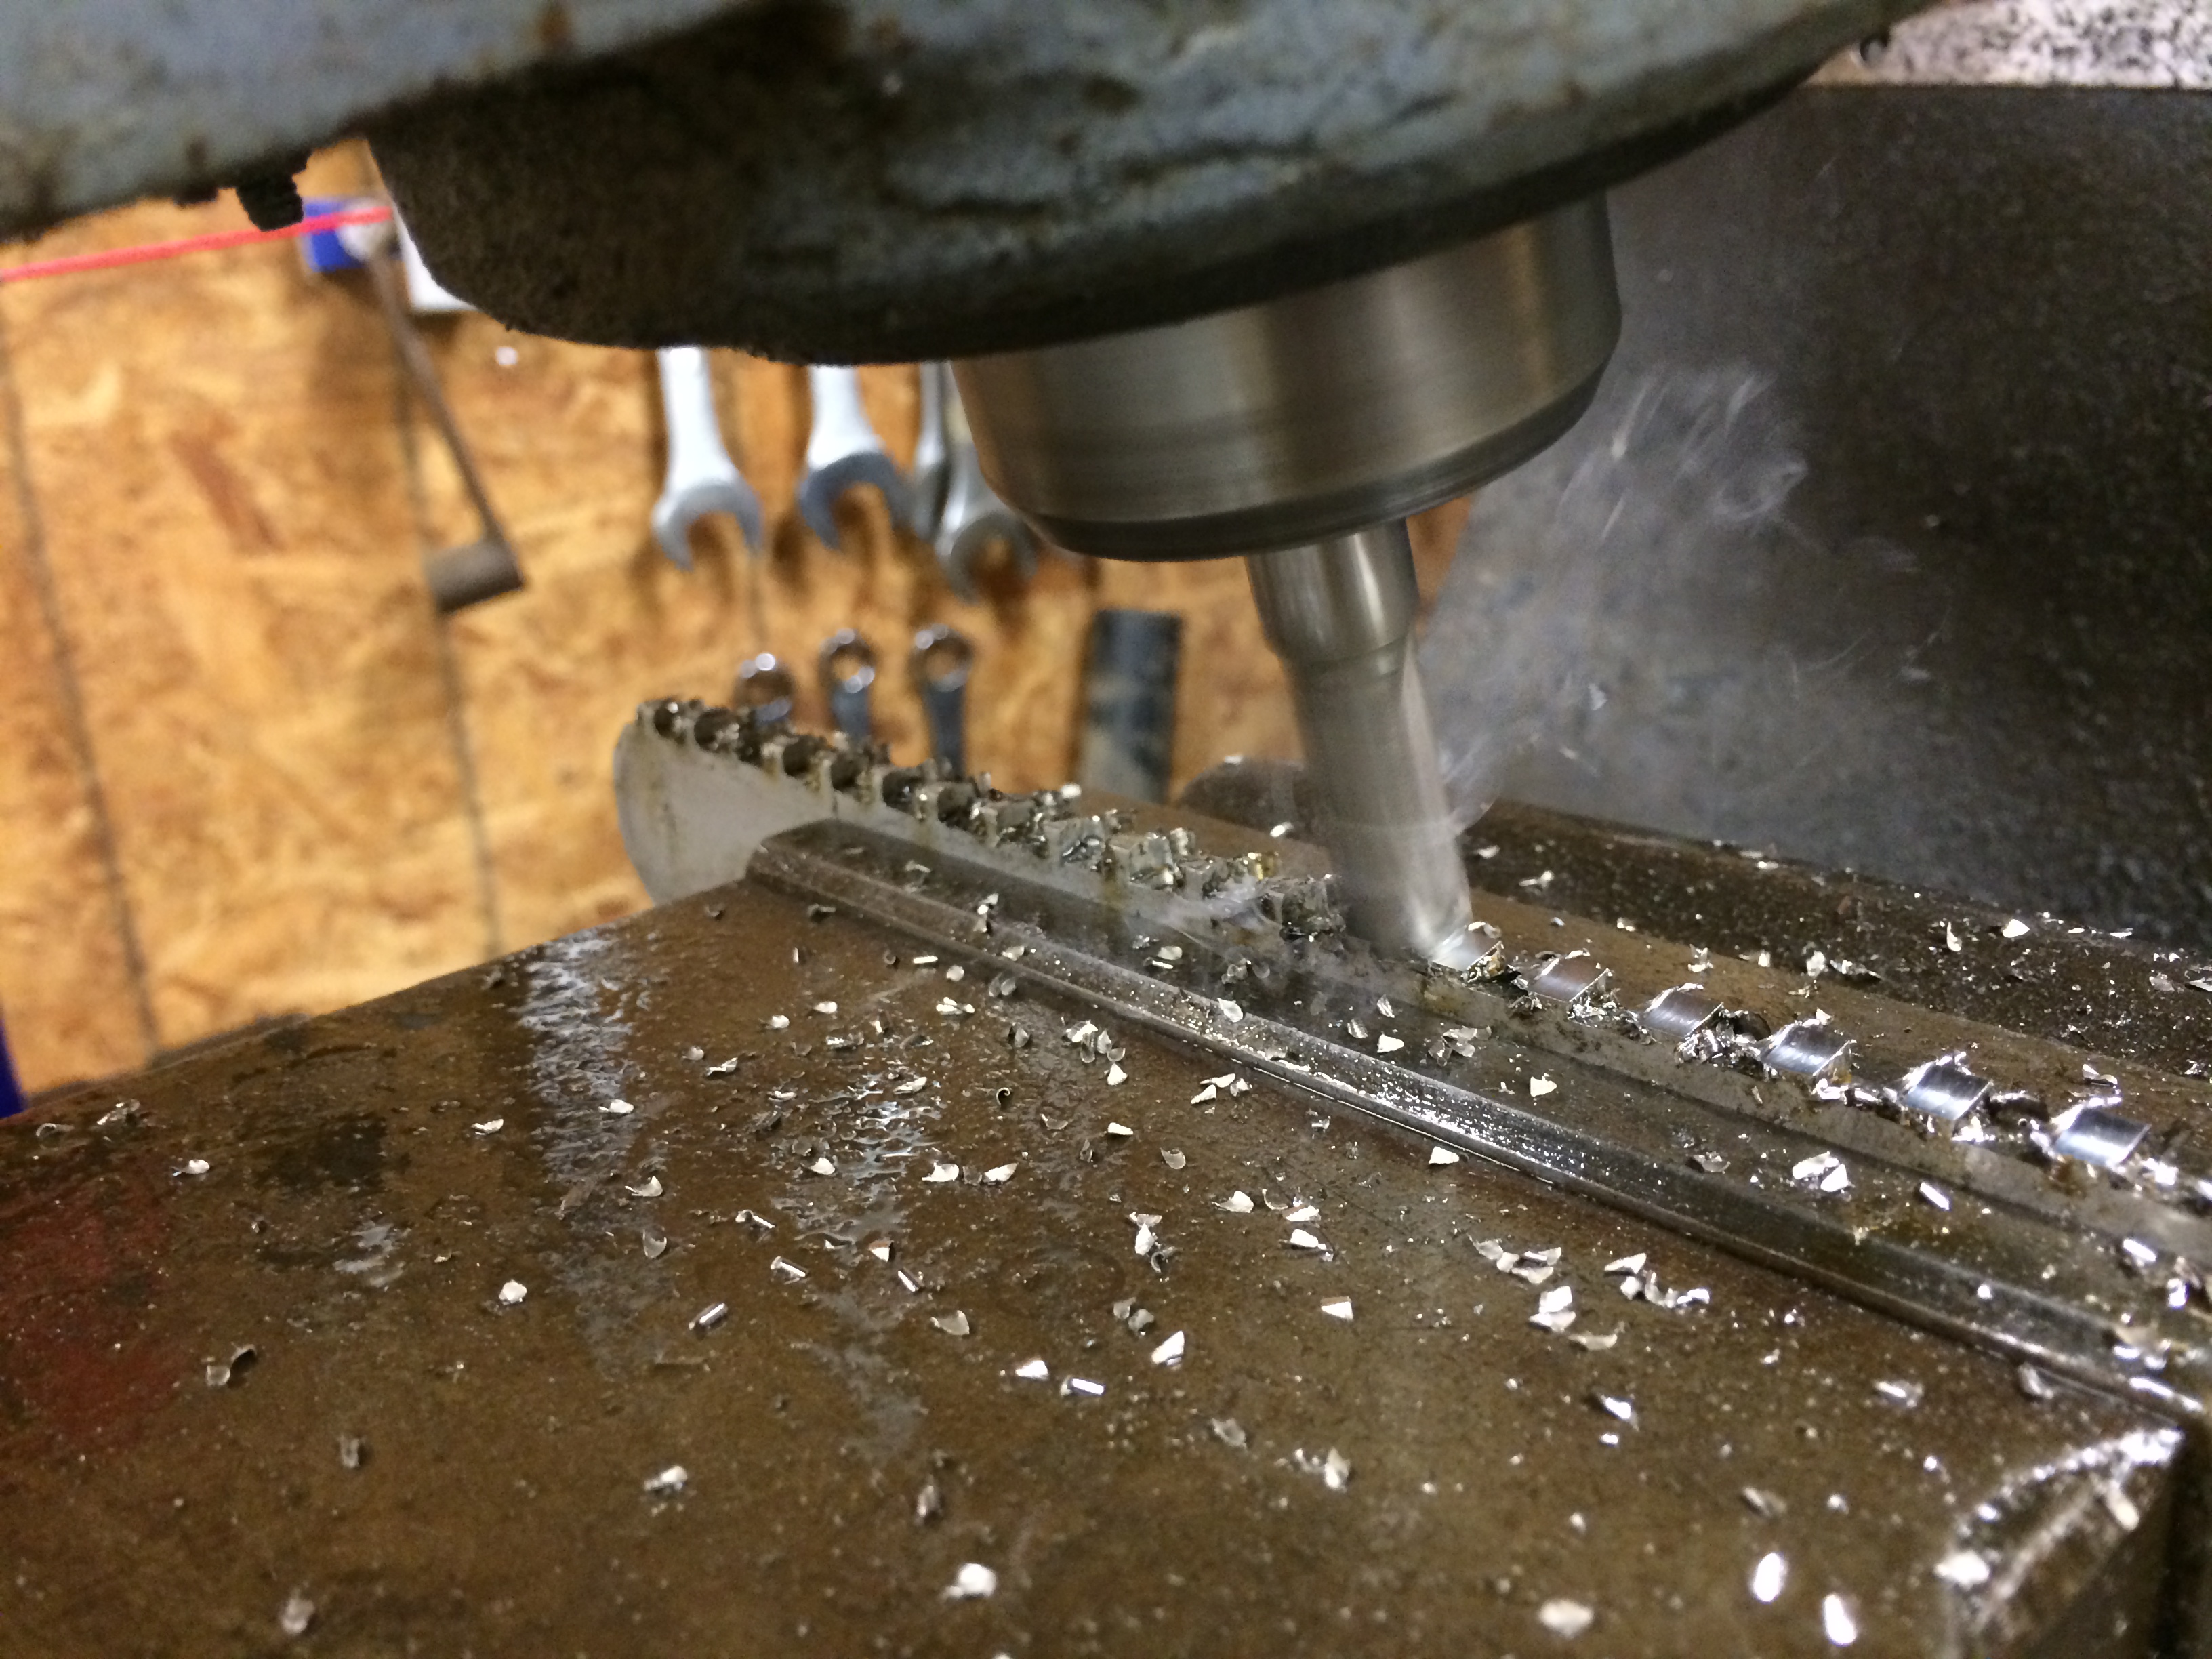
Cutting the relief on the teeth, 15 degrees.
After cutting the slots, it was time to cut the relief for the knives. The knife is spinning in an arc when the macerator is running, so the teeth have to have relief on the back side so they don’t drag on the apples. Little things like this are important, but more so when you are the power source for the machine. An electric motor might heat up a bit, you’ll quickly tire and give up if a hand powered machine isn’t running correct. Coincidentally, this was the first time I’ve had to nod the head on the mill. It was neat to get out of the normal square and 90 degree setup and see more of what the mill can do.
Action shot of cutting the relief.
Here is a closer view of the knives being cut for relief.
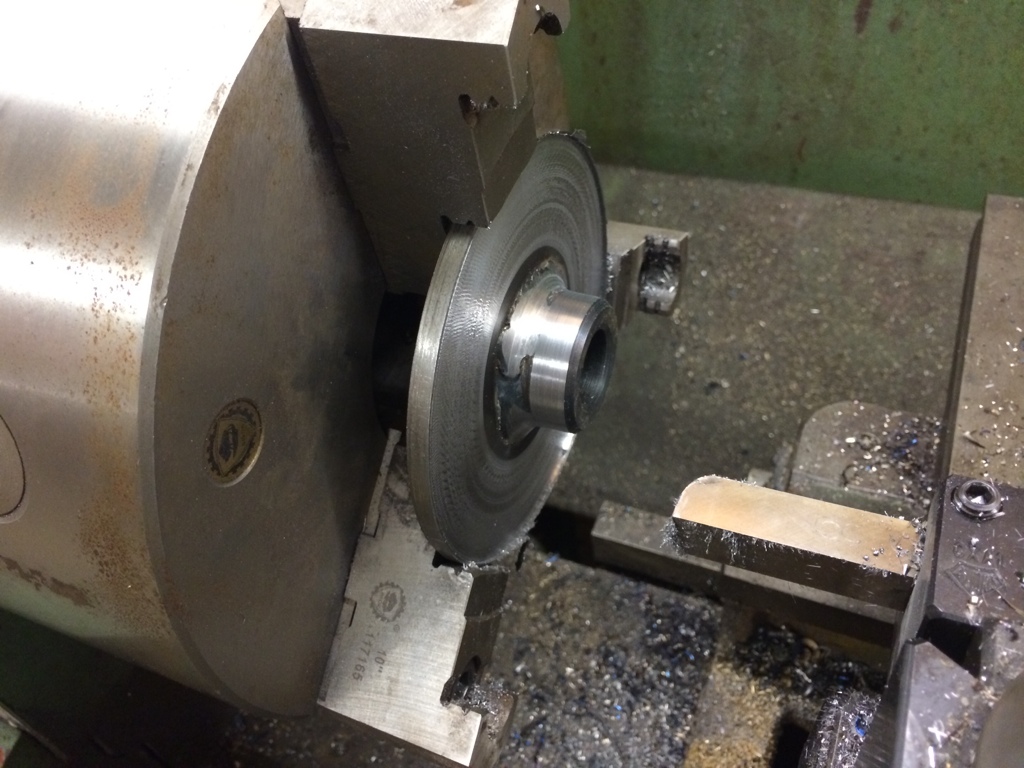
New faceplate, having the backside roughed out and trued up.
We made more progress on the apple press. First, we had to finish the remake of the cast part that I broke. Fortunately I have easily reversible jaws on my chuck so a quick flip and I had the part locked in and ready to turn. It took a bit to get the surface finish better than what you see here as the metal was getting thin so there was some chatter. As usual, a sharper bit did wonders. After everything was trued up on the back, I flipped everything around again and cleaned up the outside diameter with one quick last pass and this part was done.
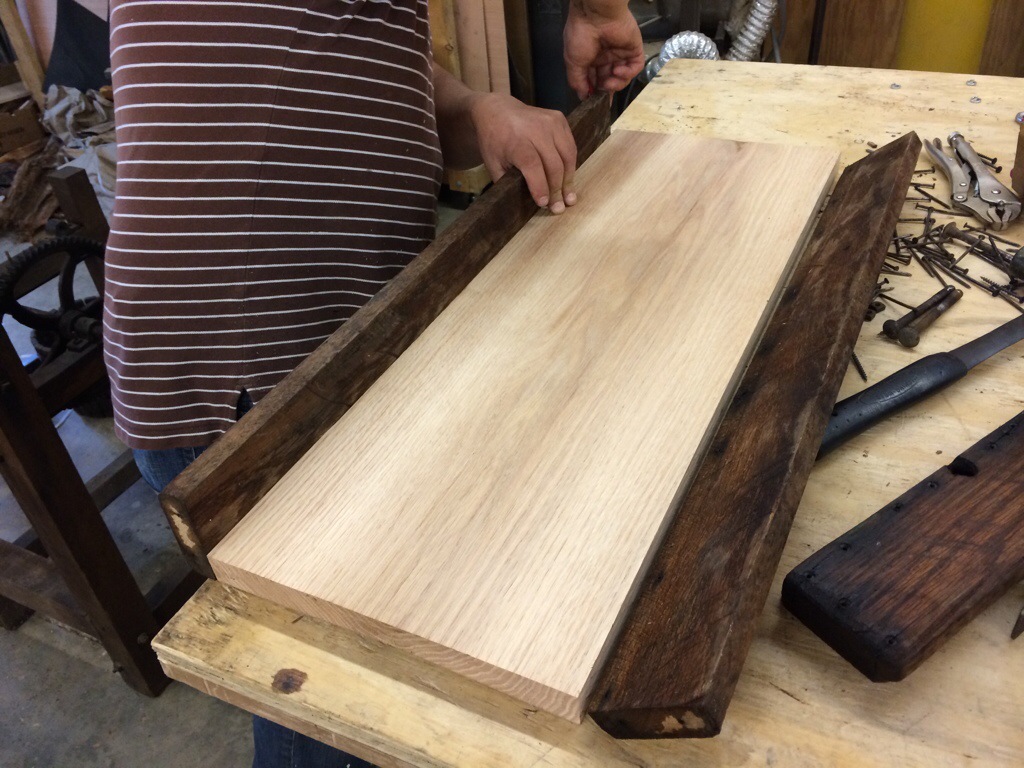
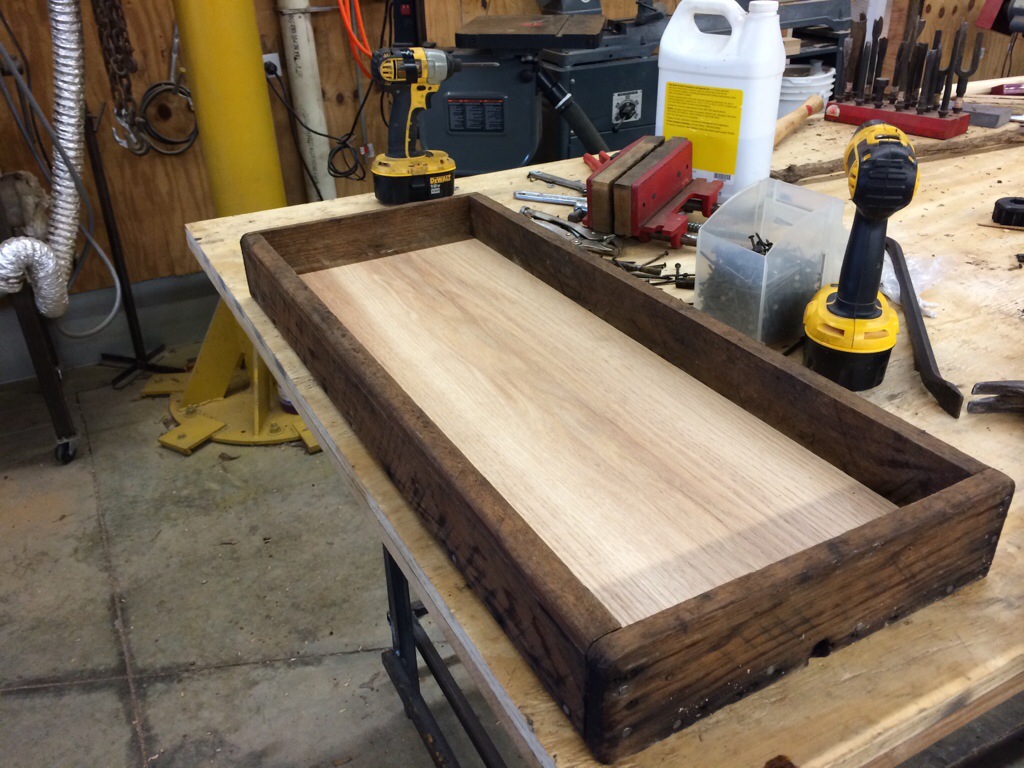
Working on the new drip tray.
While I was on the metal lathe, Miguel was working on the drip tray. He removed all the nails, and there were PLENTY, and removed the bottom board. We’d soaked the old drip tray in water for a few hours prior to doing anything to see if when the wood swelled it would close the cracks. While they did get closer, they never closed fully and we elected to just replace the two piece bottom board with a single piece of red oak from the farm. It came out very nice.
New drip tray, all finished.New hopper board to replace the cracked one
We also had a piece in the hopper which was cracked and needed to be replaced. It would probably have been fine to use as it was, but a few minutes with the correct tools and it was as good as new.
A rebuilt drip tray with one piece new bottom
The new wooden parts all back in place on the press. Once we’ve run a few bushels through and darkened the wood up, things won’t be quite so dramatic in their contrast.
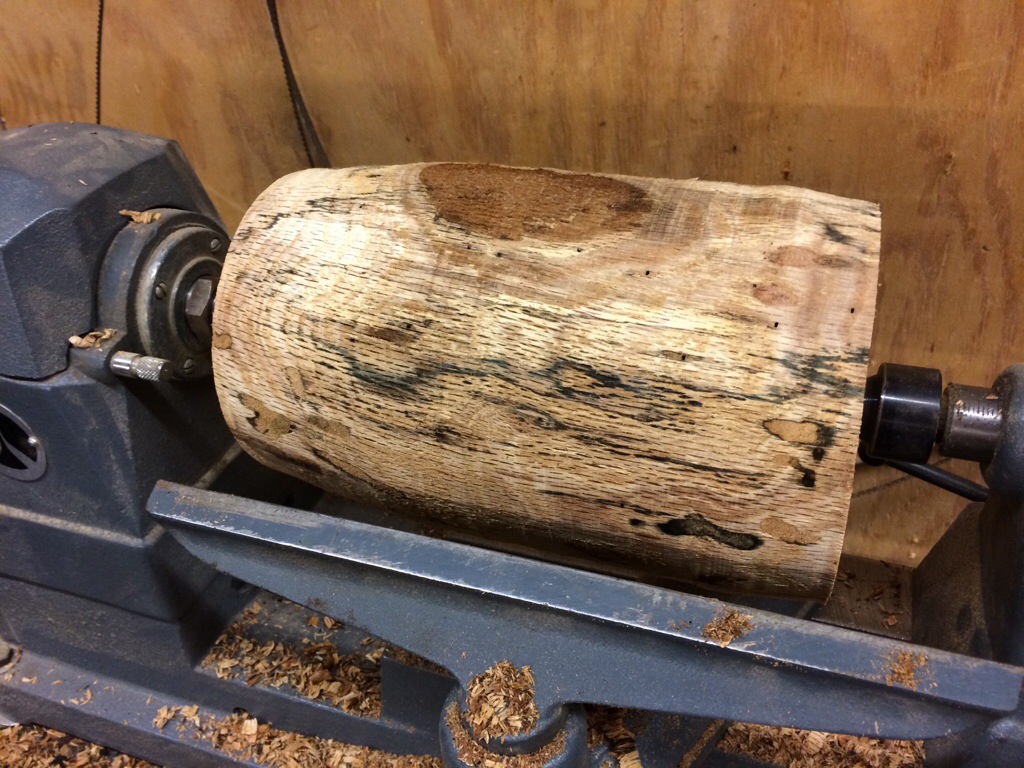
Option 1 for a new macerator drum
So we were down to the macerator drum repair. Our original plan was to take a cut from a red oak we’d sawn earlier and turn it to size. We needed a 5″ outside diameter final dimension which required a 6″ or so log. We have plenty that size but as you can see by the above picture, what we had had been on the ground too long and had started to rot. The was plenty of spalting (the black lines) and some punky areas which are very soft. After quickly turning this piece of wood to a rough dimension, it was clear we were going to be chasing non-serviceable wood for some time. That left only one option.
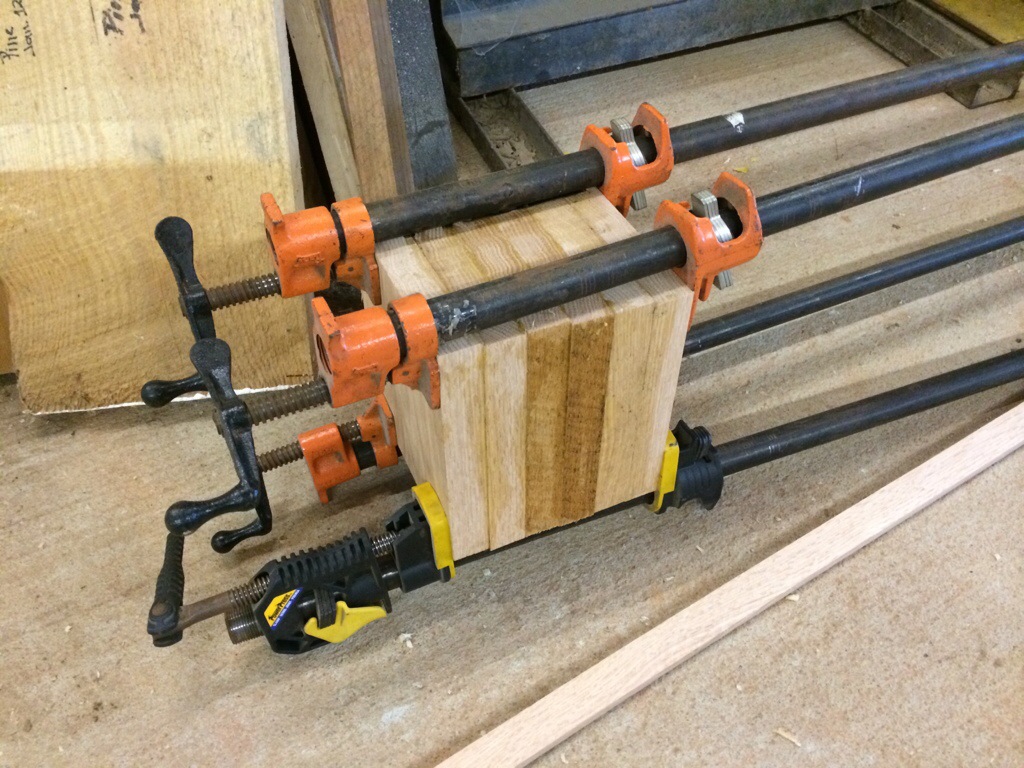
Gluing up a block of red oak so serve as a blank for the macerator drum
We took some more red oak from the hurricane blow down and cut it to size. Then we glued up the boards and clamped them to make one solid piece. Unfortunately I wasn’t prepared and hadn’t done this a day earlier so that ended the days work on the apple press as we have to wait for the glue to set 24 hours before chucking it in the lathe. I’ve had things come apart in the lathe before, it’s not a pleasant experience. Maybe this weekend I can get to turning this drum to size, cutting in the knife slots, and making the knives. Also I think I’ll pull the new bronze bushing and cut an oil ring in so it has a better chance to hold oil. Once all that’s done, this apple press should be ready to put back together and hopefully will be fully prepared to go to work come fall. Of course at the rate I’m getting late winter apples at the market, maybe we’ll have to get a bushel just to try it out.
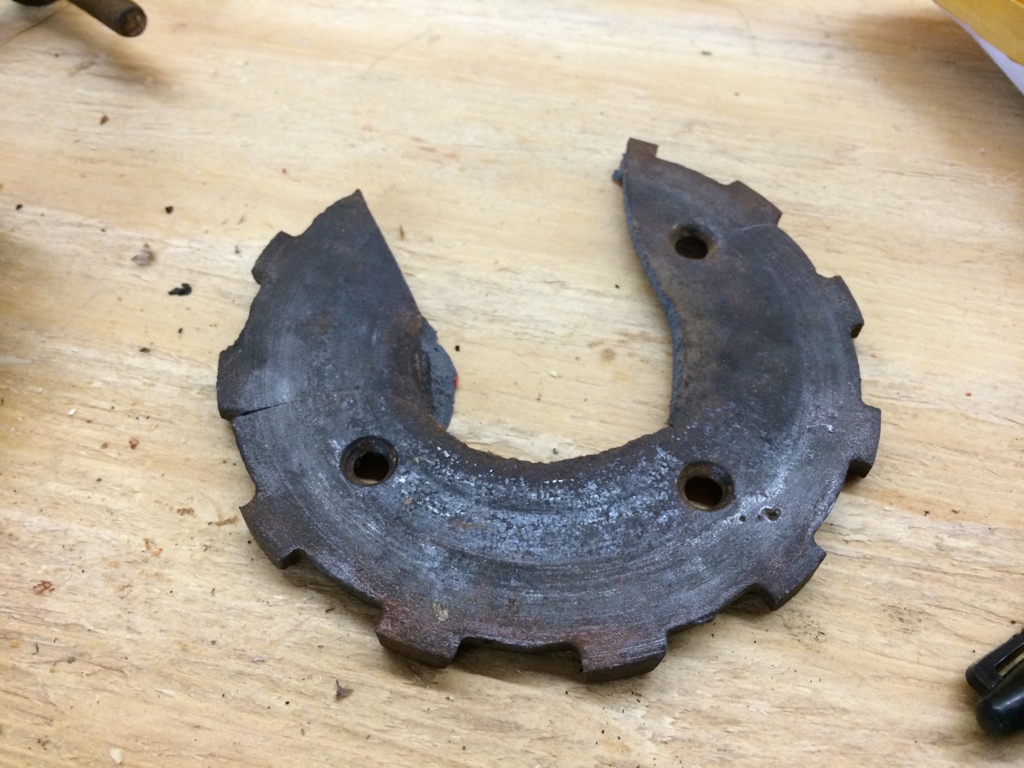
Miguel and I went to work on the apple press yesterday and worked on it most of the day. We’d be mostly done by now but I had a brain-dead moment right when we started. You see, we had to press off all the pieces of the macerator using our new hydraulic press. These parts had been pressed onto the shaft about 100 years ago and they just wasn’t going to come off easily. My brain-dead moment came when I didn’t even think about the parts being cast instead of steel. As old as this thing is of course they are cast. Well, as you can see above I cracked one of the two side pieces that encapsulate the wooden macerator. There’s no good way to put Humpty Dumpty back together again so I’m going to have to make a new one. But first we have to finish fixing the shaft.
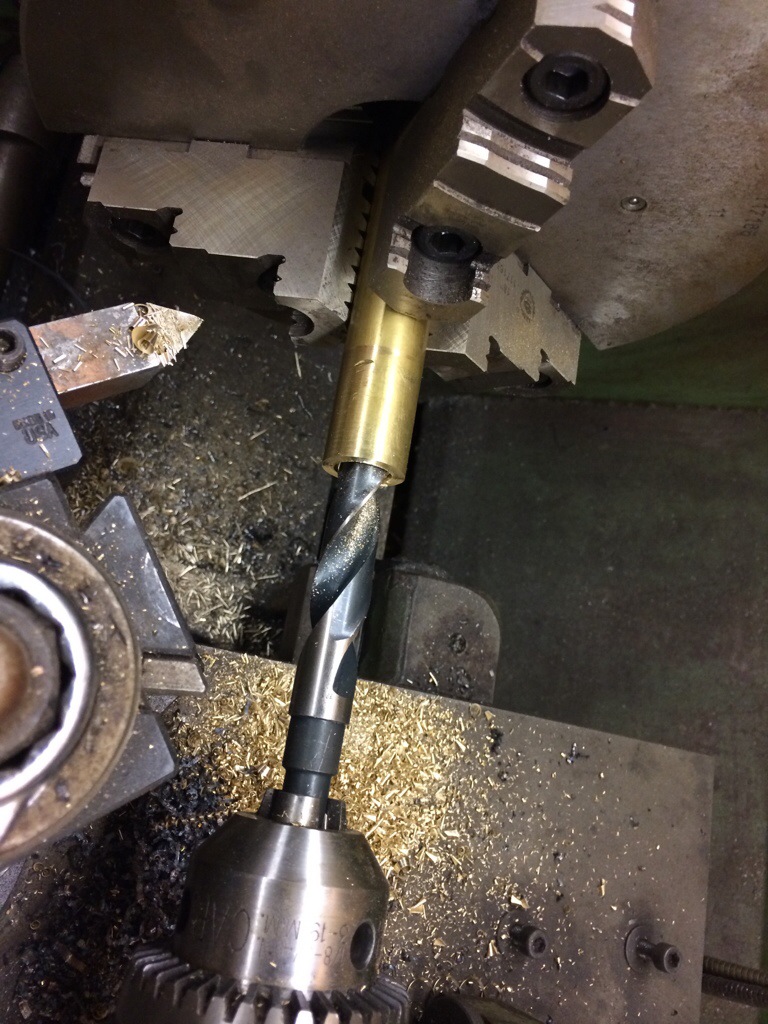
Bronze stock being drilled out to accept the new shaft
Here you see the bronze piece, already turned to dimension on the outside, being drilled out with progressively bigger bits until we hit our base dimension of .937 thousandths. The hole we need is .941 thousandths so a 15/16ths bit gets us pretty close. After that, it’s a boring bar and a few light passes.
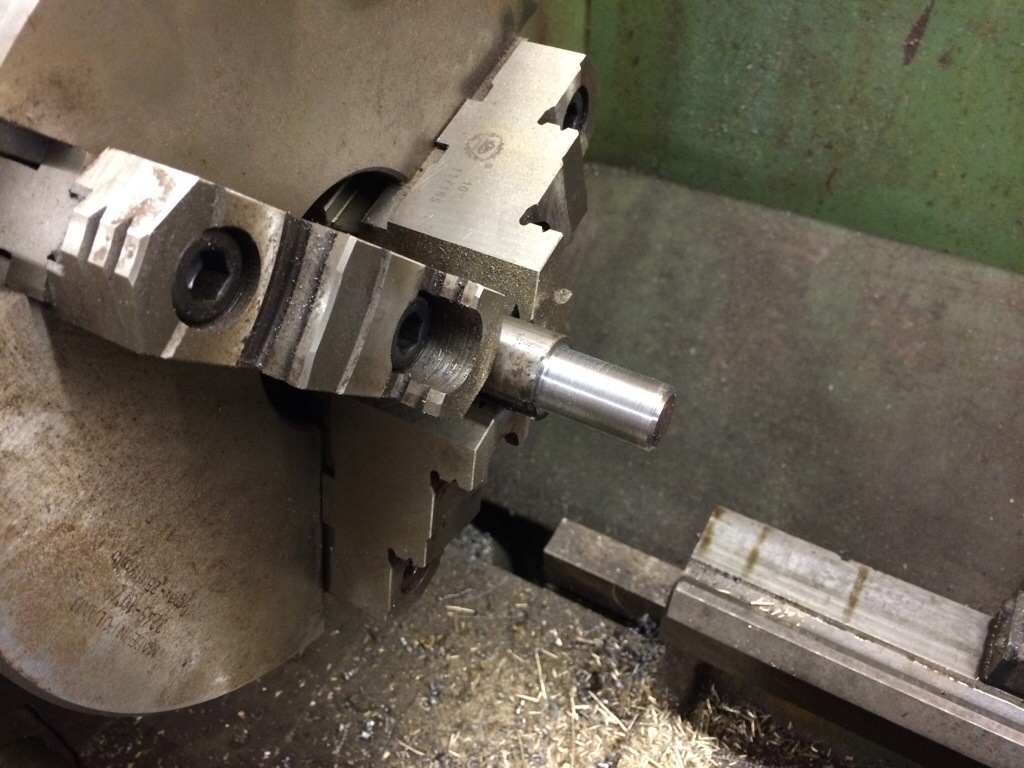
The original apple press shaft, finally being cut undersized and trued up.
This part was anti-climactic. After breaking one of the irreplaceable pieces and struggling to get the entire thing apart, we chucked the shaft into the lathe and dressed the end until it ran true in about 2 minutes. Once it was true, two quick light passes and we had my final dimension, .9415 or 1/2 thousandth over the bronze bushing inside diameter.
Pressing the bushing onto the steel shaft. A perfect fit.
A quick trip back to the press and the shaft and bronze bushing are united. The bushing is oversized because we had to bore out the bearing so that means we cannot press all the pieces back onto the shaft from either end. We should be able to press everything on from the other end though so everything should work out.
The new collar, roughed out and drilled
Now onto the piece I’ve broken. We didn’t have any stock that would work for make a 5″ round plate with a collar because really, who keeps 5″ round bar lying around? So we chose instead to make the collar separate and use a piece of mild steel cut into a 5″ circle. Then we weld the two pieces together. We did have some stock that was barely big enough for the collar, thankfully. Here you can see the stock, all roughed out and cleaned up, and with the center hole drilled out. We broke the outside edge (The piece facing you) so it’s easier to get a proper weld on it.
Parting the collar off
Here we’re parting off the collar and chucking the rest of the stock into the scrap bin for possible use another day. We’ll end up with a collar that matches the old one in all ways except for the coolness of being original.
A fully repaired drive shaft and bearing for the apple press
Everything put back together to test the fit and finish of the new bushing. It’s a bit tighter than perfect but can be turned by hand. The bronze will wear in nicely and as long as things are kept oiled should last for many years. The shiny bronze looks pretty good installed I think. Like we’re dressing up this old work horse.
New wood for the apple press
Not everything was metal work. We also had to remake the wood on the press part of this apple press completely. This is red oak, blown down when Hurricane Floyd hit our farm. It’s been patiently waiting to be used all those years and now has found a home on this apple press. It’s actually a bit beefier than the old wood so it should hopefully last another 100 years.
Center drilling the new plate
Here we have the plate welded to the bushing we made earlier. We’re center drilling the plate in preparation for drilling out the hole on this side to 15/16ths. Then a final pass with a boring bar and the entire thing is bored straight and true.
One thing we’ve elected not to do is to remake the notches on the outside of the circle of this piece (You can see them on the first picture). We’ve looked the press over and can’t see what function they provide. They don’t line up with the blades on the macerator and they don’t need to do anything to move the apples around because the blades do that plenty. If we get it all back together and find that the notches are needed for some reason, we’ll just take it all apart again and make them. We debated most of the day on making them so the two pieces would match cosmetically but in the end we figured it wasn’t that important to the overall result.
Finally here we have a 1/4″ keyway broach being pressed through the new part making a keyway like the old one had. 1/4″ isn’t actually large enough to match the old dimension. I’ll have to hand file the rest of the way but that should only take a few minutes.
As you can see, I have not dressed up the back side of this new part yet. The weld needs to be cleaned and the back side of the plate needs to be machined true. Then this part will be done. We’ve already selected a piece of red oak for the new macerator so after the last of the machine work today, we’ll move onto wood work, again on a lathe, to make a new one piece wooden drum and blade holder. Then finally we’ll make some new blades and hopefully put this thing back together and test what we’ve done.