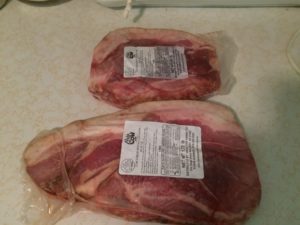
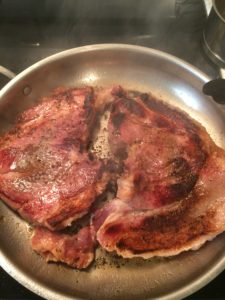
Processor pick up day is akin to Christmas morning for 5 yr olds here in the NCF store. The difference is we’re all closer to 40 than 5 and we’re getting giddy over new cuts of meat. This week we received our first Uncured Ham Slice Steak. Hello new porky goodness to experiment with.
The fat on these beautiful steaks is going to lead to a lovely crispy finish.
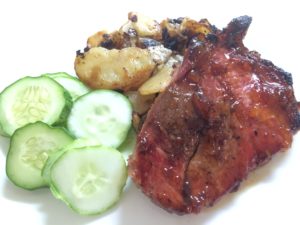
Today I’m going to serve up a Peach Jam Glazed Ham Slice. You’ll find much of my cooking has alcohol in it. As a Nashville girl Jack Daniel’s is a go to flavoring for me. Apple Cider Vinegar is Pork’s best friend. It enhances the flavor without adding a ton of unnecessary sodium.
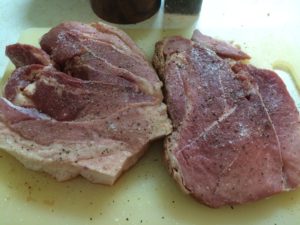
First things first, just like Beef you want to bring your Pork Steak up to room temperature. An hour before you cook set it out.
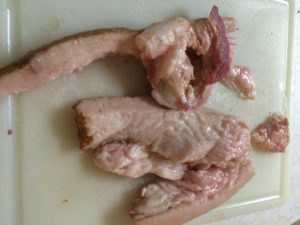
Trim the excess fat from steaks, I freeze my leftover fat to use in dishes later like collards, or to render into lard for cooking. Side note if I’m going to use the fat for collard or beans later it will get smoked first.
Sauce
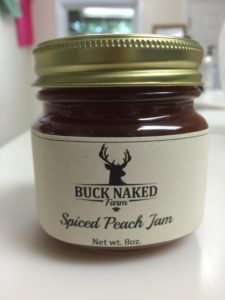
½ cup Buck Naked Farm’s Peach Jam
2 TBSP Jack Daniel’s
1 tsp Apple Cider Vinegar
Place ingredients in a small saucepan cook over a medium low heat till reduced.
Pork
*Pre-Heat broiler to 500 degrees F
*Use a heavy bottom skillet that is broiler safe
*Salt & pepper steaks to your taste
Pre Heat 2 tsp of EVOO (Extra Virgin Olive oil) over med-hi heat place steaks into your skillet
Cook for 4-5 minutes until the steaks release from the pan without tearing. If you feel them stuck to the pan let go and wait.
While waiting spoon ½ of your sauce over your steaks. Once the meat releases from the pan flip them. Spoon your Sauce over the 2nd half of the steak. Place in the oven for 7 minutes. When done place steaks on your serving platter and cover with foil for 5 minutes.
While these cool place your skillet back on the stove on medium heat. Use 1 cup of Pinot Grigio or your favorite light non-oaked white wine to deglaze your pan. Simmer down the sauce till thickened and pour over the steaks.
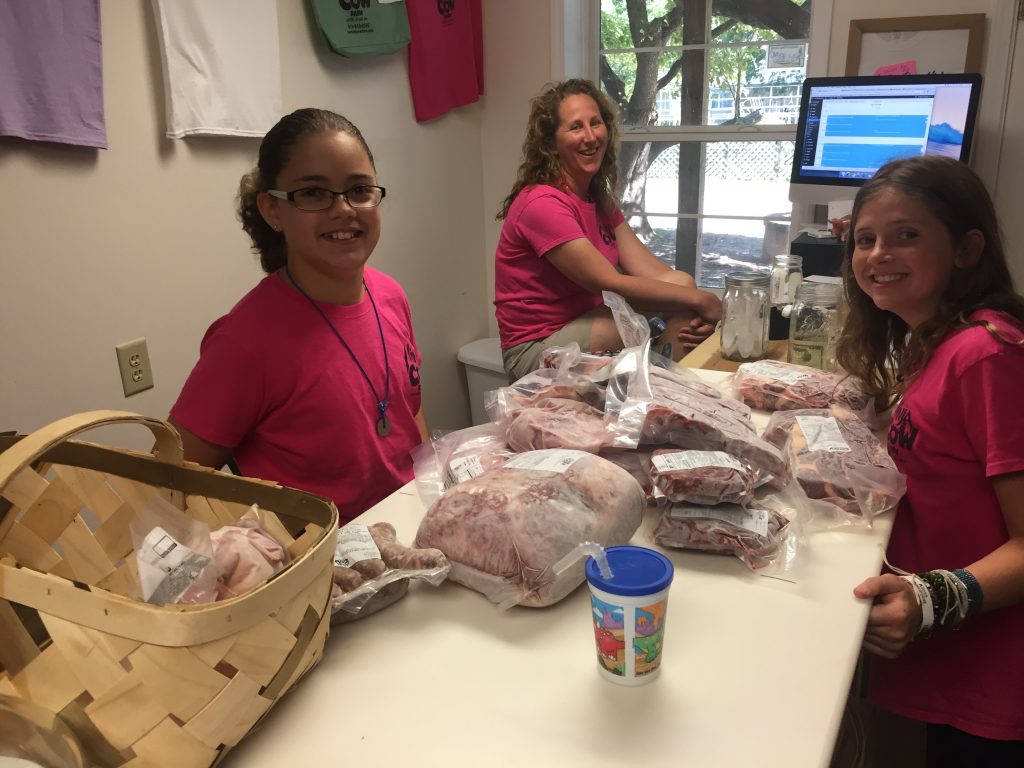
I reminded SWMBO (She Who Must Be Obeyed) that we had new lamb in the freezer and that we needed to get it out and cook a meal. This Saturday, she popped over to the store and said, “Ok, I’m here for the lamb and for the meat for the rest of the week.”
You know how you are at a restaurant, and you see the wait staff and the kitchen staff eating there? You feel like this must be a good place to eat because they work they, know everything that goes on, and they like the food. Yeah, that’s our place.
So Saturday SWMBO gets back to the house with this meat and then tells me, “You know we are having lamb on Sunday, right?”
“Huh?” Says I. No I didn’t know that. And by the look she’s giving me, I’m apparently cooking the lamb.
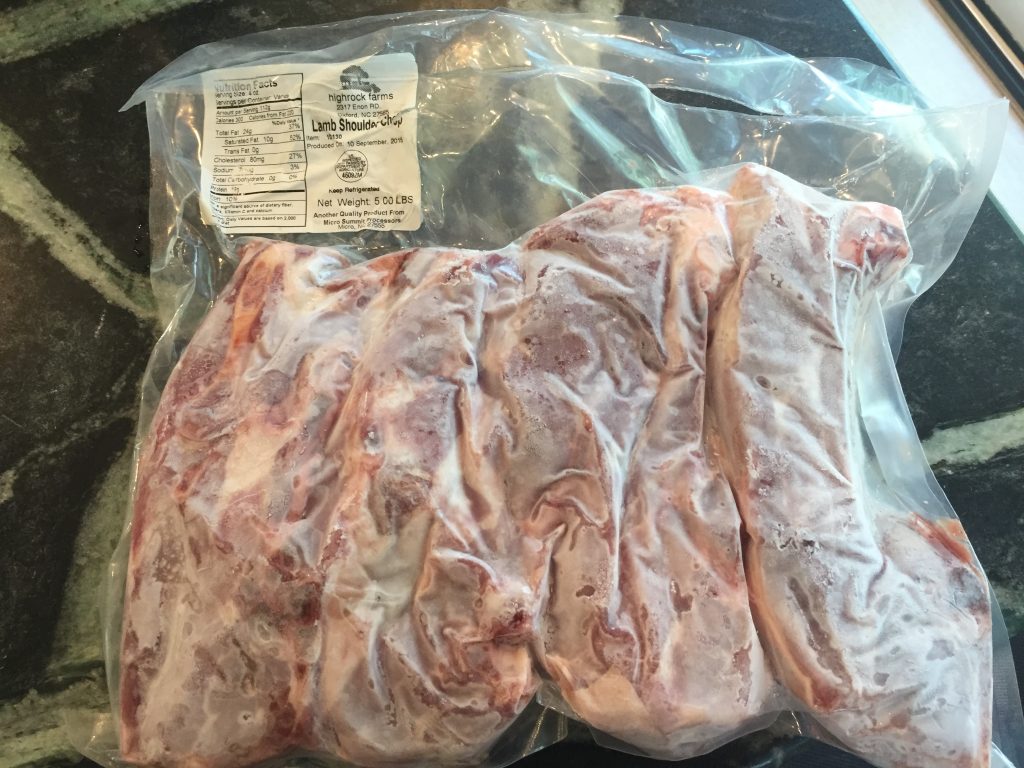
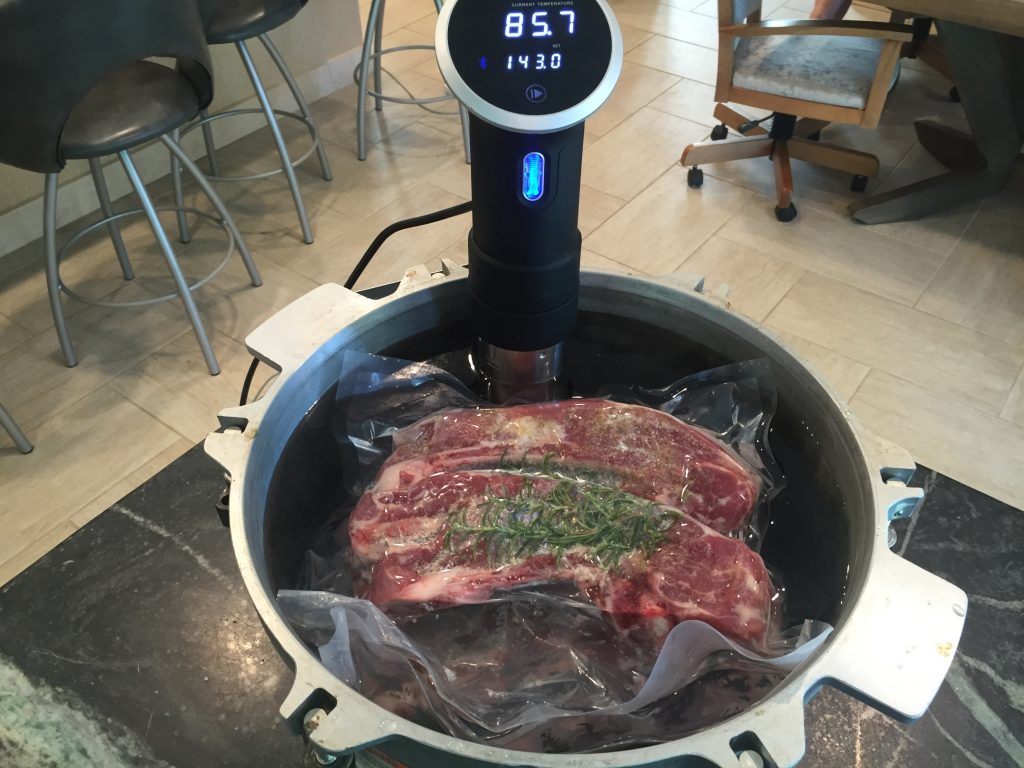
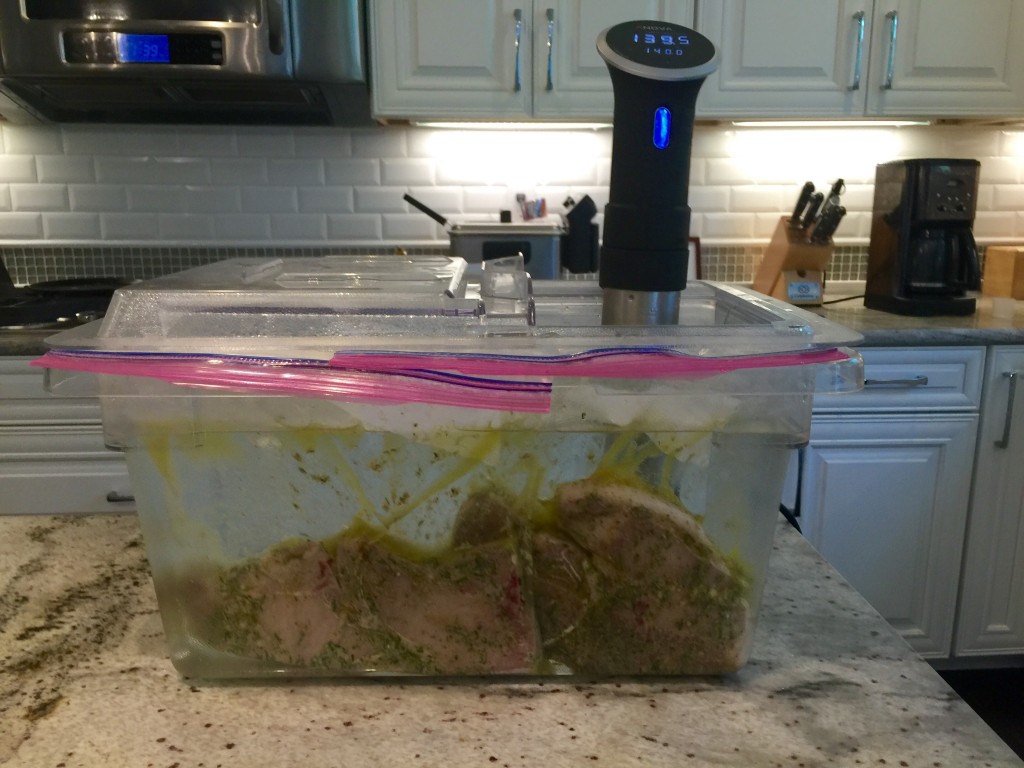
So I break out the sous vide cooker and take the solidly frozen lamb shoulders and conjure up some kind of recipe in record time (like 45 seconds).
Frozen hunks of lamb shoulder
I didn’t have a recipe for lamb shoulder, or especially frozen lamb shoulder. I also didn’t want a bunch of marinades, glazes, etc. I wanted to taste the lamb because I want to be able to tell customers exactly how it tastes. With that in mind, I cut open the packages, placed a couple of shoulders in a new package and sprinkled it liberally with plain old garlic salt from the pantry. I then placed a small sprig of rosemary in each bag, cut from our rosemary bush in the front yard. No muss, no fuss.
Frozen lamb shoulders just starting in the meat aquarium
I then sealed the bags and put the still frozen lamb shoulders in the sous vide cooker. The recipes I glanced at in the 30 seconds I looked ranged in temperature from 131 to 158. I guessed and picked 143. Seems legit.
This was Saturday afternoon. The recipes I looked at also called for cooking from 2 hours to 48 hours. We’d cooked 24 hours for other cuts before and it worked well. Plus, I only had about 15 minutes to do this entire operation because I had customers coming for tours so I was limited on my choices.
On Sunday, SWMBO informed me that we’d eat at 6pm, our normal meal time. Then about 5:30 she decided that the boys would be home at 8:15 so we’d eat then instead of 6pm. Just a 2:15 swing in when things would be done with meat already in the cooker and the oven already preheating!
No worries, I just let the lamb swim in the meat aquarium a bit longer, then pulled them and put them on a sheet pan to dry. I took all the juices that came from the bags they cooked in and put them in a sauce pan to reduce. The juice was really salty so I added about 1 cup of red wine, a bit of water, and about 3/4 cup of balsamic vinegar. I was debating adding a touch of sugar to help with the saltiness but extra vinegar did the trick. I reduced this mix by about 1/3 and took it off the heat.
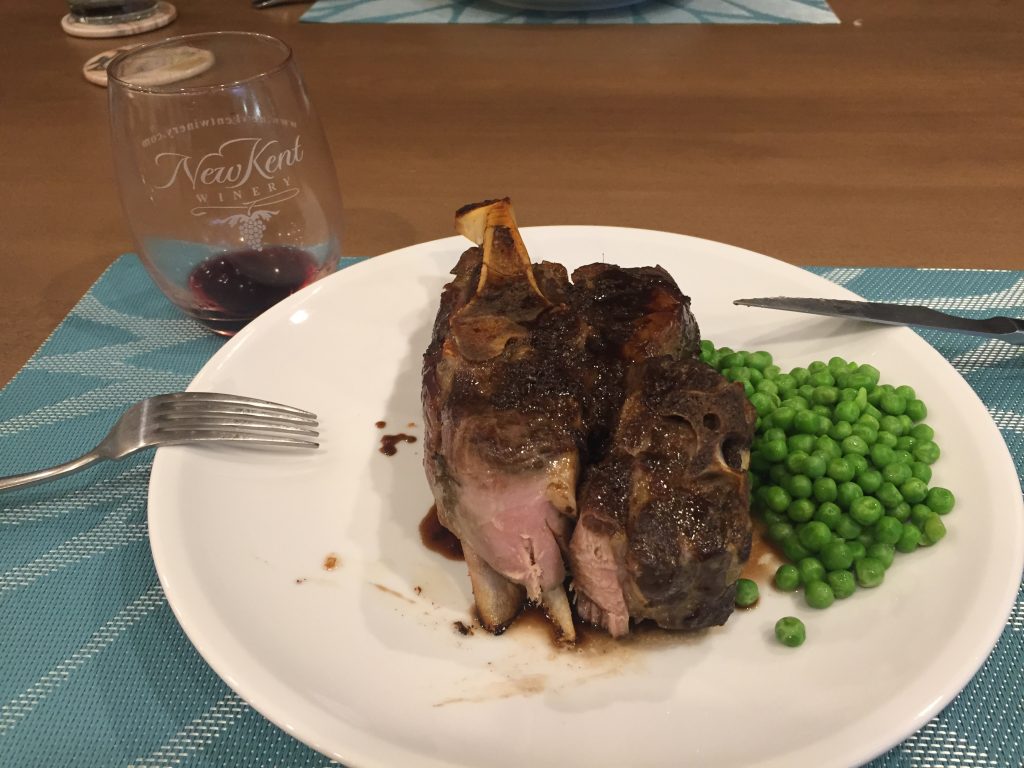
Meanwhile I’d been taking my now dry lamb shoulders and broiling them in the oven on high broil till they browned nicely. With the lamb shoulders hot from the broiler, and my reduction cooled and thickened, we pulled SWMBOs veggies from the pot and served dinner.
I didn’t’ want wine, but since I had to open a bottle to cook with…
I’ve traveled all over this country and eaten in some seriously expensive restaurants. I’ve also eaten in pretty much every high end restaurant in Raleigh. Folks, I’ve not had a better meal. We dropped frozen hockey pucks in a bag with cheap garlic salt and leaves from the lawn and cooked it six hours longer than we originally planned! We used a meat aquarium and 5 minutes of a broiler. This was as simple of a meal as you could make and it was AWESOME!
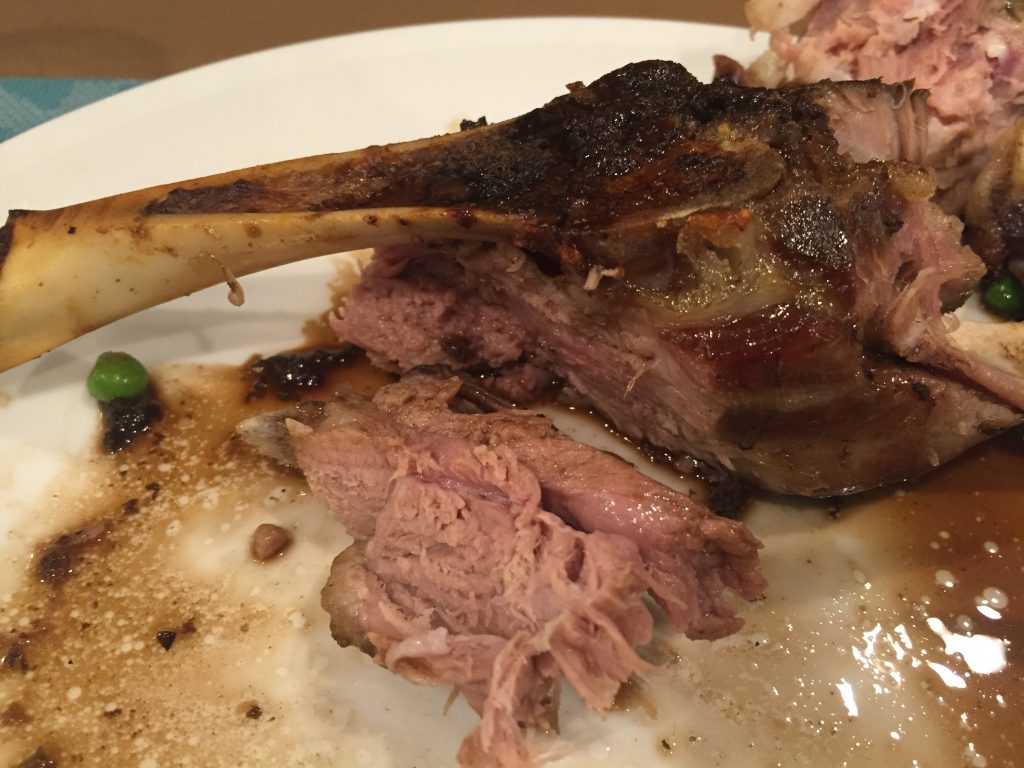
A closer look at doneness
The meat was fall off the bone tender but still had good texture. The sauce was sweet and salty and everyone asked for more of it. We had my kids, plus the cousins over. Many people at the table had never had lamb. They all agreed it was stellar. I had two pots to put away, and two sheet pans to clean.
You probably don’t have a sous vide cooker. That’s fine. Bake the lamb, or crock pot it, or boil it. I don’t know, do something with it. But try it. Americans, including us, almost never eat lamb. We have no idea what we are missing. We have this lamb in the freezer now, with more coming. If you haven’t tried lamb, or haven’t since the 70s with some weird green sauce, then you owe it to yourself to give it a try.
My thanks to The Princess, who is the one who pushed me to get lamb in the store. And to The Stanbury who cooked lamb for her on our date night giving her the idea.
Nobody has cooked, or eaten, as much of our product as we have. We’ve grilled, baked, broiled, sauteed, and crock potted our meats. Heck, we’ve even eaten it raw (steak tartare anyone?) Having had our products every way that you can, I can say that cooking method definitely matter. I usually try and catch new customers before they leave and explain to them how they should cook their new purchase, especially the beef. Grass fed, grass finished beef cooks differently than store bought beef. (I don’t subscribe to all the tips on that link, btw. But most are good). Since I can’t catch everyone, I thought I’d type up my suggestions.
The first thing to know is what kind of meat are you buying. With only so many ribeyes to go around, odds are you’ll be buying a cut of meat you don’t normally get. You need to understand that “eating high on the hog” means that you’re getting the more tender cuts of meat. It also means they are less flavorful. That’s why tenderloin, an expensive and almost flavorless cut of tender meat, is always wrapped in bacon, or marinated in Italian dressing. Recipes are trying to add flavor to the flavorless, tender meat. On the other side of the tenderness scale, the French have perfected the art of taking the cheap cuts of meat and turning them into delicacies. And finding, along of the way, that these less expensive cuts of meat hold the best potential for amazing flavor. Shanks, jowls, brisket. These are all cuts that many American cooks fear but as any Texan will tell you about brisket, they are often the best part of the animal.
Where all the cuts of beef come from
Basically, the higher up the animal, the more expensive and the more tender the cut. That’s because the less the animal uses the muscle, the more tender and the more bland. That’s part of the reason that feedlot beef is more tender. The animals sit around and eat and do little else. By knowing where on the animal your cut comes from, you can have an idea of how to cook it. Tough cuts need a braise (like a crock pot) or some other method of preserving tenderness.
For roasts, generally the crock pot is my friend. SWMBO does most of the cooking and she uses our various roasts interchangeably from one recipe to the next. If it’s a big four pound roast, she has no qualms about trimming it down or cutting it up to make it into what she wants. Not the most cost effective method but the meals are awesome so I’m not complaining. For roasts, just follow your usual recipe. If you are cooking them in the oven, remember that grass fed, grass finished beef is going to cook faster than you expect.
Osso Bucco is one of my favorite cuts. Technically it’s beef shank, sliced into 1″ thick slices. It costs the same as hamburger per pound and it’s wonderful in the crock pot. All that connective tissue breaks down and makes beef broth, which your vegetables soak up as it percolates all day in the crock pot. Just sear the osso bucco on both sides before you start, (remember the mallaird reaction from earlier, it’s your friend.) The meat shreds after cooking easily because of the way the cut is made. You pop out the one bone for Fido and serve. A $10 meal including vegetables that feeds the entire family.
For hamburger, I have to give a nod to our resident chef Drew. His hamburger recipe makes for a stellar hamburger. If you don’t want to do all that he suggests, make patties with room temperature burger meat. Sprinkle with salt, pepper, and garlic and grill. Simple burgers that taste awesome.
For Boston Butt, I again turn to Drew’s recipe. If you are in our store, you can also pick up SWMBO’s crock pot recipe to accomplish the same thing. Her BBQ is no muss, no fuss, and tastes awesome.
Lastly, I need to tell you about sous vide cooking. Drew turned me onto it after about a year of harassing me to try it, finally just loaning me his unit and shooing me away to go cook. After one meal, I had one on order from Amazon. It’s pretty much impossible to overcook using sous vide and I can really dial in the doneness that I want, down to the single degree.
Our meat aquarium
After a swim in our meat aquarium (what we call it) I simply sear the meat (mallaird again) and serve. Cook times can vary by hours with no change in doneness which really makes this more like crock pot cooking. This means that I can still get my work done and pop into the kitchen at the end of the day to finish up and serve a great meal, looking every bit the hero that I am.
Cooking skills are more important than recipes. Skills allow you to bob and weave to make something delicious even in the face of adversity. Skills also allow you to be much more efficient. When it comes to knife skills, you gain valuable lessons in safety and efficiency.
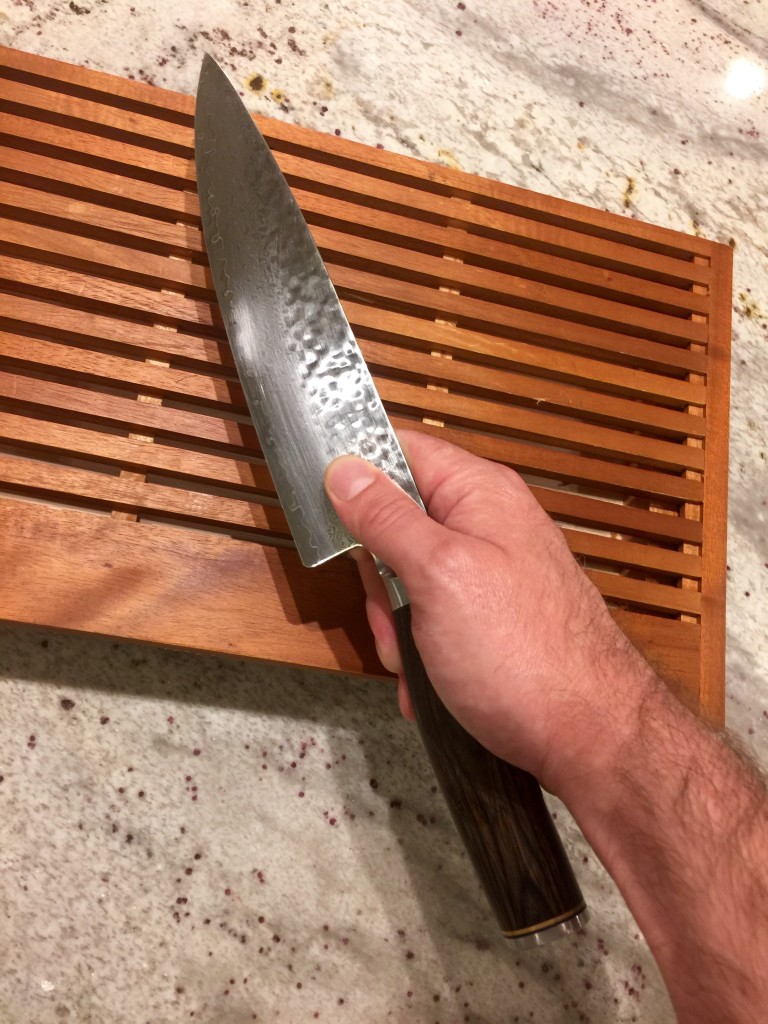
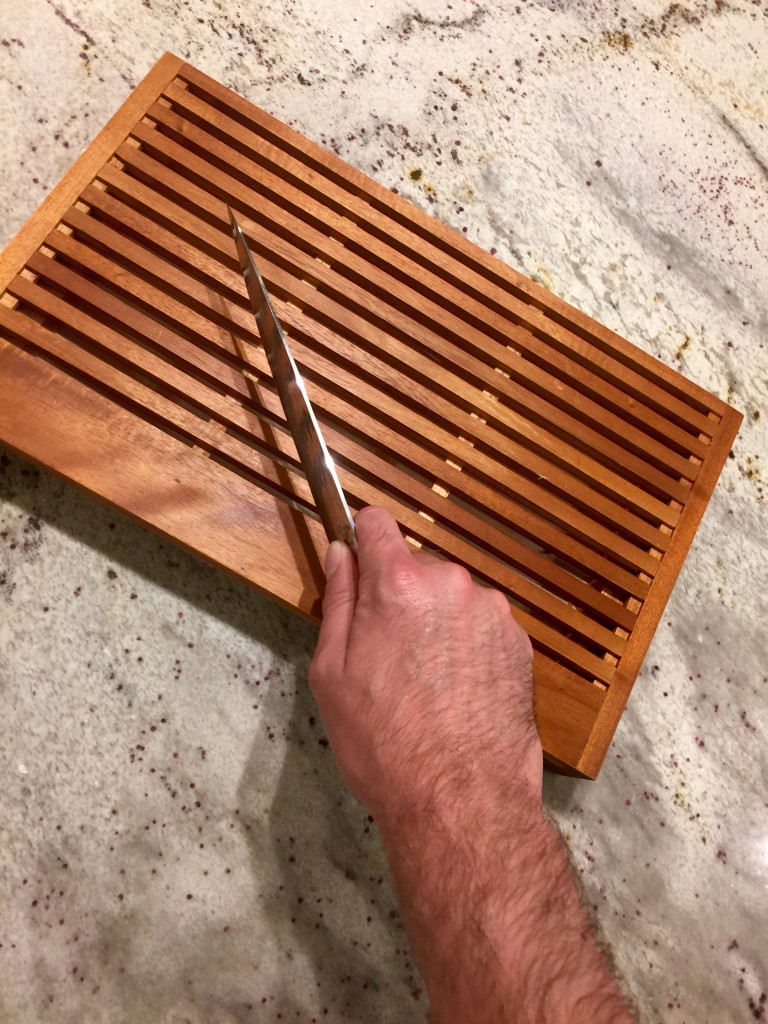
There are so many shapes and styles of knives out there. I recommend you put your 50 knife block set aside for most applications and invest in 4 quality knives. I prefer Japanese steel because it is very hard and requires less maintenance if treated properly. American steel tends to be more soft, but plenty of talented chefs choose it. From bottom to top in the above picture, I have 4 shun knives that meet the criteria for my top 4 knives:
8 inch chef’s knife
6 inch serrated utility knife
6 inch boning knife
4 inch pairing knife
These 4 knifes will cover you for most applications.
Holding a knife:
Blade grip for added dexterity
The blade grip is the way to go unless you just can’t get comfortable. You move your thumb onto the blade and pinch it with a curled index finger on the other side of the blade. Your thumb and index finger are far removed from the cutting edge at all times. This gives you an incredible amount of control and dexterity with the blade. More control = less likelihood of a slip and injury.
Proper angle for cutting:
Proper angle for cutting/prepping food
When cutting food, cut in a 45 angle across your torso. This provides a much more comfortable (straight) angle for your wrist. When you try to cut perpendicular to your body, your wrist becomes contorted resulting in an increased risk of injury.
In my next post, I will go through the basic knife cuts that are safe and efficient in addition to the claw technique for holding what you are preparing. Happy and safe cooking!
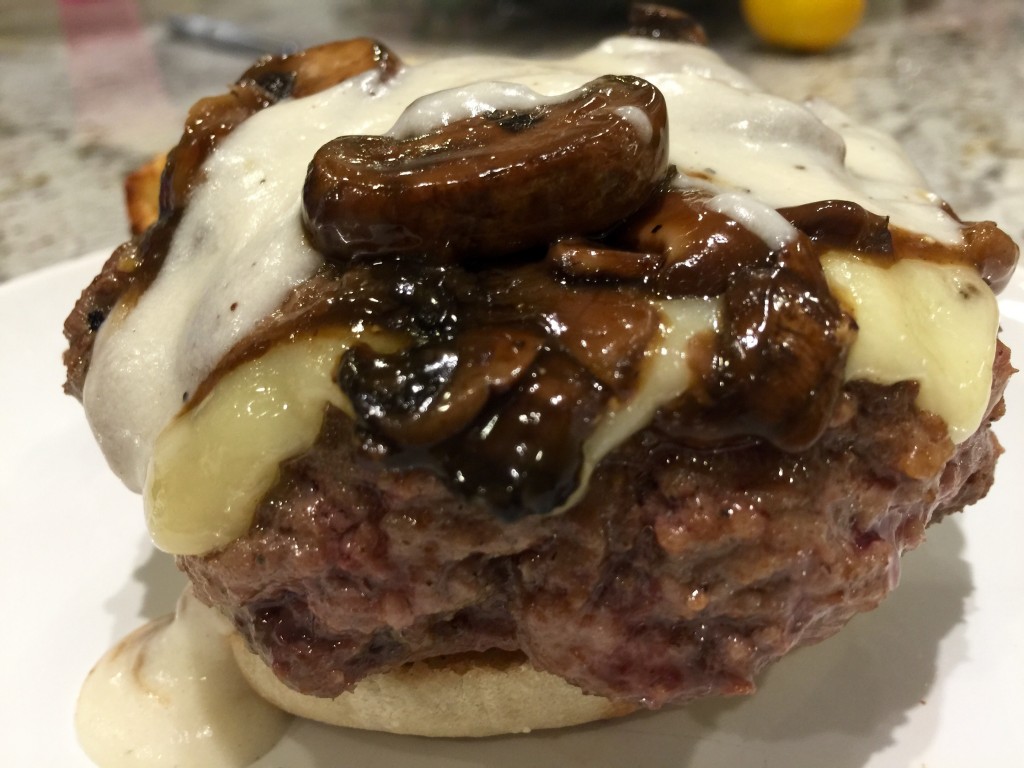
Bacon mushroom and swiss burger with a mornay sauce
Have you ever fresh ground your meat to make burgers? If not, buckle up partner because this is a game changer! While everyone knows how to make yummy burgers, this takes the classic meal to whole ‘nother level. Mixing and grinding your own meat not only opens up the burger playbook to infinite permutations of flavor, but it also leads to the most tender and juicy burgers you have ever had. I play around with combinations of steak, ground beef, brisket, pork shoulder, bacon, pork belly, ground pork, lamb, venison and I have even used a little breakfast sausage with great results. If you already own a KitchenAid mixer, you can get this meat grinder attachment from Amazon for $35 bucks and be on your way.
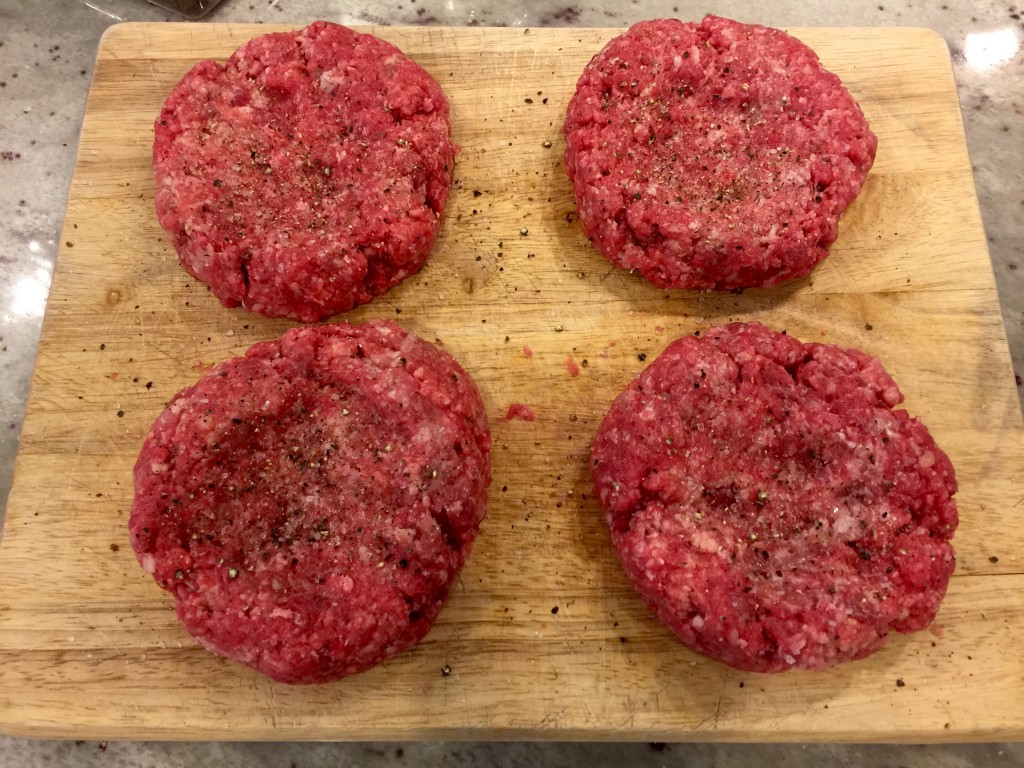
One of the biggest obstacles to a juicy burger is over compacted meat. Even when I am mixing in Ninja Cow ground beef, I will run it through the grinder for good measure to make sure it is light and fluffy. The key is to avoid man handling the patties when you are making them.
Fresh ground patties with brisket, beef and bacon
I decided to make these burgers with Ninja Cow ground beef, brisket and a few slices of bacon. I cooked them sous vide and they were the jam!
What you need
For the Burgers
1 pound ground beef
1 pound brisket (I recommend a cheap digital scale for $10 to $20 bucks on Amazon–it is necessary for cooking, baking or making pasta and it comes in handy for cutting up Dan’s brisket into 1 pound quantities for applications like this).
3-4 bacon strips
salt & pepper
Swiss cheese
English muffins–this burger is a juicy mess and those golden toasted nooks and crannies are the perfect choice to hold up to the moisture without getting soggy. It is also the perfect bun because it doesn’t try to steal the show. Rather, it highlights the delicious burger you’re eating.
For the mushroom topping
1/2 lb of mushrooms (8 oz)
1 clove of minced garlic
1 medium shallot minced
1/2 cup chicken stock
1/4 cup balsamic vinegar
1 tbsp corn starch & water
salt & pepper
For the mornay sauce
1 tbsp butter
1 tbsp flour
1 cup whole milk
1/3 cup freshly grated Gruyère cheese
salt & pepper
What you do
For the Burgers:
Grind the meat and make your patties. Remember not to compress the meat too much. Just squeeze it just enough so the patties hold together. Sprinkle each side with salt and pepper. Note that you don’t need any seasoning mixed in these patties. The meat is so delicious that it honestly doesn’t need it. I make these into four 1/2 pound burgers, but to each his own. You could definitely make 6 burgers out of this that would hit the spot.
Sous Vide: Seal in a zip lock bag using the immersion technique, which is where you submerge the zip lock slowly with one top corner unsealed. Submerge until the air is forced out and then seal the last corner without any water intrusion into the bag. All cook times are perfect anywhere from 45 minutes to 2.5 hours. Rare–120. Medium rare–128. Medium–133. Medium well– 140. Remove from the bag, pat dry and let rest for 5 minutes. Sear quickly in a screaming hot pan with bacon fat, duck fat or oil of your choosing.
Non sous vide–Sear both sides in a screaming hot pan with a little bacon fat, duck fat or oil of your choice and then bake at 350 for 10-20 minutes depending on how well you like your burgers.
Meanwhile, throw your mushrooms in another skillet on medium/high and saute until they have released their moisture–about 5 minutes. Add the minced garlic and shallots and sweat for 2-3 minutes. Add chicken stock and reduce by half. Add balsamic vinegar and reduce by half. Slowly add your corn starch slurry to make the reduction more viscous. Add salt and pepper to taste.
The Mornay Sauce:
Mornay is a derivative of one of the 5 mother sauces from which all French sauces come from–Bechamel. 99% of cooking sounds more intimidating than it actually is and this sauce is no exception. It only takes a few minutes to make and it can only be ruined by inattention and too much heat for too long. Bechamel starts with a roux, which is equal parts flour and butter. A corn starch slurry is the lazy man’s roux, but they serve the same purpose–adding starch needed to thicken your sauce.
Add the flour and butter to a sauce pan on medium/high and stir constantly until the raw flour smell has gone and it begins to smell toasty. This takes about 2 minutes. You now have a roux that you can use to thicken anything you’re cooking in any recipe. Cook the roux until it is brown and you’re getting into the French brown mother sauce. Cook the roux until it is almost blackened and you’re into Cajun territory for dishes like gumbo and jambalaya.
While whisking constantly, slowly stir in the milk until the sauce is simmering, but not at a rolling boil. This is the only risky part of making this sauce, so pay attention during this phase. You will know if it breaks because the milk fats will separate and it will become a greasy mess. Add a little salt and pepper to taste. You now have a Bechamel sauce. While this recipe doesn’t call for it, at this point you can also add a pinch of nutmeg and/or a sachet bag (banquet garni) with fresh herbs like bay leaves, thyme, and parsley sprigs.
What makes this a mornay is the addition of cheese. For this recipe, I chose Gruyère because it complements the Swiss cheese beautifully. Using a whisk, slowly stir your Gruyère cheese into the simmering bechamel sauce until melted. Taste and add more salt/pepper if needed. Enjoy!
If you want to have some fun, here are a few more variations to the bechamel sauce:
Soubise: Sweat 1 onion in a skillet without browning it. Puree in a food processor and add to 1.5 cups of bechamel.
Cream sauce–add 1/2 cup of cream to 1.5 cups of bechamel.
Poblano–blacken, peal, mince and add to the bechamel.
Anything that suits your fancy and complements your meal
Psh–who said French cooking was difficult? People in fancy restaurants. Intimidating? Initially. Difficult? No. Delicious? Incredible.
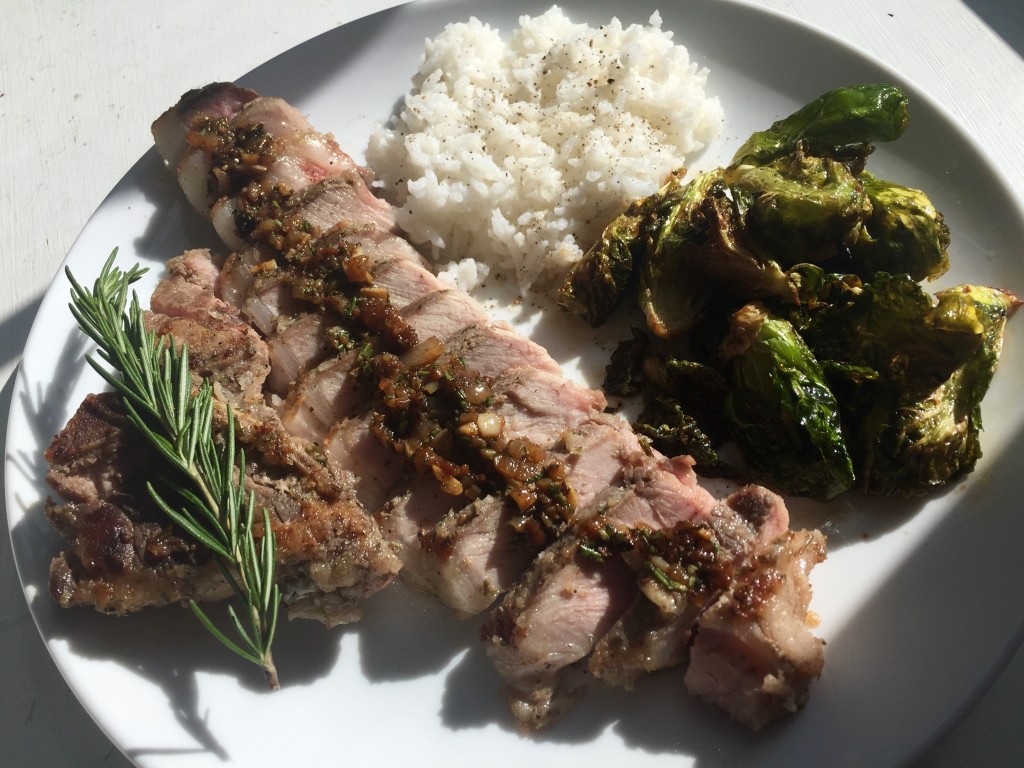
I recently ate at the Little Hen in Holly Springs and had a phenomenal experience. The pork tasted amazing and I couldn’t put my finger on exactly why. Chef Regan was kind enough to visit with us towards the end of our meal as it was getting late and the crowd had tapered off. The secret to his delicious pork? Anchovies. I almost fell out of my chair when he told me that. Anchovies are gross–or so I thought. When used correctly, anchovies add a wonderful savory flavor to your dish and are not “fishy” at all.
This is a recipe for garlic, rosemary and anchovy pork chops. I cooked these chops sous vide, which is french for under vacuum. It is basically a crock pot 2.0 where you put your food/seasonings in a zip lock or vacuum sealed bag and submerge it in water that is regulated to the 10th of a degree. Sous vide is wonderful because your meat remains incredibly juicy, you get consistent results, it’s forgiving and it’s easy. When cooking with high heat on the stove, you often have a very narrow window of minutes where your meat goes from perfect to dry. When cooking sous vide, the window of perfection is literally 1-3 hours because you are gently cooking at low temperatures. This is perfect for when my better half is working and I am making dinner while bathing kiddos and what not. A sous vide set up will cost you $170-$200 and it’s worth every penny. I use an Anova Precision cooker that I scooped up from Amazon. Anova has a free app that you can download from for Apple/Droid. I encourage you to check it out. The possibilities are endless from poached apple desserts, butter poached corn/shrimp, poached eggs and on and on. Don’t have a sous vide and don’t plan on getting one any time soon? I completely agree with Dan’s post about how to cook chops the more conventional way. Pan searing and oven finishing is my go-to technique for everything from burgers to steaks to pork chops. This recipe will also work well with the pan searing and oven finishing technique.
Pork chops cooking sous vide
What you need:
4 ninja cow chops
1/2 cup extra virgin olive oil
2 sprigs of rosemary plus more to garnish
2 medium cloves of garlic
4 anchovy fillets
salt/pepper to taste
What you do:
In a high-powered blender, combine the olive oil with the rosemary, anchovies, garlic, and a dash of salt/pepper. Puree for 30 seconds or so until there are not large chunks of anchovies. Use a silicon spatula to push the mixture down the sides of the blender if needed. The easy way to get the rosemary off the stem is to slide your fingers the opposite direction that the leaves grow. They will come right off.
If you are not cooking sous vide, marinade the chops for 2-6 hours. If you are cooking sous vide, combine the marinade with the chops in a zip lock, submerge in your sous vide bath until the air is pushed out and then seal the bag. The idea is to get the air out so the heat from the water is efficiently and evenly transferred to the meat. Start cooking.
All the sous vide cook times are 1-4 hours: Rare is 130 degrees, medium rare is 140 degrees, medium well is 150 degrees and well done is 160 degrees.
Remove from the zip lock and pat dry with a paper towel. Allow 5 minutes to cool. This is a must with all sous vide cooking to retain moisture when pan searing to finish. Finally, pan sear to finish in a screaming hot skillet with olive oil and a little butter at the end. Remember that your meat is already cooked perfectly, so get the pan really hot to sear the outside quickly without overcooking the interior.
I wanted to make a quick pan reductions sauce with these chops, so I lightly dredged them in flour before pan searing. The flour helps it to brown better and you get more fond in your pan. Fond is the brown crust on your pan after your finish cooking that I used to think was just a mess to clean. Fond is bursting with the flavor of your dish. It’s the base of any good reduction sauce and French cooking is all about maximizing the flavor in dishes. Not only do you get a more flavorful meal, but your cleaning is 90% done before you eat! For this reduction sauce, I minced and sweated a medium shallot and a clove of garlic over medium/high heat until fragrant and the shallots were translucent (about 60-90 seconds). I then “deglazed” the pan with 1/2-1 a cup of chicken stock. Deglazing is a fancy word for dissolving the fond with liquid to unlock all that flavor. Reduce the quantity of liquid to 2-3 tablespoons and thicken with a little butter. The butter may not be necessary if there was still some in your pan from cooking the chops. I also finished this reduction sauce with minced rosemary at the very end of the process.
This pan reduction technique works for all proteins and you can get creative with it. You can layer the reductions for very complex flavors. I also find that a good sauce makes your meals more forgiving if you didn’t cook the meat perfectly. I typically start with aromatics like shallots/garlic and reduce with chicken stock. Then you can add a layer of wine or balsamic vinegar and reduce again. Butter is good for thickening or you can use a corn starch slurry. You can also finish these pan reductions sauces with more aromatics like fresh herbs.
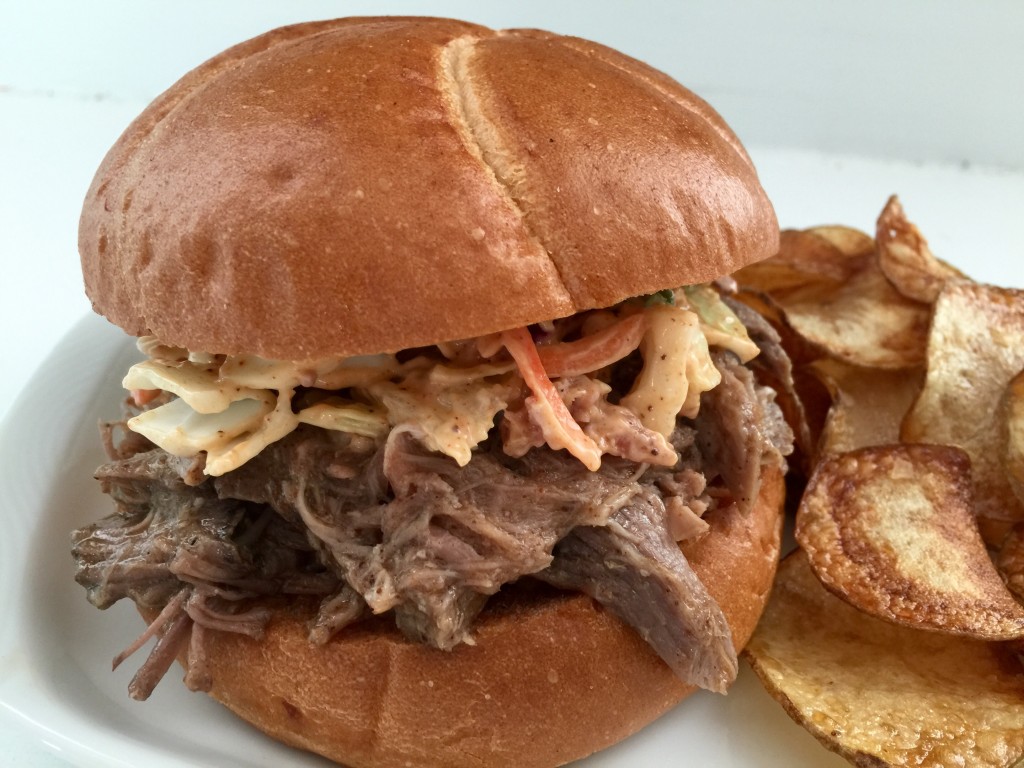
I stopped by Ninja Cow this past Saturday and was shocked to learn that a lot of customers don’t buy the pork shoulder (aka Boston butt). This is like going to Philly and not getting a cheese steak. I am convinced folks avoid pork shoulder because it can be an intimidating cut of meat to prepare. Let’s remedy that. You don’t need a smoker for this recipe nor do you need to be a pit master in order to get wonderful results. If you can use a crock pot, you can enjoy some of the best BBQ around.
It is important to appreciate that raw pork shoulder is tough and fibrous. It requires low heat over a long period of time to break down the meat and make it tender. Classic North Carolina BBQ utilizes vinegar to assist with breaking down the connective tissue so that you can pull the meat apart (i.e. pulled pork). Whether you cook your shoulder on a smoker, crock pot or in a dutch oven, low and slow is the way to go.
What you will need:
Ninja Cow Pork Shoulder (most of these are 3-4 pounds, which is what the cooking time is based on).
3 tbsp dark brown sugar
1 tbsp smoked paprika
1 tbsp cumin
3/4 tbsp garlic powder
1/2 tsp cayenne pepper
1/2 tsp ground cinnamon
1/2 tsp ground mustard
1/4 tsp ground cloves
A pinch or 2 of crushed red pepper flakes
a few dashes of your favorite hot sauce
salt to taste
2 cups chicken stock
1 cup apple cider vinegar
2 tbsp corn starch
(optional) 1 tbsp of high quality hickory liquid smoke. I don’t use this, but feel free to add some if you want a little smokiness.
What you do:
Make your rub. Combined the brown sugar, paprika, cumin, garlic powder, cayenne pepper, cinnamon, ground mustard and cloves. *note that we will be reducing the retained liquid for the sauce and I always recommend adding salt at the very end because what tastes great can become intolerably salty after reducing/concentrating flavor).
Generously apply the rub to all sides of the pork shoulder. You will still have about 3/4 of the rub left over. Retain.
Heat a little olive oil in a large skillet and sear all sides of the shoulder over medium/high heat (about 3-5 minutes). You are looking to caramelize the rub on all sides, but not burn it.
Add the shoulder to the crock pot with the skin side down.
Combine chicken stock, vinegar, a few dashes of your favorite hot sauce, 3 tbsp of your rub, add a pinch or two of cracked red pepper and add to the crock pot. *Note–you can make the sauce beforehand to allow the flavors to meld even more. Also, you will still have some rub left over. I typically use the extra rub to make my own cole slaw to top off the BBQ sandwich. Just add to taste with mayonnaise, a teaspoon of apple cider vinegar and stir in your slaw.
Cook on high for 3 hours and reduce to low for 2-3 hours. High on a crock pot is not that hot and placing the skin down will insulate the meat. I typically remove the shoulder at around 4 hours and speed up the process by using a boning knife to free the meat from the bones and cut it in to large chunks. Discard the bones, excess fat and skin at this point as well. The BBQ is ready when you can easily pull it apart using tongs or two forks. You want it tender, but not overcooked into mush. Remove the meat and set aside.
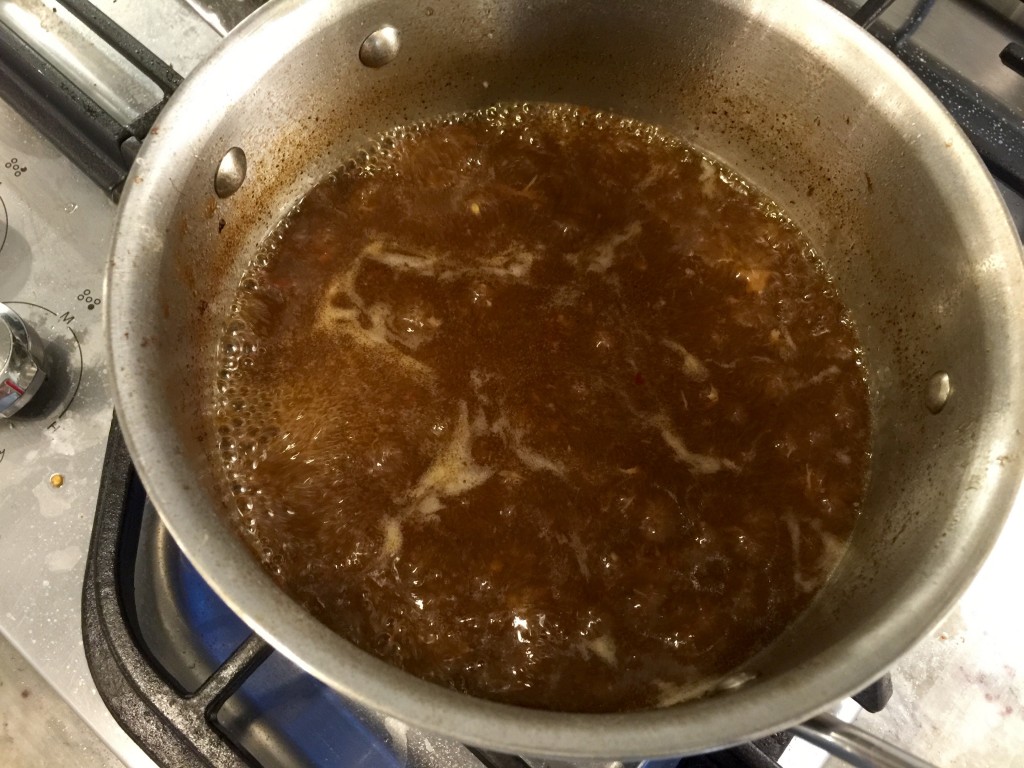
Using a ladle, skim off most of the fat from the retained sauce in the crock pot. Add the sauce to a large pan and bring to a boil on high heat. Reduce for 10-15 minutes. The goal here is to reduce the large amount of liquid into a much more concentrated and flavorful sauce. Use the ladle to continue skimming off fat as the sauce is at a rolling boil. It’s ok if you don’t get it all, but I like to remove most. When the sauce has reduced by 2/3, slowly stir in a corn starch slurry (i.e. 2 tbsp of corn starch stirred into 2 cups of water). Only add about 1/4 to 1/2 cup of the slurry at a time because you can easily over thicken the sauce. Keep reducing until the sauce is very viscous and the bubbles pop like magma. Add salt to taste.
Combine the sauce with the pulled pork in the crock pot on the warming setting and enjoy!
PRO TIP–if you are feeding a lot of people or want plenty of left overs, add some of Dan’s already made BBQ to the mix when you combine the finished sauce at the end. I do this every time.
I served this BBQ with fresh-cut potato chips. Do you own a deep fryer yet?!? If so, I also recommend buying a mandolin slicer. It will cost you $20 bucks on Amazon and it is really useful for prep work like cutting potatoes into delicious fresh made chips.
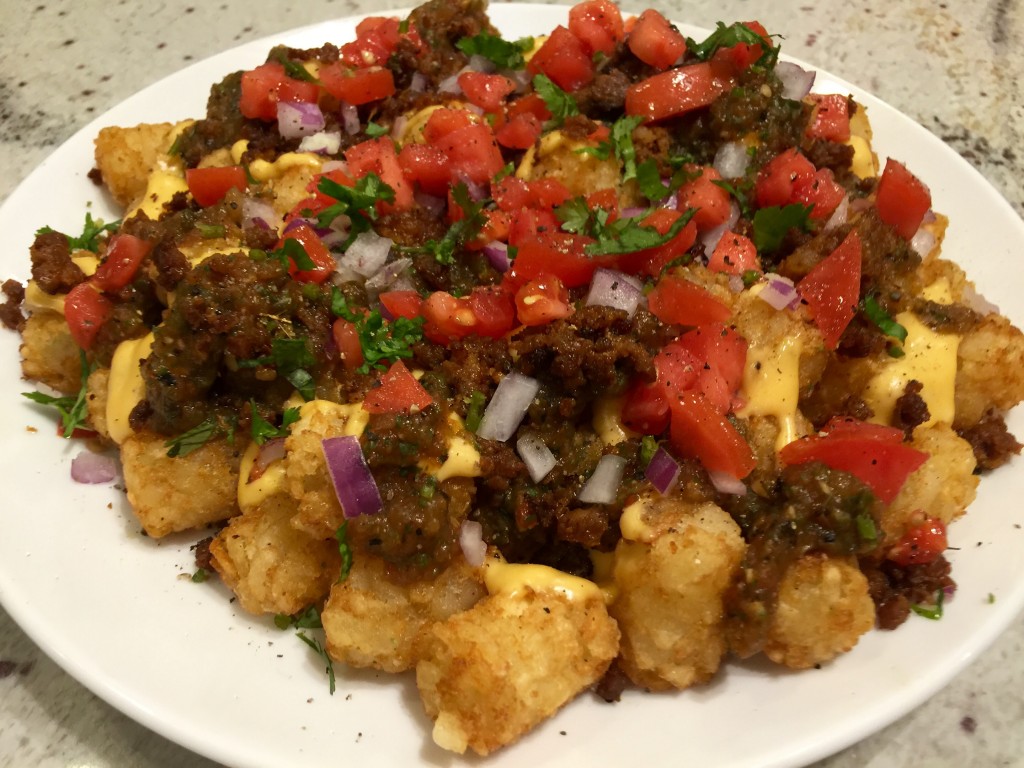
Loaded tater tot nachos with chorizo, pico and charred salsa verde
In my last tribute to chorizo before sharing recipes with other Ninja Cow meats, I wanted to share this recipe that is sure to please the whole family–kids and parents alike. Loaded tater tot nachos with a homemade ooey gooey cheese sauce!
8 oz of fresh shredded cheddar cheese (pre-shredded loses flavor/aroma and is akin to pre-ground versus fresh ground pepper)
Your favorite hot sauce
1 tablespoon of corn starch
one 12 oz can of evaporated milk
4-5 roma tomatoes
1/2 of a white or red onion
1-2 jalapenos
salt
1 lime
1/2 of a bunch of cilantro
What you do:
Make your pico de gallo. Slice the roma tomatoes diagonally and remove the excess moisture and seeds with your fingers. Dice. Mince your onion and jalapenos (remove the jalapeno seeds if you don’t like spice–this way you mainly get the flavor). Chop your cilantro. Mix everything in a bowl, salt and squeeze the juice from 1 lime into the mix. Let rest.
Brown your chorizo after removing it from the casing, drain the excess fat and let rest on a paper towel lined plate.
Do you own a deep fryer yet?!? I alleviated my guilt by using coconut oil in my deep fryer 🙂 Deep fry the tots at 375 until they are a nice, crispy brown and salt. About 4 minutes. Alternatively, you can bake the tots per the package instructions.
Meanwhile, toss the cheddar cheese with the corn starch. Throw it in a pot on the stove over medium heat and add the evaporated milk. Stir constantly until it starts to simmer and immediately take it off the heat. Add a healthy dose of your favorite hot sauce and serve immediately. No worries if your timing is off. You can easily reheat on the stove and stir.
Plate and serve! I added the ingredients in this order: tots, cheese sauce, chorizo, charred salsa verde, pico.
The cheese sauce is a real hit in my house and goes well with lots of dishes. I have had it with cheese fries and burritos when going for more of a Tex-Mex type of dish. I have also used half cheddar and half pepper jack with great results.
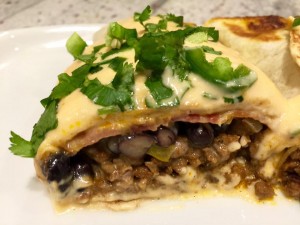
Ninja cow beef, bean, bacon and queso burritoOoey gooey hand pressed cheese fries
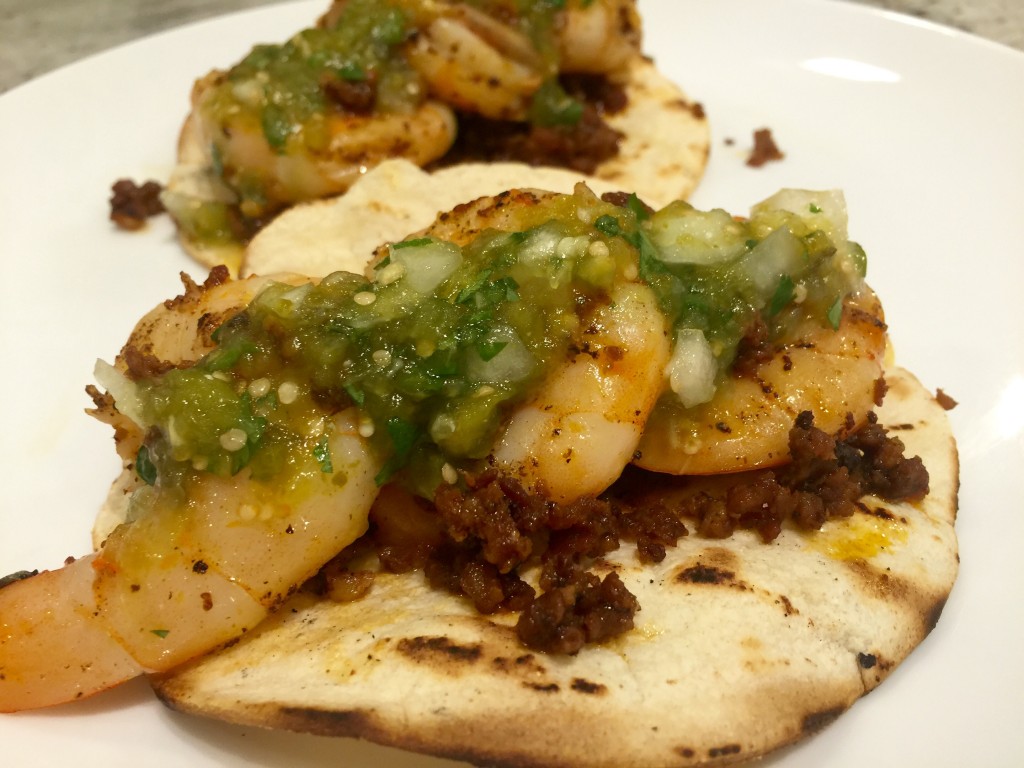
Tacos are the perfect vehicle to eat meat. If you have good meat, just about any combination will be delicious. This recipe calls for Ninja Cow chorizo and shrimp. Like Dan, I only get my seafood from Earps. Period. That place is amazing, locally owned by good people, and has the best fresh seafood around.
What you need for the tacos:
1 pound of peeled and deveined shrimp;
1/2 pound chorizo (about two links)
1 tablespoon of butter
1 tablespoon of olive oil
salt & pepper to taste
corn tortillas (flour if desired)
1/4 teaspoon of baking soda
What you do:
Dry brine (i.e. toss) the shrimp in 1 teaspoon of kosher salt and 1/4 teaspoon of baking soda and let rest for 30-45 minutes. This will result in more firm, crisp shrimp.
Brown your chorizo after removing it from the case. Add cayenne or any other chili desired if you want to kick up the spice. Drain excess fat and place on plate with paper towel.
Toast your tortillas. I like to toast corn tortillas in cast iron three at a time in one stack. Toast, flip the whole stack, flip the toasted tortilla to expose the raw side, flip the stack, and repeat until they are ready to be removed 1 at a time. Place cooked tortillas in a clean kitchen towel to keep them warm.
Cook the shrimp on medium/high heat in olive oil for 1-2 minutes per side. I add a tablespoon of butter for flavor once the shrimp are in the skillet. You want to cook the shrimp until lose their transparent appearance and remember, they will keep cooking even after you remove them from the skillet.
Assemble and enjoy.
The real star of this recipe and many of the Mexican themed meals I make, is the salsa verde. Pictured above is normal salsa verde and you can also make it “charred”. The difference is boiling the ingredients before blending versus roasting the ingredients in the oven (or on a skillet) before blending. I find that charred salsa verde has a more complex flavor with smokey notes. Boiling the tomatillos can be difficult because if you let them go too long and they split, you will lose a ton of flavor.
What you need for charred salsa verde:
8-10 tomatillos (remove the husk/stem and wash to clean off the sticky residue);
2-3 jalapenos with/stems removed;
1/2 of a white an onion quartered;
2 cloves of garlic peeled;
cilantro;
salt;
1 lime
What you do:
Line a baking sheet with aluminum foil and place tomatillos, jalapenos, onion and garlic cloves on it;
Broil for 3-4 minutes per side until all of the ingredients start to get black and charred;
Place ingredients into blender including draining all of the juice from the baking sheet (that is where the best tomatillo flavor comes from!). Add half a bunch of cilantro, juice from 1 lime and blend;
Add remaining bunch of cilantro chopped;
Add salt to taste, but don’t be shy with it. Salt is needed to bring out the full flavor of this salsa.
I hope you guys like this recipe and the salsa verde. The salsa verde is a great recipe to have in your tool box. It is extremely versatile and it is forgiving with entrees that are not perfectly cooked. In an upcoming recipe, I will share a salsa roja before we move on to some French sauces!
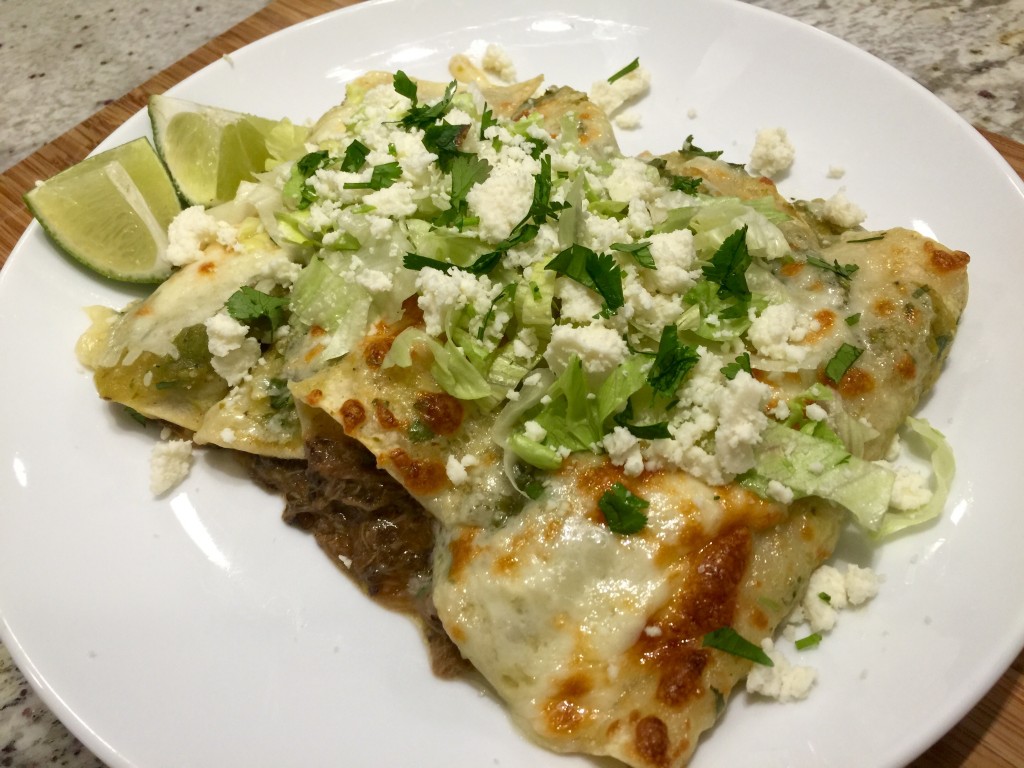
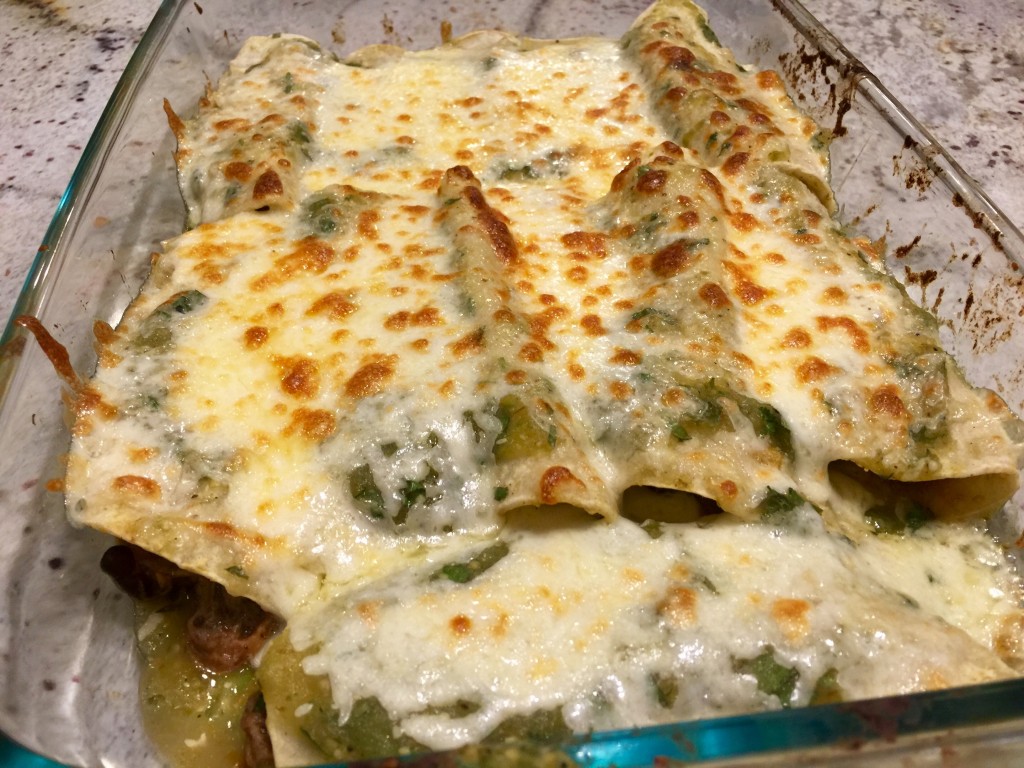
Chicken and chorizo enchiladas with charred salsa verde
One of my favorite kitchen gadgets that I have acquired in the last year is a pressure cooker. This amazing device can achieve consistencies in 30 minutes that would take all day to achieve in a crock pot. It really shines with meat that has bones and skin because it can pull out all of the flavor and have the meat falling off the bone in no time. It also can turn dried beans into creamy goodness without soaking them in 30-40 minutes. This dish works because it is loaded with flavor and keeps well in the refrigerator.
What do you need for the enchiladas:
1-1.5 pounds of chicken. I went with Ninja Cow quarters, but I also highly recommend chicken thighs. Keep the skin on and the bones in;
0.5 pounds of Ninja Cow chorizo (about 2 links removed from the casing);
8 oz of dried black beans;
half of an onion minced;
2 garlic shallots minced;
32 oz carton of reduced sodium or no sodium chicken stock
1 tablespoon of olive oil
1 tablespoon of ancho chili powder (paprika is a good substitute)
1 tablespoon of cumin
1 teaspoon of corn starch
Quesadilla cheese
Queso fresco
Corn tortillas
lettuce
cilantro for garnishing
What do you do:
Put the olive oil in the pressure cooker and set it to saute on high. Brown the chorizo for 4-5 minutes and then add the minced onion and garlic. Sweat the onion and garlic until the onions are translucent and fragrant (2 minutes).
Add the chicken stock, the chicken, the beans, and stir in the ancho chili powder along with the cumin.
Seal the pressure cooker and cook on high pressure for 40 minutes.
Release the pressure using the quick release method (open the valve on electric pressure cookers or run a stove top pressure cooker under cold water).
Take the chicken out, remove the skin and bones and discard. meanwhile, turn the pressure cooker on saute and bring the broth up to a boil. Place the chicken back in the broth.
Reduce the volume of liquid by boiling and stirring. The goal is to have a sauce not a soup. So, let it boil for at least 5 minutes. Then slowly add a corn starch slurry to thicken the sauce. A corn starch slurry is just a teaspoon of corn starch mixed into a cup of water. When the bubbles are very viscous and pop like magma, then your sauce is ready and you can take it off the heat. Salt to preference at the END of the process. Reducing liquids concentrates flavors and it’s best to salt at the end to avoid adding too much.
Assemble the enchiladas by briefly soaking warm corn tortillas in salsa, add the meat then roll them up in your dish. Add quesadilla cheese on top, cover with aluminum foil and bake at 350 for 20 minutes. You can remove the foil and broil for the last few minutes to brown the cheese.
Add shredded lettuce, crumbled queso fresco, cilantro, more salsa and serve.